一、更改IP及添加路由
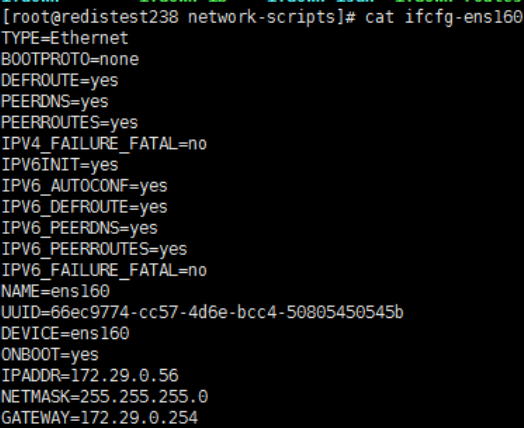
1、IPADDR=192.168.150.154
2、NETMASK=255.255.255.0
3、GATEWAY=192.168.150.1
Vi /etc/sysconfig/network-scripts/route-eno16777984
10.50.1.0/24 via 10.5.16.221 dev eno16777984
10.10.16.0/24 via 10.5.16.221 dev eno16777984
Service network restart // systemctl restart network
二、关闭防火墙
Systemctl stop firewalld.service
Systemctl disable firewalld.service
Firewall-cmd –state (查看防火墙状态) service firewalld status
Centos6.9版本:service iptables stop(关闭)
Service iptables start(开启)
Service iptables status(查看)
Chkconfig iptables on/off (永久关闭/开启)
Chkconfig –list iptables (查看状态)
三、设置代理服务器
vi ~/.bashrc
fi
export http_proxy=http://admin:[email protected]:808
source ~/.bashrc (执行脚本)
六、关闭
Vi /etc/selinux/config
#SELINUX=enforcing
SELINUX=disabled
// setenforce 0
// setenforce 1
// getenforce
四、时间同步
Yum install –y ntp
// rpm –qa|grep ntp*
// rpm –qa|grep ntp
Ntpdate 10.5.18.200
Crontab –e
0 */1 * * * /usr/sbin/ntpdate 10.5.18.200 >null 2>&1
Crontab –l
[时区在其余地区处理:
# rm -f /etc/localtime
# ln -sf /usr/share/zoneinfo/Asia/Shanghai /etc/localtime
五、zabbix安装
// rpm –qa|grep zabbix*
// rpm –qa|grep zabbix
Vi /etc/resolv.conf
Nameserver 218.85.157.99
Yum remove zabbix-release
// yum remove zabbix-agent
// yum install http://repo.zabbix.com/zabbix/2.2/rhel/6/x86_64/zabbix-release-2.2-1.el6.noarch.rpm
Rpm –ivh http://repo.zabbix.com/zabbix/3.0/rhel/7/x86_64/zabbix-release-3.0-1.el7.noarch.rpm
Rpm –ivh http://mirrors.aliyun.com/epel/7/x86_64/Packages/e/epel-release-7-11.noarch.rpm
Yum install –y wget
Rpm –ivh http://repo.zabbix.com/zabbix/3.0/rhel/7/x86_64/zabbix-agent-3.0.12-1.el7.x86_64.rpm
http://repo.zabbix.com/zabbix/3.0/rhel/6/x86_64/zabbix-agent-3.0.9-1.el6.x86_64.rpm
Cd /usr/lib/system/system
Systemctl enable zabbix-agent
// Systemctl start zabbix-agent(启用)
Systemctl status zabbix-agent (查询状态)
七、检测
其他机器:telnet IP 10050
磁盘管理
创建pv: pvcreate /dev/sdb1
查看pv: pvdisplay 或者pvscan
创建VG: vgcreate vg_xxx /dev/sdb1
查看vg: vgdisplay
拓展vg: vgextend vg_xxx /dev/sdb1
创建lv: lvcreate –l 5g –n lv_xxx vg_xxx
查看lv: lvdisplay
拓展lv: lvextend –l +100%free /dev/vg_xmxxx/lv_xxx
#lvextend –l +5g /dev/vg_xxx/lv_xxx
格式化lv: mkfs.ext4 /dev/vg_xxx/lv_xxx
挂载使用:mkdir /mnt/lv_xxx
Mount /dev/vg_xxx/lv_xxx /mnt/lv_xxx/
Rpm –ivh http://101.96.10.65/repo.zabbix.com/zabbix/3.0/rhel/6/x86_64/zabbix-agent-3.0.5-1.el6x86_64.rpm
# 查看网卡设备
[root@localhost ~]# nmcli dev
[root@localhost ~]# nmcli con sh
# 删除异常网卡
[root@localhost ~]# nmcli con del ens2f0
# 重新添加网卡配置文件
[root@localhost ~]# nmcli con add type ethernet con-name ens2f0 ifname ens2f0
# 进入ens2f0网卡配置
[root@localhost ~]#vi /etc/sysconfig/network-scripts/ifcfg-ens2f0
#更改以下内容:
路由找不到的话则直接添加vi /etc/sysconfig/network-scripts/route-ens2f0
10.5.16.0/20 via 172.29.0.201 dev ens160