开发环境:
- 开发工具:IntelliJ IDEA
- Java版本:1.8
- Spring Boot版本:2.1.6.RELEASE
- Spring Cloud版本:Greenwich.SR1
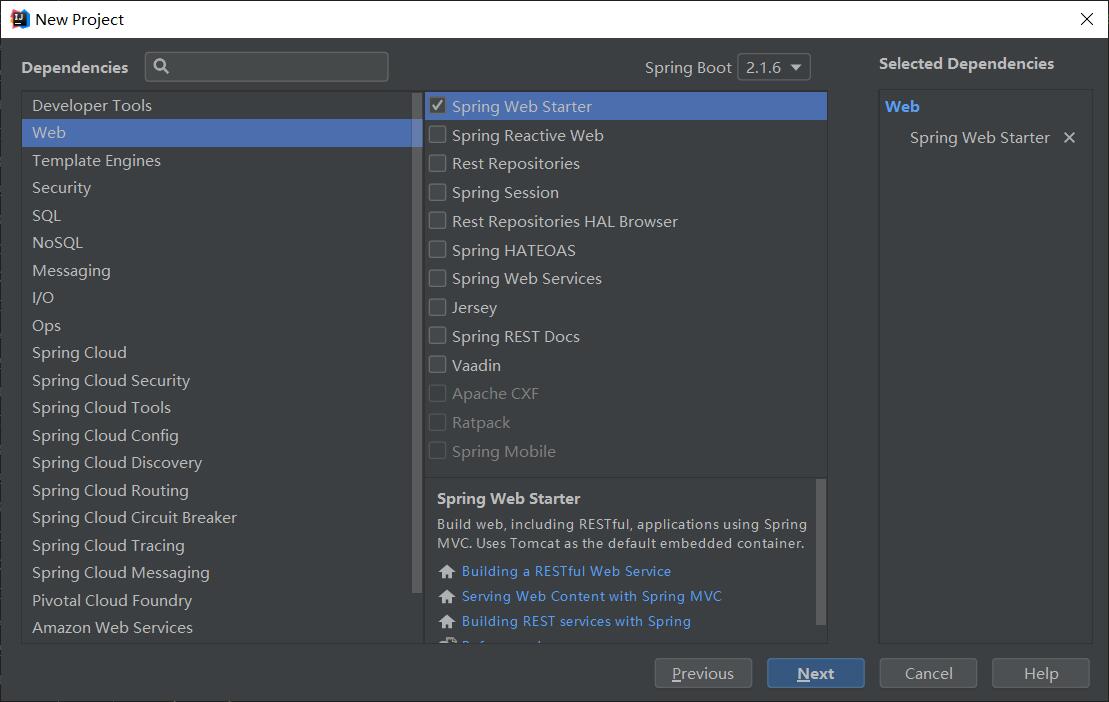
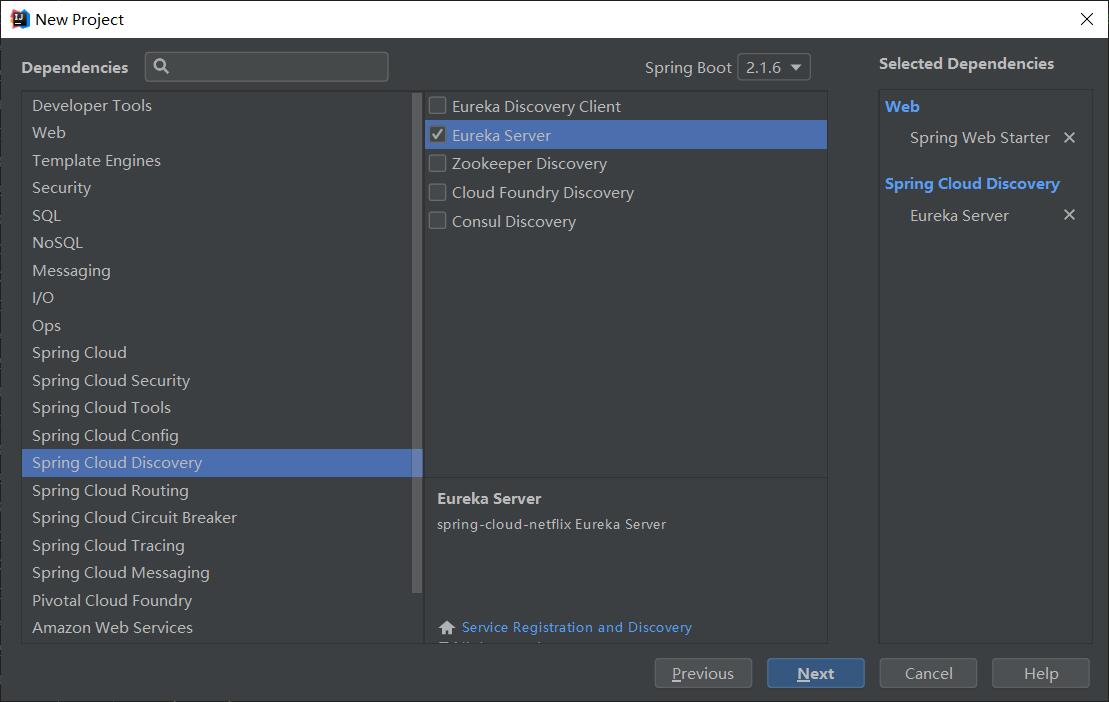
1、创建Spring Boot工程
(1)选择组件
(2)pom.xml
<?xml version="1.0" encoding="UTF-8"?>
<project xmlns="http://maven.apache.org/POM/4.0.0" xmlns:xsi="http://www.w3.org/2001/XMLSchema-instance"
         xsi:schemaLocation="http://maven.apache.org/POM/4.0.0 http://maven.apache.org/xsd/maven-4.0.0.xsd">
    <modelVersion>4.0.0</modelVersion>
    <parent>
        <groupId>org.springframework.boot</groupId>
        <artifactId>spring-boot-starter-parent</artifactId>
        <version>2.1.6.RELEASE</version>
        <relativePath/>
    </parent>
    <groupId>com.ming</groupId>
    <artifactId>eureka</artifactId>
    <version>0.0.1-SNAPSHOT</version>
    <name>eureka</name>
    <description>Eureka cluster project for Spring Boot</description>

    <properties>
        <java.version>1.8</java.version>
        <spring-cloud.version>Greenwich.SR1</spring-cloud.version>
    </properties>

    <dependencies>
        <dependency>
            <groupId>org.springframework.boot</groupId>
            <artifactId>spring-boot-starter-web</artifactId>
        </dependency>
        <dependency>
            <groupId>org.springframework.cloud</groupId>
            <artifactId>spring-cloud-starter-netflix-eureka-server</artifactId>
        </dependency>

        <dependency>
            <groupId>org.springframework.boot</groupId>
            <artifactId>spring-boot-starter-test</artifactId>
            <scope>test</scope>
        </dependency>
    </dependencies>

    <dependencyManagement>
        <dependencies>
            <dependency>
                <groupId>org.springframework.cloud</groupId>
                <artifactId>spring-cloud-dependencies</artifactId>
                <version>${spring-cloud.version}</version>
                <type>pom</type>
                <scope>import</scope>
            </dependency>
        </dependencies>
    </dependencyManagement>

    <build>
        <plugins>
            <plugin>
                <groupId>org.springframework.boot</groupId>
                <artifactId>spring-boot-maven-plugin</artifactId>
            </plugin>
        </plugins>
    </build>

</project>
2、配置属性文件
Spring Boot默认的配置文件为application.properties,可通过下载插件Properties to YAML Converter。插件生效后,选中application.properties点击右键,选择Convert Properties to YAML转换成application.yml。
application.yml:
server:
  #服务器端口
  port: 9001
spring:
  #分区配置,定义启动器时使用
  profiles: node1
  #定义服务名称
  application:
    name: server
eureka:
  #标记当前环境为开发环境,
  environment: dev
  #标记当前数据中心
  datacenter: nanjing
  instance:
    #Eureka注册服务器地址
    hostname: node1.com
    #Eureka实例名称
    appname: cluster
  client:
    service-url:
      #将9002和9003端口各自对应的服务治理中心注册到9001端口对应的服务治理中心注册
      defaultZone: http://node2.com:9002/eureka/, http://node3.com:9003/eureka/
--- #用于隔离配置
server:
  port: 9002
spring:
  profiles: node2
  application:
    name: server
eureka:
  environment: dev
  datacenter: beijing
  instance:
    hostname: node2.com
    appname: cluster
  client:
    service-url:
      defaultZone: http://node1.com:9001/eureka/, http://node3.com:9003/eureka/
---
server:
  port: 9003
spring:
  profiles: node3
  application:
    name: server
eureka:
  environment: dev
  datacenter: shanghai
  instance:
    hostname: node3.com
    appname: cluster
  client:
    service-url:
      defaultZone: http://node1.com:9001/eureka/, http://node2.com:9002/eureka/
配置文件属性的作用:
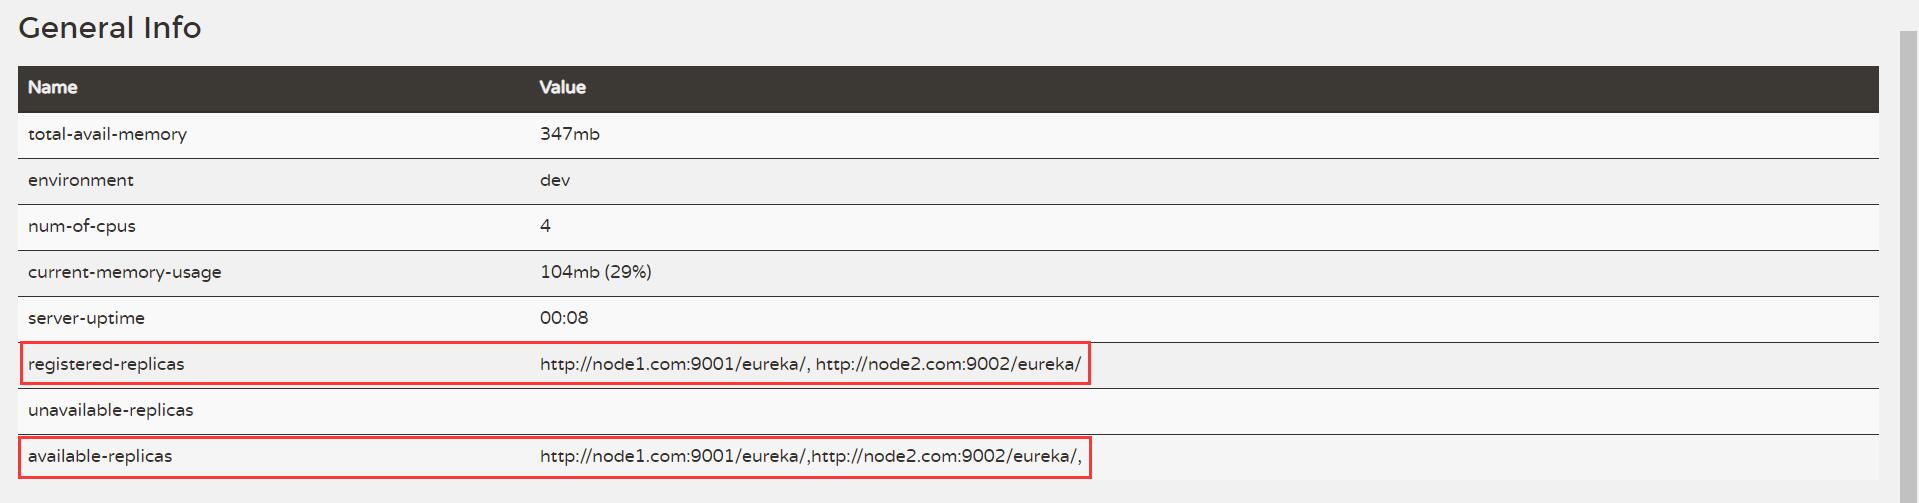
1、eureka.instance.hostname:
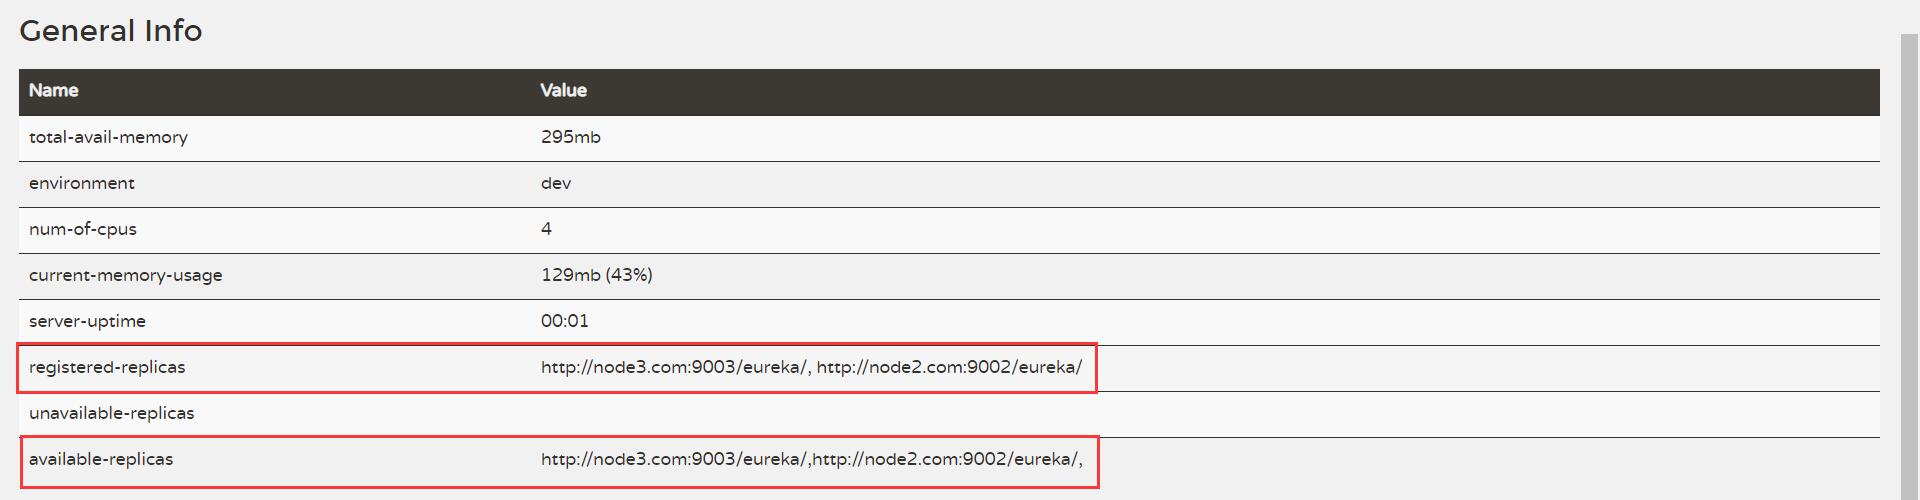
如果将hostname值设为localhost,显示页面General Info中的registered-replicas、available-replicas将没有值,一般要在C:\Windows\System32\drivers\etc下找到hosts文件,打开添加属性如下:
127.0.0.1 node1.com
127.0.0.1 node2.com
127.0.0.1 node3.com
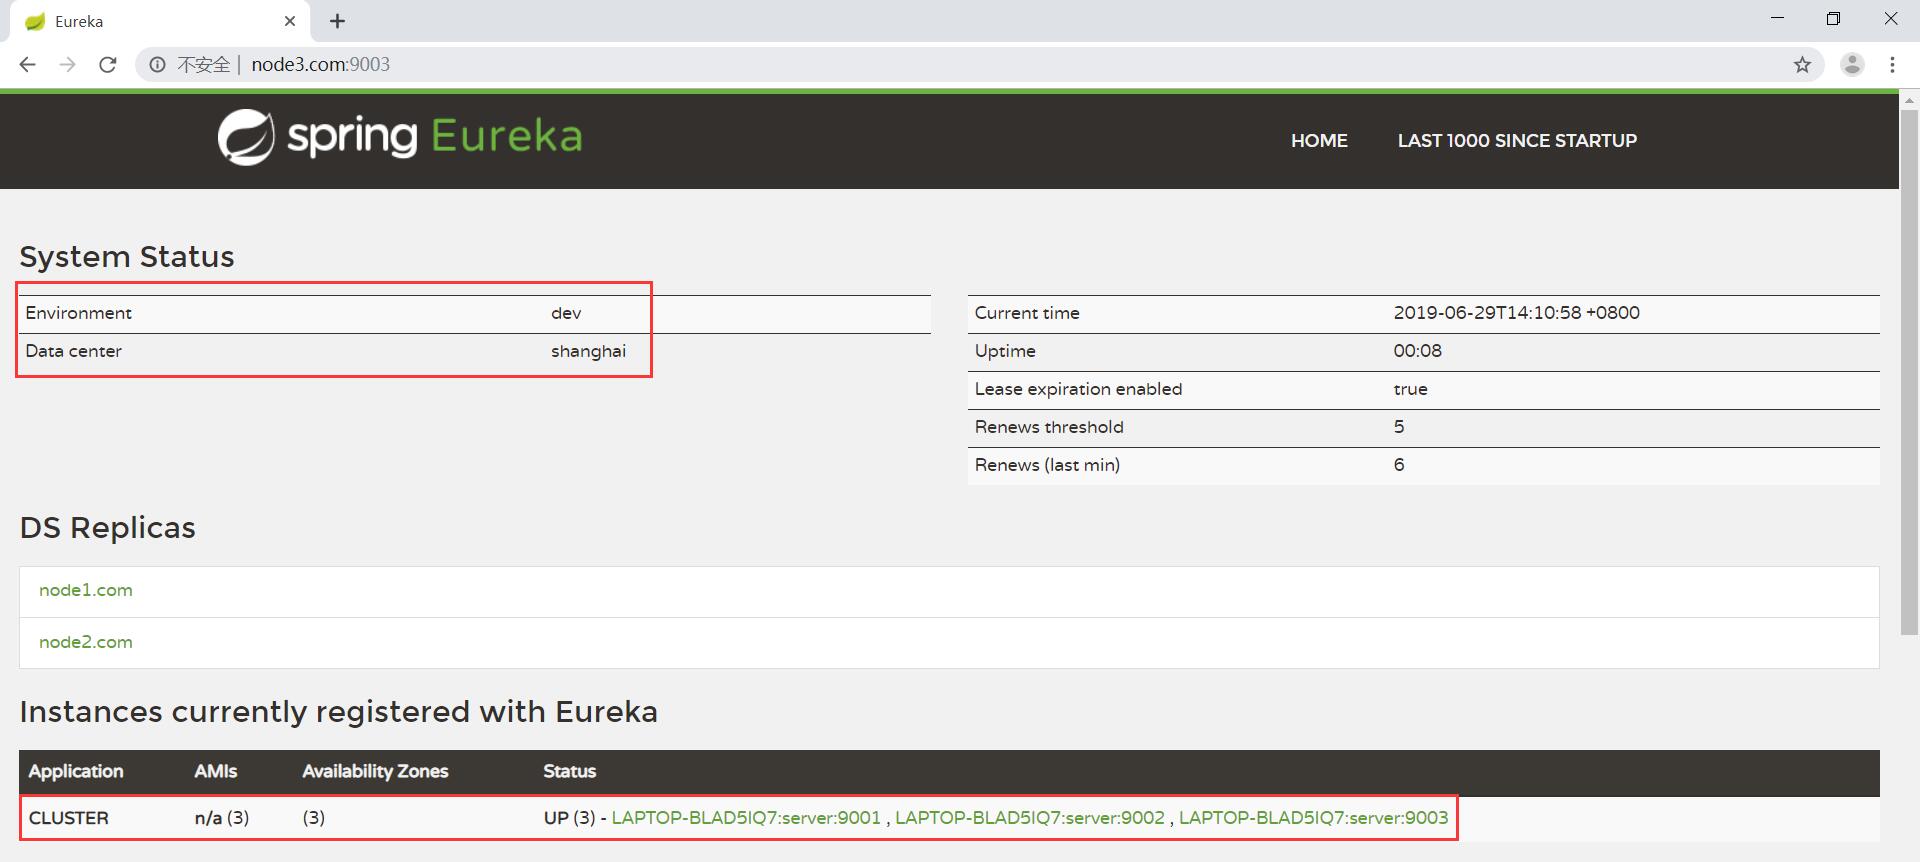
2、eureka.environment和eureka.datacenter:
用于更改显示页面System Status区域,如果不配置这两个属性,显示如下:
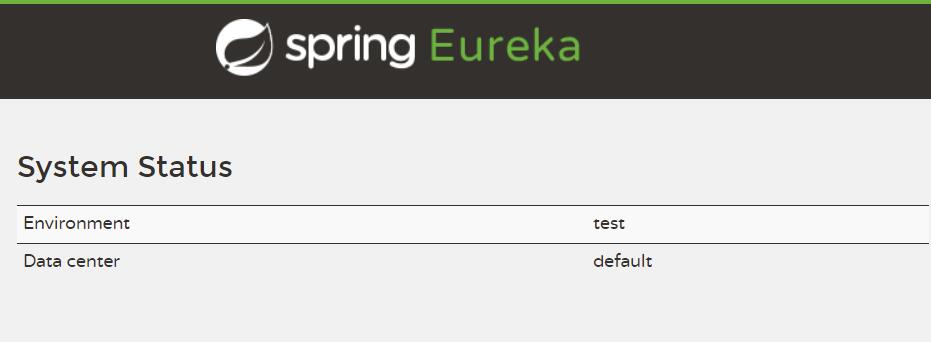
更改后,Environment和Data center对应的值设置的属性值。
3、spring.application.name和eureka.instance.appname:
如果不配置eureka.instance.appname属性值,spring.application.name在三个不同环境中的值必须相同。如果配置eureka.instance.appname属性值,则eureka.instance.appname属性值必须在三个不同环境中是相同的,而spring.application.name在不同环境中的值可任意设置。
启动类:
package com.ming.eureka;

import org.springframework.boot.SpringApplication;
import org.springframework.boot.autoconfigure.SpringBootApplication;
import org.springframework.cloud.netflix.eureka.server.EnableEurekaServer;

//在启动类上添加EurekaServer生效注解
@EnableEurekaServer
@SpringBootApplication
public class EurekaApplication {

    public static void main(String[] args) {
        SpringApplication.run(EurekaApplication.class, args);
    }
}
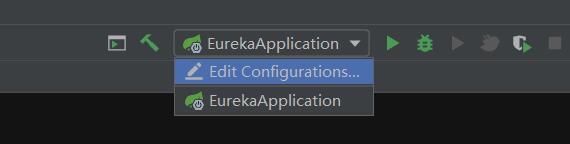
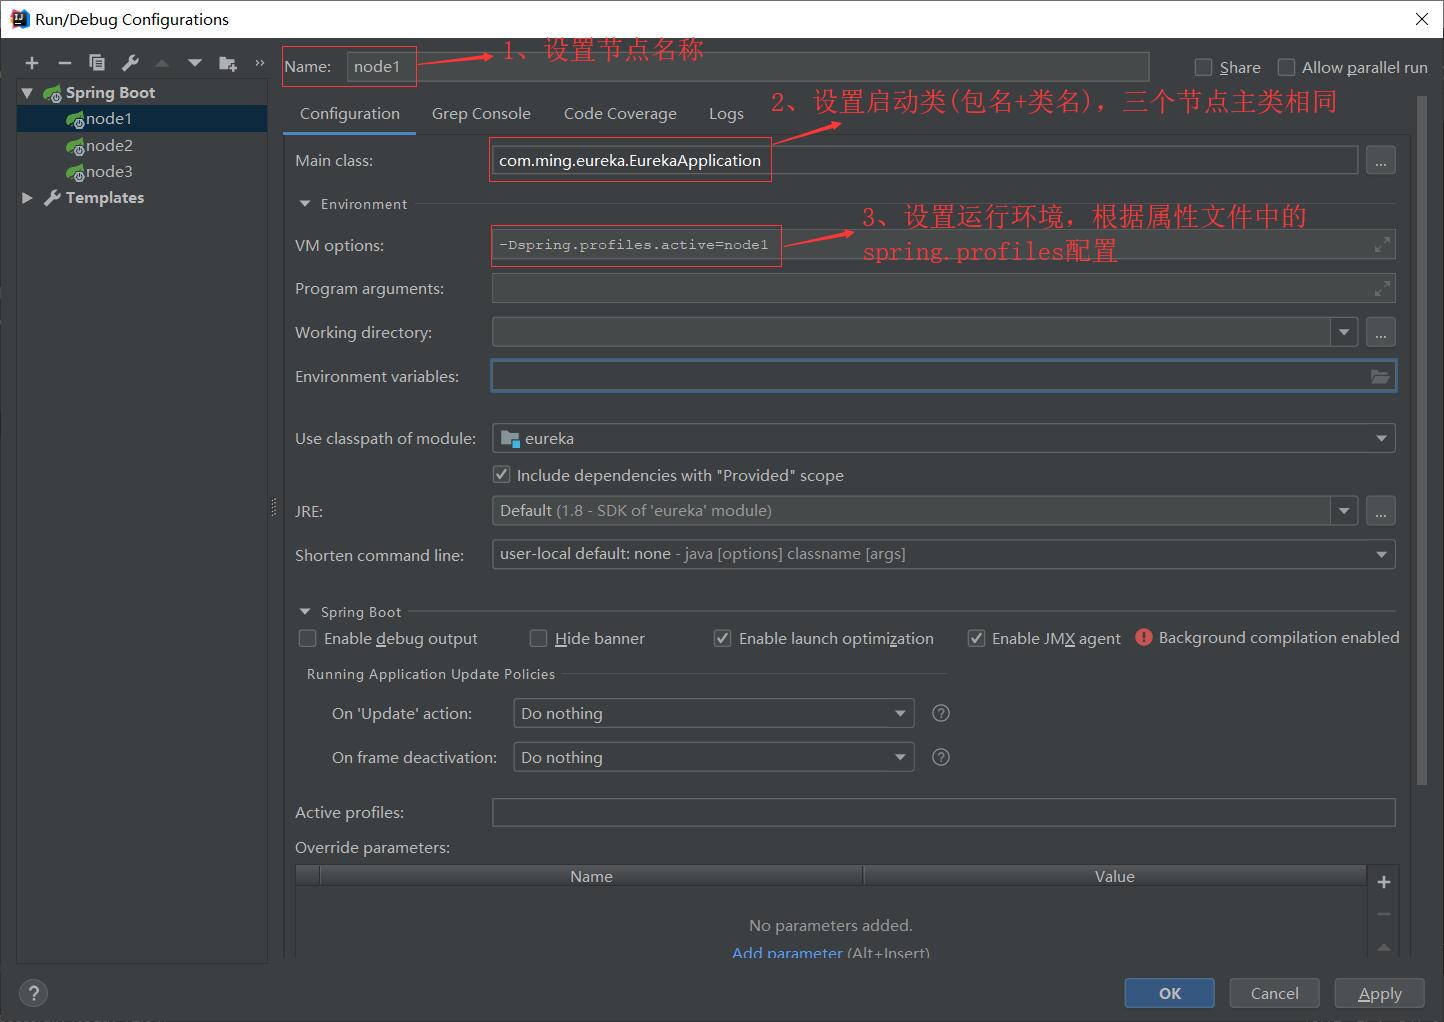
3、配置运行环境
(1)Edit Configurations:
(2)Add New Configuration:

(3)Add New Configuration:
4、运行节点工程
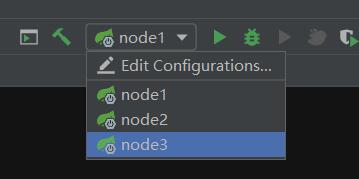
依次点击node1、node2、node3,运行工程后,节点工程会报异常,这是因为服务治理中心是通过相互注册来保持相互监控的,其中有节点正在启动中,已经成功启动的节点无法找到正在启动的节点。等待三个节点工程都启动完成后,三个节点自动会找到对应的注册节点,注册成功后,可以在Console中看到如下信息:

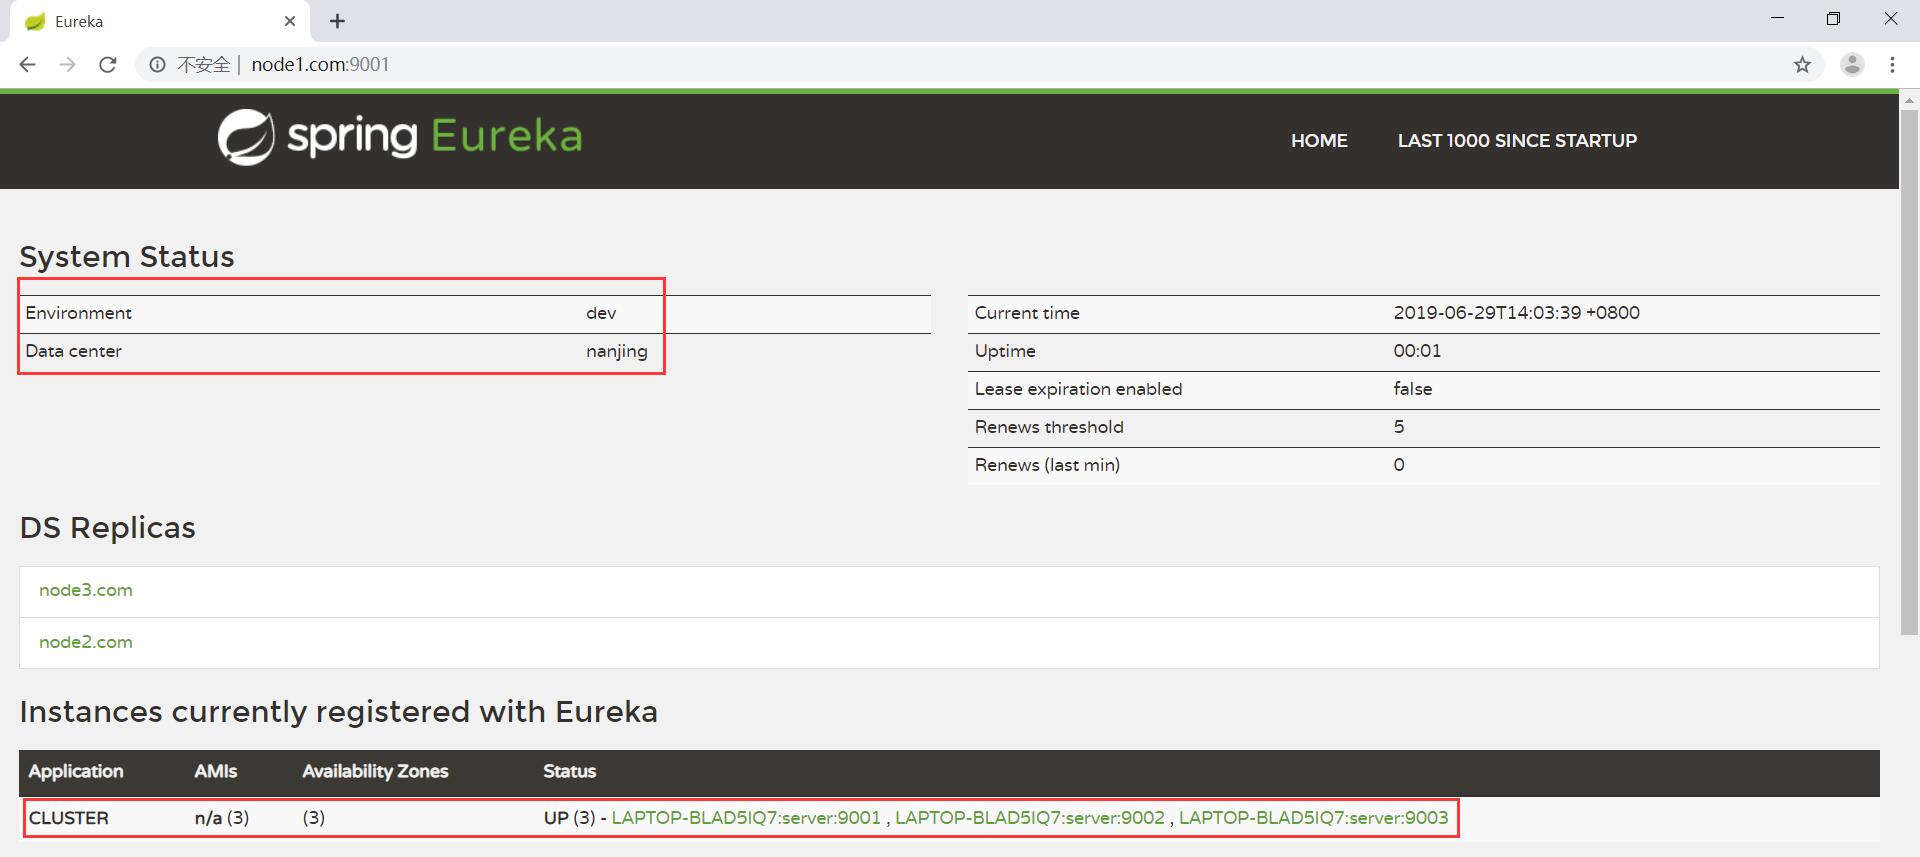
待三个节点工程都启动完毕后,在浏览器地址栏访问 node1.com:9001,其结果如下:
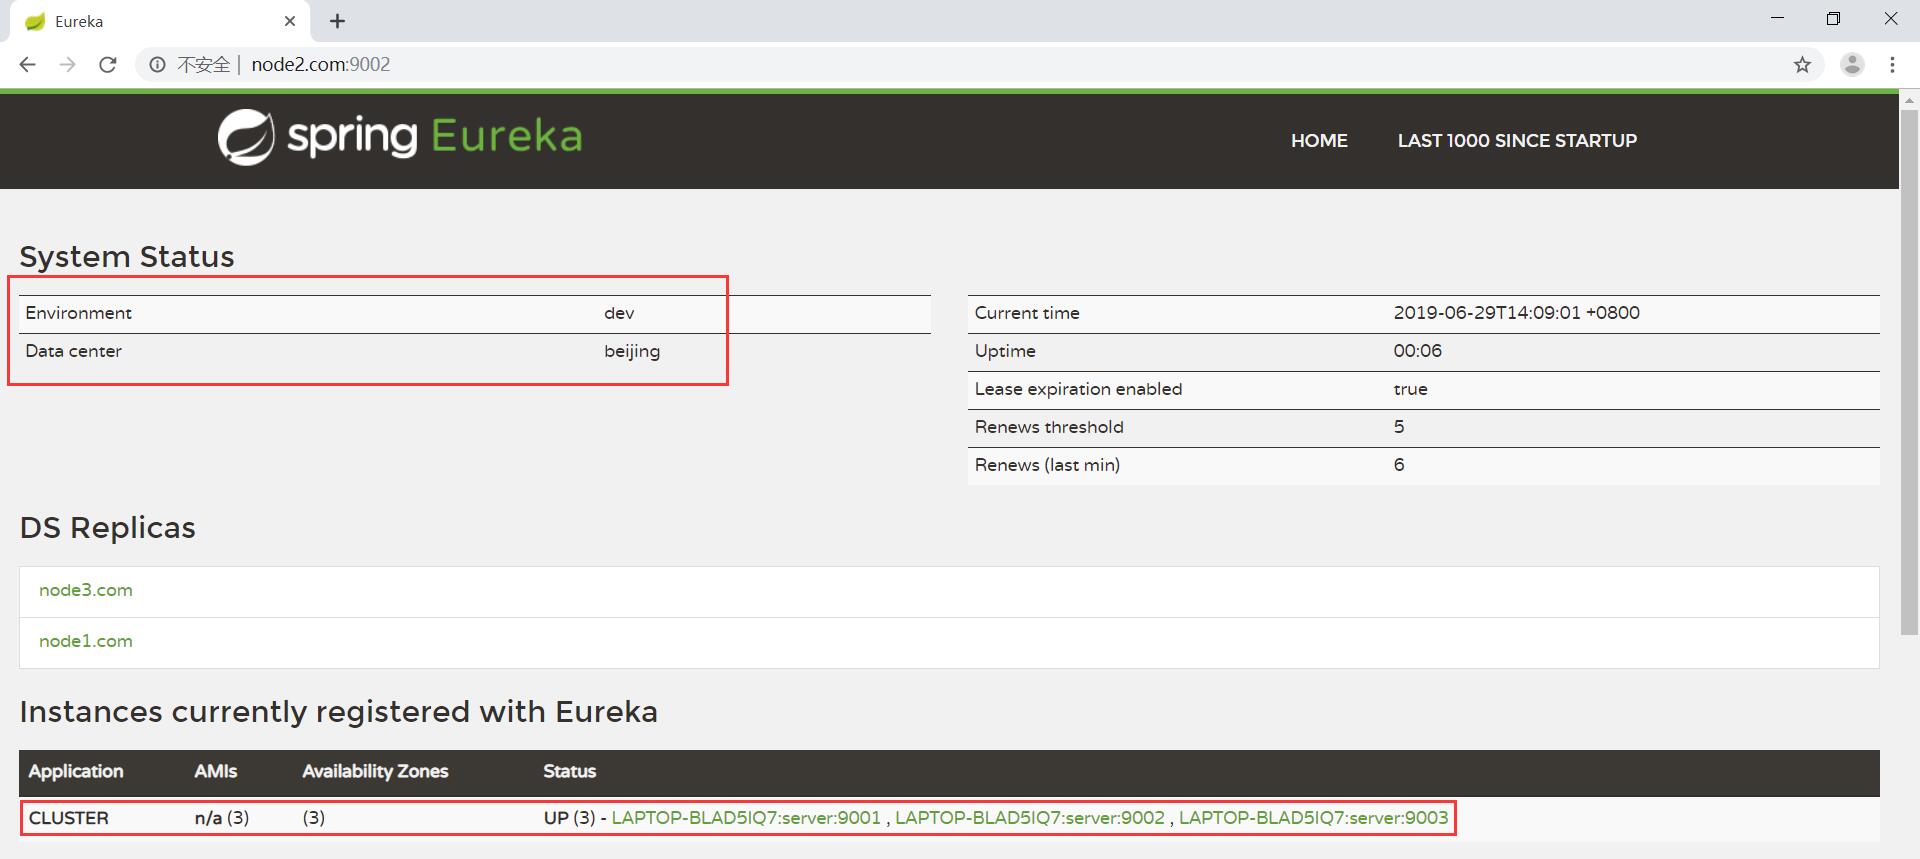
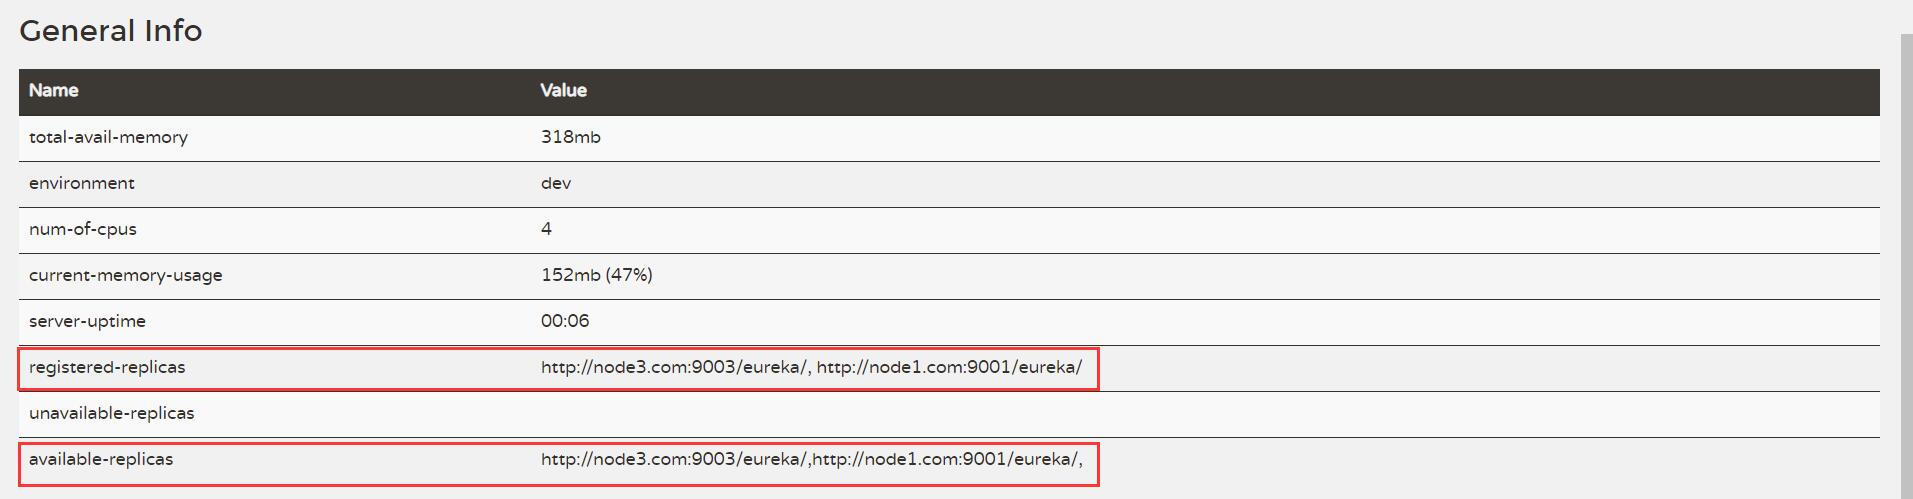
在浏览器地址栏访问 node2.com:9002,其结果如下:
在浏览器地址栏访问 node3.com:9003,其结果如下: