1.准备
- 测试集群
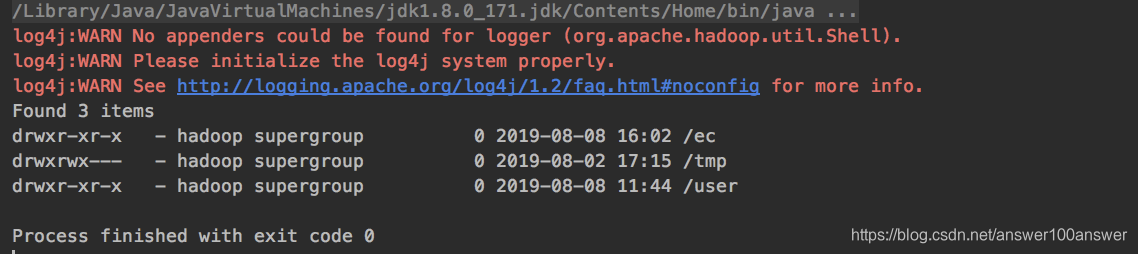
- 为了debug代码,我们编写模拟程序(pom中引入hadoop-common和hadoop-hdfs即可):
package cn.whbing.hadoop;

import org.apache.hadoop.conf.Configuration;
import org.apache.hadoop.fs.FsShell;
import org.apache.hadoop.util.ToolRunner;

public class FsShellTest {
    public static void main(String argv[]) throws Exception {
        // System.setProperty("hadoop.home.dir", "/Users/xx/CodeFile/xx_hadoop/hadoop-dist/target/hadoop-2.7.2-2324");

        FsShell shell = new FsShell();
        Configuration conf = new Configuration();
        conf.setQuietMode(false);
        shell.setConf(conf);

        String[] args = {"-ls","/"};

        int res;
        try {
            res = ToolRunner.run(shell, args);
        } finally {
            shell.close();
        }
        System.exit(res);
    }
}
然后进行断点调试。
2.代码分析
hadoop fs -ls命令首先进入FsShell.java类中,这个类的入口是main()方法(通过上述模拟程序入口可以断点进入),是一个基于ToolRunner的实现的应用Tool / ToolRunner。
为了简化 Hadoop 命令行应用的开发( 大量 MapReduce 程序使用命令行方式运行作业 ), Hadoop 提供了一些辅助类, 包括
ToolRunner,GenericOptionsParser和Tool.
GenericOptionsParser是一个类, 用来解释常用的 Hadoop 命令行选项, 并根据需要为 Hadoop 配置 Configuration 对象设置相应的配置项. 一般情况下不直接使用GenericOptionsParser, 更方便的方式是: 实现Tool接口, 通过ToolRunner来运行应用程序,ToolRunner内部调用GenericOptionsParser
public class FsShell extends Configured implements Tool {
}
其入口代码如下:
  public static void main(String argv[]) throws Exception {
    FsShell shell = newShellInstance();       // 1
    Configuration conf = new Configuration(); // 2
    conf.setQuietMode(false);
    shell.setConf(conf);
    int res;
    try {
      res = ToolRunner.run(shell, argv);      // 3
    } finally {
      shell.close();
    }
    System.exit(res);
  }
  ...
  @Override
  public int run(String argv[]) throws Exception {
    // initialize FsShell
    init();    // ** 1 **

    int exitCode = -1;
    if (argv.length < 1) {
      printUsage(System.err);
    } else {
      String cmd = argv[0];    // ** 2 **
      Command instance = null;
      try {
        instance = commandFactory.getInstance(cmd);  // ** 3 **
        if (instance == null) {
          throw new UnknownCommandException();
        }
        exitCode = instance.run(Arrays.copyOfRange(argv, 1, argv.length)); // ** 4 **
      } catch (IllegalArgumentException e) {
        displayError(cmd, e.getLocalizedMessage());
        if (instance != null) {
          printInstanceUsage(System.err, instance);
        }
      } catch (Exception e) {
        // instance.run catches IOE, so something is REALLY wrong if here
        LOG.debug("Error", e);
        displayError(cmd, "Fatal internal error");
        e.printStackTrace(System.err);
      }
    }
    return exitCode;
  }
分析:
1.首先获得FsShell对象:
  protected static FsShell newShellInstance() {
    return new FsShell();
  }
2.main方法会new Configuration,这时会优先加载core-default.xml、core-site.xml:
  static{
    //print deprecation warning if hadoop-site.xml is found in classpath
    ClassLoader cL = Thread.currentThread().getContextClassLoader();
    if (cL == null) {
      cL = Configuration.class.getClassLoader();
    }
    if(cL.getResource("hadoop-site.xml")!=null) {
      LOG.warn("DEPRECATED: hadoop-site.xml found in the classpath. " +
          "Usage of hadoop-site.xml is deprecated. Instead use core-site.xml, "
          + "mapred-site.xml and hdfs-site.xml to override properties of " +
          "core-default.xml, mapred-default.xml and hdfs-default.xml " +
          "respectively");
    }
    addDefaultResource("core-default.xml");
    addDefaultResource("core-site.xml");
  }
3.随后调用ToolRunner的run方法,即本方法中的run().
run():
1.初始化init():
非常关键的init方法,这里面很啰嗦,初始化操作。主要是建立 相应命令行参数和相应处理类示例的映射关系。
  protected void init() throws IOException {
    getConf().setQuietMode(true);
    if (commandFactory == null) {
      commandFactory = new CommandFactory(getConf());
      commandFactory.addObject(new Help(), "-help");
      commandFactory.addObject(new Usage(), "-usage");
      registerCommands(commandFactory);
    }
  }
最关键的是registerCommands(commandFactory),通过registerCommands方法将FsCommand添加到commandFactory:
  protected void registerCommands(CommandFactory factory) {
    if (this.getClass().equals(FsShell.class)) {
      factory.registerCommands(FsCommand.class);
    }
  }
这里registerCommands其实直接调用了CommandFactory中的注册方法,如下:
  public void registerCommands(Class<?> registrarClass) {
    try {
      registrarClass.getMethod(
          "registerCommands", CommandFactory.class
      ).invoke(null, this);
    } catch (Exception e) {
      throw new RuntimeException(StringUtils.stringifyException(e));
    }
  }
关键点来了,分析下CommandFactory 方法registerCommands的设计思路:
- 获取传参
registrarClass的registerCommands方法,这个方法 和CommandFactory的registerCommands()方法同名,所以源码阅读过程中容易混淆视听,要小心。如,在本例中这个registerClass指的就是FsCommand。 - 通过反射的方式获得参数类示例的registerCommands 方法后,直接使用invoke调用,调用参数继续传入CommandFactory 实例factory。(工程设计上很巧妙,但是阅读起来很累)
回到FsCommand中的registerCommand方法:
abstract public class FsCommand extends Command {
  public static void registerCommands(CommandFactory factory) {
    factory.registerCommands(AclCommands.class);
    factory.registerCommands(CopyCommands.class);
    factory.registerCommands(Count.class);
    factory.registerCommands(Delete.class);
    factory.registerCommands(FastDelete.class);
    factory.registerCommands(Display.class);
    factory.registerCommands(Find.class);
    factory.registerCommands(FsShellPermissions.class);
    factory.registerCommands(FsUsage.class);
    factory.registerCommands(Ls.class);
    factory.registerCommands(FastLs.class);
    factory.registerCommands(Mkdir.class);
    factory.registerCommands(MoveCommands.class);
    factory.registerCommands(SetReplication.class);
    factory.registerCommands(Stat.class);
    factory.registerCommands(Tail.class);
    factory.registerCommands(Test.class);
    factory.registerCommands(Touch.class);
    factory.registerCommands(Truncate.class);
    factory.registerCommands(SnapshotCommands.class);
    factory.registerCommands(XAttrCommands.class);
  }
这里又重复上边的过程!!!我们看一下Ls中的registerCommands:
class Ls extends FsCommand {
  public static void registerCommands(CommandFactory factory) {
    factory.addClass(Ls.class, "-ls");
    factory.addClass(Lsr.class, "-lsr");
  }
  ...
进一步追踪:
  public void addClass(Class<? extends Command> cmdClass, String ... names) {
    for (String name : names) classMap.put(name, cmdClass);
  }
至此水落石出,将class缓存到classMap中。
图见下,将FsCommand的命令一个个加进去:
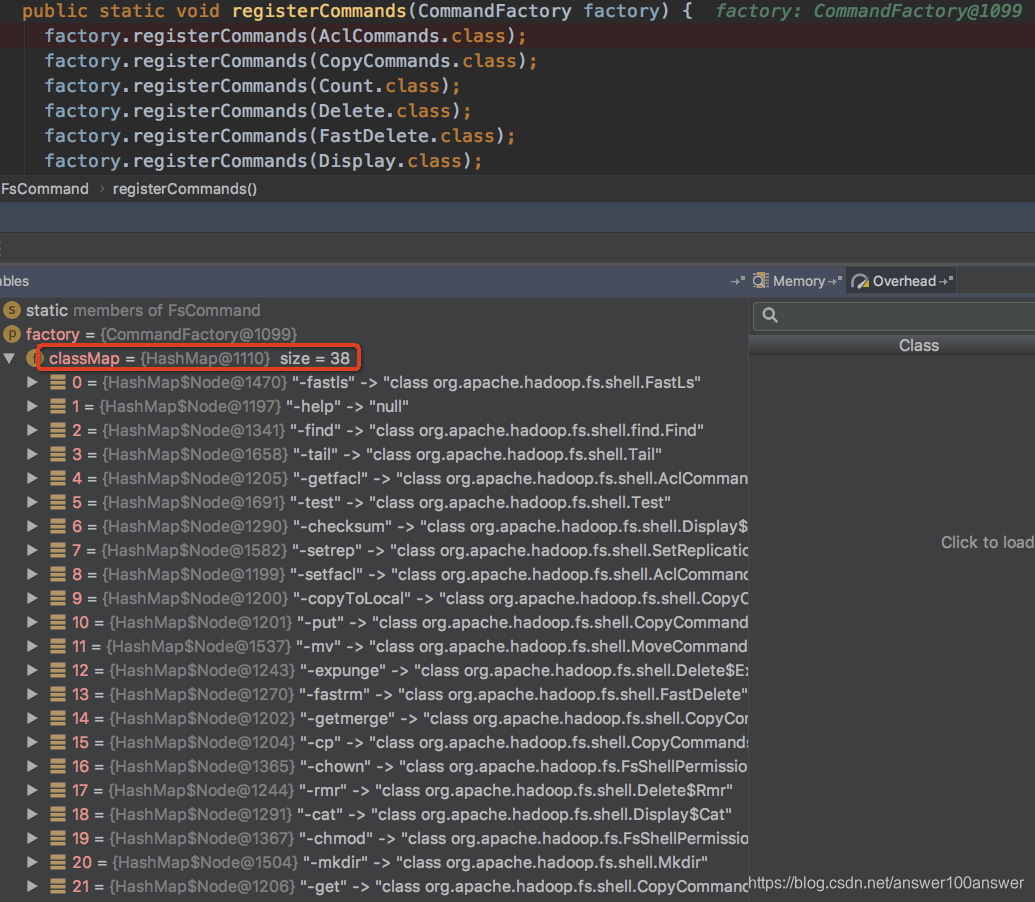
至此,init方法结束。
通过反射的方式层层注册 实例 和 命令行参数的映射关系,建立一棵实例注册树,便于工程化,以及工程扩展,值得大家积累。
2.取第一个参数。如hadoop fs -ls /,这里去取的就是-ls。
3.instance = commandFactory.getInstance(cmd);
cmd="-ls",
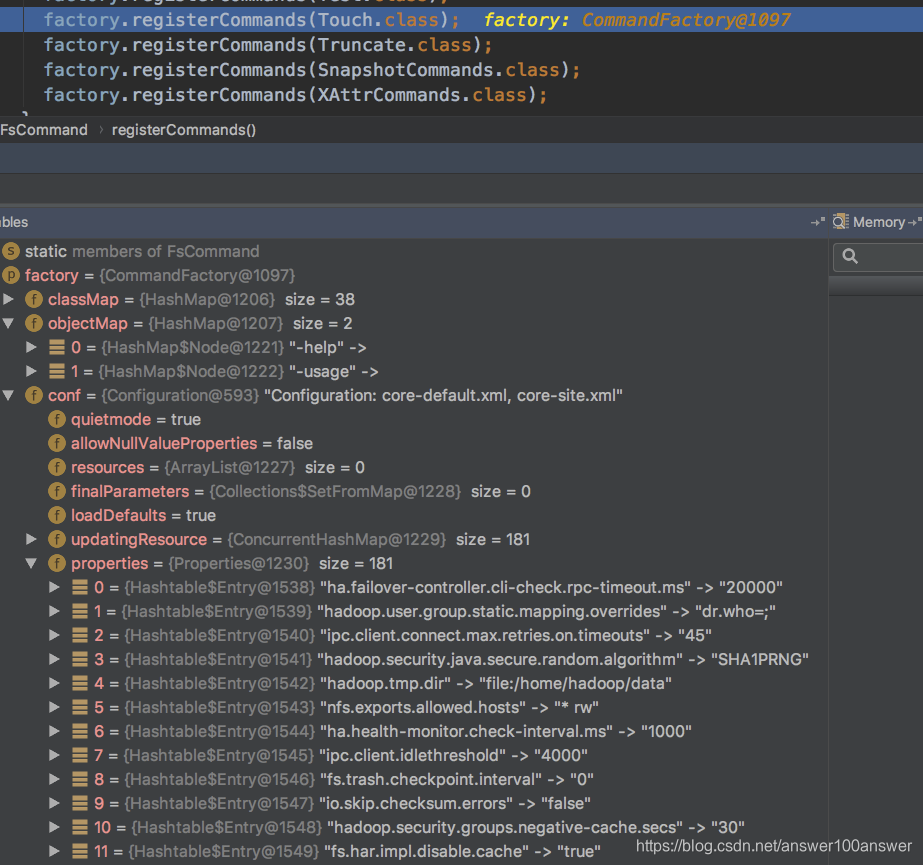
  public Command getInstance(String cmdName, Configuration conf) {
    if (conf == null) throw new NullPointerException("configuration is null");

    Command instance = objectMap.get(cmdName);
    if (instance == null) {
      Class<? extends Command> cmdClass = classMap.get(cmdName);
      if (cmdClass != null) {
        instance = ReflectionUtils.newInstance(cmdClass, conf);
        instance.setName(cmdName);
        instance.setCommandFactory(this);
      }
    }
    return instance;
  }
首次map中没有缓存,就去classMap中找,取到该Ls Command。
4.调用instance.run(Arrays.copyOfRange(argv, 1, argv.length))
进入Command 的 run方法:
  public int run(String...argv) {
    LinkedList<String> args = new LinkedList<String>(Arrays.asList(argv));
    try {
      if (isDeprecated()) {
        displayWarning(
            "DEPRECATED: Please use '"+ getReplacementCommand() + "' instead.");
      }
      processOptions(args);
      processRawArguments(args);
    } catch (IOException e) {
      displayError(e);
    }

    return (numErrors == 0) ? exitCode : exitCodeForError();
  }
其中参数仅一个"/",
processOptions(args);方法进入Ls中的processOptions(args);
  protected void processOptions(LinkedList<String> args)
  throws IOException {
    CommandFormat cf = new CommandFormat(0, Integer.MAX_VALUE, "d", "h", "R");
    cf.parse(args);
    dirRecurse = !cf.getOpt("d");
    setRecursive(cf.getOpt("R") && dirRecurse);
    humanReadable = cf.getOpt("h");
    if (args.isEmpty()) args.add(Path.CUR_DIR);
  }
该方法就是处理参数。
接着走:
  protected void processRawArguments(LinkedList<String> args)
  throws IOException {
    processArguments(expandArguments(args));
  }
  ...
  protected void processArguments(LinkedList<PathData> args)
  throws IOException {
    for (PathData arg : args) {
      try {
        processArgument(arg);
      } catch (IOException e) {
        displayError(e);
      }
    }
  }
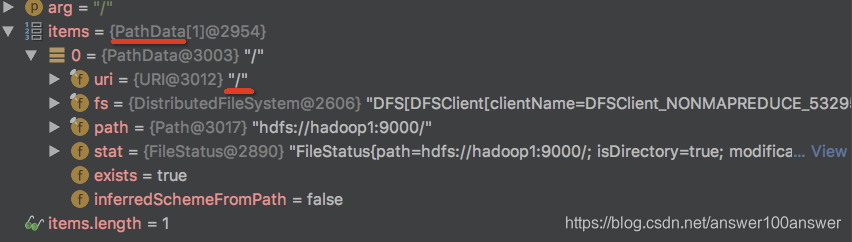
在上述代码中可以看到,参数String args最后变成了PathData。我们分析下PathData的结构,进入expandArguments(args)方法。
PathData的结构为:
public class PathData implements Comparable<PathData> {
  protected final URI uri;
  public final FileSystem fs;
  public final Path path;
  public FileStatus stat;
  public boolean exists;
  ...
List<PathData> expandArgument(String arg)方法将返回PathData,描述了对应路径的fs信息,如:
接着走:
  protected void processArgument(PathData item) throws IOException {
    if (item.exists) {
      processPathArgument(item);
    } else {
      processNonexistentPath(item);
    }
  }
如果路径存在,进入processPathArgument处理。这里会进入Ls类中的processPathArgument方法。
  protected void processPathArgument(PathData item) throws IOException {
    // implicitly recurse once for cmdline directories
    if (dirRecurse && item.stat.isDirectory()) {
      recursePath(item);
    } else {
      super.processPathArgument(item);
    }
  }
dirRecurse便是是否遍历目录,这个为true(代码中直接为true),进入:
recursePath(item);// 这里item="/"
这里recursePath 又回到 Command 抽象类中:
  protected void recursePath(PathData item) throws IOException {
    try {
      depth++;
      processPaths(item, item.getDirectoryContents());
    } finally {
      depth--;
    }
  }
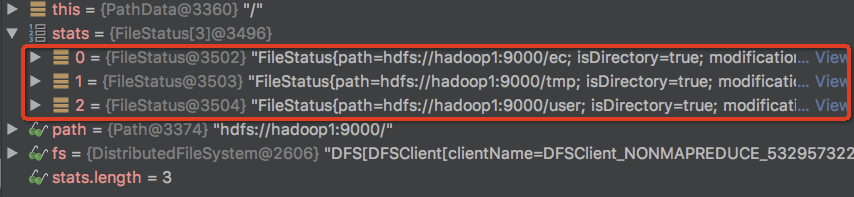
这里会进入item.getDirectoryContents(),即"/"目录下的内容。
  public PathData[] getDirectoryContents() throws IOException {
    checkIfExists(FileTypeRequirement.SHOULD_BE_DIRECTORY);
    FileStatus[] stats = fs.listStatus(path);
    PathData[] items = new PathData[stats.length];
    for (int i=0; i < stats.length; i++) {
      // preserve relative paths
      String child = getStringForChildPath(stats[i].getPath());
      items[i] = new PathData(fs, child, stats[i]);
    }
    Arrays.sort(items);
    return items;
  }
到这里就明白了,调用了fs.listStatus:
FileStatus[] stats = fs.listStatus(path);
会进入processPaths中:
  protected void processPaths(PathData parent, PathData ... items)
  throws IOException {
    // TODO: this really should be iterative
    for (PathData item : items) {
      try {
        processPath(item);
        if (recursive && isPathRecursable(item)) {
          recursePath(item);
        }
        postProcessPath(item);
      } catch (IOException e) {
        displayError(e);
      }
    }
  }
其中Ls 类中的 processPath 如下:
  protected void processPath(PathData item) throws IOException {
    FileStatus stat = item.stat;
    String line = String.format(lineFormat,
        (stat.isDirectory() ? "d" : "-"),
        stat.getPermission() + (stat.getPermission().getAclBit() ? "+" : " "),
        (stat.isFile() ? stat.getReplication() : "-"),
        stat.getOwner(),
        stat.getGroup(),
        formatSize(stat.getLen()),
        dateFormat.format(new Date(stat.getModificationTime())),
        item
    );
    out.println(line);
  }
至此,调试完毕。
小结:
FsShell初始化时,分析设计模式hadoop fs -ls最终走的是fs.listStatus,如要更进一步分析,需要分析listStatus