前言
底部切换效果已经很常见了,本文介绍其中的一种实现方法:FrameLayout+Fragment
本案例已上传至Github,你可以查看完整源码,也可以下载demo apk体验一下
实现效果如下:
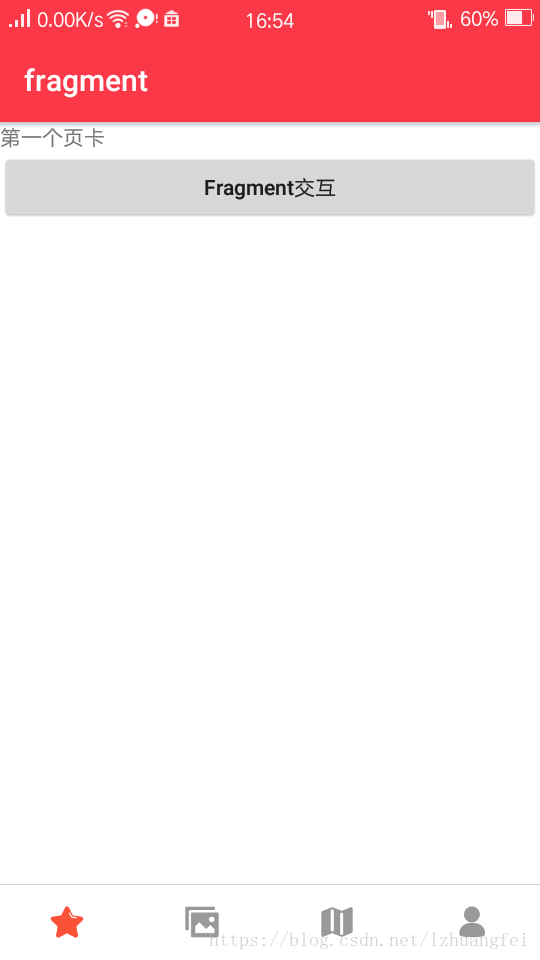
Tab切换
Step1:创建Fragment
创建四个页卡所表示的Fragment以及其布局文件,图中每个页卡都是一个Fragment(碎片)
先创建第一个页卡的Fragment以及布局文件
fragment_tab1.xml
<LinearLayout xmlns:android="http://schemas.android.com/apk/res/android"
    xmlns:tools="http://schemas.android.com/tools"
    android:layout_width="match_parent"
    android:layout_height="match_parent"
    tools:context="com.zhuangfei.fragment.TabFragment1"
    android:orientation="vertical">

    <TextView
        android:layout_width="match_parent"
        android:layout_height="wrap_content"
        android:text="第一个页卡" />

    <Button
        android:id="@+id/tab1_btn"
        android:layout_width="match_parent"
        android:layout_height="wrap_content"
        android:textAllCaps="false"
        android:text="Fragment交互"/>

</LinearLayout>
TabFragment1.java
import android.os.Bundle;
import android.support.v4.app.Fragment;
import android.view.LayoutInflater;
import android.view.View;
import android.view.ViewGroup;
import android.widget.Button;
import android.widget.Toast;

/**
 *第一个页卡
 * A simple {@link Fragment} subclass.
 */
public class TabFragment1 extends Fragment {

    View view;

    @Override
    public View onCreateView(LayoutInflater inflater, ViewGroup container,
                             Bundle savedInstanceState) {
        view=inflater.inflate(R.layout.fragment_tab1, container, false);

        Button button=view.findViewById(R.id.tab1_btn);
        button.setOnClickListener(new View.OnClickListener() {
            @Override
            public void onClick(View view) {
                Toast.makeText(getContext(),"findViewById()时不要忘了前边的view."
                        ,Toast.LENGTH_SHORT).show();
            }
        });
        return view;
    }
}以下copy3份,并简单的修改一下显示的文字
fragment_tab2.xml
<LinearLayout xmlns:android="http://schemas.android.com/apk/res/android"
    xmlns:tools="http://schemas.android.com/tools"
    android:layout_width="match_parent"
    android:layout_height="match_parent"
    tools:context="com.zhuangfei.fragment.TabFragment1">

    <TextView
        android:layout_width="match_parent"
        android:layout_height="match_parent"
        android:text="第二个页卡" />

</LinearLayout>
TabFragment2.java
import android.os.Bundle;
import android.support.v4.app.Fragment;
import android.view.LayoutInflater;
import android.view.View;
import android.view.ViewGroup;

/**
 *第二个页卡
 * A simple {@link Fragment} subclass.
 */
public class TabFragment2 extends Fragment {

    @Override
    public View onCreateView(LayoutInflater inflater, ViewGroup container,
                             Bundle savedInstanceState) {
        return inflater.inflate(R.layout.fragment_tab2, container, false);
    }
}
fragment_tab3.xml
<LinearLayout xmlns:android="http://schemas.android.com/apk/res/android"
    xmlns:tools="http://schemas.android.com/tools"
    android:layout_width="match_parent"
    android:layout_height="match_parent"
    tools:context="com.zhuangfei.fragment.TabFragment1">

    <TextView
        android:layout_width="match_parent"
        android:layout_height="match_parent"
        android:text="第三个页卡" />

</LinearLayout>
TabFragment3.java
import android.os.Bundle;
import android.support.v4.app.Fragment;
import android.view.LayoutInflater;
import android.view.View;
import android.view.ViewGroup;

/**
 *第三个页卡
 * A simple {@link Fragment} subclass.
 */
public class TabFragment3 extends Fragment {

    @Override
    public View onCreateView(LayoutInflater inflater, ViewGroup container,
                             Bundle savedInstanceState) {
        return inflater.inflate(R.layout.fragment_tab3, container, false);
    }
}
fragment_tab4.xml
<LinearLayout xmlns:android="http://schemas.android.com/apk/res/android"
    xmlns:tools="http://schemas.android.com/tools"
    android:layout_width="match_parent"
    android:layout_height="match_parent"
    tools:context="com.zhuangfei.fragment.TabFragment1">

    <TextView
        android:layout_width="match_parent"
        android:layout_height="match_parent"
        android:text="第四个页卡" />

</LinearLayout>
TabFragment4.java
import android.os.Bundle;
import android.support.v4.app.Fragment;
import android.view.LayoutInflater;
import android.view.View;
import android.view.ViewGroup;

/**
 *第四个页卡
 * A simple {@link Fragment} subclass.
 */
public class TabFragment4 extends Fragment {

    @Override
    public View onCreateView(LayoutInflater inflater, ViewGroup container,
                             Bundle savedInstanceState) {
        return inflater.inflate(R.layout.fragment_tab4, container, false);
    }
}
创建主页面
四个Fragment应该怎么显示在主页面上呢,这里用到了帧布局,主页面的底部是底部导航的布局,中间是一个帧布局
activity_main.xml
<LinearLayout xmlns:android="http://schemas.android.com/apk/res/android"
    xmlns:tools="http://schemas.android.com/tools"
    android:layout_width="match_parent"
    android:layout_height="match_parent"
    android:orientation="vertical" >

    <!--帧布局,承载四个TAB的Fragment-->
    <FrameLayout
        android:id="@+id/id_framelayout"
        android:layout_width="match_parent"
        android:layout_height="0dp"
        android:layout_weight="1"
        android:background="@color/app_white" />

    <View
        android:layout_width="match_parent"
        android:layout_height="1px"
        android:background="@color/app_line"/>

    <include layout="@layout/view_bottom" />

</LinearLayout>
view_bottom.xml
<?xml version="1.0" encoding="utf-8"?>
<LinearLayout xmlns:android="http://schemas.android.com/apk/res/android"
    android:id="@+id/bottomLayout"
    android:layout_width="match_parent"
    android:layout_height="50dp"
    android:background="@color/app_white"
    android:orientation="horizontal">

    <!-- 主界面底部4个TAB -->

    <LinearLayout
        android:id="@+id/id_tab1_layout"
        android:layout_width="0dp"
        android:layout_height="match_parent"
        android:layout_weight="1"
        android:gravity="center"
        android:orientation="vertical">

        <ImageView
            android:id="@+id/id_tab1_imageview"
            android:layout_width="25dp"
            android:layout_height="25dp"
            android:src="@drawable/ic_tab1" />
    </LinearLayout>

    <LinearLayout
        android:id="@+id/id_tab2_layout"
        android:layout_width="0dp"
        android:layout_height="match_parent"
        android:layout_weight="1"
        android:gravity="center"
        android:orientation="vertical">

        <ImageView
            android:id="@+id/id_tab2_imageview"
            android:layout_width="25dp"
            android:layout_height="25dp"
            android:src="@drawable/ic_tab2" />
    </LinearLayout>

    <LinearLayout
        android:id="@+id/id_tab3_layout"
        android:layout_width="0dp"
        android:layout_height="match_parent"
        android:layout_weight="1"
        android:gravity="center"
        android:orientation="vertical">

        <ImageView
            android:id="@+id/id_tab3_imageview"
            android:layout_width="25dp"
            android:layout_height="25dp"
            android:src="@drawable/ic_tab3" />
    </LinearLayout>

    <LinearLayout
        android:id="@+id/id_tab4_layout"
        android:layout_width="0dp"
        android:layout_height="match_parent"
        android:layout_weight="1"
        android:gravity="center"
        android:orientation="vertical">

        <ImageView
            android:id="@+id/id_tab4_imageview"
            android:layout_width="25dp"
            android:layout_height="25dp"
            android:src="@drawable/ic_tab4" />
    </LinearLayout>

</LinearLayout>
MainActivity.java
package com.zhuangfei.fragment;

import android.media.Image;
import android.support.v4.app.FragmentManager;
import android.support.v4.app.FragmentTransaction;
import android.support.v7.app.AppCompatActivity;
import android.os.Bundle;
import android.view.View;
import android.widget.ImageView;
import android.widget.LinearLayout;

/**
 * 主页面,显示多个Fragment
 */
public class MainActivity extends AppCompatActivity implements View.OnClickListener{

    // 创建Fragment对象
    private TabFragment1 tabFragment1;
    private TabFragment2 tabFragment2;
    private TabFragment3 tabFragment3;
    private TabFragment4 tabFragment4;

    private ImageView tabImageView1;
    private ImageView tabImageView2;
    private ImageView tabImageView3;
    private ImageView tabImageView4;

    private LinearLayout tabLayout1;
    private LinearLayout tabLayout2;
    private LinearLayout tabLayout3;
    private LinearLayout tabLayout4;

    @Override
    protected void onCreate(Bundle savedInstanceState) {
        super.onCreate(savedInstanceState);
        setContentView(R.layout.activity_main);
        initView();
        select(0);
    }

    private void initView() {
        tabImageView1=findViewById(R.id.id_tab1_imageview);
        tabImageView2=findViewById(R.id.id_tab2_imageview);
        tabImageView3=findViewById(R.id.id_tab3_imageview);
        tabImageView4=findViewById(R.id.id_tab4_imageview);

        tabLayout1=findViewById(R.id.id_tab1_layout);
        tabLayout2=findViewById(R.id.id_tab2_layout);
        tabLayout3=findViewById(R.id.id_tab3_layout);
        tabLayout4=findViewById(R.id.id_tab4_layout);

        tabLayout1.setOnClickListener(this);
        tabLayout2.setOnClickListener(this);
        tabLayout3.setOnClickListener(this);
        tabLayout4.setOnClickListener(this);
    }

    /**
     * 初始化Tab的状态
     */
    public void initTab() {
        int color = getResources().getColor(R.color.app_gray);
        // 更改图片颜色为暗色
        tabImageView1.setColorFilter(color);
        tabImageView2.setColorFilter(color);
        tabImageView3.setColorFilter(color);
        tabImageView4.setColorFilter(color);
    }

    /**
     * 选中第i个Tab时的处理
     *
     * @param i
     */
    public void select(int i) {
        // 得到Fragment管理器以及事务
        FragmentManager manager = getSupportFragmentManager();
        FragmentTransaction transaction = manager.beginTransaction();
        initTab();
        int color = getResources().getColor(R.color.app_orange);
        switch (i) {
            case 0:
                tabImageView1.setColorFilter(color);

                if (tabFragment1 == null) {
                    tabFragment1 = new TabFragment1();
                }
                transaction.replace(R.id.id_framelayout, tabFragment1);

                break;
            case 1:
                tabImageView2.setColorFilter(color);

                if (tabFragment2 == null) {
                    tabFragment2 = new TabFragment2();
                }
                transaction.replace(R.id.id_framelayout, tabFragment2);
                break;
            case 2:
                tabImageView3.setColorFilter(color);

                if (tabFragment3 == null) {
                    tabFragment3 = new TabFragment3();
                }
                transaction.replace(R.id.id_framelayout, tabFragment3);
                break;
            case 3:
                tabImageView4.setColorFilter(color);

                if (tabFragment4 == null) {
                    tabFragment4 = new TabFragment4();
                }
                transaction.replace(R.id.id_framelayout, tabFragment4);
                break;
            default:
                break;
        }
        transaction.commit();
    }

    @Override
    public void onClick(View view) {
        switch (view.getId()) {
            case R.id.id_tab1_layout:
                select(0);
                break;
            case R.id.id_tab2_layout:
                select(1);
                break;
            case R.id.id_tab3_layout:
                select(2);
                break;
            case R.id.id_tab4_layout:
                select(3);
                break;
        }
    }
}
本文用的是replace()方法来替换显示的Fargment,这种方法的优缺点:
优点:使用简单
缺点:会导致Fargment在每次切换时都实例化一个对象,性能有影响,并且Fargment有嵌套时会出现内部数据消失的问题
还可以使用add()、show()、hide()实现Fragment切换,该方法的优缺点:
优点:提升性能
缺点:可能会出现重影问题
当然,上面提到的两个问题都是有解决方法的,后续的文章中将使用add()、show()、hide()实现Fragment切换,敬请期待…