目录
主要功能
- HAProxy服务搭建负载均衡服务器,将请求派发不同的后端服务
- Keepalived服务实现主从热备,提高服务的可用性
- Nginx服务器负责处理.heml静态web请求,并将动态的请求重定向给指定的服务器
- Tomcat服务器负责处理.jsp动态web请求
- Apache服务器负责.php动态web请求
- Mariadb服务器提供数据存储功能,存储用户注册信息
- NFS服务器提供各个站点的数据,保证数据的一致性
- Rsyslog服务器记录存储各个服务器的日志
- DNS服务器负责各个web站点域名解析
拓扑图
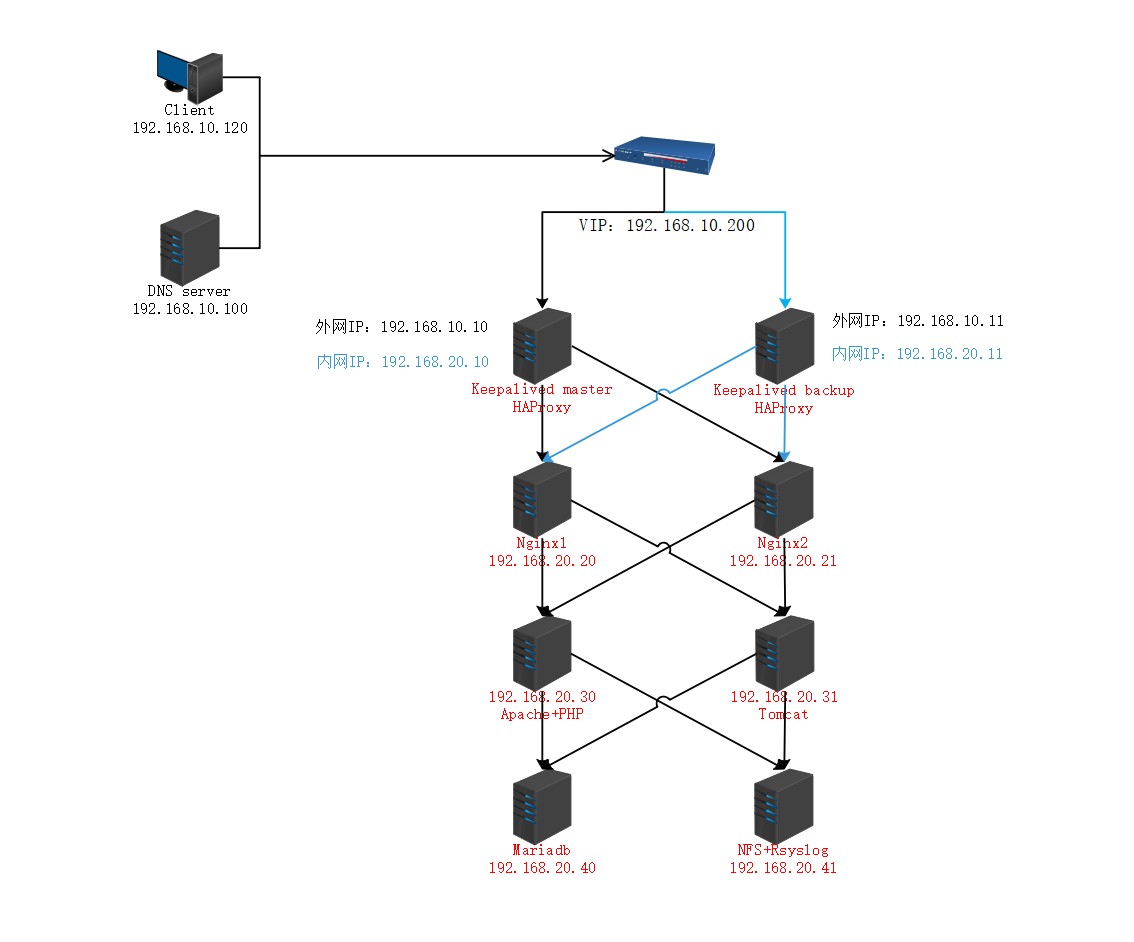
实验环境
- haproxy-master server:centos7
- 192.168.20.10(内网)
- 192.168.10.10(外网)
- 192.168.10.200(VIP)
- haproxy-slave server:centos7
- 192.168.20.11(内网)
- 192.168.10.11(外网)
- 192.168.10.200(VIP)
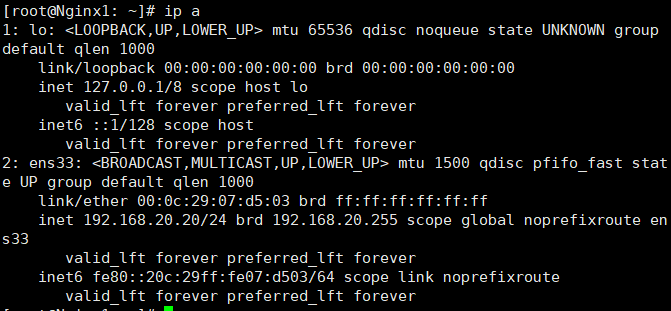
- nginx server:centos7 192.168.20.20
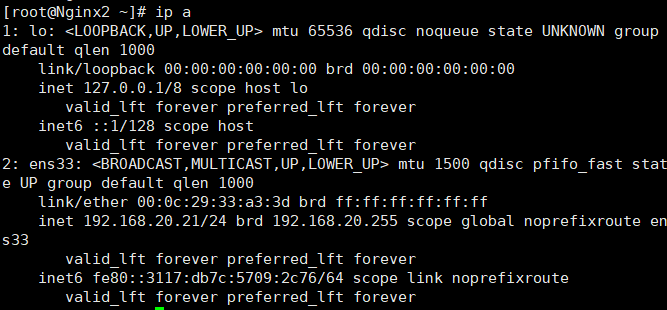
- nginx server:centos7 192.168.20.21
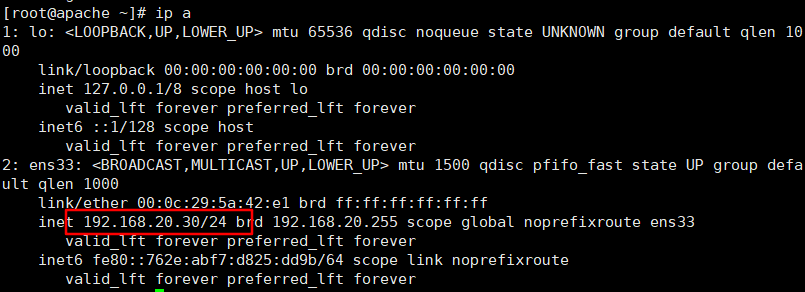
- apache server:centos7 192.168.20.30
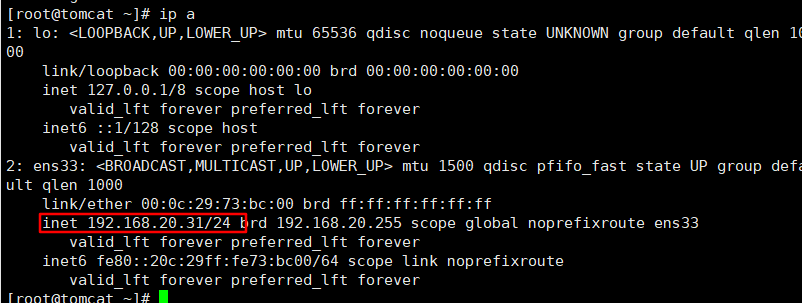
- tomcat server:centos7 192.168.20.31
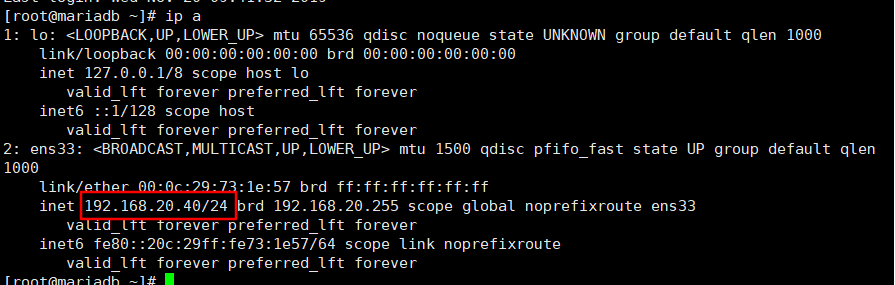
- mariadb server:centos7 192.168.20.40
- nfs server:centos7 192.168.20.41
- dns server:centos7 192.168.10.100
- client server:centos7 192.168.10.120
- haproxy-master server:centos7
NFS_Rsyslog服务器搭建
配置环境
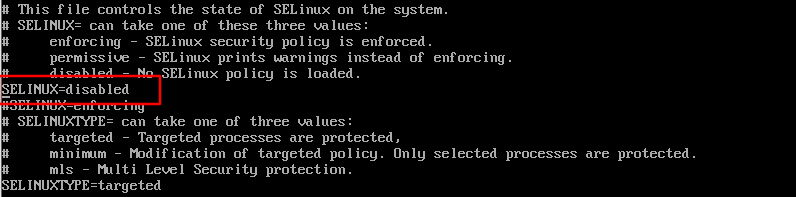
- 关闭防火墙与selinux

- 修改主机名

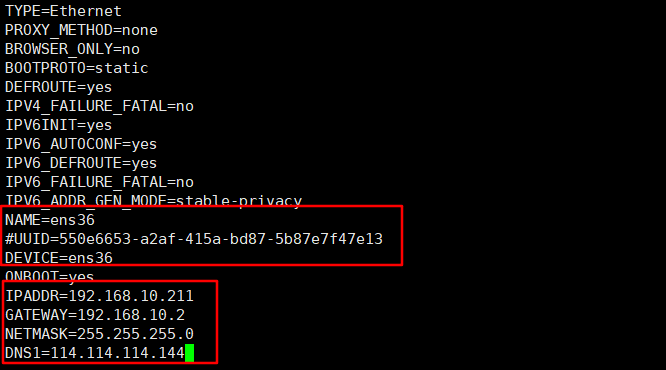
- 修改IP地址


注:其余主机均做相同配置
- 关闭防火墙与selinux
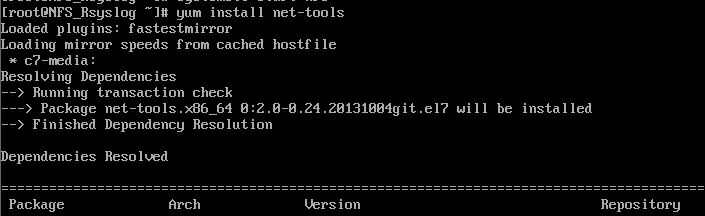
安装服务

启动服务

查看监听端口(需要安装net-tools工具)

修改nfs共享配置


创建共享目录并存放测试文件


上传discuz至共享目录


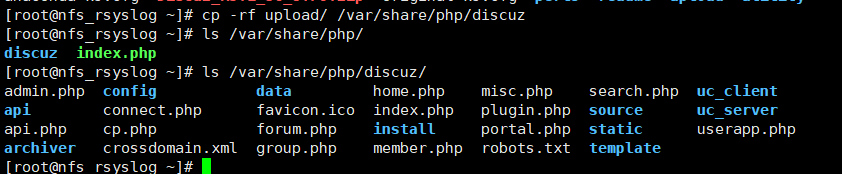
修改共享目录权限

重启服务并设置开机自启


安装rsyslog服务(默认安装)

未安装则可使用 yum install rsyslog命令进行安装修改主配置文件如下


$ModLoad imudp
$UDPServerRun 514
$AllowedSender udp, 192.168.20.0/24
开启监听端口


SYSLOGD_OPTIONS="-r514 -c2"重启服务并查看监听端口


Mariadb服务器搭建
环境配置如上台服务器相同
安装mariadb服务

启动服务


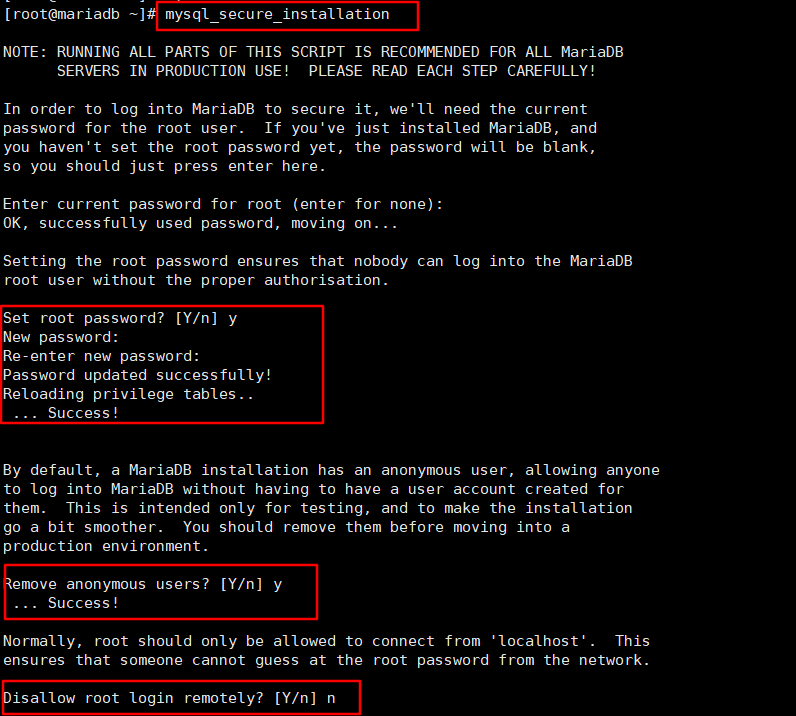
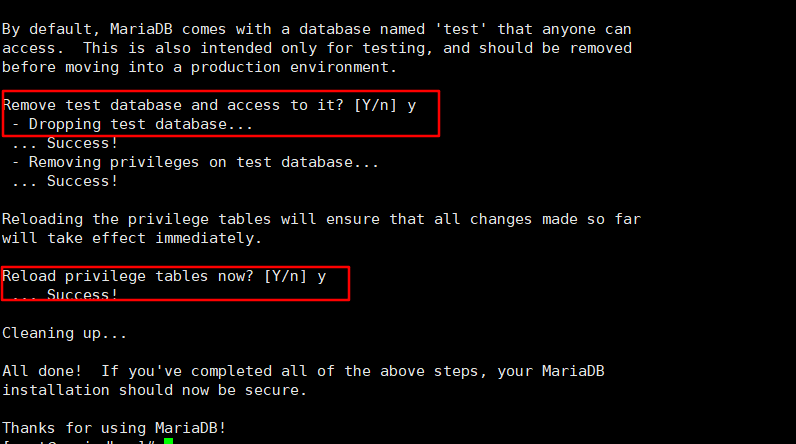
初始化数据库
为php创建数据库及用户

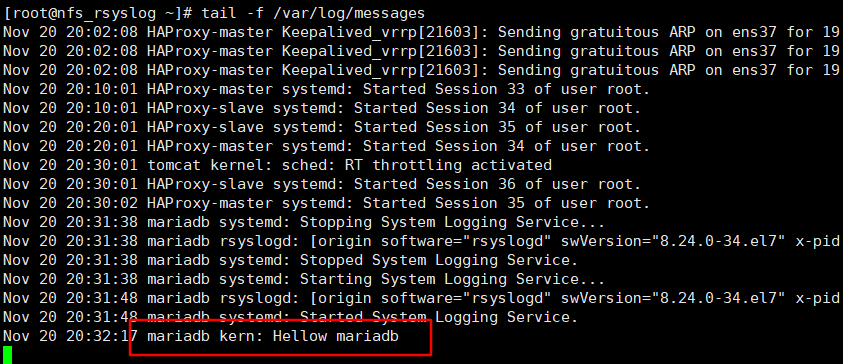
将日志传送至日志服务器


*.* @192.168.20.41:514重启服务

测试

Tomcat服务器搭建
环境配置如上相同
下载JDK rpm包
官网下载
jdk-8u191-linux-x64.rpm上传至服务器

rpm命令进行安装

添加环境变量


export JAVA_HOME=/usr/java/default
export PATH=$PATH:$JAVA_HOME/bin
CLASSPATH=.:$JAVA_HOME/jre/lib:$JAVA_HOME/lib:$JAVA_HOME/lib/tools.jar
使配置立即生效并查看结果

安装tomcat
下载源码包
上传至服务器

解压缩

创建运行目录并将解压文件复制过去

创建运行用户

添加环境变量


修改权限

启动服务

挂载nfs共享目录


192.168.20.41:/var/share/java /usr/tomcat/webapps/ROOT nfs rw,tcp,intr 0 1修改tomcat配置


<Connector port="80" protocol="HTTP/1.1" connectionTimeout="20000" redirectPort="8443" /> ... <Host name="192.168.20.31" appBase="webapps" unpackWARs="true" autoDeploy="true"> <Contest path="/" docBase="ROOT" reloadable="true" /> <Valve className="org.apache.catalina.valves.AccessLogValve" directory="logs" prefix="www.lg_access_log." suffix=".txt" pattern="%h %l %u %t "%r" %s %b" /> </Host>重启服务

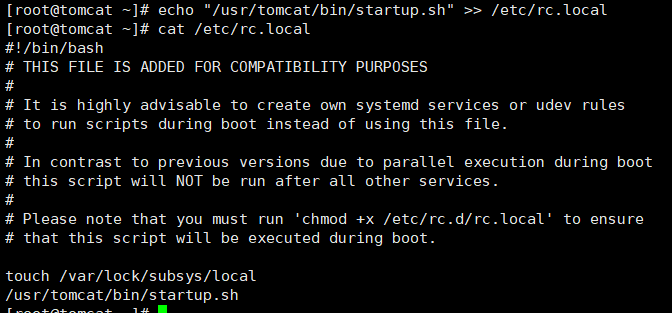
设置开机启动
本地测试访问

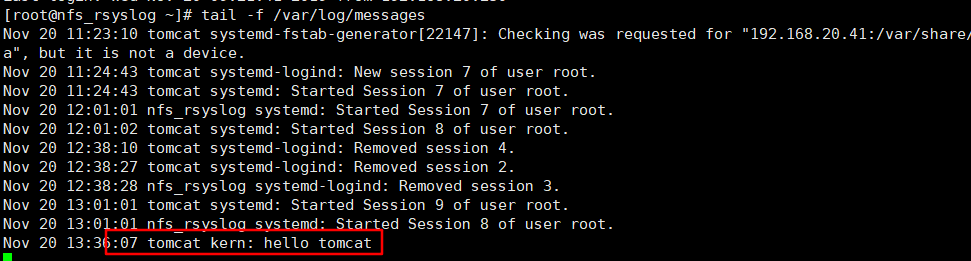
将本地日志传送至日志服务器


*.*@192.168.20.41:514重启日志服务

测试

Apache服务器搭建
环境配置同上
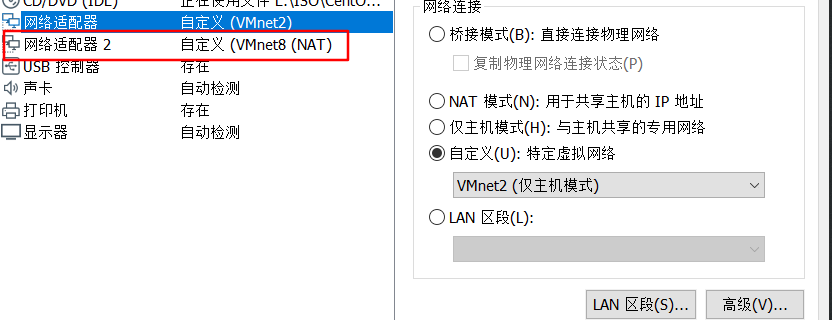
加装一块网卡用于连接外网(需要使用epel源安装软件)
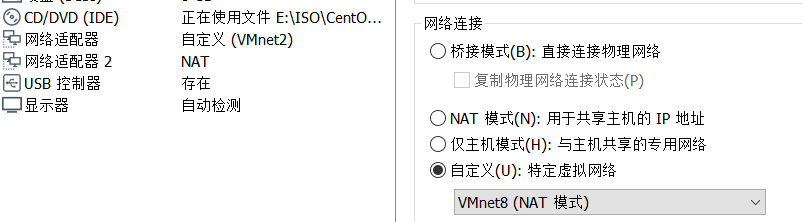
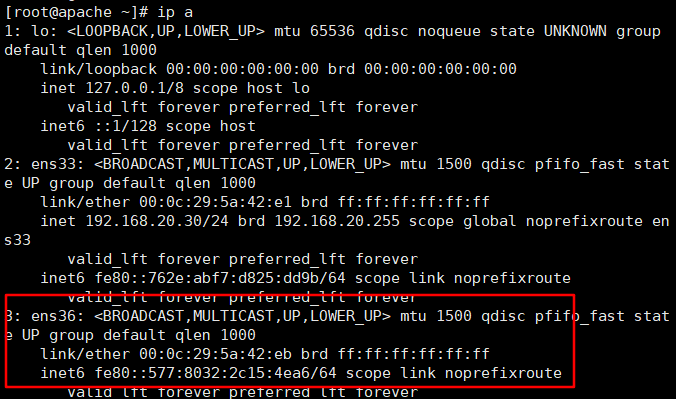

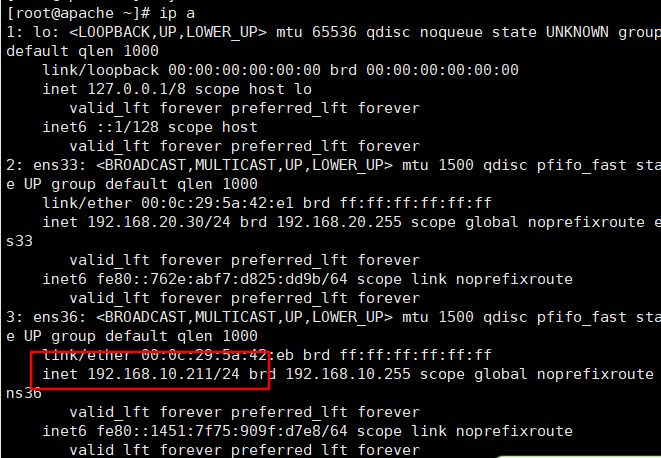
若新加入的网卡无法连接外网需要将ens33网卡暂时停用


配置epel源


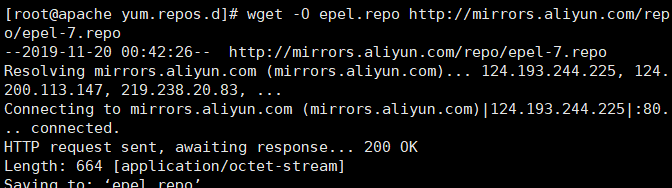

wget -O CentOS-Base.repo http://mirrors.aliyun.com/repo/Centos-7.repo
wget -O epel.repo http://mirrors.aliyun.com/repo/epel-7.repo
yum clean all
yum makecache
安装服务和依赖


yum install httpd -y
yum install php php-mysql -y
yum install -y php-gd libjpeg* php-imap php-ldap php-odbc php-pear php-xml php-xmlrpc php-mbstring php-mcrypt php-bcmath php-mhash libmcrypt
检测是否加载php模块

修改主配置文件


安装完成服务后重新启动ens33网卡

挂载nfs共享目录


启动服务
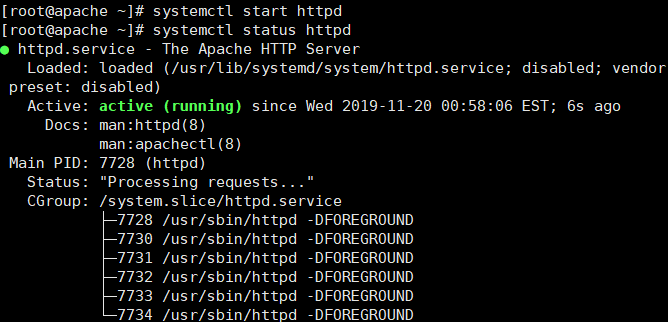
设置开机自启

测试

将日志传送至日志服务器


重启本地日志服务

测试

nginx 服务器配置
环境同上
安装nginx服务
下载以源码包
官网上传服务器

解压缩

安装依赖包

yum install gcc pcre-devel zlib-devel openssl-devel为nginx创建系统用户

编译安装


./configure --prefix=/usr/local/nginx --conf-path=/etc/nginx/nginx.conf --error-log-path=/var/log/nginx/error.log --http-log-path=/var/log/nginx/aaccess.log --pid-path=/var/run/nginx.pid --lock-path=/var/lock/nginx.lock --user=nginx --group=nginx --with-http_ssl_module --with-http_v2_module --with-http_dav_module --with-http_stub_status_module --with-threads --with-file-aio
make && make install
修改环境变量


export PATH=$PATH:/usr/local/nginx/sbin
修改配置文件

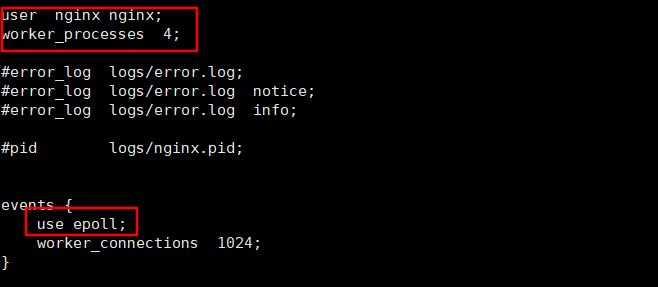

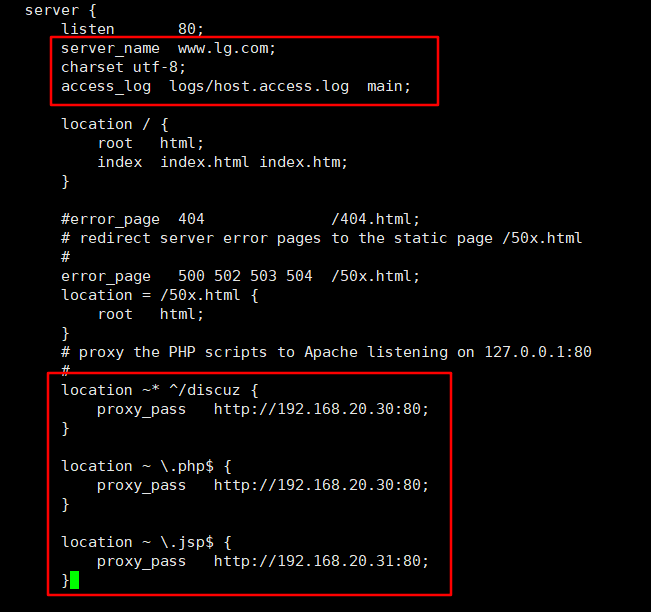
user  nginx nginx;
worker_processes  4;
events {
    use epoll;
    worker_connections  1024;
}
http {
    include       mime.types;
    default_type  application/octet-stream;

    log_format  main  '$remote_addr - $remote_user [$time_local] "$request" '
                      '$status $body_bytes_sent "$http_referer" '
                      '"$http_user_agent" "$http_x_forwarded_for"';
    access_log  logs/access.log  main;
    sendfile        on;
    keepalive_timeout  65;
    server {
        listen       80;
        server_name  www.lg.com;
        charset utf-8;
        access_log  logs/host.access.log  main;

        location / {
            root   html;
            index  index.html index.htm;
        }

        #error_page  404              /404.html;
        # redirect server error pages to the static page /50x.html
        #
        error_page   500 502 503 504  /50x.html;
        location = /50x.html {
            root   html;
        }
        # proxy the PHP scripts to Apache listening on 127.0.0.1:80
        #
        location ~* ^/discuz {
            proxy_pass   http://192.168.20.30:80;
        }

        location ~ \.php$ {
            proxy_pass   http://192.168.20.30:80;
        }

        location ~ \.jsp$ {
            proxy_pass   http://192.168.20.31:80;
        }

}
创建日志文件夹

启动服务

为nginx创建启停脚本并设置开机自启

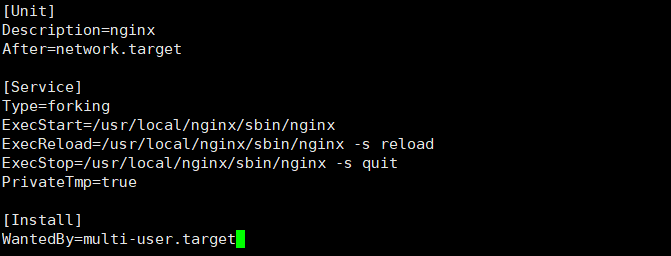
[Unit]
Description=nginx
After=network.target

[Service]
Type=forking
ExecStart=/usr/local/nginx/sbin/nginx
ExecReload=/usr/local/nginx/sbin/nginx -s reload
ExecStop=/usr/local/nginx/sbin/nginx -s quit
PrivateTmp=true

[Install]
WantedBy=multi-user.target
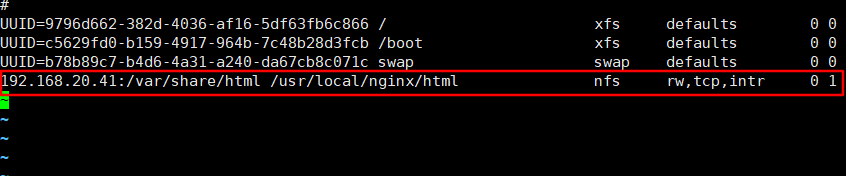
挂载nfs


访问测试


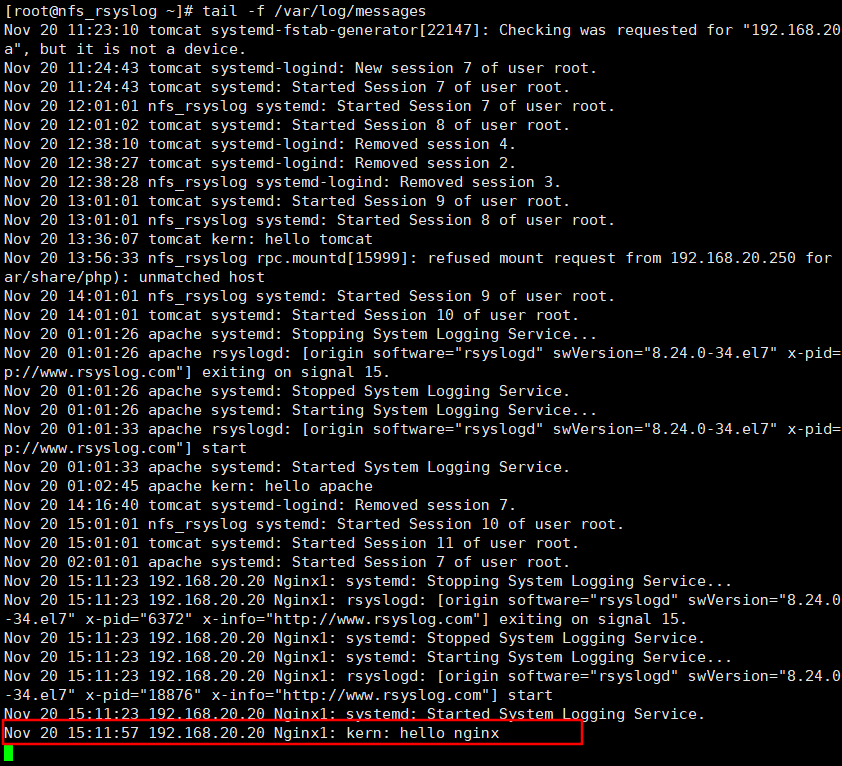
将日志上传至日志服务器


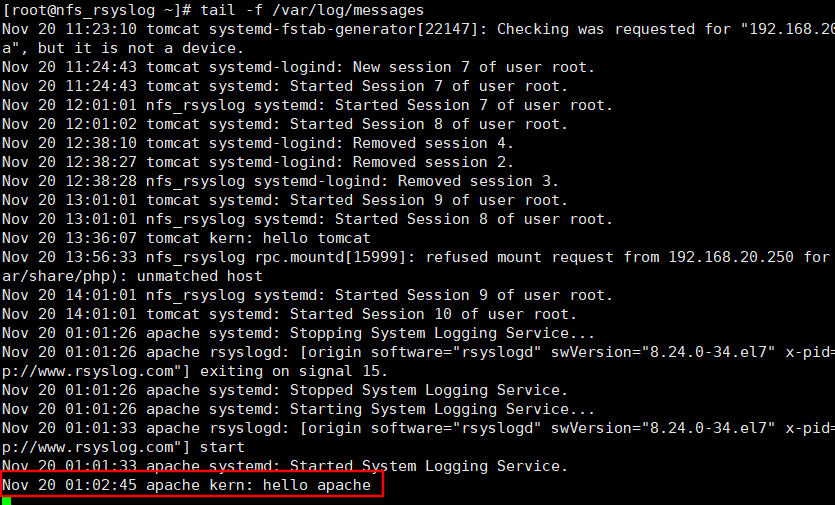
测试日志服务

另一台Nginx服务器做相同配置
HAProxy负载均衡服务器搭建
环境配置如上相同
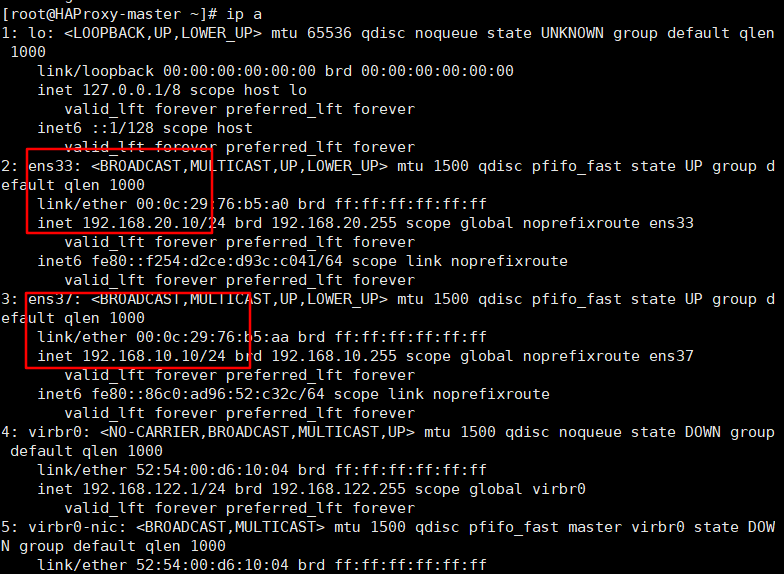
为haproxy服务器添加外网网卡,并设置IP
安装服务

修改配置

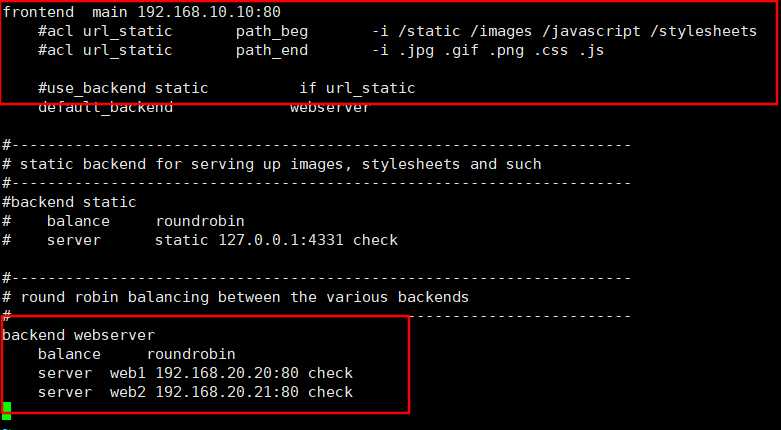
frontend  main 192.168.10.10:80
    #acl url_static       path_beg       -i /static /images /javascript /stylesheets
    #acl url_static       path_end       -i .jpg .gif .png .css .js

    #use_backend static          if url_static
    default_backend             webserver

#---------------------------------------------------------------------
# static backend for serving up images, stylesheets and such
#---------------------------------------------------------------------
#backend static
#    balance     roundrobin
#    server      static 127.0.0.1:4331 check

#---------------------------------------------------------------------
# round robin balancing between the various backends
#---------------------------------------------------------------------
backend webserver
    balance     roundrobin
    server  web1 192.168.20.20:80 check
    server  web2 192.168.20.21:80 check
启动服务并设置开机自启


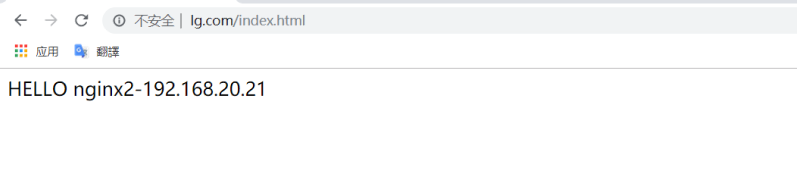
测试(测试时为了看出区别暂时将nginx服务器挂载的nfs取消,并创建不同的主页)


配置另一台haproxy服务器(配置过程相同,配置文件不同,从服务器主配置文件如下)
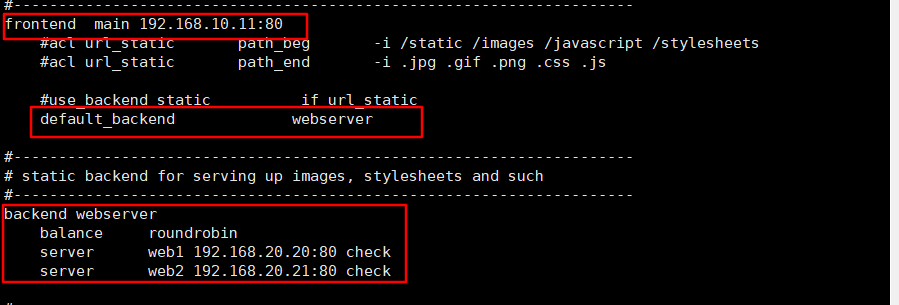
frontend  main 192.168.10.11:80
    #acl url_static       path_beg       -i /static /images /javascript /stylesheets
    #acl url_static       path_end       -i .jpg .gif .png .css .js

    #use_backend static          if url_static
    default_backend             webserver

#---------------------------------------------------------------------
# static backend for serving up images, stylesheets and such
#---------------------------------------------------------------------
backend webserver
    balance     roundrobin
    server      web1 192.168.20.20:80 check
    server      web2 192.168.20.21:80 check
测试从负载均衡服务器

使用keepalived为这两台负载均衡服务器做主从
下载源码包
官网下载上传至服务器

安装依赖包

解压安装


修改配置文件


! Configuration File for keepalived

global_defs {
   router_id HA_A1
}

vrrp_instance VI_1 {
    state MASTER
    interface ens37
    virtual_router_id 51
    priority 100
    advert_int 1
    authentication {
        auth_type PASS
        auth_pass 123456
    }
    virtual_ipaddress {
        192.168.10.200
    }
}
按照相同步骤安装从负载均衡服务器上的keepalive服务,并进行如下配置

global_defs {
    router_id HA_A2
}

vrrp_instance VI_1 {
    state BACKUP
    interface eth1
    virtual_router_id 51
    priority 90
    advert_int 1
    authentication {
        auth_type PASS
        auth_pass 123456
    }
    virtual_ipaddress {
        192.168.10.200
    }
}
~
启动服务

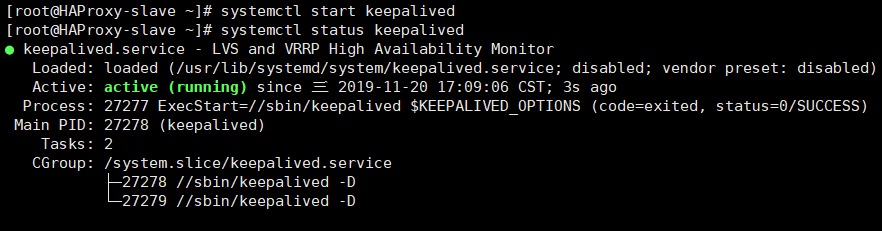
设置开机自启

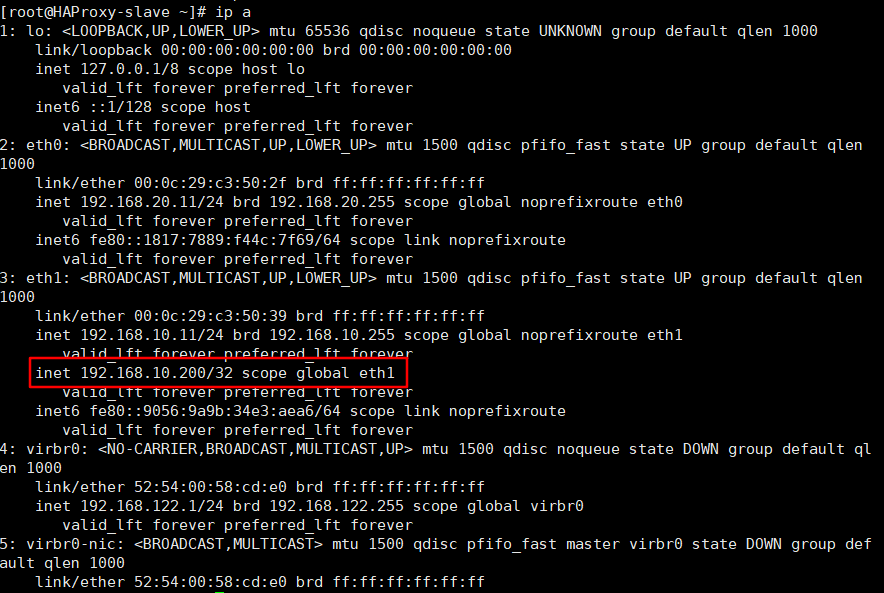
查看漂移地址
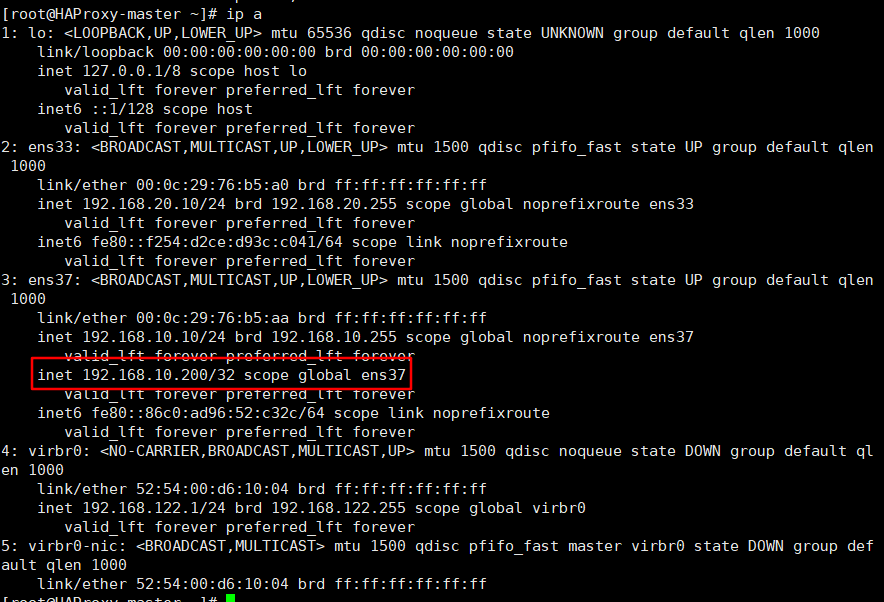
测试

修改haproxy配置(两台haproxy都做相同修改)


frontend  main 192.168.10.200:80
    #acl url_static       path_beg       -i /static /images /javascript /stylesheets
    #acl url_static       path_end       -i .jpg .gif .png .css .js

    #use_backend static          if url_static
    default_backend             webserver

#---------------------------------------------------------------------
# static backend for serving up images, stylesheets and such
#---------------------------------------------------------------------
#backend static
#    balance     roundrobin
#    server      static 127.0.0.1:4331 check

#---------------------------------------------------------------------
# round robin balancing between the various backends
#---------------------------------------------------------------------
backend webserver
    balance     roundrobin
    server  web1 192.168.20.20:80 check
    server  web2 192.168.20.21:80 check


测试

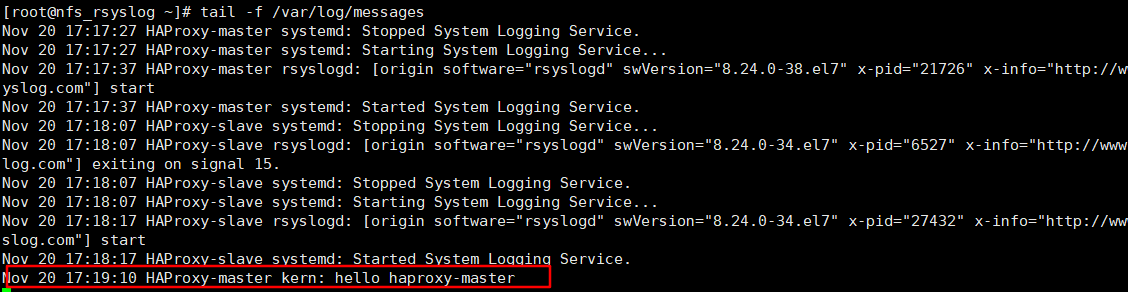
将日志上传日志服务器


测试

为haproxy-slave做相同配置
为两台haproxy服务器修改内核参数,使其能够监听到另一台haproxy服务器上的漂移地址,解决服务器重启无法自动启动haproxy的问题(有安全隐患,慎用)


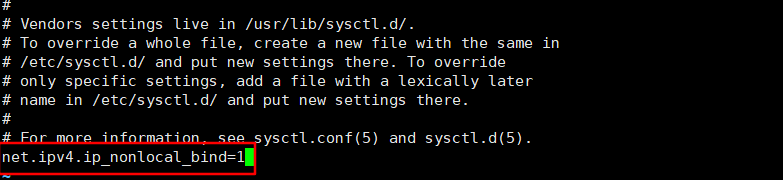
echo 1 > /proc/sys/net/ipv4/ip_nonlocal_bind
vi /etc/sysctl.conf
net.ipv4.ip_nonlocal_bind=1
搭建DNS服务器
安装服务

修改配置文件

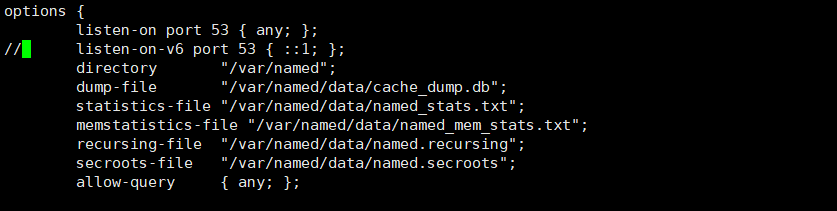

options {
        listen-on port 53 { any; };
//      listen-on-v6 port 53 { ::1; };
        directory       "/var/named";
        dump-file       "/var/named/data/cache_dump.db";
        statistics-file "/var/named/data/named_stats.txt";
        memstatistics-file "/var/named/data/named_mem_stats.txt";
        recursing-file  "/var/named/data/named.recursing";
        secroots-file   "/var/named/data/named.secroots";
        allow-query     { any; };

zone "lg.com" IN {
        type master;
        file "lg.com.zone";
};

zone "10.168.192.in-addr.arpa" IN {
        type master;
        file "10.168.192.arpa";
};
使用提供的模板文件修改区域配置

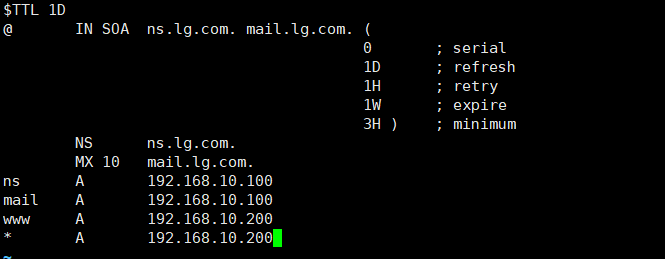
$TTL 1D
@       IN SOA  ns.lg.com. mail.lg.com. (
                                        0       ; serial
                                        1D      ; refresh
                                        1H      ; retry
                                        1W      ; expire
                                        3H )    ; minimum
        NS      ns.lg.com.
        MX 10   mail.lg.com.
ns      A       192.168.10.100
mail    A       192.168.10.100
www     A       192.168.10.200
*       A       192.168.10.200
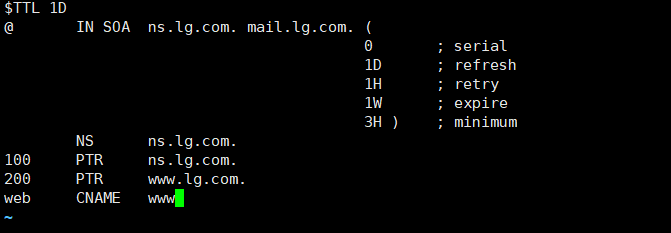
$TTL 1D
@       IN SOA  ns.lg.com. mail.lg.com. (
                                        0       ; serial
                                        1D      ; refresh
                                        1H      ; retry
                                        1W      ; expire
                                        3H )    ; minimum
        NS      ns.lg.com.
100     PTR     ns.lg.com.
200     PTR     www.lg.com.
web     CNAME   www
检查配置文件语法
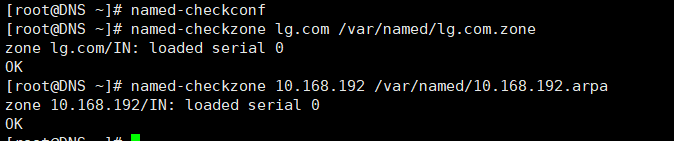
修改区域配置文件属主

启动服务
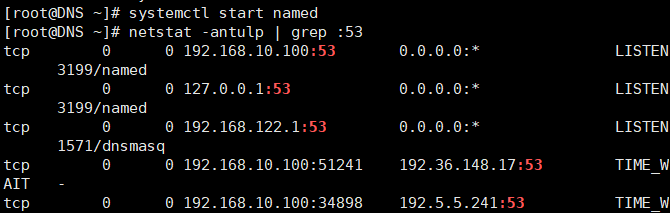
设置开机自启

防火墙配置(可选)
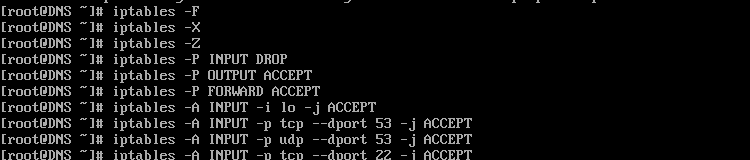
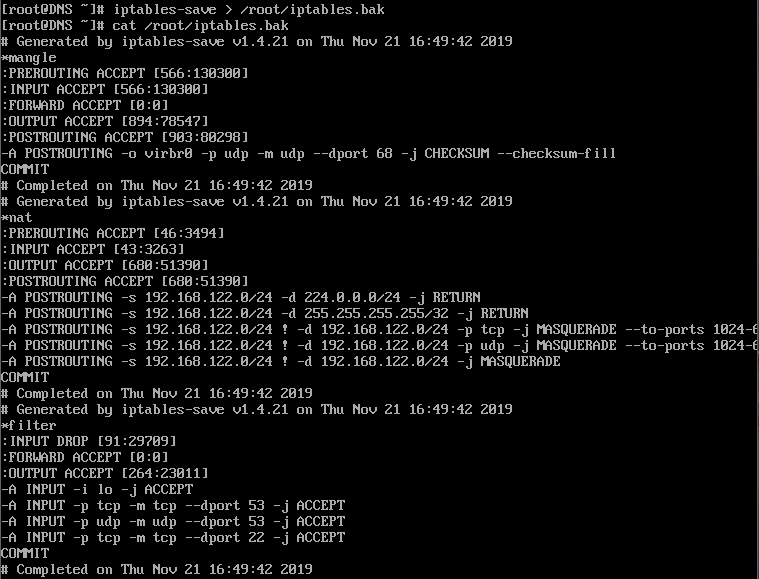
iptables -F
iptables -X
iptables -Z
iptables -P INPUT DROP
iptables -P OUTPUT ACCEPT
iptables -P FORWARD ACCEPT
iptables -A INPUT -i lo -j ACCEPT
iptables -A INPUT -p tcp --dport 53 -j ACCEPT
iptables -A INPUT -p udp --dport 53 -j ACCEPT
iptables -A INPUT -p udp --dport 22 -j ACCEPT
iptables -A INPUT -p tcp --dport 22 -j ACCEPT
iptables-save > /root/iptables.bak
cat /root/iptables.bak
客户机测试
修改客户机网络配置
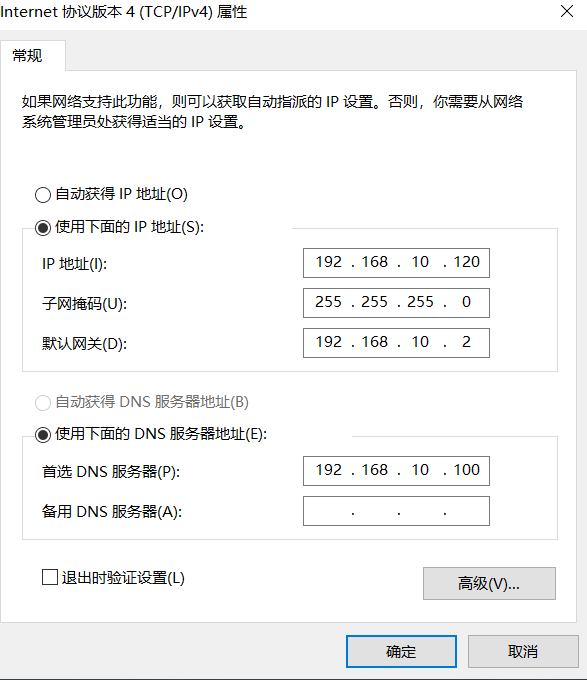
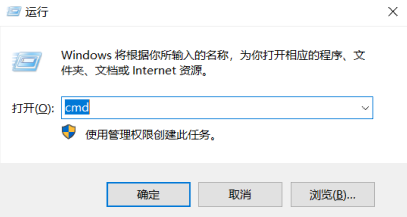
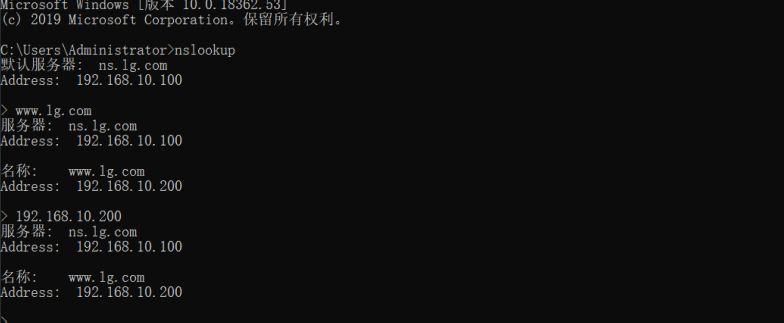
测试DNS服务
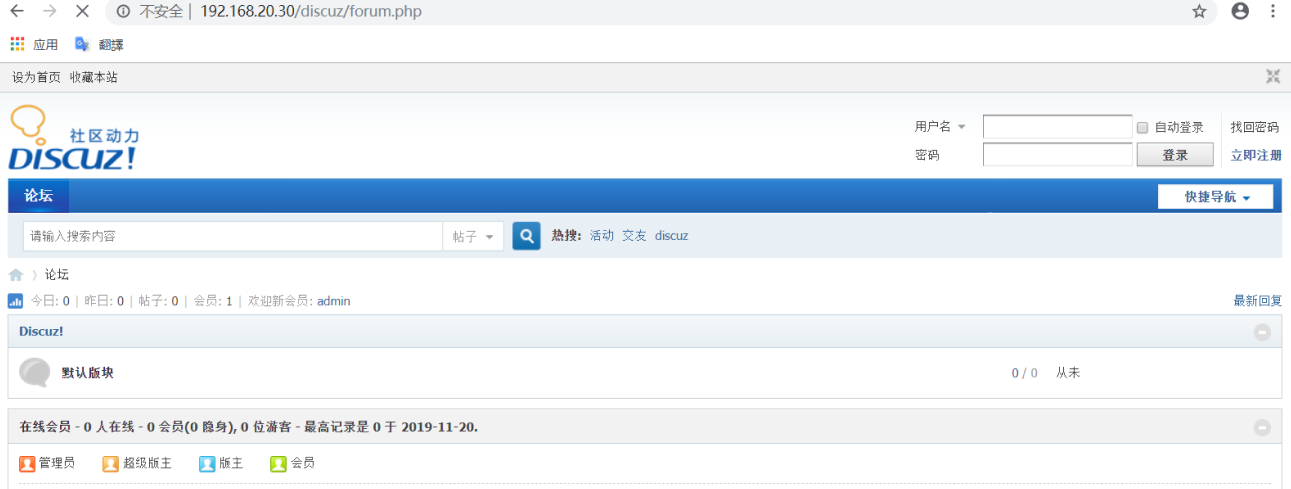
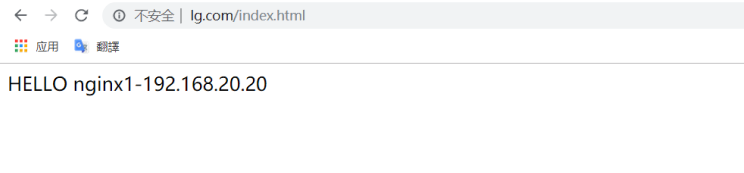
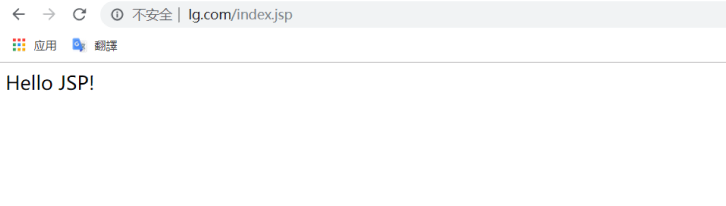
浏览器访问测试

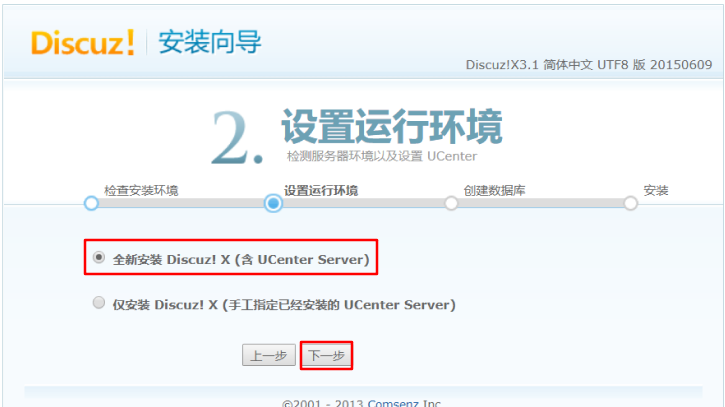
安装discuz论坛
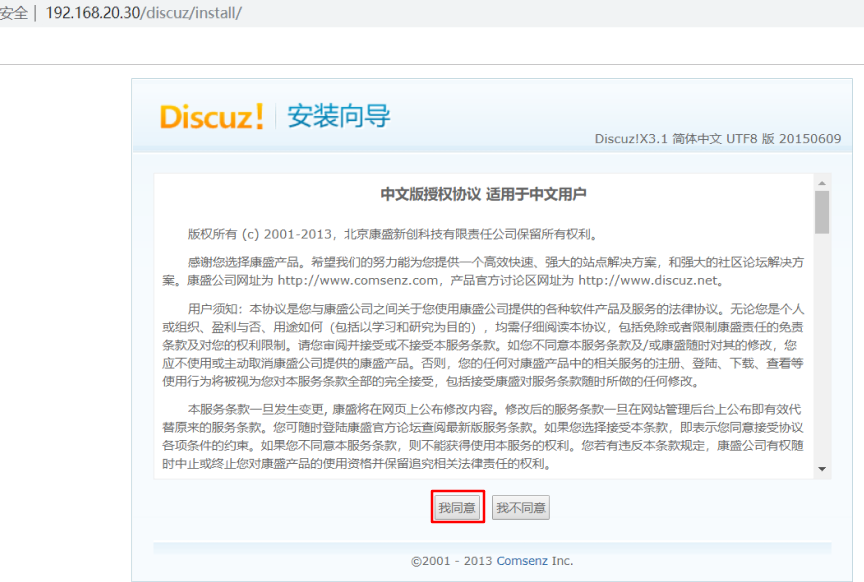

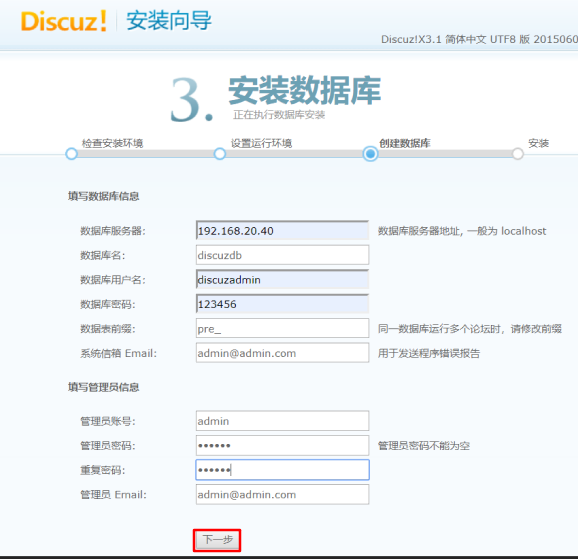
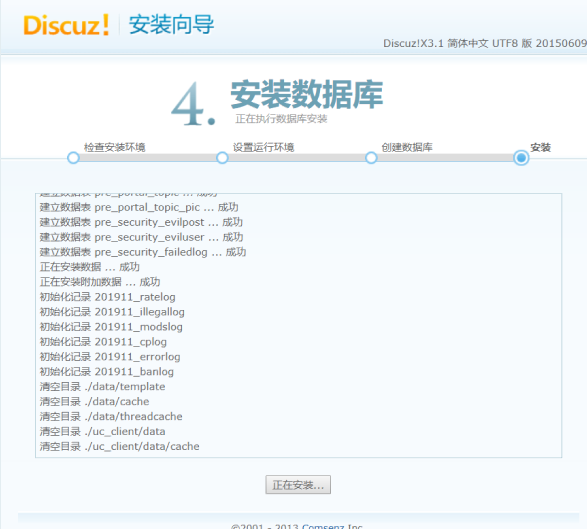

(由于使用自己搭建的dns,未指定图片所在域名的ip所以链接图片无法获取显示)