一、前言
网络安全实验五中需要搭建FTP服务器进行实验,在进了一些坑之后,还是记录下搭建和配置过程,希望其他人可以少走弯路。
本文中Linux下安装和配置FTP在VMware中Ubuntu 16下进行,对于CentOS等其他Linux系统不适用,其他系统的安装需要参照其他文章。
同时注意权限问题,有的命令需要sudo [原命令]才可执行,因此这里基本上都用了sudo。
下面是正文
二、基本安装
1.安装ftp服务器
分别执行下列命令
sudo apt-get update
sudo apt-get install vsftpd
#这里遇到了问题1,解决方案在最下面。之后可以利用命令vsftpd --version 检测是否安装已经安装后的版本。
2.配置ftp服务器
(1)配置文件修改之前先备份,系列命令进行备份。
sudo cp /etc/vsftpd.conf /etc/vsftpd_bk.conf
(2)修改配置文件
可以使用vim,也可以使用gedit进入修改,本人感觉gedit操作相对简单,因此这里使用的gedit.(下面命令2选1)
使用sudo vim /etc/vsftpd.conf或者sudo gedit /etc/vsftpd.conf
(3)配置文件内容
我这里的配置文件vsftpd.conf中内容如下(对于更深入的要求,可在之后修改配置文件),此处只配置简单的情形。
listen=NO
listen_ipv6=YES

# Allow anonymous FTP? (Disabled by default).
anonymous_enable=NO

# Uncomment this to allow local users to log in.
local_enable=YES

# Uncomment this to enable any form of FTP write command.
write_enable=YES

# Default umask for local users is 077. You may wish to change this to 022,
# if your users expect that (022 is used by most other ftpd's)
local_umask=022

# Activate directory messages - messages given to remote users when they
# go into a certain directory.
dirmessage_enable=YES
#
# If enabled, vsftpd will display directory listings with the time
# in  your  local  time  zone.  The default is to display GMT. The
# times returned by the MDTM FTP command are also affected by this
# option.
use_localtime=YES
#
# Activate logging of uploads/downloads.
xferlog_enable=YES
#
# Make sure PORT transfer connections originate from port 20 (ftp-data).
connect_from_port_20=YES

# You may override where the log file goes if you like. The default is shown
# below.
xferlog_file=/var/log/vsftpd.log
#
# If you want, you can have your log file in standard ftpd xferlog format.
# Note that the default log file location is /var/log/xferlog in this case.
xferlog_std_format=YES


# You may fully customise the login banner string:
ftpd_banner=Welcome to FTP service.


# You may specify an explicit list of local users to chroot() to their home
# directory. If chroot_local_user is YES, then this list becomes a list of
# users to NOT chroot().
# (Warning! chroot'ing can be very dangerous. If using chroot, make sure that
# the user does not have write access to the top level directory within the
# chroot)
chroot_local_user=YES
chroot_list_enable=YES
# (default follows)
chroot_list_file=/etc/vsftpd.chroot_list

# This option should be the name of a directory which is empty.  Also, the
# directory should not be writable by the ftp user. This directory is used
# as a secure chroot() jail at times vsftpd does not require filesystem
# access.
secure_chroot_dir=/var/run/vsftpd/empty
#
# This string is the name of the PAM service vsftpd will use.
# pam_service_name=vsftpd
pam_service_name=ftp

# This option specifies the location of the RSA certificate to use for SSL
# encrypted connections.
rsa_cert_file=/etc/ssl/certs/ssl-cert-snakeoil.pem
rsa_private_key_file=/etc/ssl/private/ssl-cert-snakeoil.key
ssl_enable=NO

#
# Uncomment this to indicate that vsftpd use a utf8 filesystem.
utf8_filesystem=YES
注意Ctrl+s保存。
对于终端中的警告暂时可以忽视(一般问题不大)。
三、添加用户
这里以添加用户t1为例,其他用户名同理可以添加。
1.先在/home下创建一个用户名目录
sudo mkdir /home/t1
2.接着绑定用户登录目录和shell
命令中-d 后面指定用户登入时的目录,-s指定用户登入后使用的shell
sudo useradd -d /home/t1 -s /bin/bash t1

3.添加用户t1的密码
sudo passwd t1
之后密码自己设置
4.设置/home/t1的拥有者为t1
sudo chown t1:t1 /home/t1
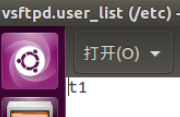
5.添加用户到/etc/vsftpd.user_list中
在下面命令打开的文件中添加一行,内容为t1(即你新建的用户的用户名),保存后退出。
sudo gedit /etc/vsftpd.user_list
文件中内容如下图
6.添加用户到/etc/vsftpd.chroot_list中,新增行内容也为t1,与上一步操作类似。
sudo gedit /etc/vsftpd.chroot_list
最后尝试重启服务
systemctl restart vsftpd
基本配置完成
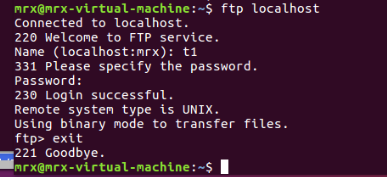
四、测试
1.Ubuntu本地测试ftp localhost
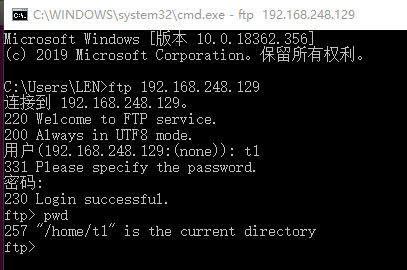
2.Windows下测试:
(1)cmd中: ftp IP地址
(2)地址栏
也可以在地址栏ftp:IP地址或ftp://IP地址/进行查看。

输入正确的用户名和密码后出现

文件夹为空,因为我们还没有创建文件。
3.Ubuntu新建文件后测试:
在Ubuntu中新建一个文件
cd /home/t1
sudo gedit test.txt
输入下列内容后退出

然后在windows下查看
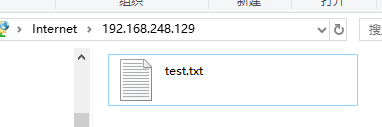
打开txt得到
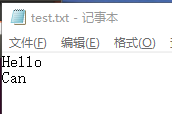
成功搭建了简单的FTP服务器
五、遇到的问题
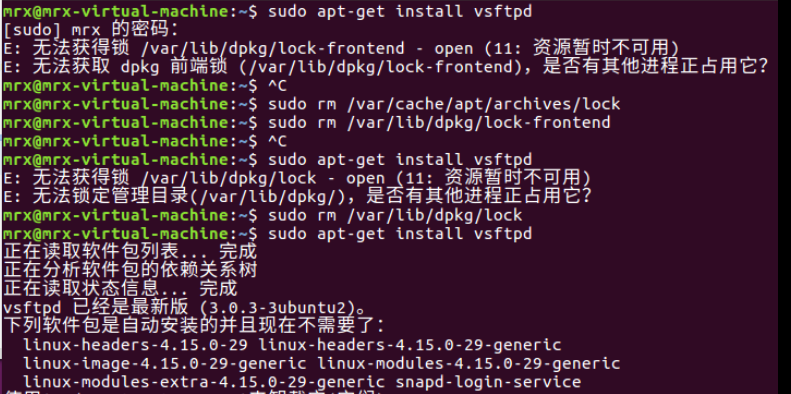
1.sudo apt-get update之后的命令出现下列问题。
E: 无法获得锁 /var/lib/dpkg/lock-frontend - open (11: 资源暂时不可用)
E: 无法获取 dpkg 前端锁 (/var/lib/dpkg/lock-frontend),是否有其他进程正占用它?
解决:
sudo rm /var/cache/apt/archives/lock
sudo rm /var/lib/dpkg/lock-frontend
之后如果:
E: 无法获得锁 /var/lib/dpkg/lock - open (11: 资源暂时不可用)
E: 无法锁定管理目录(/var/lib/dpkg/),是否有其他进程正占用它?
则:
sudo rm /var/lib/dpkg/lock整体过程如下,成功解决: