In this lesson, you will learn how to use a Security System in the application. When you use this system, the SecurityStrategyComplex security strategy is applied to your application. According to this strategy, Users have Roles, which in turn are characterized by a permission set. This topic will guide you through creating an administrator and a common user in code. The administrator will have a full-access permission set, and the user will have a limited permission set. You will see how the administrator can create Users and Roles, specify Permissions for them, and then assign Roles to Users at runtime. You will also use the AuthenticationStandar authentication type to log on to the application.
在本课中,您将学习如何在应用程序中使用安全系统。使用此系统时,安全策略复合安全策略将应用于您的应用程序。根据此策略,用户具有角色,而角色又以权限集为特征。本主题将指导您创建管理员和代码中的普通用户。管理员将具有完全访问权限集,并且用户将具有有限的权限集。您将看到管理员如何创建用户和角色,为其指定权限,然后在运行时将角色分配给用户。您还将使用身份验证 Standar 身份验证类型登录到应用程序。
Note 注意
Before proceeding, take a moment to review the following topics.
在继续之前,请花点时间回顾以下主题。
- Create a Solution using the Wizard
- Supply Initial Data (XPO/EF) lesson.
- 使用向导创建解决方案
- 提供初始数据 (XPO/EF) 课程。
Active Directory Authentication
活动目录身份验证
If you have followed the Create a Solution using the Wizard lesson, you have already enabled the Security System with the AuthenticationActiveDirectory authentication.
如果您遵循了使用向导课程创建解决方案,则表示您已使用身份验证活动目录身份验证启用了安全系统。
Invoke the Application Designer for the WinForms application and take a look at the Security section.
调用 WinForms 应用程序的应用程序设计器,并查看"安全"部分。

As you can see in the image above, a Complex Security Strategy and Active Directory authentication are used, and the CreateUserAutomatically property is set to true. This means that a user object (PermissionPolicyUser) is created automatically when you first run the application. This object's UserName property is set to your Active Directory account. You've got all permissions as the automatically created user type is an administrator. To see this user's details at runtime, navigate to the User and MyDetails items in the navigation control.
如上图所示,将使用复杂安全策略和活动目录身份验证,并将"创建用户自动"属性设置为 true。这意味着在首次运行应用程序时将自动创建用户对象(权限策略用户)。此对象的 UserName 属性设置为活动目录帐户。您已获得所有权限,因为自动创建的用户类型是管理员。要在运行时查看此用户的详细信息,请导航到导航控件中的"用户"和"MyDetails"项。

Now, follow the Tutorial to learn how to change authentication type in your application.
现在,请按照教程了解如何更改应用程序中的身份验证类型。
Standard Authentication
标准身份验证
-
Invoke the Application Designer for the WinForms application. To use a standard authentication strategy, drag the AuthenticationStandard component from the DX.19.2: XAF Security Toolbox tab to the Designer's Security section.
-
调用 WinForms 应用程序的应用程序设计器。要使用标准身份验证策略,请将身份验证标准组件从 DX.19.2:XAF 安全工具箱选项卡拖动到设计器的安全部分。

- Invoke the Application Designer for the ASP.NET application. Drag the AuthenticationStandard component from the DX.19.2: XAF Security Toolbox tab to the Designer's Security section.
- 调用ASP.NET应用程序的应用程序设计器。将身份验证标准组件从 DX.19.2:XAF 安全工具箱选项卡拖动到设计器的安全部分。
Create Predefined Users and Roles in Code
在代码中创建预定义的用户和角色
-
Before running an application with Standard Authentication enabled, create several predefined Users and Roles business objects, and assign the Roles to Users. This will allow you to logon and create more Users at runtime.
-
在运行启用了标准身份验证的应用程序之前,请创建多个预定义的用户和角色业务对象,并将角色分配给用户。这将允许您在运行时登录并创建更多用户。
The objects that should exist in the database while running the application are created in the ModuleUpdater.UpdateDatabaseAfterUpdateSchema method in the MySolution.Module | DatabaseUpdate | Updater.cs/Updater.vb file (see the Supply Initial Data (EF/XPO) topic).
运行应用程序时数据库中应存在的对象在 MySolution.模块中的"模块更新器.更新数据库后更新架构"方法中创建。数据库更新 |Updater.cs/Updater.vb文件(请参阅电源初始数据 (EF/XPO) 主题)。
- First, create Roles. The following code demonstrates how to create an "Administrators" Role.
- 首先,创建角色。以下代码演示如何创建"管理员"角色。
using DevExpress.ExpressApp.Security;
// ...
public override void UpdateDatabaseAfterUpdateSchema() {
    base.UpdateDatabaseAfterUpdateSchema();
    // ...
    PermissionPolicyRole adminRole = ObjectSpace.FindObject<PermissionPolicyRole>(
        new BinaryOperator("Name", SecurityStrategy.AdministratorRoleName));
    if (adminRole == null) {
        adminRole = ObjectSpace.CreateObject<PermissionPolicyRole>();
        adminRole.Name = SecurityStrategy.AdministratorRoleName;
        adminRole.IsAdministrative = true;
    }
    // ...
}
Note 注意
In the code above, the PermissionPolicyRole class from the DevExpress.Persistent.BaseImpl.PermissionPolicy namespace is used for XPO, and the PermissionPolicyRole class from the DevExpress.Persistent.BaseImpl.EF.PermissionPolicy namespace is used for Entity Framework. Ensure that the correct using (Imports in VB) directive is added.
在上面的代码中,来自 DevExpress.持久.BaseImpl.权限策略命名空间的权限策略角色类用于 XPO,而来自 DevExpress 的"权限策略"类。实体框架。确保添加了正确的使用(VB 中的导入)指令。
Here, the "Administrators" Role has full access to objects of all types, because its IPermissionPolicyRole.IsAdministrative property is set to true.
此处,"管理员"角色具有对所有类型的对象的完全访问权限,因为它的 I 权限策略Role.is管理属性设置为 true。
Now create a "Users" Role - a very basic Role that will have access to the current user object only. You can later extend this Role's permission set in the UI using extension methods of the PermissionSettingHelper class. See the following code.
此处,"管理员"角色具有对所有类型的对象的完全访问权限,因为它的 I 权限策略Role.is管理属性设置为 true。
public override void UpdateDatabaseAfterUpdateSchema() {
    // ...
    PermissionPolicyRole userRole = ObjectSpace.FindObject<PermissionPolicyRole>(new BinaryOperator("Name", "Users"));
    if(userRole == null) {
        userRole = ObjectSpace.CreateObject<PermissionPolicyRole>();
        userRole.Name = "Users";
        userRole.PermissionPolicy = SecurityPermissionPolicy.AllowAllByDefault;
        userRole.AddTypePermission<PermissionPolicyRole>(SecurityOperations.FullAccess,
SecurityPermissionState.Deny);
        userRole.AddTypePermission<PermissionPolicyUser>(SecurityOperations.FullAccess,
SecurityPermissionState.Deny);
        userRole.AddObjectPermission<PermissionPolicyUser>(SecurityOperations.ReadOnlyAccess,
"[Oid] = CurrentUserId()", SecurityPermissionState.Allow);
        userRole.AddMemberPermission<PermissionPolicyUser>(SecurityOperations.Write,
"ChangePasswordOnFirstLogon", null, SecurityPermissionState.Allow);
        userRole.AddMemberPermission<PermissionPolicyUser>(SecurityOperations.Write,
"StoredPassword", null, SecurityPermissionState.Allow);
        userRole.AddTypePermission<PermissionPolicyRole>(SecurityOperations.Read, SecurityPermissionState.Allow);
        userRole.AddTypePermission<PermissionPolicyTypePermissionObject>("Write;Delete;Navigate;Create", SecurityPermissionState.Deny);
        userRole.AddTypePermission<PermissionPolicyMemberPermissionsObject>("Write;Delete;Navigate;Create",
SecurityPermissionState.Deny);
        userRole.AddTypePermission<PermissionPolicyObjectPermissionsObject>("Write;Delete;Navigate;Create",
SecurityPermissionState.Deny);
    }
    //...
}
The following code demonstrates how to create Users.
以下代码演示如何创建用户。
    C#
    VB.NET

using DevExpress.ExpressApp.Security;
// ...
public class Updater : ModuleUpdater {
   public Updater(IObjectSpace objectSpace, Version currentDBVersion)
      : base(objectSpace, currentDBVersion) { }
   public override void UpdateDatabaseAfterUpdateSchema() {
      // ...
      // If a user named 'Sam' does not exist in the database, create this user.
      PermissionPolicyUser user1 = ObjectSpace.FindObject<PermissionPolicyUser>(
        new BinaryOperator("UserName", "Sam"));
      if(user1 == null) {
         user1 = ObjectSpace.CreateObject<PermissionPolicyUser>();
         user1.UserName = "Sam";
         // Set a password if the standard authentication type is used.
         user1.SetPassword("");
      }
      // If a user named 'John' does not exist in the database, create this user.
      PermissionPolicyUser user2 = ObjectSpace.FindObject<PermissionPolicyUser>(
           new BinaryOperator("UserName", "John"));
      if(user2 == null) {
         user2 = ObjectSpace.CreateObject<PermissionPolicyUser>();
         user2.UserName = "John";
         // Set a password if the standard authentication type is used.
         user2.SetPassword("");
      }
   }
}
Finally, you will assign Roles to Users.
最后,您将角色分配给用户。
public class Updater : ModuleUpdater {
    // ...
    public override void UpdateDatabaseAfterUpdateSchema() {
      // ...
      user1.Roles.Add(adminRole);
      user2.Roles.Add(userRole);
    }
}
Note注意
More examples are provided in the Client-Side Security (2-Tier Architecture) topic.
更多示例在客户端安全(2 层体系结构)主题中提供。
-
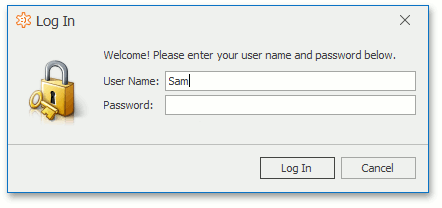
Run the WinForms or ASP.NET application. The following logon window will be displayed in a WinForms application.
-
运行 WinForms 或ASP.NET应用程序。WinForms 应用程序中将显示以下登录窗口。
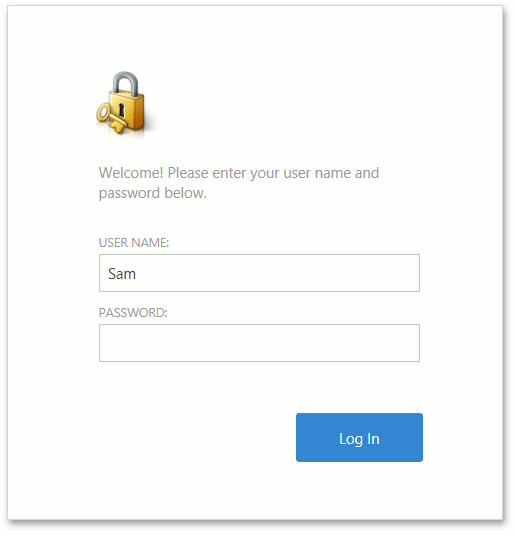
- The following window will be displayed in the ASP.NET application.
- 以下窗口将显示在ASP.NET应用程序中。
- After the Log In button is clicked, the user's credentials are authenticated and the application will run.
- 单击"登录"按钮后,将对用户的凭据进行身份验证,应用程序将运行。
Create a Role in a UI
在 UI 中创建角色
Administrators, and other users with Role creation permission can create Roles as follows.
具有角色创建权限的管理员和其他用户可以创建角色,如下所示。
Select the Role item in the navigation control and click the New Action. In the invoked Detail View, set the name and permissions for the new Role.
在导航控件中选择"角色"项,然后单击"新建操作"。在调用的详细信息视图中,设置新角色的名称和权限。

With the Permission Policy property, you can assign "deny all", "read only all" or "allow all" default permission policies for each role. For each operation, you can explicitly specify the Allow or Deny modifier or leave it blank. If the modifier is not specified, the permission is determined by the role's permission policy.
使用"权限策略"属性,您可以为每个角色分配"拒绝所有"、"只读所有"或"允许所有"默认权限策略。对于每个操作,可以显式指定"允许"或"拒绝"修改器,或将其留空。如果未指定修饰符,则权限由角色的权限策略确定。
Create a User in a UI
在 UI 中创建用户
Users who have permission to create Users can do the following.
有权创建用户的用户可以执行以下操作。
Select the User item in the navigation control and click the New button. In the invoked Detail View, specify the User Name and assign one or more Roles.
在导航控件中选择"用户"项目,然后单击"新建"按钮。在调用的详细信息视图中,指定用户名并分配一个或多个角色。

Note 注意
Set the Is Active property to false if you need to temporarily prohibit the user from using the application.
如果需要暂时禁止用户使用应用程序,请将"是活动"属性设置为 false。
To assign a password to a newly created user, click the Reset Password button. The assigned password should be passed to the user. A User will be able to change it when logging on for the first time.
要为新创建的用户分配密码,请单击"重置密码"按钮。分配的密码应传递给用户。用户将能够在首次登录时更改它。

Note 注意
This button is the ResetPassword Action, which is available to users who are allowed to modify User objects. This button is not available when the Active Directory authentication is used.
此按钮是"重置密码操作",允许修改用户对象的用户可以使用。使用活动目录身份验证时,此按钮不可用。
My Details
我的详细信息
The My Details navigation item is available for users who have read access to the current User object. This navigation item opens the current user details.
"我的详细信息"导航项可供具有当前用户对象的读取访问权限的用户使用。此导航项将打开当前用户详细信息。

In an ASP.NET application, it can also be opened by clicking the My Details link at the top-right corner of the page.
在ASP.NET应用程序中,还可以通过单击页面右上角的"我的详细信息"链接来打开它。

Change Password
更改密码
When the standard authentication type is used, the Change My Password button is available once the My Details Detail View is displayed. This button opens a dialog where a user can change the password.
使用标准身份验证类型时,显示"我的详细信息"视图后,"更改我的密码"按钮将可用。此按钮将打开一个对话框,用户可以在其中更改密码。

Note 注意
This button is the ChangePasswordByUser Action that is not available if the Active Directory authentication is used. To change a password in this instance, end users can use the operating system's standard tools (e.g., press CTRL+ALT+DEL and select Change a password).
此按钮是使用活动目录身份验证时不可用的"更改密码按用户"操作。要在这种情况下更改密码,最终用户可以使用操作系统的标准工具(例如,按 CTRL_ALT_DEL 并选择"更改密码")。