源码编译redis包
下载当前最新 release 版本 redis源码包:选择4.0.14版本
http://download.redis.io/releases/
1、开始在官网上下载包,下载到指定的路径
[root@rs1src]#cd /usr/local/src
[root@rs1src]#wget http://download.redis.io/releases/redis-4.0.14.tar.gz
2、将下载好的包进行解压
[root@rs1src]#tar -xvf redis-4.0.14.tar.gz
3、新建一个目录,并开始编译到指定的目录里
[[email protected]]#mkdir /apps/redis  -p
[[email protected]]#make PREFIX=/apps/redis  install
4、查看编译后的文件内容

5、将编译的配置文件存放在新建的etc目录下
[[email protected]]#mkdir /apps/redis/etc   新建一个etc目录

[[email protected]]#cp redis.conf /apps/redis/etc/  将配置文件复制到etc目录下
6、启动redis服务,此时就会有三个警告,需要我们进行处理
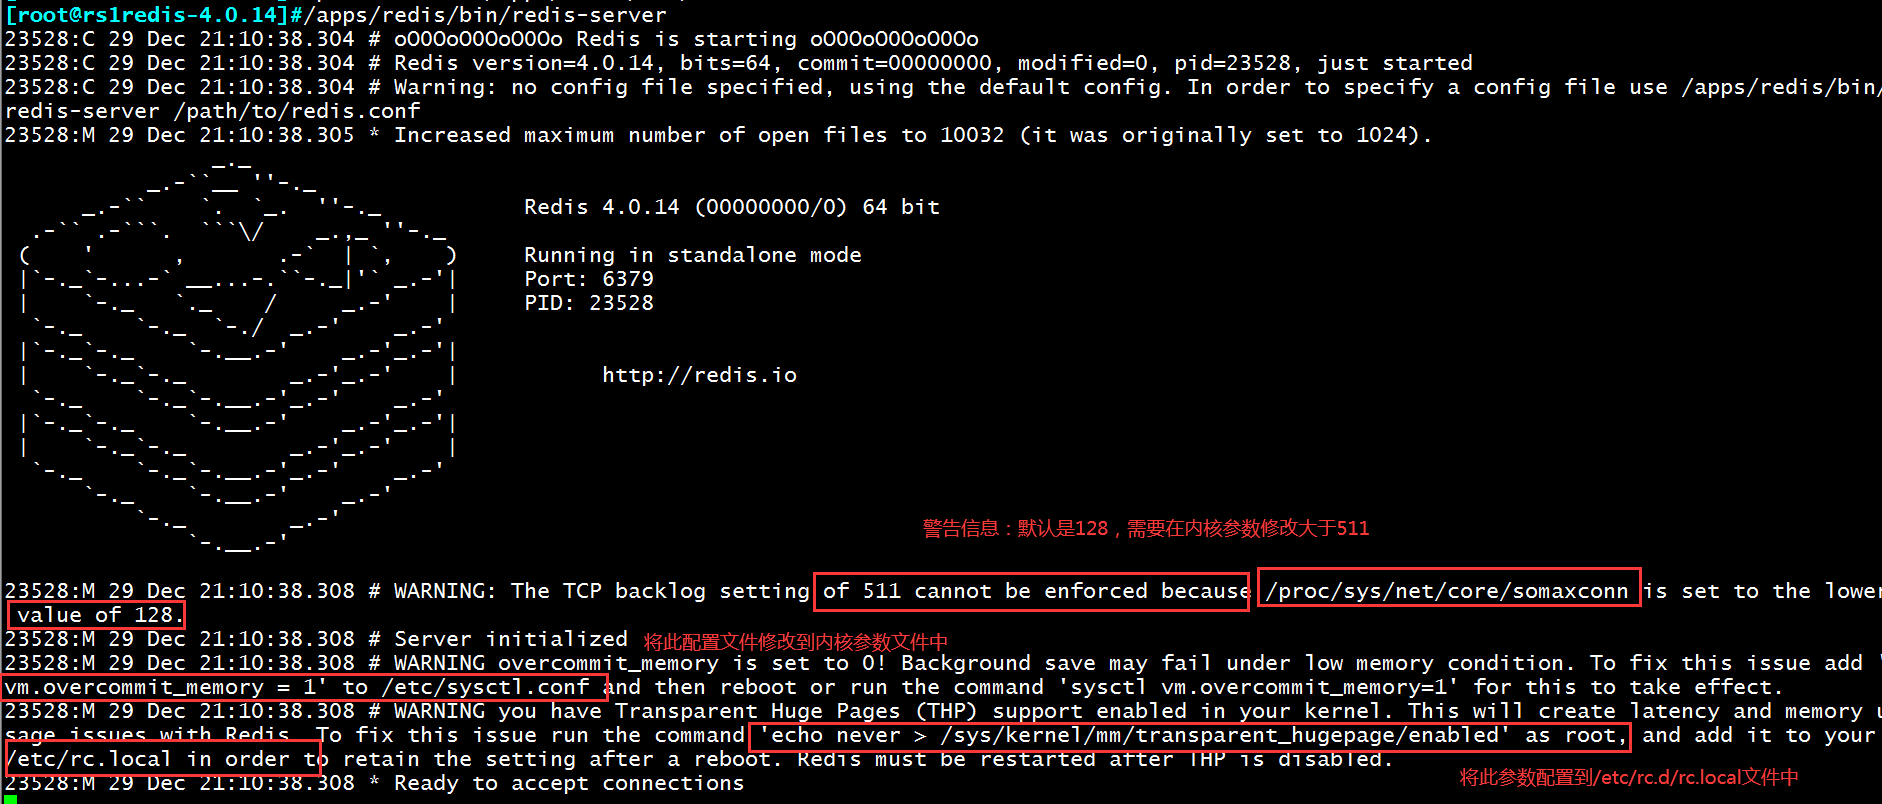
7、开始处理三个警告问题
第一个警告处理:backlog参数控制的是三次握手的时候 server 端收到 client ack 确认号之后 的队列值 。
第二个警告处理:
0、表示内核将检查是否有足够的可用内存供应用进程使用;如果有足够的可用内存,内存申请允许;否则,内存申请失败,并把错误返回给应用进程。
1、表示内核允许分配所有的物理内存,而不管当前的内存状态如何。
2、表示内核允许分配超过所有物理内存和交换空间总和的内存
[[email protected]]#vim /etc/sysctl.conf  解决前两个警告
net.core.somaxconn = 512
vm.overcommit_memory = 1

[[email protected]]#sysctl -p  将此配置文件进行生效
net.core.somaxconn = 512
vm.overcommit_memory = 1
第三个警告处理:开启大页内存动态分配 ,需要关闭让 redis 负责 内存管理,确保此配置文件生效情况,可以进行重启机器验证。
[[email protected]]#vim  /etc/rc.d/rc.lcoal

echo never > /sys/kernel/mm/transparent_hugepage/enabled

[[email protected]]#chmod +x /etc/rc.d/rc.local   加上执行权限

重启机器后就没有警告信息:

8、配置基于systemd进行启动redis服务脚本
[root@rs1~]#vim  /usr/lib/systemd/system/redis.service
[Util]
Description=Redis persistent key-value database
After=network.target
After=network online.target
Wants=network online.target

[Service]
ExecStart=/apps/redis/bin/redis-server /apps/redis/etc/redis.conf --supervised systemd
ExecReload=/bin/kill -s HUP $MAINPID
ExecStop=/bin/kill -s QUIT $MAINPID
Type=notify
User=redis
Group=redis
RuntimeDirectory=redis
RuntimeDirectoryMode=0755

[install]
WantedBy=multi-user.target
9 、创建一个redis用户,并将执行redis目录的权限(所有者和所属组)改为redis
[root@rs1~]#useradd -s /sbin/nologin redis
[root@rs1~]#chown redis.redis /apps/redis -R
[root@rs1~]#systemctl start redis 启动redis服务,此用法不多
10、我们可以将redis目录下可执行的程序全部软链接到/usr/bin目录,就可以直接执行redis-server命令。
[root@rs1~]#ln -sv /apps/redis/bin/redis-*  /usr/bin  将可执行程序软连接到/usr/bin目录下
[root@rs1~]#redis-server   启动redis服务
此时,redis源码编译完成!