思路:
安卓客户端输入账号和密码,使用 okHttp 向服务器端发送请求并传递输入的账号和密码,服务器端的登录接口查询数据库,判断是否能登录成功,然后返回给客户端JSON字符串,客户使用Gson解析服务器返回的数据,做出不同的操作。
服务器端:
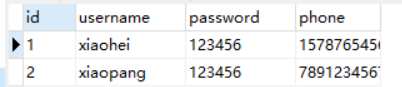
1. 数据库
2. 服务器端是 Java Web 用SpringBoot+Mybatis-Plus 快速搭建的,接口返回 map 集合
        if(users.size() != 0){
            map.put("msg","登录成功");
        }else {
            map.put("msg","账号或密码错误");
        }
        return map;
重点是在安卓端
安卓端:
1. 首先弄一个登录页面activity_main.xml出来,相当简陋
<?xml version="1.0" encoding="utf-8"?>
<androidx.constraintlayout.widget.ConstraintLayout xmlns:android="http://schemas.android.com/apk/res/android"
    xmlns:app="http://schemas.android.com/apk/res-auto"
    xmlns:tools="http://schemas.android.com/tools"
    android:layout_width="match_parent"
    android:layout_height="match_parent"
    tools:context=".MainActivity">

    <TextView
        android:id="@+id/textUsername"
        android:layout_width="wrap_content"
        android:layout_height="25dp"
        android:layout_marginStart="4dp"
        android:layout_marginLeft="4dp"
        android:text="账号:"
        app:layout_constraintBottom_toBottomOf="@+id/editUsername"
        app:layout_constraintEnd_toStartOf="@+id/editUsername"
        app:layout_constraintStart_toStartOf="parent"
        app:layout_constraintTop_toTopOf="@+id/editUsername" />

    <TextView
        android:id="@+id/textPassword"
        android:layout_width="wrap_content"
        android:layout_height="23dp"
        android:layout_marginStart="4dp"
        android:layout_marginLeft="4dp"
        android:text="密码:"
        app:layout_constraintBottom_toBottomOf="@+id/editPassword"
        app:layout_constraintEnd_toStartOf="@+id/editPassword"
        app:layout_constraintStart_toStartOf="parent"
        app:layout_constraintTop_toTopOf="@+id/editPassword" />

    <EditText
        android:id="@+id/editUsername"
        android:layout_width="wrap_content"
        android:layout_height="wrap_content"
        android:layout_marginEnd="23dp"
        android:layout_marginRight="23dp"
        android:ems="10"
        android:hint="请输入用户名/手机号"
        android:inputType="textPersonName"
        app:layout_constraintBottom_toBottomOf="parent"
        app:layout_constraintEnd_toEndOf="parent"
        app:layout_constraintStart_toEndOf="@+id/textUsername"
        app:layout_constraintTop_toTopOf="parent" />

    <EditText
        android:id="@+id/editPassword"
        android:layout_width="wrap_content"
        android:layout_height="wrap_content"
        android:layout_marginTop="45dp"
        android:layout_marginEnd="23dp"
        android:layout_marginRight="23dp"
        android:ems="10"
        android:hint="请输入密码"
        android:inputType="textPersonName"
        app:layout_constraintEnd_toEndOf="parent"
        app:layout_constraintStart_toEndOf="@+id/textPassword"
        app:layout_constraintTop_toBottomOf="@+id/editUsername" />

    <Button
        android:id="@+id/login"
        android:layout_width="142dp"
        android:layout_height="42dp"
        android:layout_marginStart="200dp"
        android:layout_marginLeft="200dp"
        android:layout_marginTop="50dp"
        android:layout_marginEnd="57dp"
        android:layout_marginRight="57dp"
        android:text="登录"
        app:layout_constraintEnd_toEndOf="@+id/editPassword"
        app:layout_constraintStart_toStartOf="parent"
        app:layout_constraintTop_toBottomOf="@+id/editPassword" />
</androidx.constraintlayout.widget.ConstraintLayout>
2. MainActivity.java
public class MainActivity extends AppCompatActivity {

    private EditText editUsername;
    private EditText editPassword;
    //服务器端的登录接口
    private String url = "http://192.168.17.xx:8081/user/login";
    private String address = null;

    @Override
    protected void onCreate(Bundle savedInstanceState) {
        super.onCreate(savedInstanceState);
        setContentView(R.layout.activity_main);
        //获取用户输入的数据
        editUsername = findViewById(R.id.editUsername);
        editPassword = findViewById(R.id.editPassword);
        Button login = findViewById(R.id.login);
        login.setOnClickListener(new View.OnClickListener() {
            @Override
            public void onClick(View v) {
                String username = editUsername.getText().toString();
                String password = editPassword.getText().toString();
                //向服务器传参
                address = url+"?username="+username+"&password="+password;
                login();

            }
        });
    }

    //登录操作中开启一个子线程
    private void login(){
        new Thread(new Runnable() {
            @Override
            public void run() {
                try {
                    Response response = HttpUtil.sendOkHttpRequest(address);
                    if(response != null){
                        String responseData = response.body().string();
                        Map<String,Object> map = null;
                        //使用Gson解析服务器返回的数据
                        Gson gson = new Gson();
                        Type type = new TypeToken<Map<String,Object>>(){}.getType();
                        map = gson.fromJson(responseData,type);
                        String msg = map.get("msg").toString();
                        //判断登录成功还是失败,并向主线程传递数据
                        if("登录成功".equals(msg)){
                            Message message = new Message();
                            message.what = 1;
                            message.obj = msg;
                            handler.sendMessage(message);
                        }else{
                            Message message = new Message();
                            message.what = 2;
                            message.obj = msg;
                            handler.sendMessage(message);
                        }
                    }
                } catch (IOException e) {
                    e.printStackTrace();
                }
            }
        }).start();
    }

    //根据子线程传来数据的不同,进行不同的操作
    Handler handler = new Handler(){
        public void handleMessage(Message msg){
            switch (msg.what){
                case 1:
                    String data = (String) msg.obj;
                    Intent intent = new Intent(MainActivity.this,SecondActivity.class);
                    intent.putExtra("msg",data);
                    startActivity(intent);
                    break;
                case 2:
                    String data2 = (String) msg.obj;
                    Toast.makeText(MainActivity.this, data2, Toast.LENGTH_SHORT).show();
            }
        }
    };

}
- 其中 String url = "http://192.168.17.99:8081/user/login" 是服务器端的登录接口
- SecondActivity 就是打开一个空白的页面activity_second.xml,就不粘代码了
- HttpUtil 是自己封装的 okHttp
public class HttpUtil {

    public static Response sendOkHttpRequest(String address) {
        OkHttpClient client = new OkHttpClient();
        Request request = new Request.Builder()
                .url(address)
                .build();
        try {
            Response response = client.newCall(request).execute();
            return response;
        } catch (IOException e) {
            e.printStackTrace();
            return null;
        }
    }

}
3. 其他要注意的地方
- okhttp 和 gson 依赖应该添加好
implementation 'com.squareup.okhttp3:okhttp:4.2.2'
implementation 'com.google.code.gson:gson:2.7'
- AndroidManifest.xml 打开权限
<uses-permission android:name="android.permission.INTERNET" />

android:usesCleartextTraffic="true" //使用明文传输
4. 最后运行服务器端代码,让手机和服务器端处于同一网络,就能测试登录了
