Zabbix客户端配置被动模式
| 主机 | IP |
|---|---|
| 服务端 | 192.168.146.136 |
| 客户端 | 192.168.146.134 |
一、服务端安装部署Zabbix服务
运维之道 | Centos7安装部署Zabbix4.4监控服务
二 、客户端安装部署Zabbix服务
1、安装Zabbix仓库
[root@localhost ~]# rpm -Uvh https://repo.zabbix.com/zabbix/4.4/rhel/7/x86_64/zabbix-release-4.4-1.el7.noarch.rpm
[root@localhost ~]# yum clean all
[root@localhost ~]# yum makecache
[root@localhost ~]# yum update    ///可选择进行更新
[root@localhost ~]# yum -y install yum-utils
[root@localhost ~]# yum-config-manager --enable rhel-7-server-optional-rpms
2、安装Zabbix-agent服务器
[root@localhost ~]# yum -y install zabbix-agent
3、修改Zabbix-agent服务端配置
[root@localhost ~]#  vim /etc/zabbix/zabbix_agentd.conf

PidFile=/var/run/zabbix/zabbix_agentd.pid
LogFile=/var/log/zabbix/zabbix_agentd.log
LogFileSize=0
Server=192.168.146.136					///服务端IP
ServerActive=192.168.146.136			///服务端IP
Hostname=Zabbix server 					///自定义的主机名,一会还需要在web界面下设置同样的主机名
Include=/etc/zabbix/zabbix_agentd.d/*.conf
4、关闭防火墙、selinux服务
[root@localhost ~]# setenforce 0
[root@localhost ~]# systemctl stop firewalld
5、启动zabbix-agent服务,并设置开启自启
[root@localhost ~]# systemctl start zabbix-agent
[root@localhost ~]# systemctl enable zabbix-agent
6、查看zabbix进程是否启动
[root@localhost ~]# ps -ef | grep zabbix
zabbix     9700      1  0 14:25 ?        00:00:00 /usr/sbin/zabbix_agentd -c /etc/zabbix/zabbix_agentd.conf
zabbix     9701   9700  0 14:25 ?        00:00:01 /usr/sbin/zabbix_agentd: collector [idle 1 sec]
zabbix     9702   9700  0 14:25 ?        00:00:00 /usr/sbin/zabbix_agentd: listener #1 [waiting for connection]
zabbix     9703   9700  0 14:25 ?        00:00:00 /usr/sbin/zabbix_agentd: listener #2 [waiting for connection]
zabbix     9704   9700  0 14:25 ?        00:00:00 /usr/sbin/zabbix_agentd: listener #3 [waiting for connection]
zabbix     9705   9700  0 14:25 ?        00:00:00 /usr/sbin/zabbix_agentd: active checks #1 [idle 1 sec]
三、zabbix服务端配置连接客户端
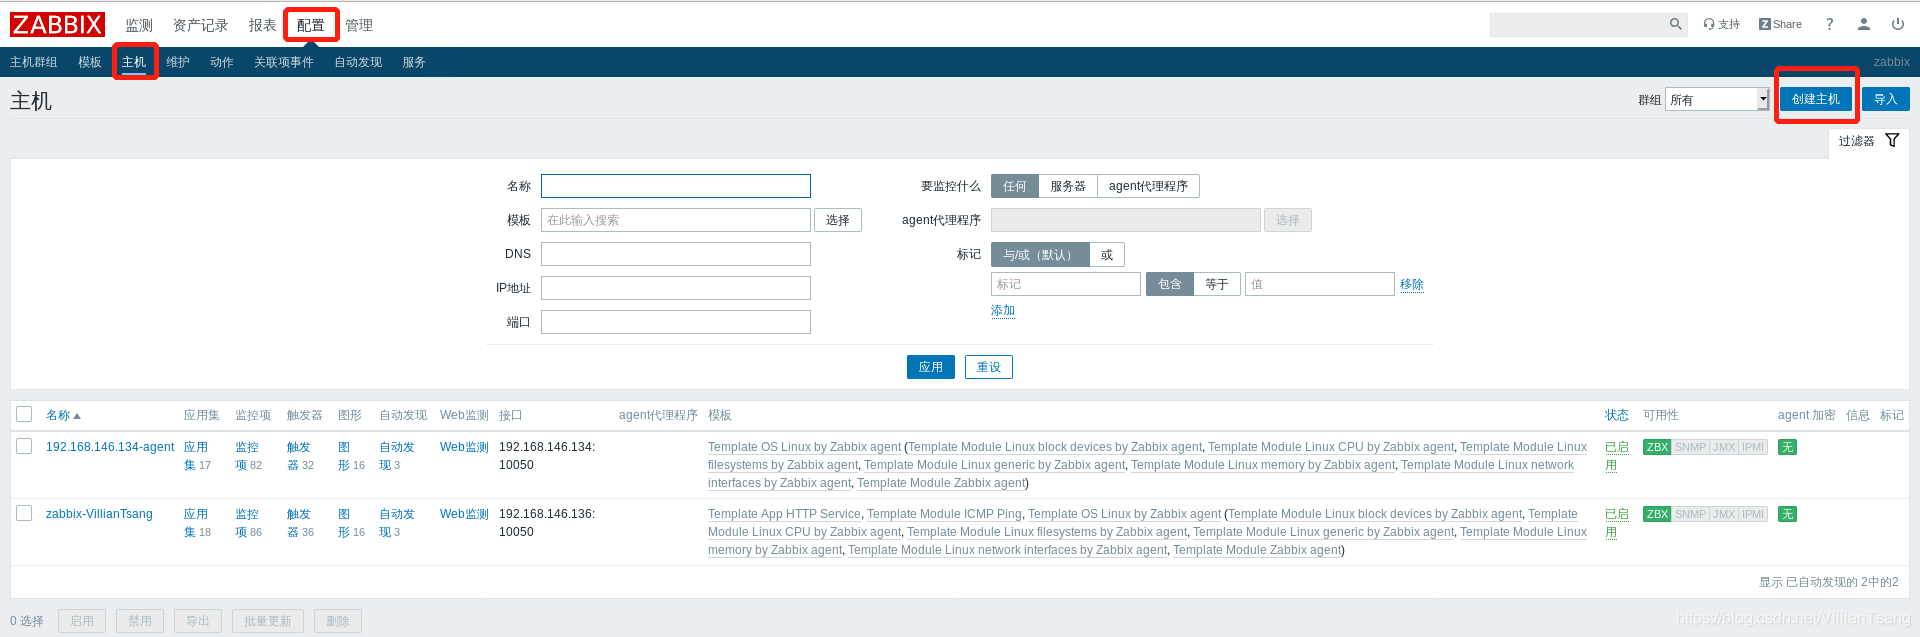
1、进入到zabbix-web服务端新建主机
- 配置 → 主机 → 新建主机
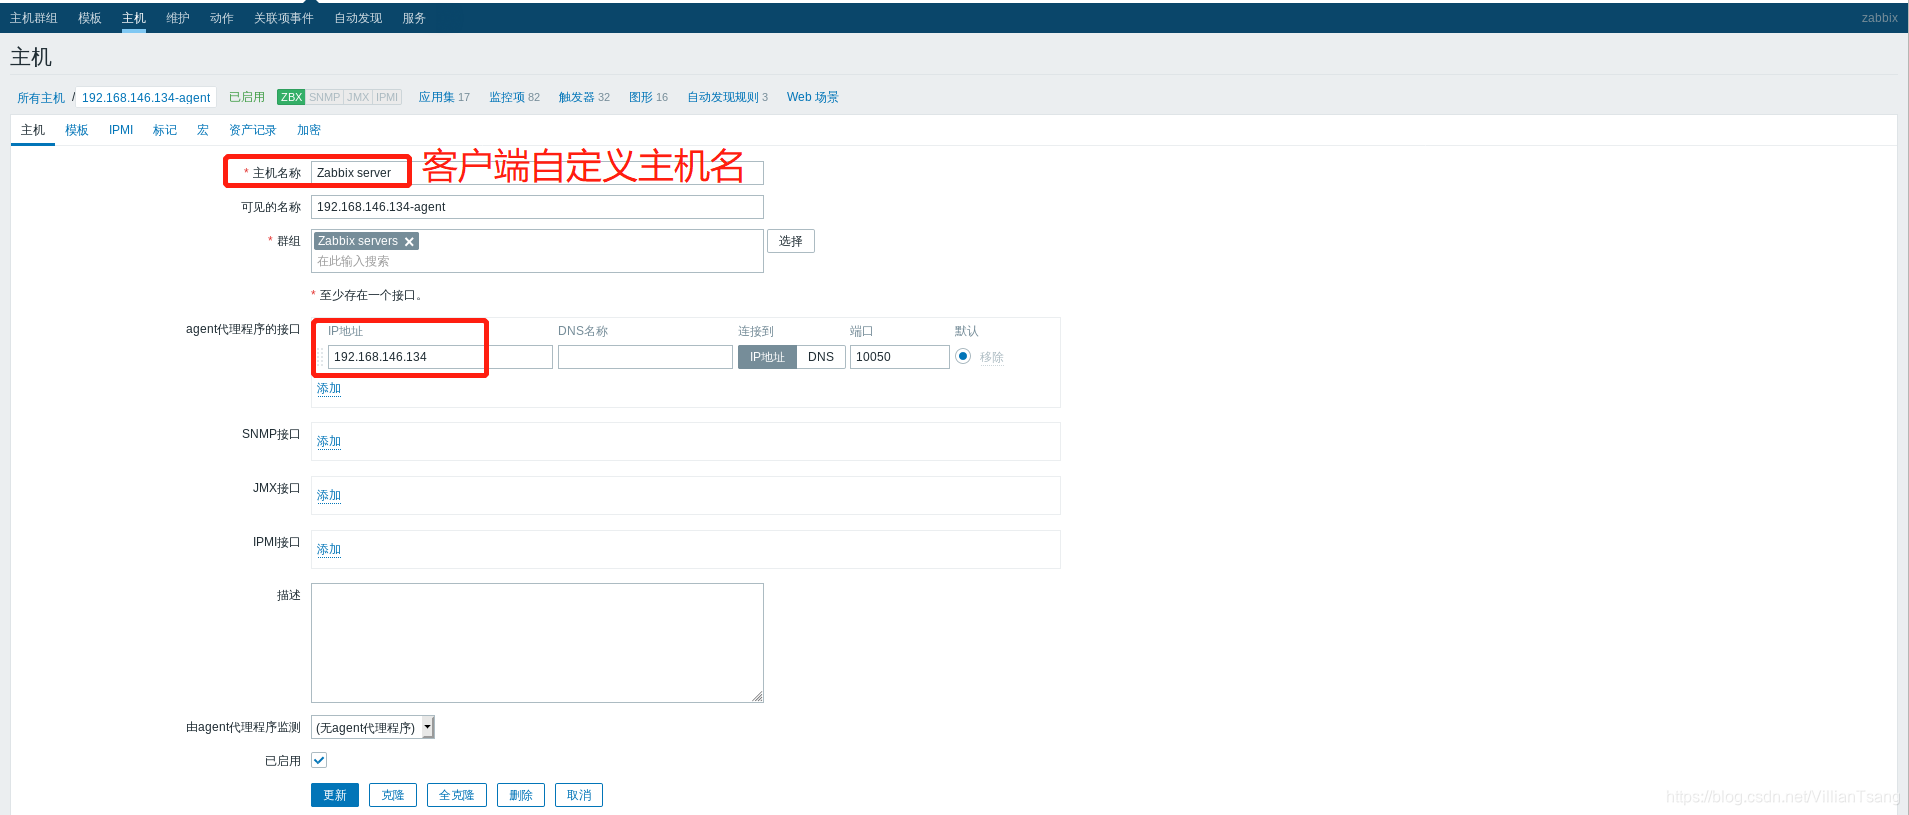
2、配置客户端参数
3、添加监控内容

4、提交

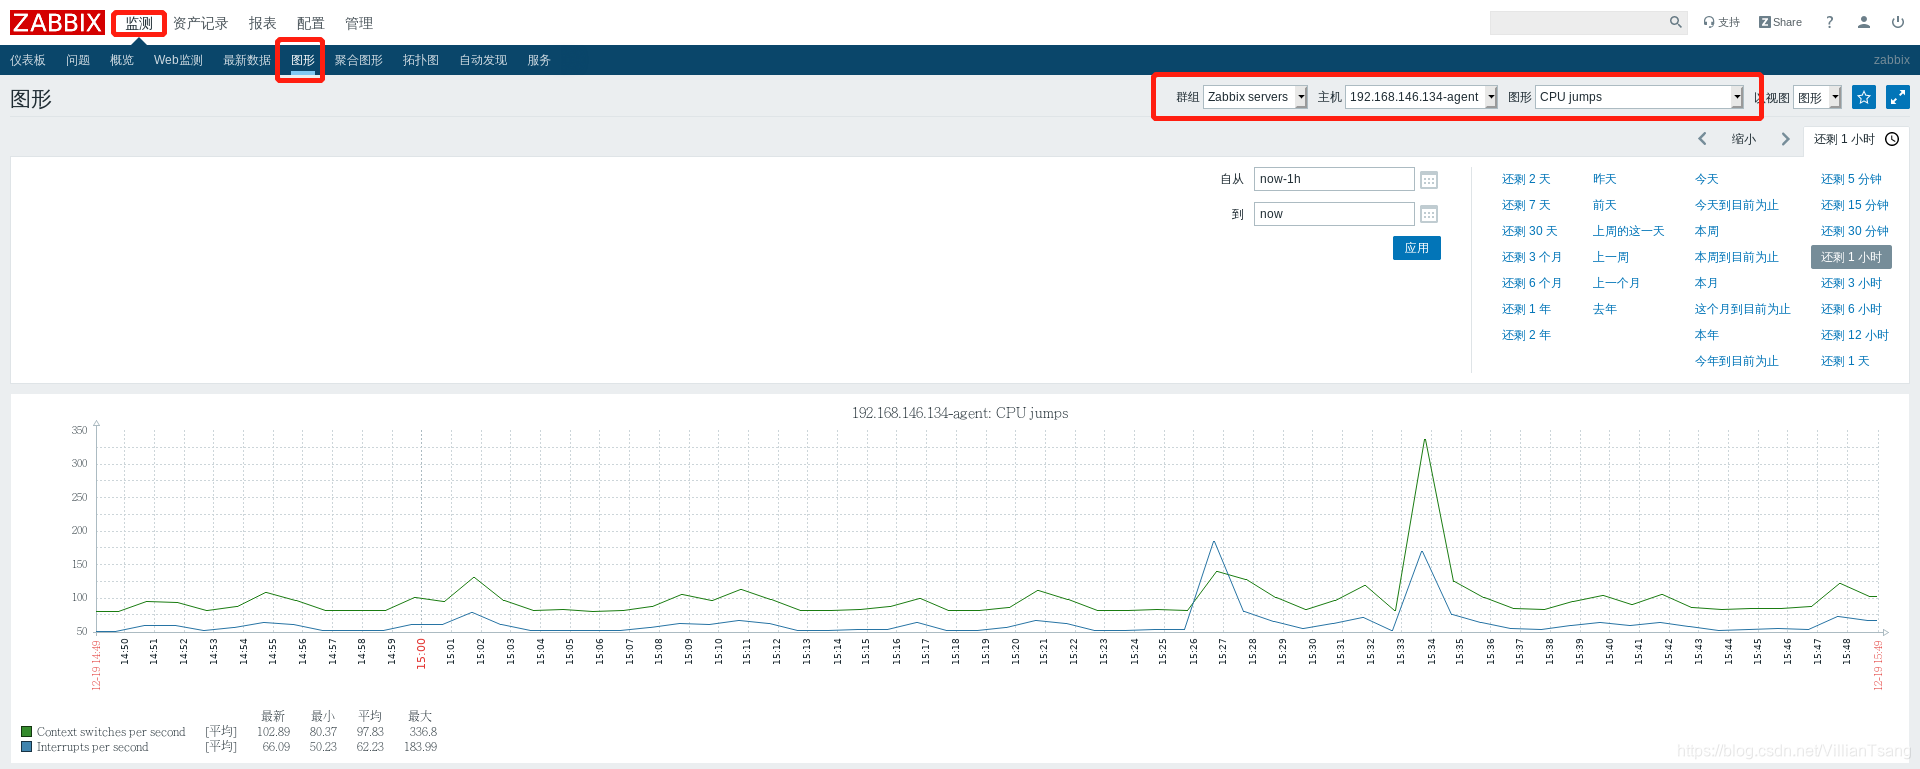
5、查看客户端监测数据