本博文为系列文章建议大家从头阅读
- 自动生成代码
请先阅读springboot学习(四)整合mysql、druid、mybatis
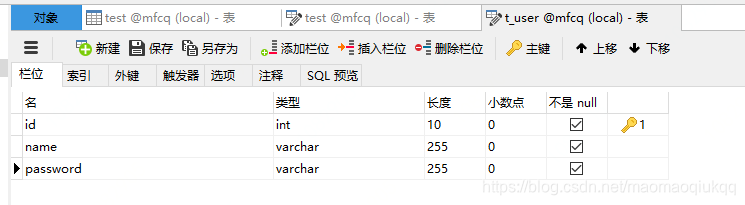
自己在本地库创建t_user表:
代码生成请参考我的另一篇文章:mappr文件自动生成
生成后如下图:

- 配置
启动类添加MapperScan注解
@SpringBootApplication
@MapperScan(basePackages = "com.hero.study.dao")

public class StudyApplication {

    public static void main(String[] args) {
        SpringApplication.run(StudyApplication.class, args);
    }

}
同时检查对应环境application.yml文件中如下配置路径是否正确
mybatis:
  mapper-locations: classpath:mapper/*.xml
  type-aliases-package: com.hero.study.domain
还有不要忘记maven里面的资源过滤
<resources>
            <resource>
                <directory>src/main/resources</directory>
                <!-- 是否替换@xx@表示的maven properties属性值 -->
                <filtering>true</filtering>
                <includes>
                    <include>mapper/*.xml</include>
                    <include>application.yml</include>
                    <include>log4j.properties</include>
                    <include>application-${profileActive}.yml</include>
                    <include>properties/${profileActive}/*.*</include>
                </includes>
            </resource>
        </resources>
- 测试
在test包下创建测试类
@RunWith(SpringRunner.class)
@SpringBootTest
public class StudyApplicationTests {

    @Autowired
    private UserDao userDao;
    @Test
    public void contextLoads() {
        User user = userDao.selectByPrimaryKey(20);
        System.out.println(user);
    }

}
运行,控制台打印User [Hash = 104634049, id=20, name=name, password=y, serialVersionUID=1]
测试成功
生成的BaseDao中主要有以下方法,简单的crud读者可以自行测试,业务需要的sql自行编写,或者自己改造最上面提到的github项目源码。
public interface MyBatisBaseDao<Model, PK extends Serializable> {
    int deleteByPrimaryKey(PK id);

    int insert(Model record);

    int insertSelective(Model record);

    Model selectByPrimaryKey(PK id);

    int updateByPrimaryKeySelective(Model record);

    int updateByPrimaryKey(Model record);
}
- 运行
通过上面的单元测试,数据库的基础crud已经整合完毕,下面我们写一个controller进行测试,测试controller直接引入dao此处省略了中间层
@RestController
public class DemoController {

    @Autowired
    private UserDao userDao;

    @RequestMapping("/user/{id}")
    public User user(@PathVariable Integer id) {
        return userDao.selectByPrimaryKey(id);
    }
}
运行项目,浏览器访问http://localhost:8080/user/20
可以看到id为20的用户信息
{
  "id": 20,
  "name": "name",
  "password": "y"
}
- 集成分页插件pagehelper
com.github.pagehelper的原理是使用ThreadLocal和mybatis的拦截器对查询sql进行拼接分页和orderby参数,然后执行拼接后的sql,大家也可以不使用该插件,自定义分页类自己写limit sql效果一样的,在一些海量数据需要深度分页的场景自己写还是有一定优点的。
引入pom依赖
        <!--分页-->
        <dependency>
            <groupId>com.github.pagehelper</groupId>
            <artifactId>pagehelper-spring-boot-starter</artifactId>
            <version>1.2.7</version>
        </dependency>
mapper文件添加如下sql
  <select id="selectList" resultMap="BaseResultMap">
    select <include refid="Base_Column_List" /> from t_user
  </select>
添加相应的dao与service方法
@Repository
public interface UserDao extends MyBatisBaseDao<User, Integer> {

    List<User> selectList();
}

    @Override
    public List<User> selectList(){
        //只对其后的第一个查询有效
        PageHelper.startPage(2,10);
        //PageHelper.offsetPage(5,10);
        PageHelper.orderBy("id");
        List<User> users = userDao.selectList();
        PageInfo<User> userPageInfo = new PageInfo<>(users);
        return users;
    }
我们这里仅作为演示方法,没有封装返回的Page对象,大家也可以直接返回pagehelper的PageInfo
但是需要注意一点,如果是对外提供api的话,尽量保证api干净一些,可以自己封装page对象,减少使用者由于引入你的api间接引入了其他包。包括好多人推崇的lombook也是一个道理,好用但是并不一定适合于任何地方,比如从ddd领域充血对象来看lombook就不一定合适
这里有几个注意的点
1、PageHelper.startPage只对他后面的第一个sql有作用;
2、offsetPage后面的参数和sql limit xx xx,效果是一样的,startpage比较好理解一些
3、查询完毕使用PageInfo userPageInfo = new PageInfo<>(users);可以获取到总记录数总页数等,当然也可以设置为不查询总记录数,具体的配置参数请查阅github上的说明
