第一种方式请访问https://www.cnblogs.com/fernfei/p/12200246.html
一、创建项目并导入依赖
<dependency>
<groupId>org.springframework.boot</groupId>
<artifactId>spring-boot-starter-web</artifactId>
</dependency>
<dependency>
<groupId>org.apache.shiro</groupId>
<artifactId>shiro-spring-boot-web-starter</artifactId>
<version>1.4.0</version>
</dependency>
二、相关配置和代码
2.1)application.properties
shiro.enabled=true
shiro.loginUrl=/login
shiro.unauthorizedUrl=/unauthorizedUrl
shiro.web.enabled=true
shiro.successUrl=/success
#sessionId是否支持放在cookie传到服务器端去
#shiro.sessionManager.sessionIdCookieEnabled=true
#sessionId是否支持放在url传到服务器端去
#shiro.sessionManager.sessionIdUrlRewritingEnabled=true
2.2)创建配置ShiroConfig并在类上加@configuration
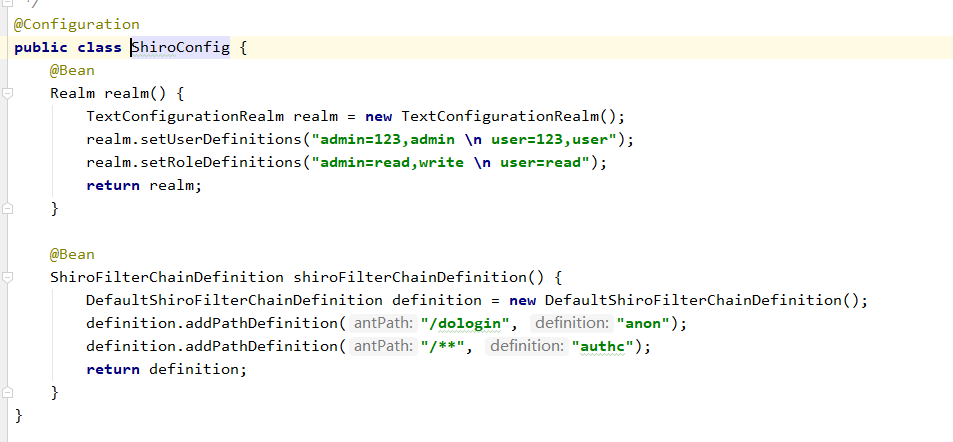
SpringBoot相较于SSM配置shiro要简单多了
2.3)创建controller测试
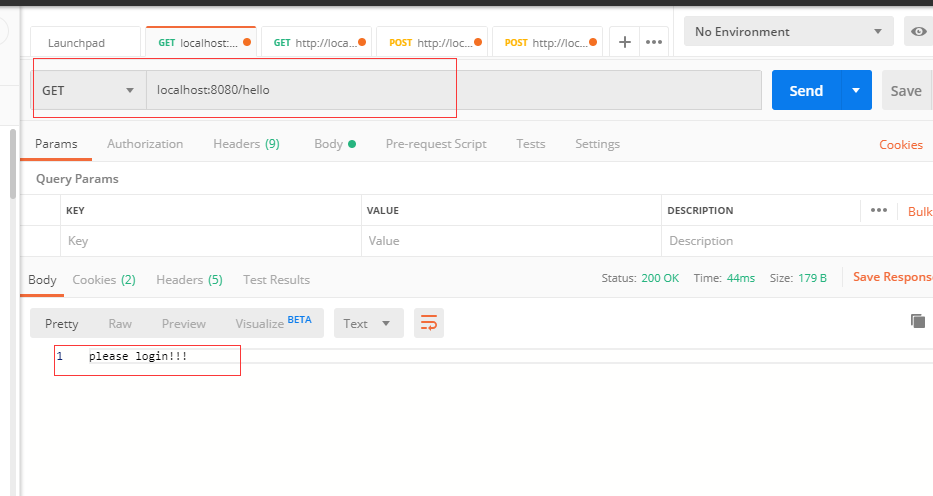
三、效果图
一开始访问,提示请登陆
成功!!!
