上篇文章Spring中Xml配置Bean的依赖注入源码分析,讲的是通过XML方式配置Bean来实现依赖注入的,主要是通过BeanWrapperImpl.setPropertyValue方法,调用java类提供的Setter方法,利用反射机制注入属性值,完成依赖注入。
这次讲讲注解@Autowired与@Resource,是如何实现依赖注入的。
1.@Autowired实现依赖注入
测试Main代码:
public class BeanExample {
    public static void main(String[] args) {
        ClassPathXmlApplicationContext applicationContext = new ClassPathXmlApplicationContext("beans.xml");
        StudentService studentService = (StudentService) applicationContext.getBean("studentServiceImpl");
        studentService.hello();
    }
}
开启注解:
<?xml version="1.0" encoding="UTF-8"?>
<beans xmlns="http://www.springframework.org/schema/beans"
       xmlns:xsi="http://www.w3.org/2001/XMLSchema-instance"
       xmlns:context="http://www.springframework.org/schema/context"
       xsi:schemaLocation="http://www.springframework.org/schema/beans http://www.springframework.org/schema/beans/spring-beans.xsd http://www.springframework.org/schema/context http://www.springframework.org/schema/context/spring-context.xsd">
    <context:component-scan base-package="com.hand"/>
</beans>
java类:
@Service
public class StudentServiceImpl implements StudentService {
    @Autowired
    private UserService userService;

    @Override
    public void hello() {
        userService.hello("haha");
    }
}
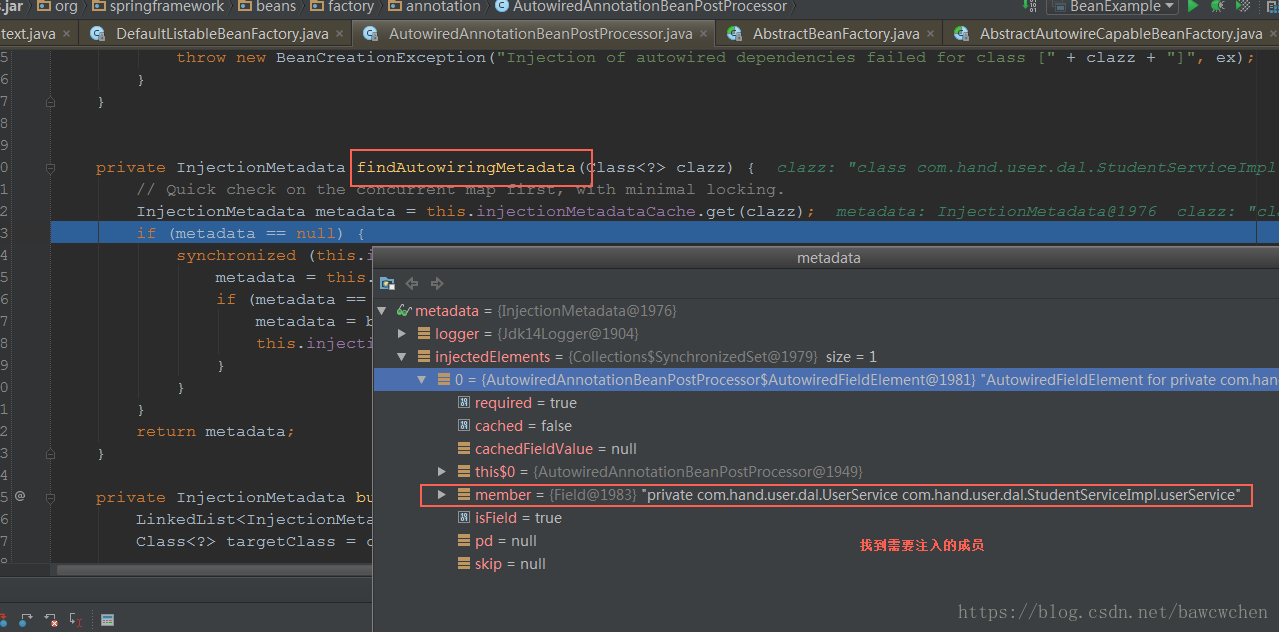
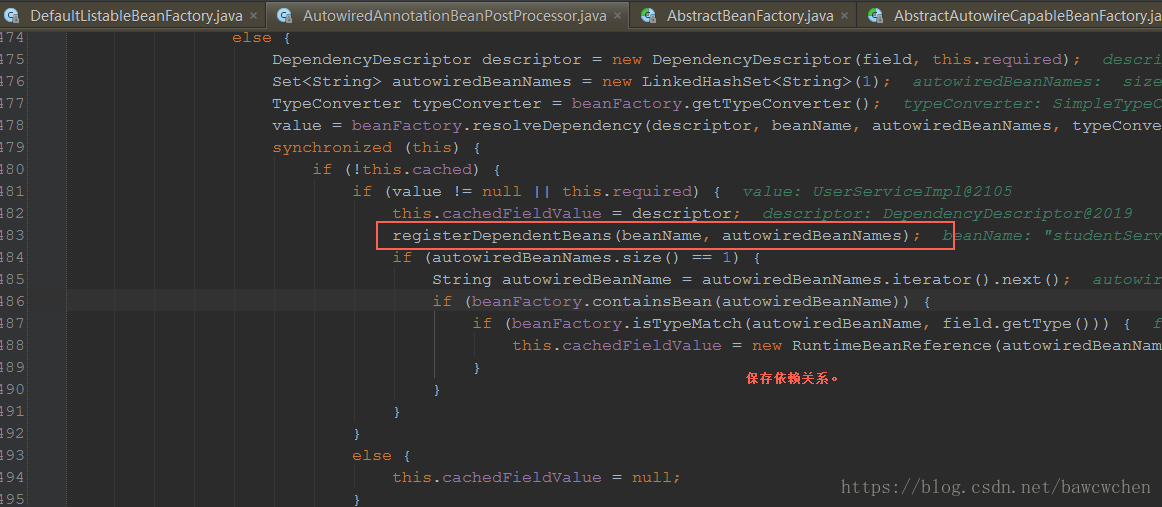
因为开启了注解注入,在Spring容器启动时,默认会向BeanFactory注册AutowiredAnnotationBeanPostProcessor后置处理器,也就是在Bean实例化完后,用来做依赖注入工作的。


AutowiredAnnotationBeanPostProcessor处理器就是用来实现@Autowired的依赖注入的。


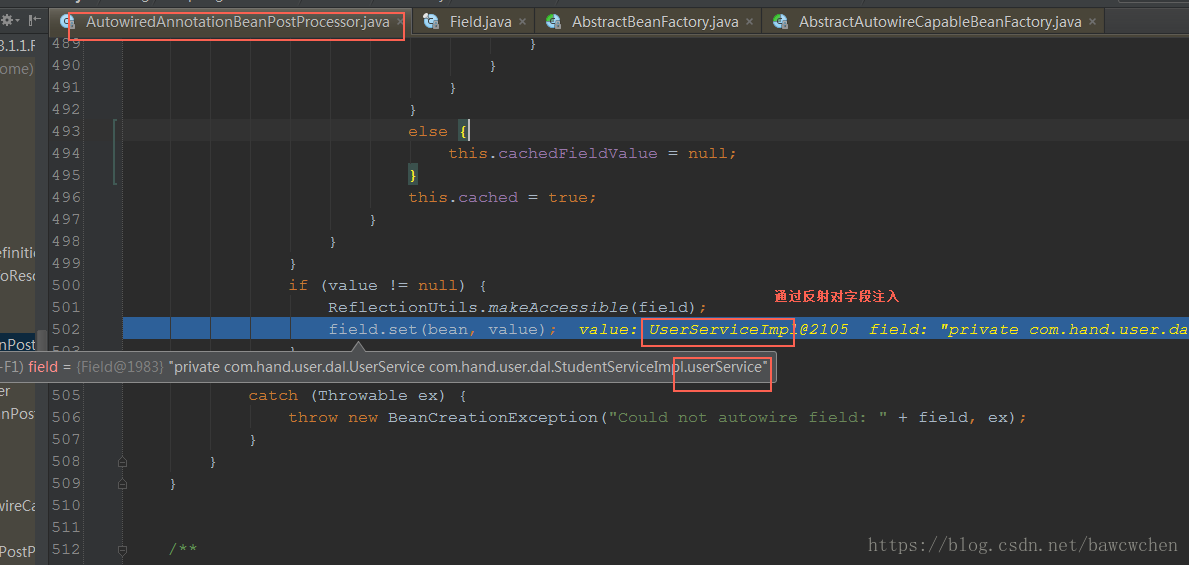
到这里,就完成了@AutoWired方式的属性注入了。
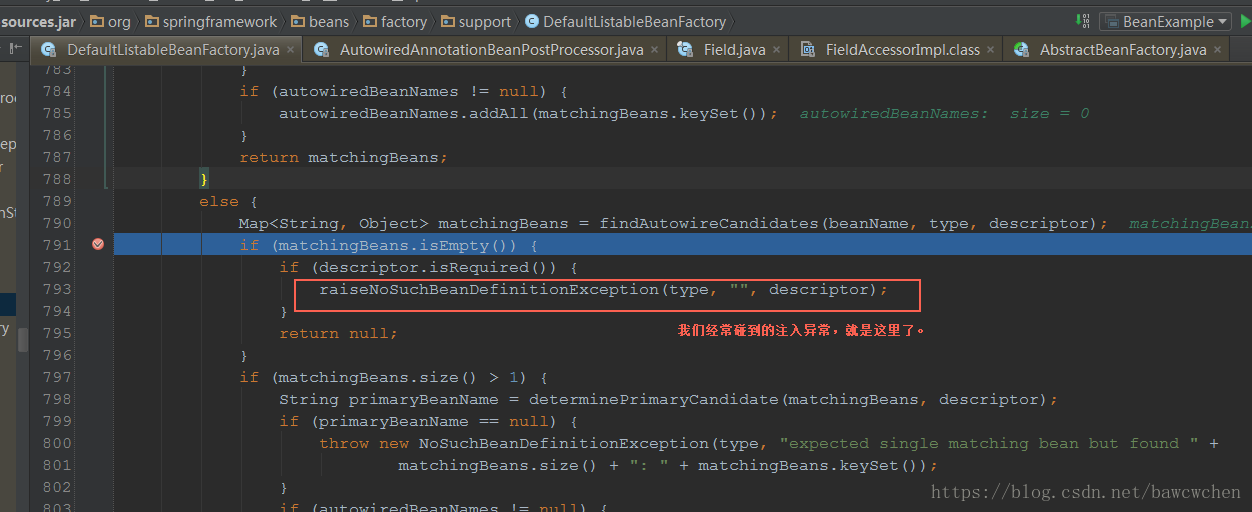
PS:常见注入异常报错代码位置。

2.@Resource实现依赖注入
测试代码同上,就是注入类型@AutoWired改为@Resource。
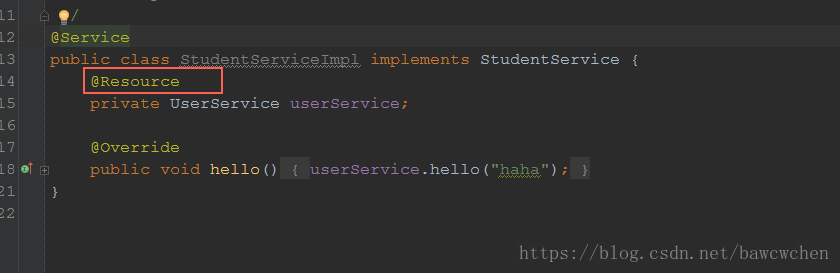
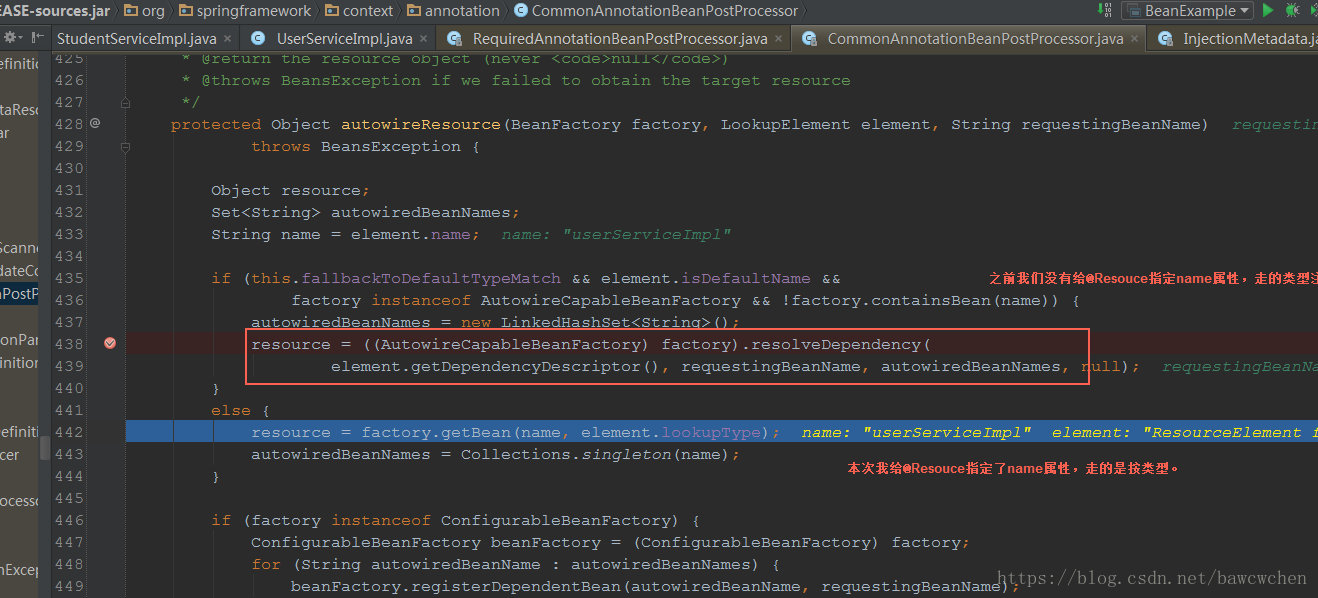
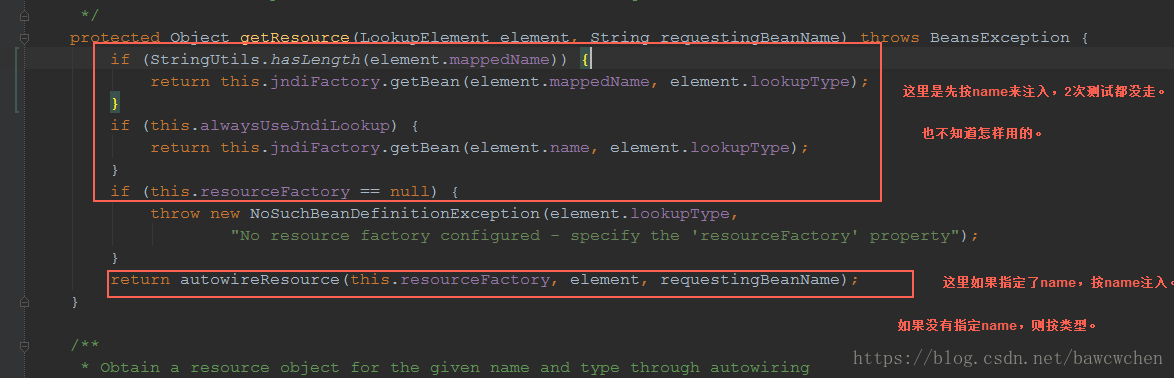
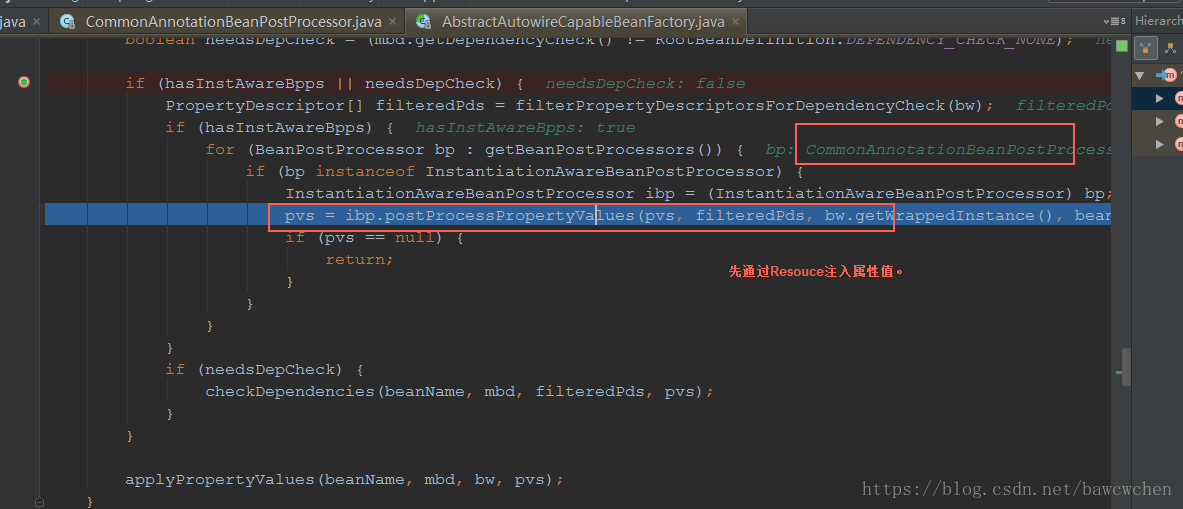
@Resource类型注解,依赖注入的处理类是CommonAnnotationBeanPostProcessor
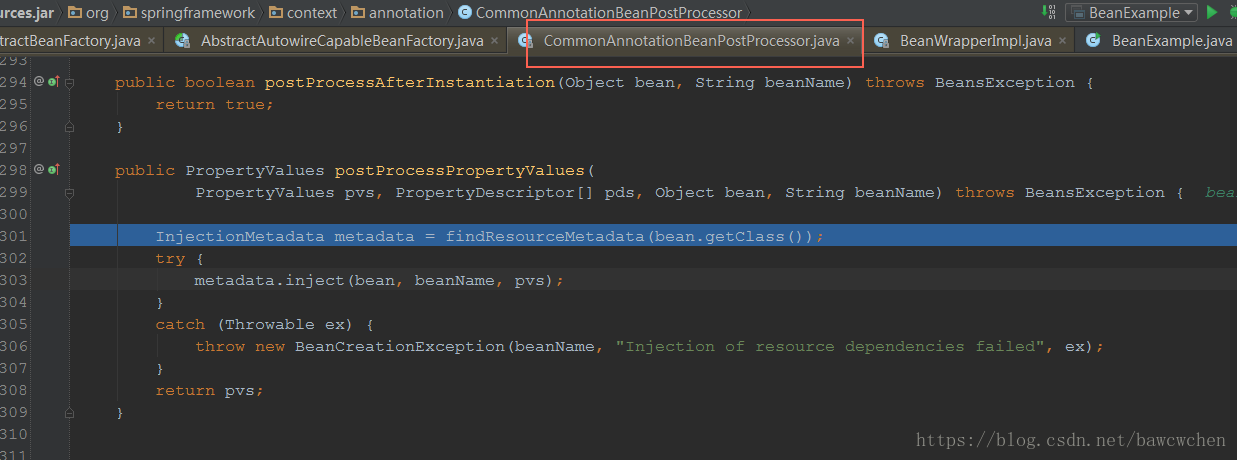
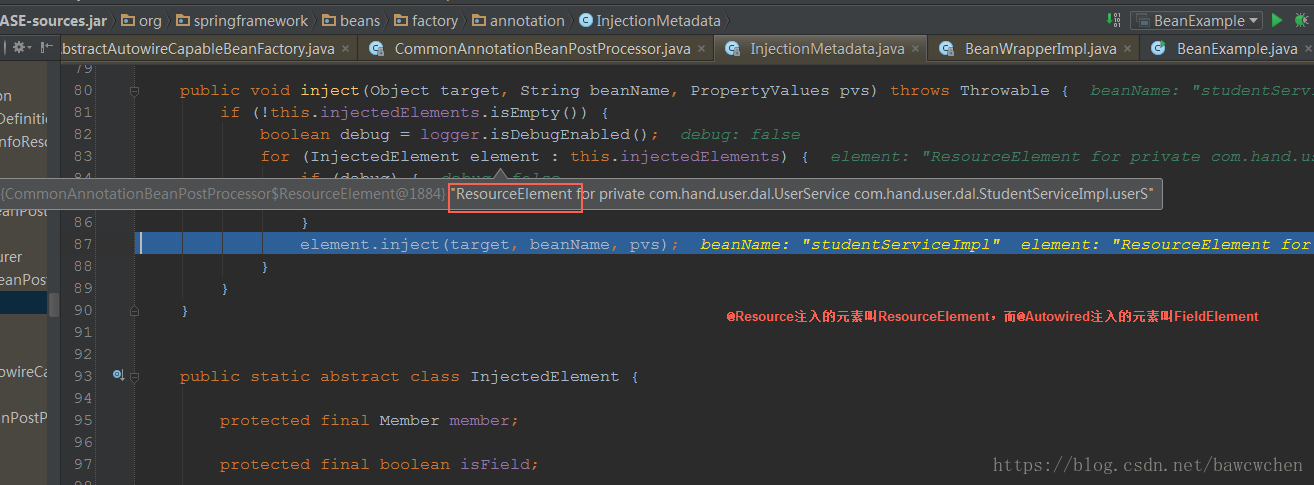
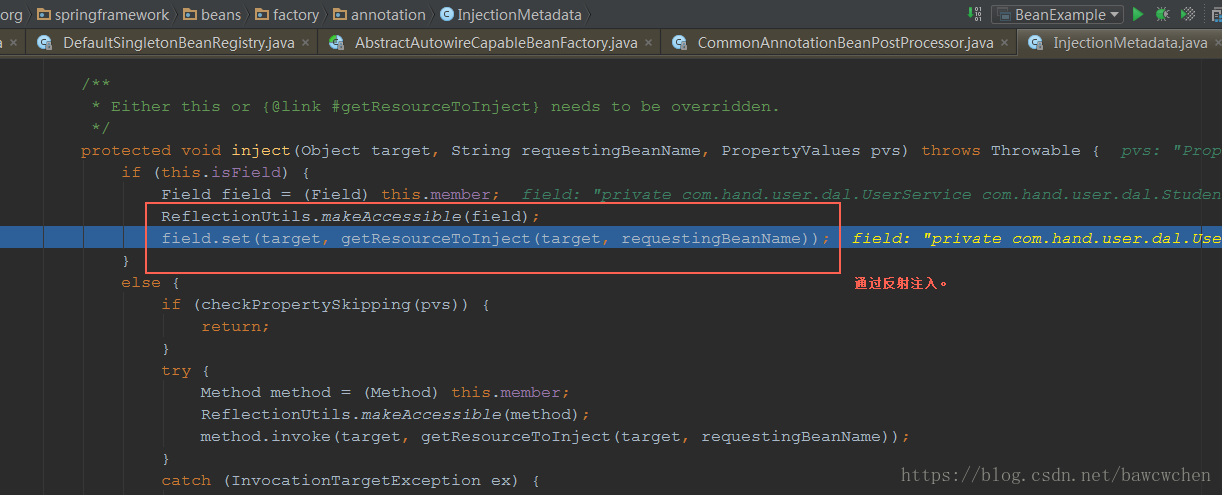
到这里,就完成了@Resource方式的属性的依赖注入。
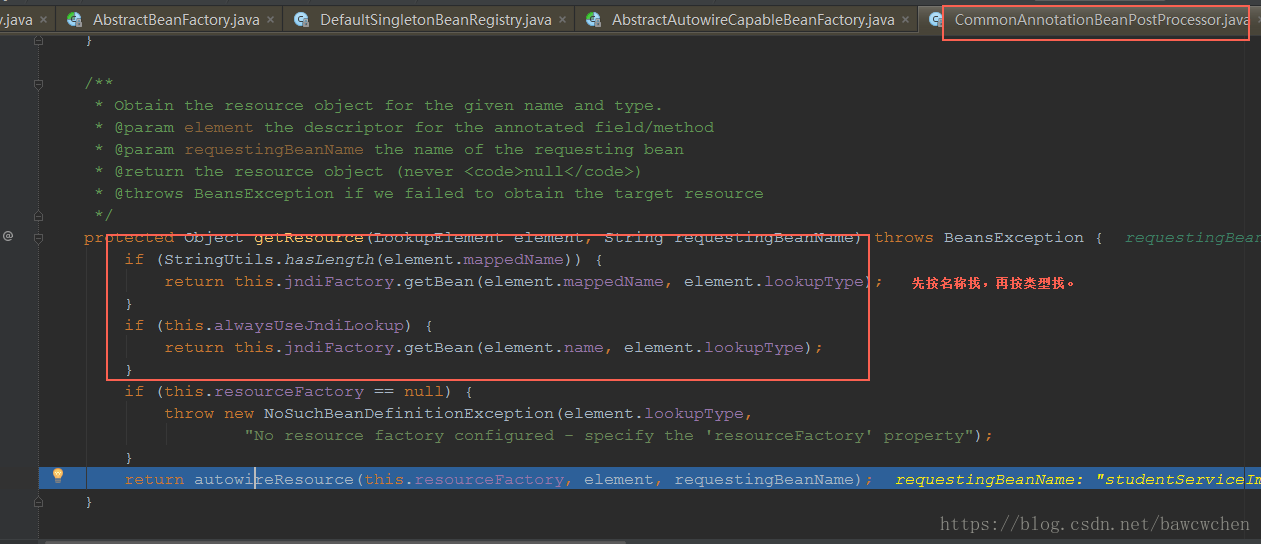
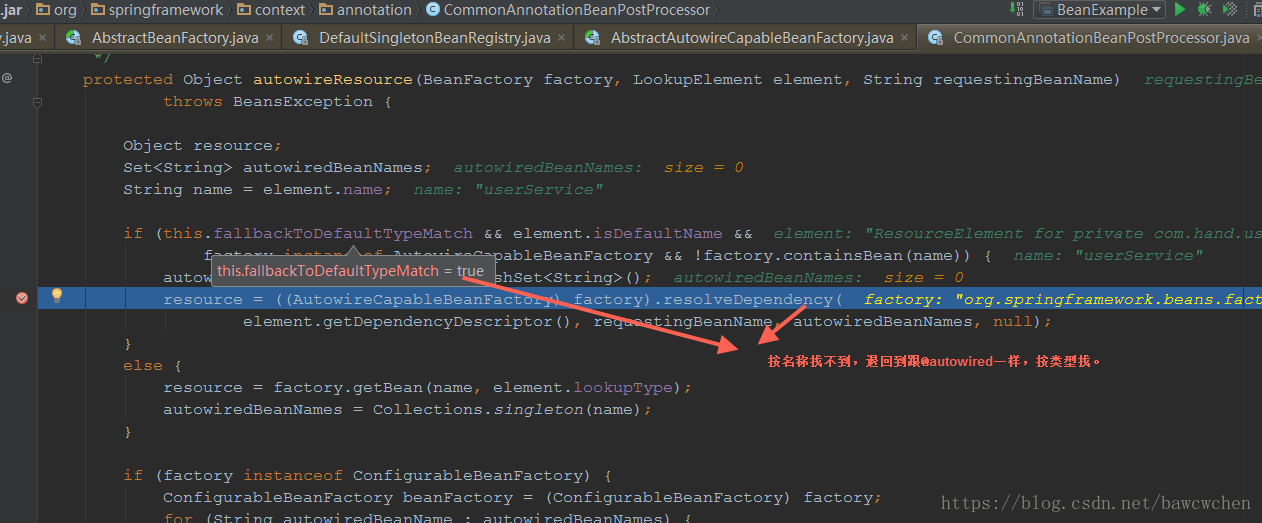
这里不够准确,上面是先按名称找。autowireResouce可能按类型也可能按名称,就看你有么有给@Resource加name属性了。
下面我会上个案例。


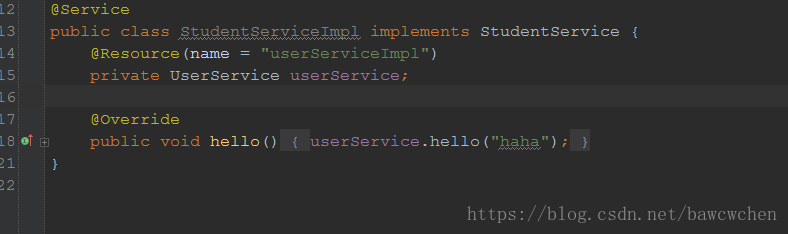
给@Resource指定name值。
3.注解+Setter混合注入(当然正常情况,不会这么用 )
public class BeanExample {
    public static void main(String[] args) {
        ClassPathXmlApplicationContext applicationContext = new ClassPathXmlApplicationContext("beans.xml");
        StudentService studentService = (StudentService) applicationContext.getBean("studentServiceImpl");
        studentService.hello();
    }
}
<?xml version="1.0" encoding="UTF-8"?>
<beans xmlns="http://www.springframework.org/schema/beans"
xmlns:xsi="http://www.w3.org/2001/XMLSchema-instance"
xmlns:context="http://www.springframework.org/schema/context"
xsi:schemaLocation="http://www.springframework.org/schema/beans http://www.springframework.org/schema/beans/spring-beans.xsd http://www.springframework.org/schema/context http://www.springframework.org/schema/context/spring-context.xsd">
<context:component-scan base-package="com.hand"/> <!--开启注解-->
<bean id="studentServiceImpl" class="com.hand.user.dal.StudentServiceImpl">
<!--该属性通过属性注入,userService通过注解注入-->
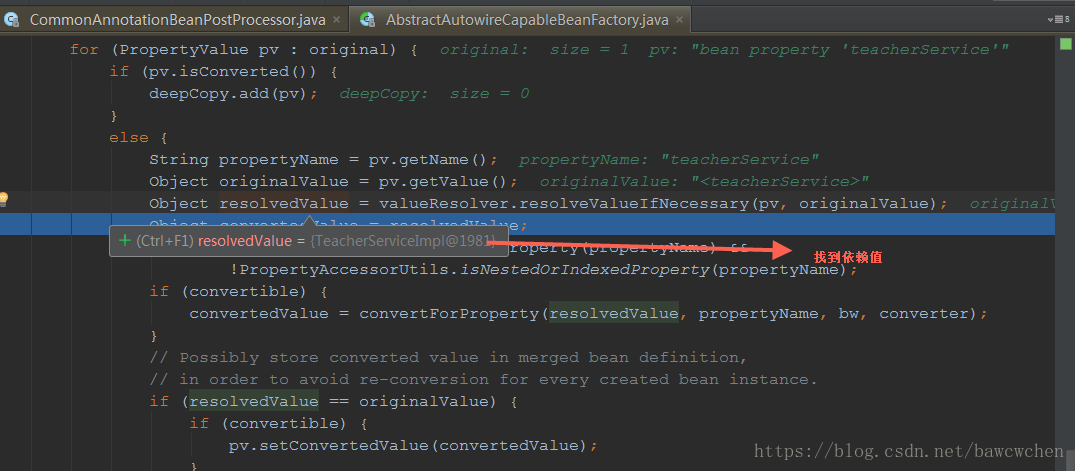
<property name="teacherService" ref="teacherService"></property>
</bean>
</beans>
/**
 * Function Desc: 注解+Setter混合注入。
 * Date:2018/3/31 16:15
 * author:[email protected]
 */
public class StudentServiceImpl implements StudentService {
    @Resource
    private UserService userService;//通过注解注入

    private TeacherService teacherService;//通过Setter注入

    public void setTeacherService(TeacherService teacherService) {
        this.teacherService = teacherService;
    }

    @Override
    public void hello() {
        userService.hello("haha");
    }
}

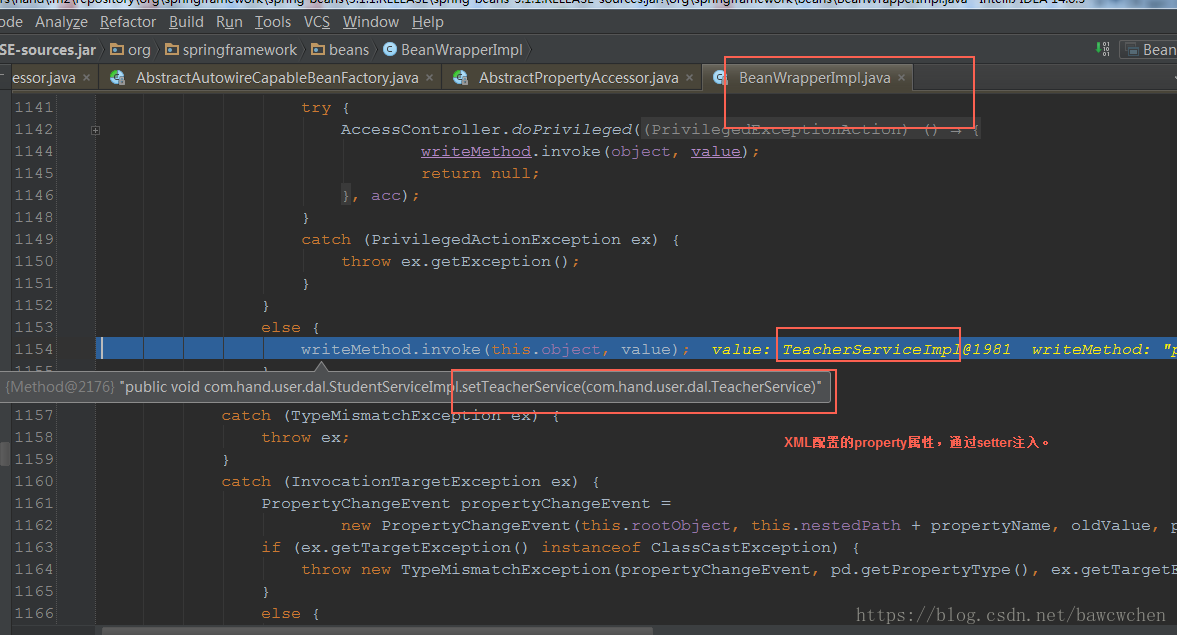
可以看出,Spring底层代码每个方法职责单一,结构合理。
主要流程:解析bean-》保存beanDefition到IOC容器-》根据beanDefition实例化-》根据BeanpostProcessor依赖注入
总结:
1.Autowired是Spring提供的,Resouce是JDK提供的。
2.Autowired通过AutowiredAnnotationBeanPostProcessor实现属性的依赖注入,Resouce通过CommonAnnotationBeanPostProcessor。实现属性的依赖注入。
3.注解方式实例化的bean,默认都是单例,没找到定义bean Scope的入口。
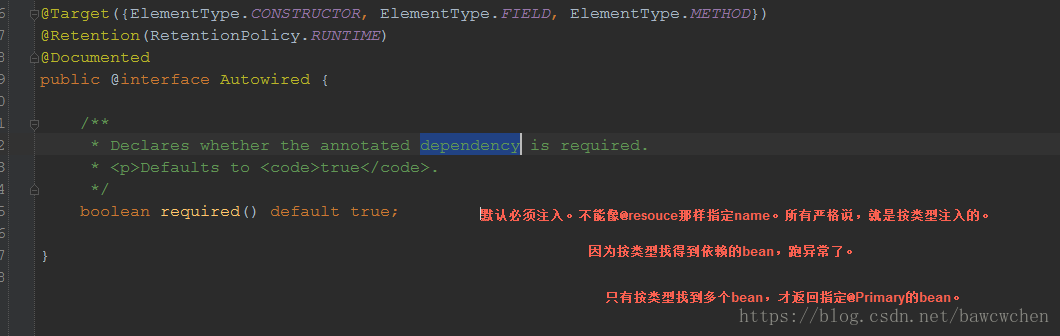
4.Autowired注解严格来说,只是按类型来注入的。因为如果按类型找不到依赖的bean,直接抛异常了。配置了多个类型的bean时,会返回指定@Primary注解的bean。
5.Resouce注解,当么有指定name时,是按类型注入的;指定了name,才按name。当然前提时,我还没弄明白jndiFactory是怎么样用的。