Spring-cloud微服务实战【二】:eureka注册中心(上)
## 前言 本系列教程旨在为大家演示如何一步一步构建一整套微服务系统,至于其中的数据库用什么,订单ID如何保持唯一,分布式相关问题等等不在我们讨论范围内,本教程为了方便大家后续下载代码运行测试,不依赖任何其他诸如缓存、数据库之类的资源,此类操作我们在项目中使用代码的方式来模拟。 我们的实战过程会教童鞋们一步一步进行演化,让童鞋们了解一个微服务的开发流程: 1.创建两个用于演示的springboot项目,用于后续将其演化为两个微服务. 2.使用Eureka注册中心进行服务治理. 3.使用Ribbon进行负载均衡. 4.整合Feign接口服务. 5.服务降级与熔断Hystrix. 6.API网关zuul进行路由. 7.使用config配置中心. ## 创建演示服务 在本实战教程中,我们会模拟一个最简单的业务场景:生产者生产商品,消费者消费商品,这会涉及两个服务,生产者和消费者,因此我们需要先创建这两个服务.为方便演示,我将他们放到一个maven工程中。 首先创建该maven工程: 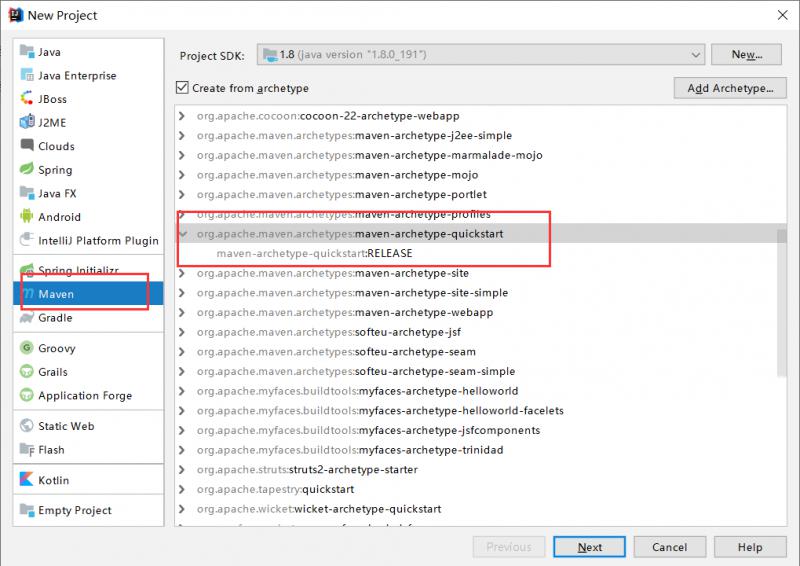 等待创建完成:  然后创建一个生产者,该生产者是一个springboot项目:  点击next: 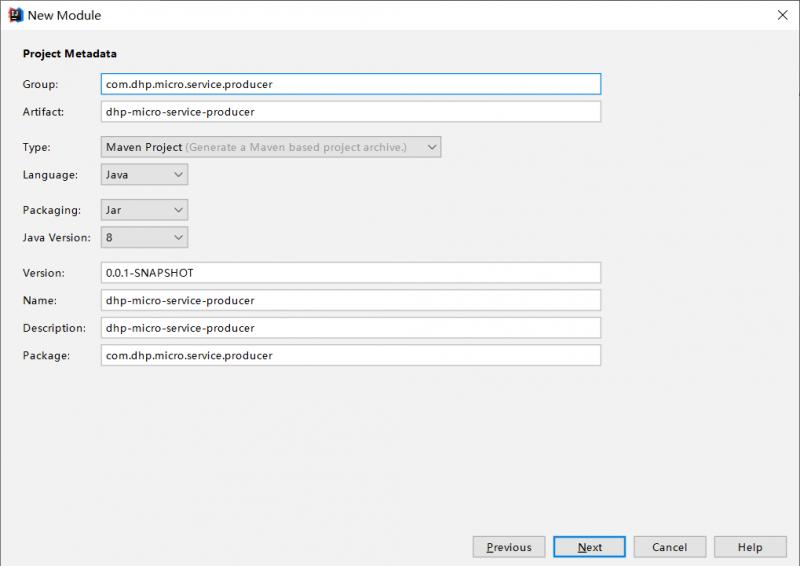 继续点击next: 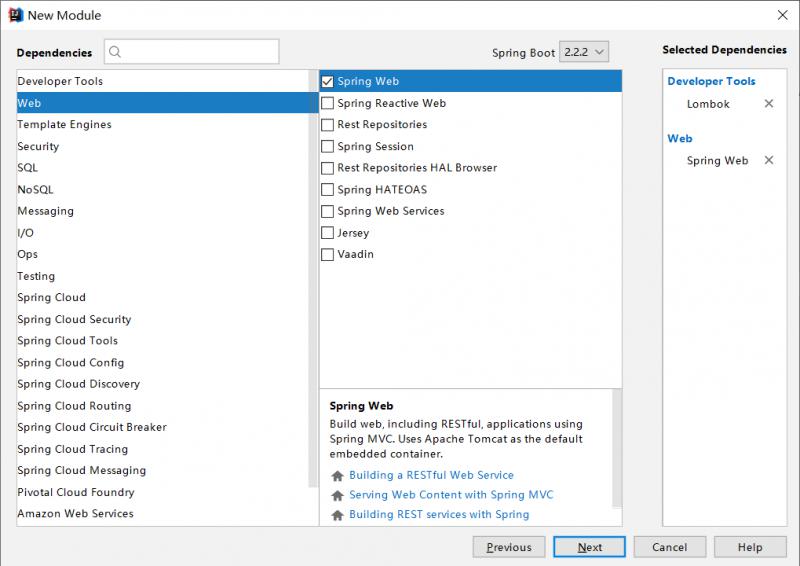 生产者就生成好了,接下来,我们把该模块加入父项目: 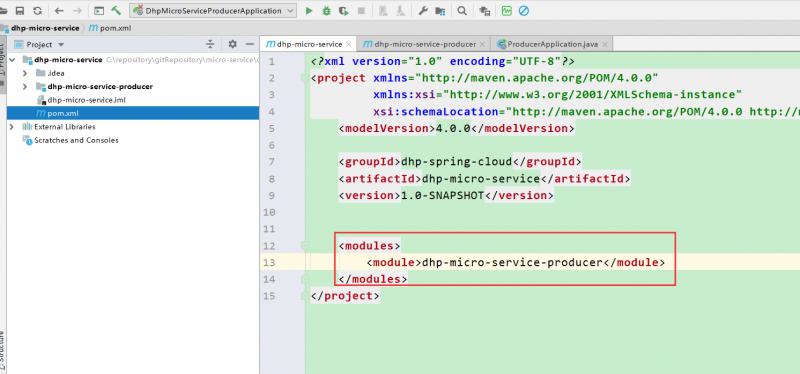 然后实现生产者相关代码:  其中的数据库操作我们使用map来模拟: 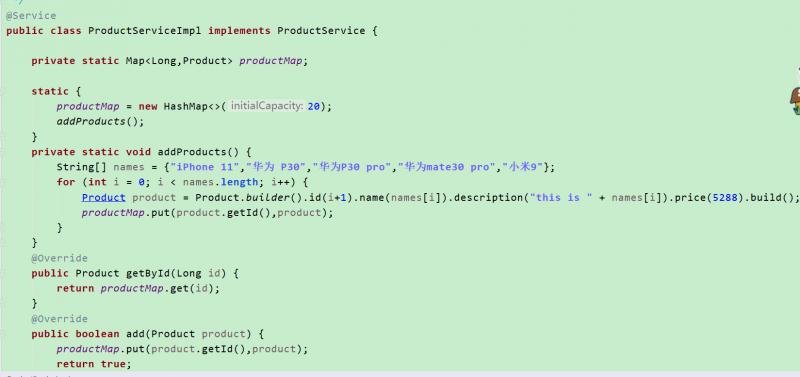 在application.properties中配置一下服务端口号:  然后启动项目看一下:  生产者就完成了. 接下来是消费者项目,同样创建一个springboot项目:  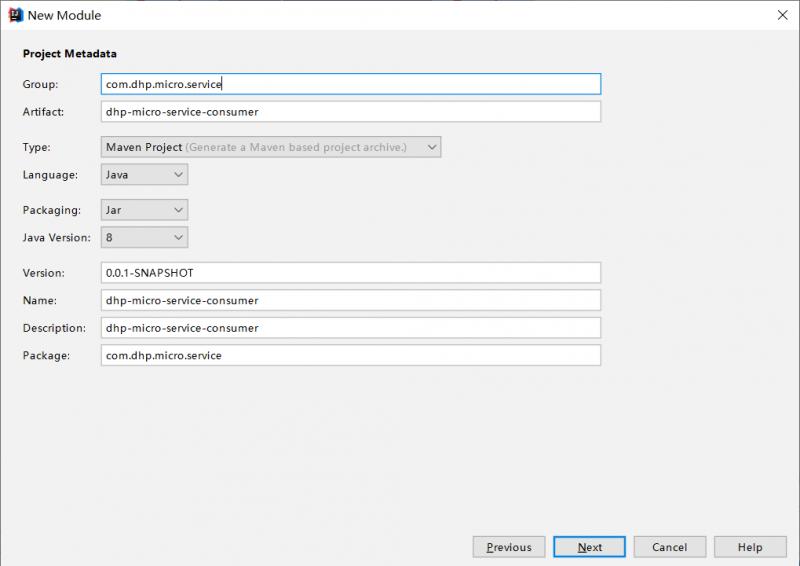  同样纳入父工程项目: 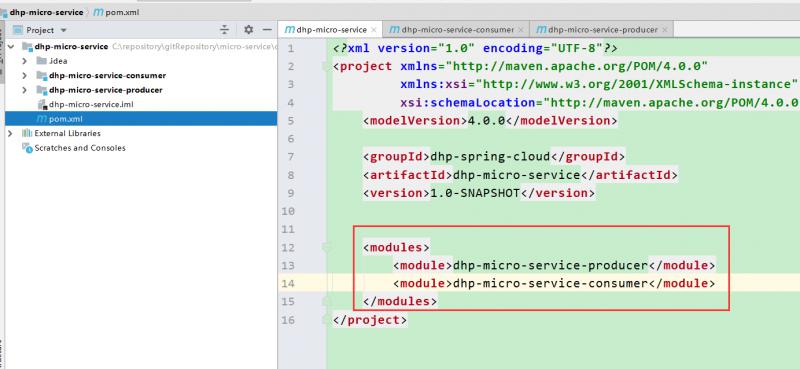 然后编写相关代码:在消费者端,我们使用spring RestTemplate和生产者进行通信: 首先需要配置一下restTemplate: 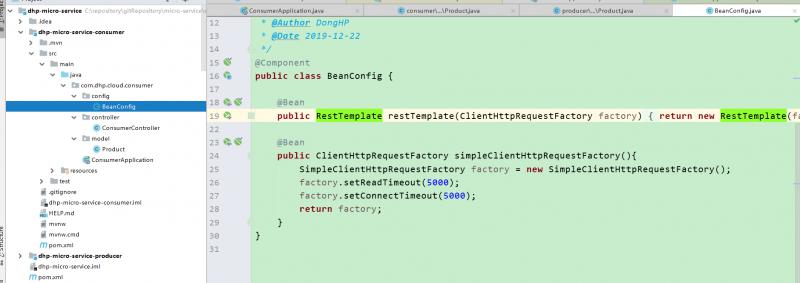 然后编写controller:  注意:在consumer项目中也需要使用Product对象,本文直接从producer项目中拷贝过来: 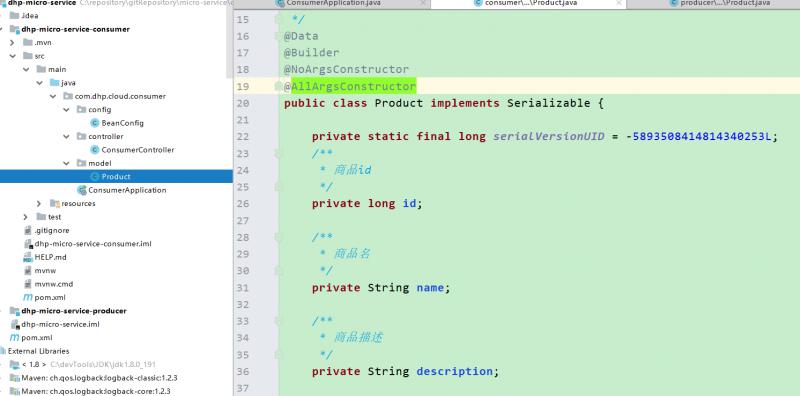 实际生产中根据业务需要,有可能需要根据返回字段构造一结果个对象,也有可能让调用的服务提供方提供jar包. 在appilication.properties配置一下启动端口:  然后我们去浏览器访问一下试一下: 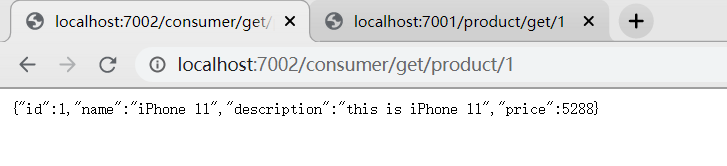 可以看到,在消费者端的代码已经通过restTemplate访问到生产者提供的接口. ## 使用spring-security进行用户认证 接下来,我们思考一个问题:假如我们的接口需要对公网开放,如果对接口不加任何限制,任何人都能访问,是不是不安全呢?因此,我们需要添加一个认证小模块.该模块我们使用spring-security来实现,首先添加依赖:  然后在配置文件中新增相关信息: 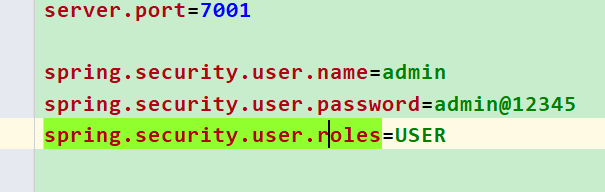 然后重启生产者服务,访问浏览器,此时浏览器提示需要登陆,账号密码就是我们在配置文件中配置的信息: 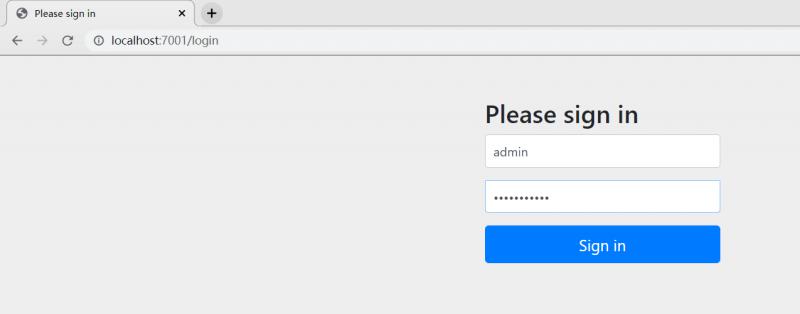 输入配置文件中配置的账号密码就能成功访问了: 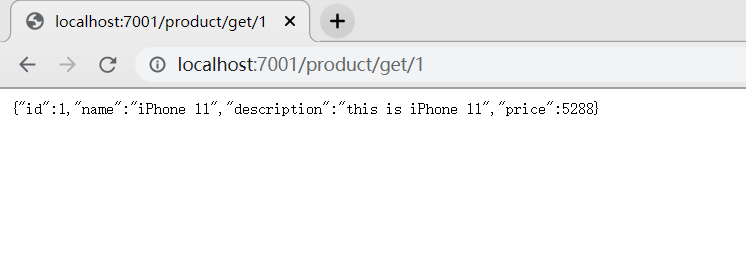 此时,我们再来访问consumer项目试一试:  页面提示信息说认证失败,因此,我们还需要修改consumer项目的代码,新增一个httpheaders头信息,添加账号密码进行认证: 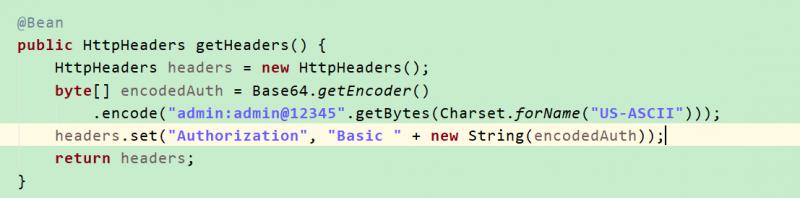 然后修改controller层代码: 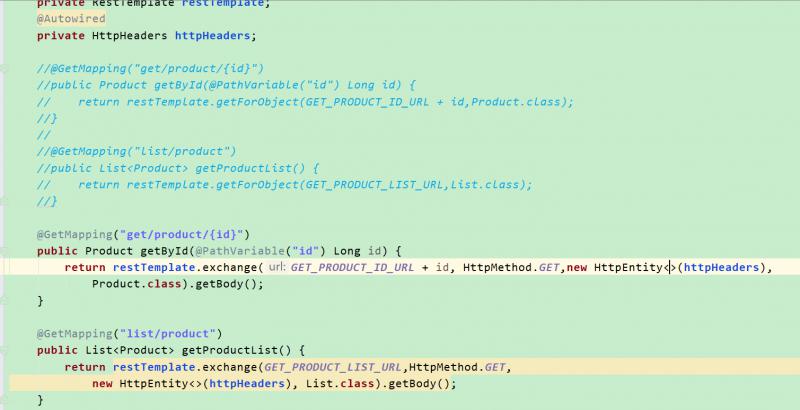 然后再重启访问浏览器:  此时我们又能在consumer中访问到producer的接口了. ## spring-security抽象 设想一下,假如我们有数十甚至上百个微服务,难道要在每一个模块中都设置这样的账号密码?答案肯定是否定的,一般来说,一个微服务系统中的所有微服务都使用相同的用户名和密码进行认证,我们可以将认证功能单独抽出来形成一个模块,然后再集成到需要进行认证的微服务中去,因此我们再新建一个模块: 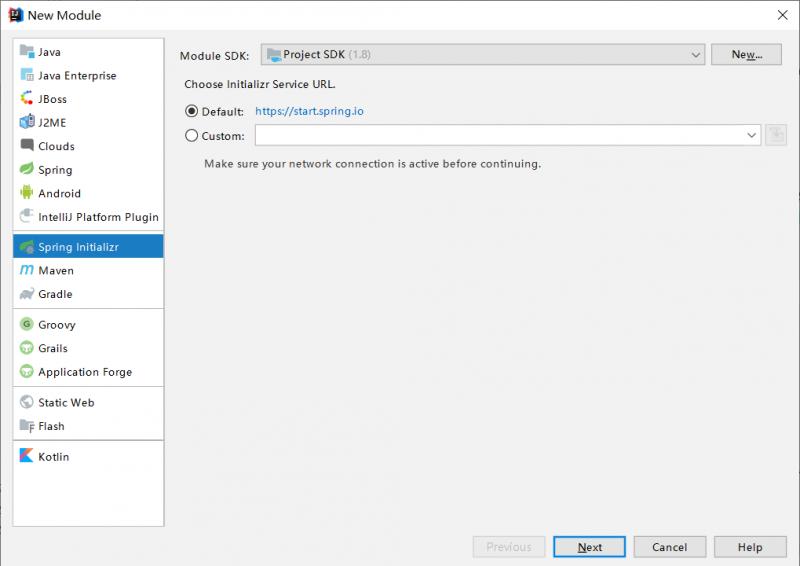 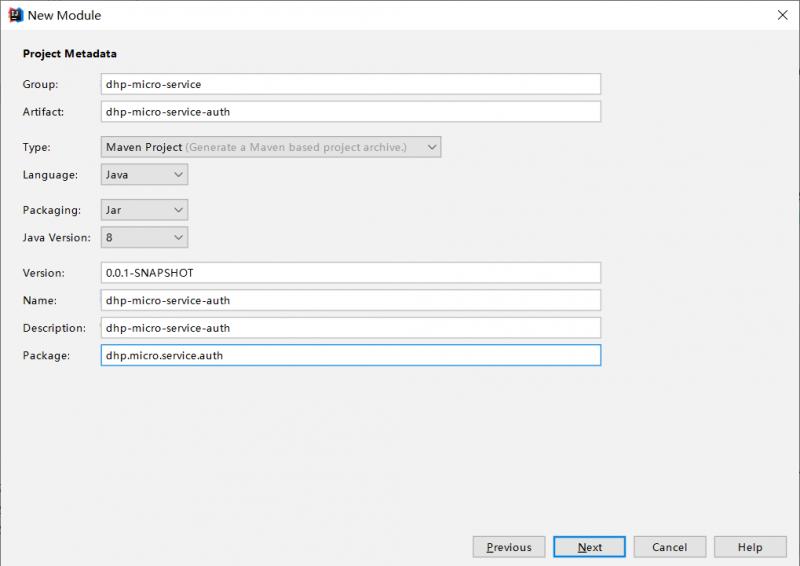 创建项目完成后,首先新增pom.xml依赖:  整个项目结构如下: 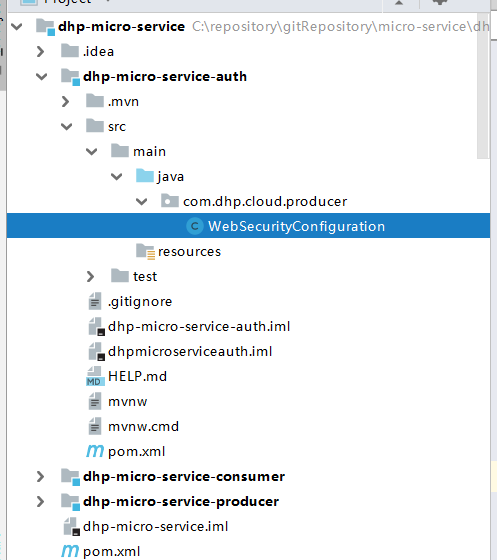 resources目录下没有任何文件,接下来看看最重要的WebSecurityConfiguration: 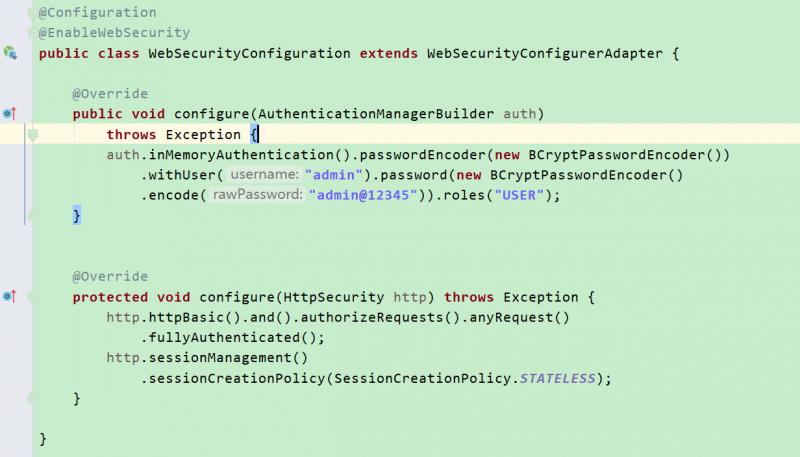 首先使用@Configuration标识它是一个配置类,需要被spring容器扫描. 其次@EnableWebSecurity标志启用WebSecurity安全相关的功能. 最后是继承自WebSecurityConfigurerAdapter,从名字我们可以看出,该类采用了适配器模式,主要作用是进行安全相关的配置,有兴趣的童鞋可以详细去了解一下,在此我们主要演示spring-cloud,就不再过多赘述. 把该模块加入父项目: 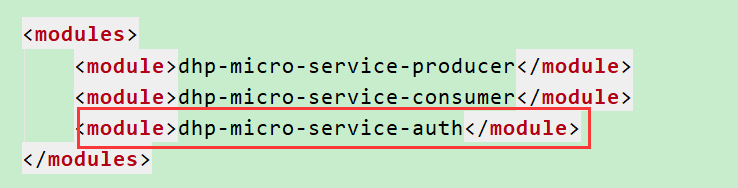 接下来,我们需要修改producer项目的代码,取消自定义的安全配置,使用dhp-micro-service-auth来替代. 首先修改producer项目的pom.xml: 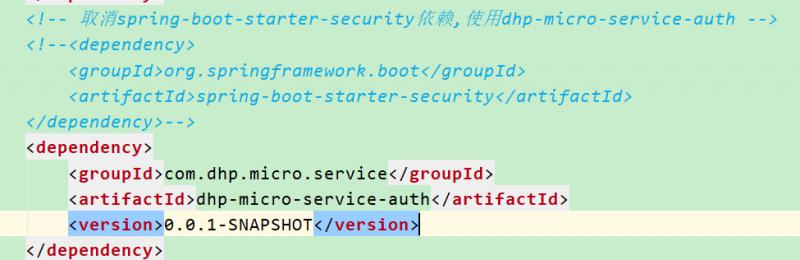 然后去掉application.properties中的配置: 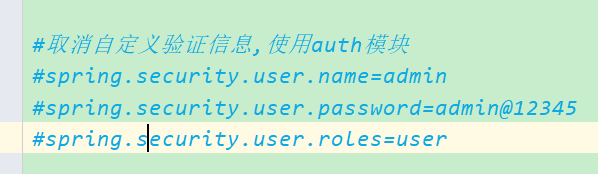 接下来再启动producer项目,使用浏览器进行访问: 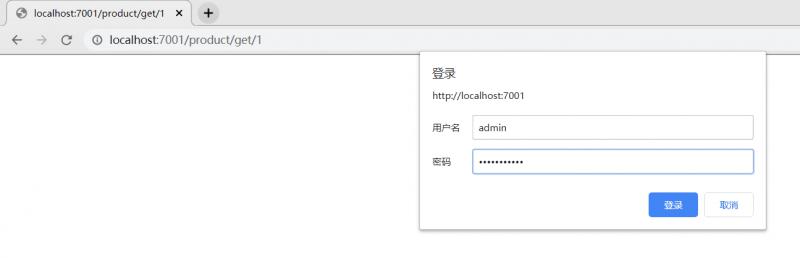 输入账号密码,认证成功后能正常访问: 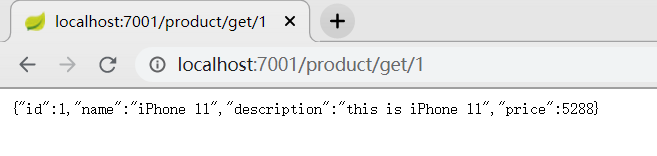 此时,再启动consumer项目访问: 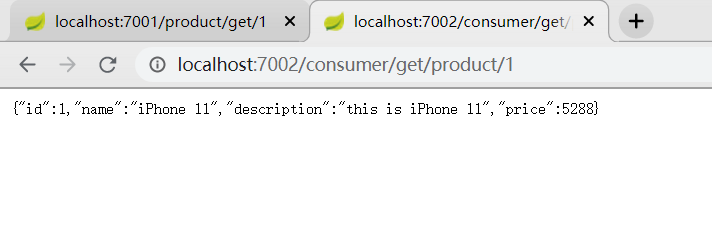 说明我们的公共验证模块成功应用到了producer项目,后续再有新的微服务需要用户认证,直接引入该模块即可. 自此,我们需要的服务都有了.文末,请童鞋们思考一下,本文中consumer访问producer的方式有什么问题?我们会在下一篇文章来解答这个问题. [本文的github地址](https://github.com/dongheping/dhp-micro-service-chapter1) > 本文由博客一文多发平台 [OpenWrite](https://openwrite.cn?from=article_bottom) 发布!
猜你喜欢
转载自www.cnblogs.com/wukongbubai/p/12208628.html
今日推荐
周排行