在重新学习一下springboot,在此先来回顾一下ssm用xml的方式搭建
工具就用 IntelliJ IDEA
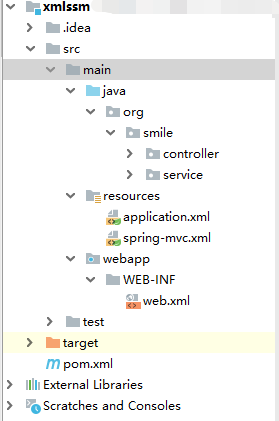
1 先用IDEA搭建一个J2EE项目
目录结构
2 在pom.xml文件下添加依赖
<?xml version="1.0" encoding="UTF-8"?>
<project xmlns="http://maven.apache.org/POM/4.0.0"
         xmlns:xsi="http://www.w3.org/2001/XMLSchema-instance"
         xsi:schemaLocation="http://maven.apache.org/POM/4.0.0 http://maven.apache.org/xsd/maven-4.0.0.xsd">
    <modelVersion>4.0.0</modelVersion>

    <groupId>org.smile</groupId>
    <artifactId>xmlssm</artifactId>
    <version>1.0-SNAPSHOT</version>
    <packaging>war</packaging>

    <dependencies>

        <!-- https://mvnrepository.com/artifact/org.springframework/spring-webmvc -->
        <dependency>
            <groupId>org.springframework</groupId>
            <artifactId>spring-webmvc</artifactId>
            <version>5.1.1.RELEASE</version>
        </dependency>

    </dependencies>

</project>
只用添加 spring-webmvc 一个 其他的依赖maven都会帮你添加进来 如下图

3 然后创建spring与springmvc的xml配置文件
在resource目录下创建spring的xml配置文件以及springmvc.xml配置文件
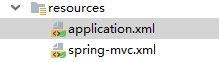
application.xml(spring的配置)
<?xml version="1.0" encoding="UTF-8"?>
<beans xmlns="http://www.springframework.org/schema/beans"
       xmlns:xsi="http://www.w3.org/2001/XMLSchema-instance"
       xmlns:context="http://www.springframework.org/schema/context"
       xsi:schemaLocation="http://www.springframework.org/schema/beans http://www.springframework.org/schema/beans/spring-beans.xsd http://www.springframework.org/schema/context http://www.springframework.org/schema/context/spring-context.xsd">

                             <!--使用默认过滤器为true 就是把org.smile下面所有东西都扫描-->
    <context:component-scan base-package="org.smile" use-default-filters="true">
        <!--除去controller包,所有包都扫,就是不扫描controller-->
        <context:exclude-filter type="annotation" expression="org.springframework.stereotype.Controller" />
    </context:component-scan>
</beans>
spring-mvc.xml
<?xml version="1.0" encoding="UTF-8"?>
<beans xmlns="http://www.springframework.org/schema/beans"
       xmlns:xsi="http://www.w3.org/2001/XMLSchema-instance"
       xmlns:context="http://www.springframework.org/schema/context"
       xmlns:mvc="http://www.springframework.org/schema/mvc"
       xsi:schemaLocation="http://www.springframework.org/schema/beans http://www.springframework.org/schema/beans/spring-beans.xsd http://www.springframework.org/schema/context http://www.springframework.org/schema/context/spring-context.xsd http://www.springframework.org/schema/mvc http://www.springframework.org/schema/mvc/spring-mvc.xsd">

        <!--只扫描controller包-->
        <context:component-scan base-package="org.smile" use-default-filters="false">
            <context:include-filter type="annotation" expression="org.springframework.stereotype.Controller"/>
        </context:component-scan>

    <mvc:annotation-driven />
</beans>
其实可以不用配置这么麻烦的扫描,可以直接扫描全部就可以了,这样是为了更好的理解
4 配置web.xml
<?xml version="1.0" encoding="UTF-8"?>
<web-app xmlns="http://xmlns.jcp.org/xml/ns/javaee"
         xmlns:xsi="http://www.w3.org/2001/XMLSchema-instance"
         xsi:schemaLocation="http://xmlns.jcp.org/xml/ns/javaee http://xmlns.jcp.org/xml/ns/javaee/web-app_4_0.xsd"
         version="4.0">
    <!--spring 相关-->
    <context-param>
        <param-name>contextConfigLocation</param-name>
        <param-value>classpath:application.xml</param-value>
    </context-param>
    <listener>
        <listener-class>org.springframework.web.context.ContextLoaderListener</listener-class>
    </listener>


    <!--spring mvc相关-->
    <servlet>
        <servlet-name>springmvc</servlet-name>
        <servlet-class>org.springframework.web.servlet.DispatcherServlet</servlet-class>
        <init-param>
            <param-name>contextConfigLocation</param-name>
            <param-value>classpath:spring-mvc.xml</param-value>
        </init-param>
    </servlet>
    <servlet-mapping>
        <servlet-name>springmvc</servlet-name>
        <url-pattern>/</url-pattern>
    </servlet-mapping>

</web-app>
5 测试
创建controller , service 包 以及测试类
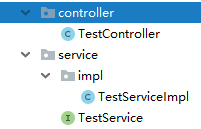
(1)TestController.class
package org.smile.controller;

import org.smile.service.TestService;
import org.springframework.beans.factory.annotation.Autowired;
import org.springframework.web.bind.annotation.GetMapping;
import org.springframework.web.bind.annotation.RestController;

/**
 * @author Smile    博客  https://blog.csdn.net/Smile__1
 * @version 1.0
 * @date 2019/12/3 21:38
 * @description
 */
@RestController
public class TestController {
    @Autowired
    TestService testService;

    @GetMapping(value = "/hello",produces = "text/html;charset=utf-8")//中文乱码
    public String test(){

        return testService.hello();
    }
}
(2)TestService
package org.smile.service;

/**
 * @author Smile    博客  https://blog.csdn.net/Smile__1
 * @version 1.0
 * @date 2019/12/3 21:54
 * @description
 */

public interface TestService {

    public String hello();
}
(3)TestServiceImpl
package org.smile.service.impl;

import org.smile.service.TestService;
import org.springframework.stereotype.Service;

/**
 * @author Smile    博客  https://blog.csdn.net/Smile__1
 * @version 1.0
 * @date 2019/12/3 21:55
 * @description
 */
@Service
public class TestServiceImpl implements TestService {
    public String hello() {
        return "hello  smile  ssm 哈喽";
    }
}
然后用Tomcat启动项目
有些刚接触IDEA的不太熟悉, 下面我们来配置一下tomcat, 点击右上角

来配置tomcat,看到以下界面

点击左上角的加号

往下拉按图中的步骤选择
 然后点击Deployment

点击左面加号
选择第一个

最后点击ok完事

启动tomcat
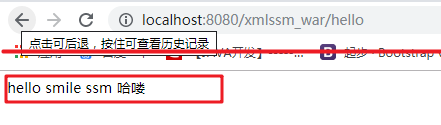
测试成功!!!
