http://www.tecmint.com/install-imagemagick-in-linux/
ImageMagick is an free open source simple software suite for any kind of image manipulation that is used for creating, editing, converting, displaying image files. It can able to read and write over 200 image files such as JPEG, GIF, PNG, TIFF and Photo CD image formats and it is also used for thumbnail or captcha generation. It also includes command line options for creating transparent or animated gif image formats and many more feature like resize, sharpen, rotate or add special effects to an image.
To use ImageMagick tool with PHP or Perl programming language, you will need to installImageMagick with Imagick PHP extension for PHP and ImageMagick-perl extension for Perl.
Imagick is an simple php extension for creating and modifying images using the ImageMagick API program. There is a confusion in name, as people think that ImageMagick and Imagickboth are same, but you can use ImageMagick without Imagick extension but you need both installed on your machine to use and run it.
Installing ImageMagick
First, install following prerequisite php-pear and gcc packages to compile imagick PHP extension.
# yum install php-pear gcc
Once you’ve installed php-pear and gcc packages, you may now install ImageMagick software for PHP and Perl support using Yum command.
# yum install ImageMagick ImageMagick-devel ImageMagick-perl
Next, compile the imagick for PHP extension. To do, simple run the following ‘pecl‘ command. It will install ImageMagick and imagick PHP extension module ‘imagick.so‘ under/usr/lib/php/modules directory. If you are using 64-bit system, the module directory path would be /usr/lib64/php/modules.
# pecl install imagick

WARNING: channel "pecl.php.net" has updated its protocols, use "pecl channel-update pecl.php.net" to update
downloading imagick-3.1.0RC2.tgz ...
Starting to download imagick-3.1.0RC2.tgz (93,264 bytes)
.....................done: 93,264 bytes
15 source files, building
running: phpize
Configuring for:
PHP Api Version:         20090626
Zend Module Api No:      20090626
Zend Extension Api No:   220090626
Please provide the prefix of Imagemagick installation [autodetect] :
Note: It will ask you to provide Imagemagick installation prefix, simply hit enter to auto detect.
Now, add the ‘imagick.so‘ extension to ‘/etc/php.ini‘ file.
echo extension=imagick.so >> /etc/php.ini
Next, restart Apache web server. 这个地方现在一般都是Nginx了,所以应该换成:service nginx restart
# service httpd restart
Verify imagick PHP extension by running the following command. You will see imagick extension similar to below.
# php -m | grep imagick

imagick
Alternatively, you can create a file called ‘phpinfo.php‘ under website root directory (ex:/var/www/html/).
# vi /var/www/html/phpinfo.php
Add the following code.
<?php
     phpinfo ();
?>
Open your favorite web browser and type ‘http://localhost/phpinfo.php‘ or ‘http://ip-addresss/phpinfo.php‘ and verify the imagick extension.
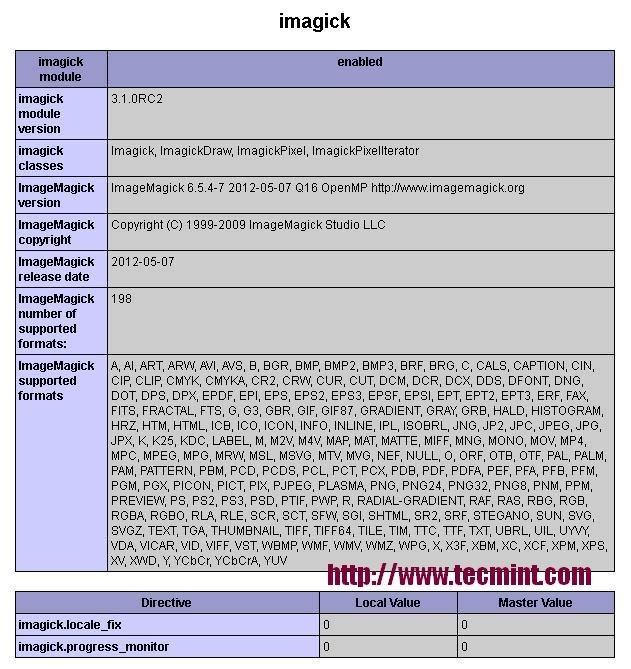
Imagick PHP Extension