一、安装环境
- 操作系统:CentOS7
- Hadoop版本:Hadoop-3.2.0
- MySQL版本:MySQL5.7
在Hive安装之前要先安装好Hadoop,可以参考:https://blog.csdn.net/weixin_43207025/article/details/100536738 或者其他文章。
然后MySQL作为Hive的源数据库,也要安装好MySQL,可以参考这篇文章:https://blog.csdn.net/z13615480737/article/details/78906598,我觉得写得很详细。
二、安装配置Hive
安装包可以到这个网址里面下载:http://ftp.twaren.net/Unix/Web/apache/hive/,官网下载的很慢。我下载的是Hive-3.1.2版本。
1、把压缩包上传到虚拟机中,使用命令进行解压:
[helloworld@localhost software]$ tar -zxvf apache-hive-3.1.2-bin.tar.gz

[helloworld@localhost apache-hive-3.1.2-bin]$ ll

2、在/etc/profile中配置环境变量
[helloworld@localhost apache-hive-3.1.2-bin]$ vim /etc/profile
# 添加内容
export HIVE_HOME=/home/helloworld/software/apache-hive-3.1.2-bin
export PATH=$PATH:HIVE_HOME/bin

使变量立即生效:
[helloworld@localhost apache-hive-3.1.2-bin]$ source /etc/profile
3、创建hive-site.xml 文件:
在 /home/helloworld/software/apache-hive-3.1.2-bin/conf/ 下创建hive-site.xml 文件,注意自己的文件路径不要弄错。
# 复制hive-default.xml.template并更名为hive-site.xml
[helloworld@localhost conf]$ cp hive-default.xml.template hive-site.xml
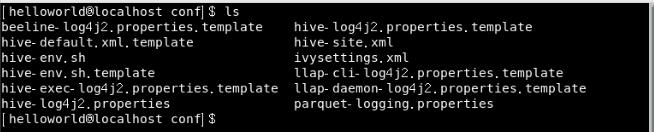
[helloworld@localhost conf]$ ls
创建好后文件如下:
4、创建HDFS文件夹
[helloworld@localhost apache-hive-3.1.2-bin]$ hadoop fs -mkdir -p /user/hive/warehouse   # 创建文件夹
[helloworld@localhost apache-hive-3.1.2-bin]$ hadoop fs -mkdir -p /tmp/hive    # 创建文件夹
[helloworld@localhost apache-hive-3.1.2-bin]$ hadoop fs -chmod -R 777 /user/hive/warehouse   # 授予权限
[helloworld@localhost apache-hive-3.1.2-bin]$ hadoop fs -chmod -R 777 /tmp/hive   # 授予权限
查看是否创建成功:
[helloworld@localhost apache-hive-3.1.2-bin]$ hadoop fs -ls /

如果出现下面错误:

那就是还没有启动 hadoop,把hadoop启动后再执行 hadoop 命令就可以了。
5、Hive相关配置
如果temp目录不存在,需要先创建该目录。
[helloworld@localhost apache-hive-3.1.2-bin]$ mkdir temp
[helloworld@localhost apache-hive-3.1.2-bin]$ chmod -R 777 temp   # 授予权限
[helloworld@localhost temp]$ pwd   # 查看temp的文件位置
# /home/helloworld/software/apache-hive-3.1.2-bin/temp
这里的路径和用户名要根据自己的情况而定。
然后,将 hive-site.xml 中的{system:java.io.tmpdir}改为hive的本地目录,将{system:user.name}改为用户名。
- 注意:路径和用户名都是自己的。下面列出的是根据我的路径和我的用户名修改的文件。
- 由于hive-site.xml文件内容很多,可以借助文本编辑器的查找功能来定位。
  <property>
    <name>hive.exec.local.scratchdir</name>
    <value>/home/helloworld/software/apache-hive-3.1.2-bin/helloworld</value>
    <description>Local scratch space for Hive jobs</description>
  </property>

  <property>
    <name>hive.downloaded.resources.dir</name>
    <value>/home/helloworld/software/apache-hive-3.1.2-bin/${hive.session.id}_resources</value>
    <description>Temporary local directory for added resources in the remote file system.</description>
  </property>

  <property>
    <name>hive.server2.logging.operation.log.location</name>
    <value>/home/helloworld/software/apache-hive-3.1.2-bin/helloworld/operation_logs</value>
    <description>Top level directory where operation logs are stored if logging functionality is enabled</description>
  </property>

  <property>
    <name>hive.querylog.location</name>
    <value>/home/helloworld/software/apache-hive-3.1.2-bin/helloworld</value>
    <description>Location of Hive run time structured log file</description>
  </property>
6、数据库的相关配置
同样修改 hive-site.xml 中的以下几项,注意驱动版本的问题,否则后面会报错(报错信息会有提示你修改的内容):
数据库jdbc地址,value标签内修改为主机ip地址
  <property>
    <name>javax.jdo.option.ConnectionURL</name>
    <value>jdbc:mysql://localhost:3306/hive?createDatabaseIfNotExist=true</value>
    <description>
      JDBC connect string for a JDBC metastore.
      To use SSL to encrypt/authenticate the connection, provide database-specific SSL flag in the connection URL.
      For example, jdbc:postgresql://myhost/db?ssl=true for postgres database.
    </description>
  </property>
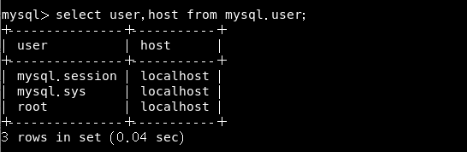
这里jdbc:mysql://localhost:3306/hive?createDatabaseIfNotExist=true 中的 localhost 要看自己的数据库的 user 和 host,打开数据库,执行以下命令即可看到:
mysql> select user,host from mysql.user;
数据库的驱动类名称
驱动名称我看网上说要区分,8.x版本和5.x版本不一样,但是在按照网上的配置后,在运行时还是会出错,最后我是根据报错信息修改的驱动名称。
  <property>
    <name>javax.jdo.option.ConnectionDriverName</name>
    <value>com.mysql.jdbc.Driver</value>
    <description>Driver class name for a JDBC metastore</description>
  </property>
数据库用户名——切记要和自己的对应
用户名再前面已经查看了,我的是 root,所以这里就写root。
  <property>
    <name>javax.jdo.option.ConnectionUserName</name>
    <value>root</value>
    <description>Username to use against metastore database</description>
  </property>
数据库密码——自己数据库的密码
这里我就用123456代替,实际是自己的数据库密码。
 <property>
    <name>javax.jdo.option.ConnectionPassword</name>
    <value>123456</value>
    <description>password to use against metastore database</description>
  </property>
 <property>
    <name>hive.metastore.schema.verification</name>
    <value>false</value>
 </property>
7、配置hive-log4j2.properties
# 复制创建文件
[helloworld@localhost conf]$ cp hive-log4j2.properties.template hive-log4j2.properties
[helloworld@localhost conf]$ vi hive-log4j2.properties   # 打开文件
# 修改内容
property.hive.log.dir = /home/helloworld/software/apache-hive-3.1.2-bin/temp/helloworld
8、配置hive-env.sh文件
[helloworld@localhost conf]$ cp hive-env.sh.template hive-env.sh
[helloworld@localhost conf]$ vi hive-env.sh
添加以下文件,没有的要添加
export JAVA_HOME=/home/helloworld/software/jdk1.8.0_221
export HADOOP_HOME=/home/helloworld/software/hadoop-3.2.0
export HIVE_HOME=/home/helloworld/software/apache-hive-3.1.2-bin
export HIVE_CONF_DIR=$HIVE_HOME/conf
export HIVE_AUX_JARS_PATH=/home/helloworld/software/apache-hive-3.1.2-bin/lib
9、下载数据库驱动:
这里我放入的是这个:mysql-connector-java-5.1.28-bin.jar 。注意结尾是带 bin 的jar。
将下好的文件解压后上传到Hive的lib文件夹下。
三、启动 Hive: [helloworld@localhost bin]$ ./hive
1、进入hive的bin目录,进行初始化:
[helloworld@localhost bin]$ schematool -dbType mysql -initSchema
若出现“未找到命令”,就在前面加上 “ ./ ” 试一试。
出现以下信息代表初始化成功。若出现错误(这里是出错最多的地方),可以网上搜索一下,根据错误寻找解决方法,还是挺麻烦的,要有耐心,最后会给一些参考文章,有错误可以借鉴借鉴。
SLF4J: Class path contains multiple SLF4J bindings.
SLF4J: Found binding in [jar:file:/Hive/hive-3.1.2/lib/log4j-slf4j-impl-2.6.2.jar!/org/slf4j/impl/StaticLoggerBinder.class]
SLF4J: Found binding in [jar:file:/Hadoop/hadoop-3.2.0/share/hadoop/common/lib/slf4j-log4j12-1.7.10.jar!/org/slf4j/impl/StaticLoggerBinder.class]
SLF4J: See http://www.slf4j.org/codes.html#multiple_bindings for an explanation.
SLF4J: Actual binding is of type [org.apache.logging.slf4j.Log4jLoggerFactory]
Metastore connection URL:   jdbc:mysql://master:3306/metastore?createDatabaseIfNotExist=true
Metastore Connection Driver :    com.mysql.jdbc.Driver
Metastore connection User:   root
Sun Mar 04 15:30:33 CST 2018 WARN: Establishing SSL connection without server's identity verification is not recommended. According to MySQL 5.5.45+, 5.6.26+ and 5.7.6+ requirements SSL connection must be established by default if explicit option isn't set. For compliance with existing applications not using SSL the verifyServerCertificate property is set to 'false'. You need either to explicitly disable SSL by setting useSSL=false, or set useSSL=true and provide truststore for server certificate verification.
Starting metastore schema initialization to 3.1.2
Initialization script hive-schema-3.1.2.mysql.sql
Sun Mar 04 15:30:34 CST 2018 WARN: Establishing SSL connection without server's identity verification is not recommended. According to MySQL 5.5.45+, 5.6.26+ and 5.7.6+ requirements SSL connection must be established by default if explicit option isn't set. For compliance with existing applications not using SSL the verifyServerCertificate property is set to 'false'. You need either to explicitly disable SSL by setting useSSL=false, or set useSSL=true and provide truststore for server certificate verification.
Initialization script completed
Sun Mar 04 15:30:36 CST 2018 WARN: Establishing SSL connection without server's identity verification is not recommended. According to MySQL 5.5.45+, 5.6.26+ and 5.7.6+ requirements SSL connection must be established by default if explicit option isn't set. For compliance with existing applications not using SSL the verifyServerCertificate property is set to 'false'. You need either to explicitly disable SSL by setting useSSL=false, or set useSSL=true and provide truststore for server certificate verification.
schemaTool completed
往往会出现的错误:

也就是在hive-site.xml文件的3215行有个特殊字符,删除掉for:(因为行数不确定,可以直接查找到这个字符,然后删掉就行):
<description>
Ensures commands with OVERWRITE (such as INSERT OVERWRITE) acquire Exclusive locks fortransactional tables. This ensures that inserts (w/o overwrite) running concurrently
are not hidden by the INSERT OVERWRITE.
</description>
然后再执行初始化命令即可。
2、启动 hive
启动hive,出现以下信息,特别是出现 hive>,说明安装成功了。
[helloworld@localhost bin]$ ./hive
SLF4J: Class path contains multiple SLF4J bindings.
SLF4J: Found binding in [jar:file:/home/helloworld/software/apache-hive-3.1.2-bin/lib/log4j-slf4j-impl-2.10.0.jar!/org/slf4j/impl/StaticLoggerBinder.class]
SLF4J: Found binding in [jar:file:/home/helloworld/software/hadoop-3.2.0/share/hadoop/common/lib/slf4j-log4j12-1.7.25.jar!/org/slf4j/impl/StaticLoggerBinder.class]
SLF4J: See http://www.slf4j.org/codes.html#multiple_bindings for an explanation.
SLF4J: Actual binding is of type [org.apache.logging.slf4j.Log4jLoggerFactory]
which: no hbase in (/usr/local/bin:/usr/local/sbin:/usr/bin:/usr/sbin:/bin:/sbin:/home/helloworld/software/jdk1.8.0_221/bin:/home/helloworld/software/hadoop-3.2.0/bin:HIVE_HOME/bin:/home/helloworld/.local/bin:/home/helloworld/bin)
SLF4J: Class path contains multiple SLF4J bindings.
SLF4J: Found binding in [jar:file:/home/helloworld/software/apache-hive-3.1.2-bin/lib/log4j-slf4j-impl-2.10.0.jar!/org/slf4j/impl/StaticLoggerBinder.class]
SLF4J: Found binding in [jar:file:/home/helloworld/software/hadoop-3.2.0/share/hadoop/common/lib/slf4j-log4j12-1.7.25.jar!/org/slf4j/impl/StaticLoggerBinder.class]
SLF4J: See http://www.slf4j.org/codes.html#multiple_bindings for an explanation.
SLF4J: Actual binding is of type [org.apache.logging.slf4j.Log4jLoggerFactory]
Hive Session ID = a185690b-5f92-43f6-8b90-78eba902b337

Logging initialized using configuration in file:/home/helloworld/software/apache-hive-3.1.2-bin/conf/hive-log4j2.properties Async: true
Hive-on-MR is deprecated in Hive 2 and may not be available in the future versions. Consider using a different execution engine (i.e. spark, tez) or using Hive 1.X releases.
Hive Session ID = 34c0e86b-2a08-4db6-bd27-5c5fc2bdcfd4
hive>
输入show functions;出现以下信息,说明 hive 安装成功。
安装成功后如果想尝试hive的用法,可以参考一下:https://blog.csdn.net/weixin_43207025/article/details/101065705
hive> show functions;
OK
!
!=
$sum0
%
&
*
+
-
/
<
<=
<=>
<>
=
........
