- 前言
在此之前,我在单元测试的时候,往往会单独创建一个Demo去进行功能实现,这俩天正好闲下来,所以快速的掌握了一下这个知识点,挺简单的,下面看图说话,看完你就出师了
- 使用步骤
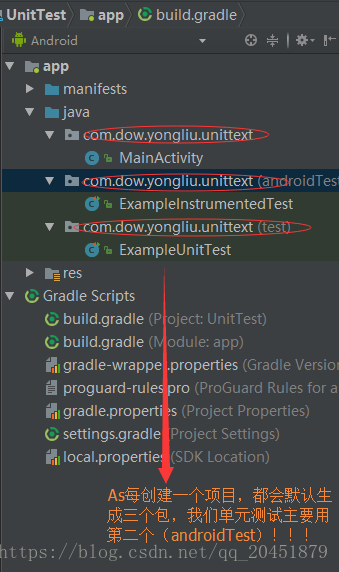
1.创建项目,识别每个包的作用
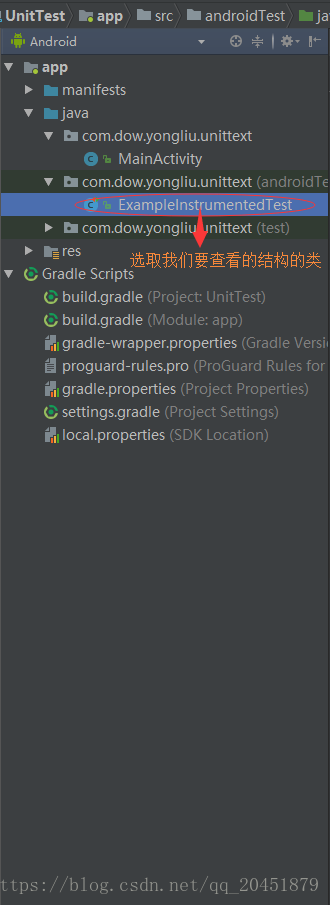
2.选取对应包名下的类名,点击左侧的 Structure(结构)
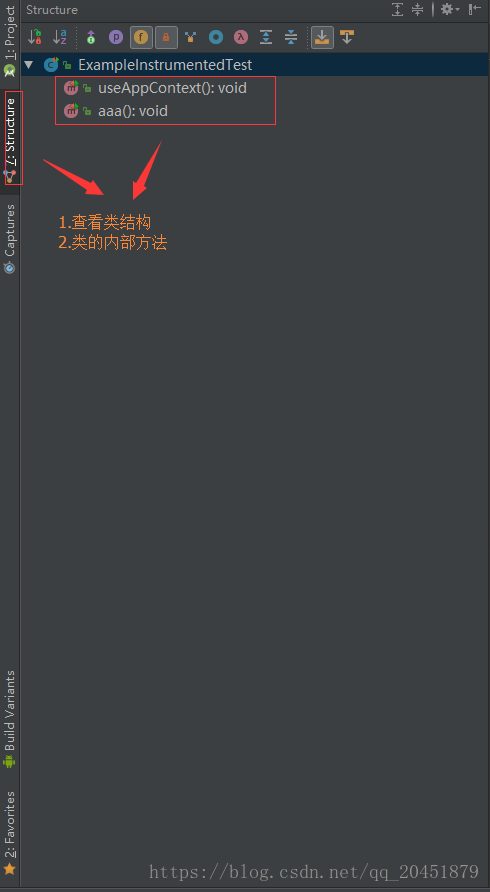
3.查看当前选取测试类的内部方法,这里的aaa()是我自己进行测试一个方法
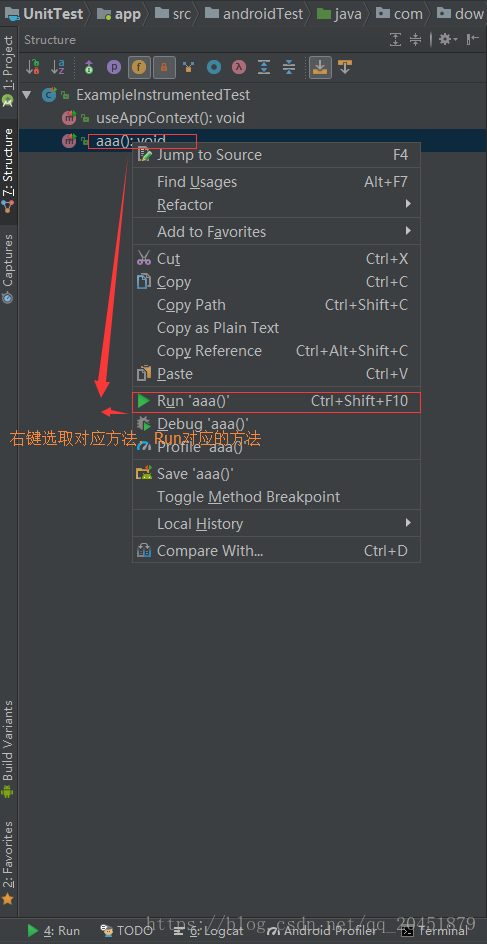
4.选取对应方法Run起来
ExampleInstrumentedTest:
package com.dow.yongliu.unittext;

import android.content.Context;
import android.support.test.InstrumentationRegistry;
import android.support.test.runner.AndroidJUnit4;
import android.util.Log;

import org.junit.Test;
import org.junit.runner.RunWith;

import static org.junit.Assert.*;

/**
 * Instrumented test, which will execute on an Android device.
 * @see <a href="http://d.android.com/tools/testing">Testing documentation</a>
 */
@RunWith(AndroidJUnit4.class)
public class ExampleInstrumentedTest {
    @Test
    public void useAppContext() throws Exception {
        // Context of the app under test.
        Context appContext = InstrumentationRegistry.getTargetContext();

        assertEquals("com.dow.yongliu.myapplication", appContext.getPackageName());
    }

    @Test
    public void aaa(){
        Log.e("tag","测试方法执行完毕");
    }
}
5.运行通过,我是Logcat进行结果查询

- 创建自己的单元测试
1.在单元测试包下,创建我们自己的Test类(注意图中的俩处注解)
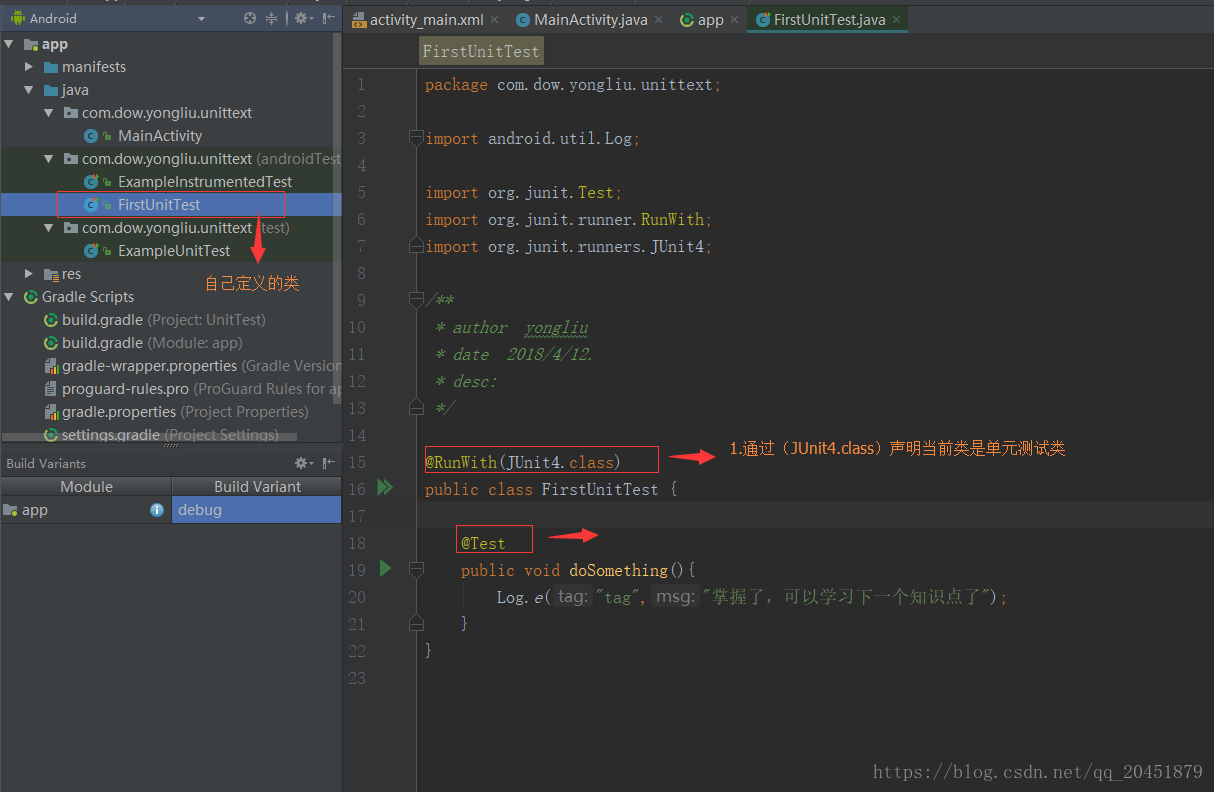
2.老方法,Run起来

- 注意事项
1.上图的每个Run后的结果都是正确的,只是图片有一丢丢的模糊
2.写自己的方法时候,一定要声明权限,一般为Public
3.测试类一定要在androidTest包下
4.测试类加入注解@RunWith(AndroidJUnit4.class) 或者 @RunWith(JUnit4.class)
5.测试方法加入注解 @Test
在较早的一篇博文中,有这样的一段话:
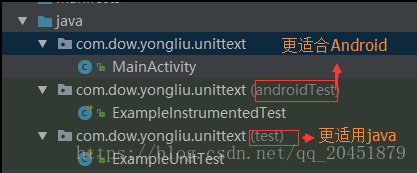
Build Variants的选择很重要,如果选择Unit Tests,Android的测试用例就会不被识别,反之Java的测试用例不被识别,所以在跑测试用例时一定选对标签。
经我理解,就是测试的时候要选择正确的区间,因为单元测试给了我们俩个包!一个是androidTest,一个是test!
如果不明,请看下图!
个人认为,在AndroidStudio内部进行单元测试,均在androidTest下写测试类和测试方法即可!如果以后我遇到这类型问题,我会来补足不足之处!