文章目录

Step1.确认操作系统的版本
[root@artisan ~]# cat /etc/redhat-release
CentOS Linux release 7.7.1908 (Core)
[root@artisan ~]#
CentOS7 及以上版本 默认安装了 MariaDB ,MariaDB是MySQL源代码的一个分支, 该分支完全兼容MySQL 。
CentOS 7为什么放弃了MySQL,而改使用MariaDB?。简言之,MySQL被Oracle收购后,为了避免后续的法律纠纷,好多操作系统厂商都集成了开源免费的MariaDB了。
Step2. 检查并卸载MariaDB
yum list installed | grep mariadb  ---- 查询已安装的mariadb

yum -y remove mariadb*  ----- 移除已安装的mariadb
[root@artisan ~]# yum list installed | grep mariadb
mariadb-libs.x86_64               1:5.5.35-3.el7                       @anaconda
mariadb-libs.x86_64               1:5.5.64-1.el7                       installed
[root@artisan ~]#
[root@artisan ~]# yum -y remove mariadb*
......
......
......
Complete!
[root@artisan ~]#
[root@artisan ~]#
重新查看,确保写在完成
[root@artisan ~]# yum list installed | grep mariadb
[root@artisan ~]#
Step3. 下载RPM
访问: https://dev.mysql.com/downloads/repo/yum/
[root@artisan ~]# cd /usr/local/
[root@artisan local]# mkdir mysql
[root@artisan local]# cd mysql
[root@artisan mysql]#

[root@artisan mysql]# wget https://dev.mysql.com/get/mysql57-community-release-el7-11.noarch.rpm

如果想要确认下载的文件是否完整,可通过md5sum生成MD5值并确保同官方网站上的MD5值相同,以确保文件无损坏。
[root@artisan mysql]# md5sum mysql57-community-release-el7-11.noarch.rpm
c070b754ce2de9f714ab4db4736c7e05  mysql57-community-release-el7-11.noarch.rpm
[root@artisan mysql]#
Step4. 安装rpm包 并确认yum源
[root@artisan mysql]# rpm -ivh mysql57-community-release-el7-11.noarch.rpm

[root@artisan mysql]# yum repolist enabled | grep "mysql.*-community.*"

查看 MySQL 版本
[root@artisan mysql]# yum repolist all | grep mysql

Step5. 安装 MySQL
[root@artisan mysql]# yum install mysql-community-server
一路y即可 ,下载安装,静候…

Step6. 启动 MySQL
[root@artisan mysql]# systemctl start mysqld
[root@artisan mysql]#
查看进程
[root@artisan mysql]# ps -ef|grep mysqld |grep -v grep
mysql    118107      1  0 23:46 ?        00:00:00 /usr/sbin/mysqld --daemonize --pid-file=/var/run/mysqld/mysqld.pid
[root@artisan mysql]#
https://blog.csdn.net/u011886447/article/details/79796802
Step7. 登录MySQL
[root@artisan mysql]# mysql -u root
ERROR 1045 (28000): Access denied for user 'root'@'localhost' (using password: NO)
[root@artisan mysql]#
刚安装的 MySQL 是没有密码的,所以需要设置密码
-
① 停止 MySQL 服务:
systemctl stop mysqld -
② 以不检查权限的方式启动 MySQL:
mysqld --user=root --skip-grant-tables & -
③ 再次输入
mysql -u root或者mysql,这次就可以进来了。 -
④ 更新密码:
MySQL 5.7 以下版本:

UPDATE mysql.user SET Password=PASSWORD('artisan') where USER='root';

MySQL 5.7 版本:

UPDATE mysql.user SET authentication_string=PASSWORD('artisan') where USER='root';
- ⑤ 刷新:
flush privileges;
⑥ 退出:exit;
设置完之后,输入 mysql -u root -p,这时输入刚设置的密码,就可以登进数据库了。
[root@artisan mysql]# mysql -u root -p
Enter password:
Welcome to the MySQL monitor. Commands end with ; or \g.
Your MySQL connection id is 4
Server version: 5.7.29
Copyright (c) 2000, 2020, Oracle and/or its affiliates. All rights reserved.
Oracle is a registered trademark of Oracle Corporation and/or its
affiliates. Other names may be trademarks of their respective
owners.
Type 'help;' or '\h' for help. Type '\c' to clear the current input statement.
mysql>
mysql>
mysql> use mysql;
ERROR 1820 (HY000): You must reset your password using ALTER USER statement before executing this statement.
mysql>
mysql> use mysql;
ERROR 1820 (HY000): You must reset your password using ALTER USER statement before executing this statement.
mysql>
mysql> SET PASSWORD = PASSWORD('artisan');
Query OK, 0 rows affected, 1 warning (0.00 sec)
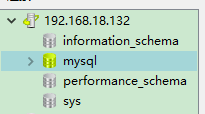
mysql> show databases;
+--------------------+
| Database |
+--------------------+
| information_schema |
| mysql |
| performance_schema |
| sys |
+--------------------+
4 rows in set (0.00 sec)
mysql>
Step8. 开启远程访问
[root@artisan mysql]# mysql -u root -p
Enter password:
Welcome to the MySQL monitor.  Commands end with ; or \g.
Your MySQL connection id is 6
Server version: 5.7.29 MySQL Community Server (GPL)

Copyright (c) 2000, 2020, Oracle and/or its affiliates. All rights reserved.

Oracle is a registered trademark of Oracle Corporation and/or its
affiliates. Other names may be trademarks of their respective
owners.

Type 'help;' or '\h' for help. Type '\c' to clear the current input statement.

mysql>
mysql>
mysql>
mysql> use mysql;
Reading table information for completion of table and column names
You can turn off this feature to get a quicker startup with -A

Database changed
mysql> update user set host = '%' where user = 'root';
Query OK, 1 row affected (0.29 sec)
Rows matched: 1  Changed: 1  Warnings: 0

mysql> FLUSH PRIVILEGES;
Query OK, 0 rows affected (0.01 sec)

mysql>
其他方式 参考 :mysql开启远程访问权限

mysql> insert into user (host, user, password) values('192.168.0.51','root',password('123'));

GRANT ALL PRIVILEGES ON *.* TO 'myuser'@'%'IDENTIFIED BY 'mypassword' WITH GRANT OPTION;
grant all privileges on *.* to 'root'@'192.168.0.49'identified by '123' with grant option;
常见错误
[ERROR] --initialize specified but the data directory has files in it. Aborting.
[root@artisan mysql]# systemctl start mysqld
Job for mysqld.service failed because the control process exited with error code. See "systemctl status mysqld.service" and "journalctl -xe" for details.
[root@artisan mysql]# systemctl status mysqld.service
● mysqld.service - MySQL Server
   Loaded: loaded (/usr/lib/systemd/system/mysqld.service; enabled; vendor preset: disabled)
   Active: deactivating (final-sigterm) (Result: exit-code)
     Docs: man:mysqld(8)
           http://dev.mysql.com/doc/refman/en/using-systemd.html
  Process: 28796 ExecStart=/usr/sbin/mysqld --daemonize --pid-file=/var/run/mysqld/mysqld.pid $MYSQLD_OPTS (code=exited, status=1/FAILURE)
  Process: 28773 ExecStartPre=/usr/bin/mysqld_pre_systemd (code=exited, status=0/SUCCESS)
   CGroup: /system.slice/mysqld.service
           └─28799 /usr/sbin/mysqld --daemonize --pid-file=/var/run/mysqld/mysqld.pid

Jan 27 08:55:43 artisan systemd[1]: mysqld.service holdoff time over, scheduling restart.
Jan 27 08:55:43 artisan systemd[1]: Stopped MySQL Server.
Jan 27 08:55:43 artisan systemd[1]: Starting MySQL Server...
Jan 27 08:55:43 artisan mysqld_pre_systemd[28773]: 2020-01-27T00:55:43.664988Z 0 [Warning] TIMESTAMP with implicit DEFAULT value is deprecated. Please use --explicit... details).
Jan 27 08:55:43 artisan mysqld_pre_systemd[28773]: 2020-01-27T00:55:43.685134Z 0 [ERROR] --initialize specified but the data directory has files in it. Aborting.
Jan 27 08:55:43 artisan mysqld_pre_systemd[28773]: 2020-01-27T00:55:43.685213Z 0 [ERROR] Aborting
Jan 27 08:55:44 artisan systemd[1]: mysqld.service: control process exited, code=exited status=1
Hint: Some lines were ellipsized, use -l to show in full.
[root@artisan mysql]# systemctl start firewalld
[root@artisan mysql]#
[root@artisan mysql]#
找下关键的信息: [ERROR] --initialize specified but the data directory has files in it. Aborting.
既然说了data directory不为空,那就去/etc/my.cnf 配置文件看下mysql的配置去吧

到这个datadir指定的目录下去瞅瞅吧

确实不为空。 那按照信息提示,那就清空了再启呗
结果验证,清了也没用,依然是这个错,那就…
解决办法
MySQL的官网上找找吧
https://bugs.mysql.com/bug.php?id=79442

那就关闭 SELinux 吧
CentOS7关闭SELinux吧
[root@artisan mysql]# getenforce
Enforcing

# 临时变更

# 设置SELinux 成为permissive模式
# setenforce 1 设置SELinux 成为enforcing模式


[root@artisan mysql]# setenforce 0
[root@artisan mysql]# getenforce
Permissive
[root@artisan mysql]#
永久改变

将SELINUX=enforcing改为SELINUX=disabled ,重启生效
Initialization of mysqld failed: 0

查看下 mysql的日志 /var/log/mysqld.log

解决办法
那就重新停一次吧
[root@artisan mysql]# ps aux|grep mysql
mysql    117306  5.7 17.4 1122336 174664 ?      Sl   23:33   0:01 /usr/sbin/mysqld --daemonize --pid-file=/var/run/mysqld/mysqld.pid
root     117352  0.0  0.0 112716   960 pts/1    R+   23:34   0:00 grep --color=auto mysql
[root@artisan mysql]# systemctl stop mysqld
[root@artisan mysql]# ps aux|grep mysql
root     117379  0.0  0.0 112716   964 pts/1    S+   23:34   0:00 grep --color=auto mysql
kill 不行,每次都会自动拉起。
然后重启mysql
[root@artisan mysql]# systemctl start  mysqld
[root@artisan mysql]#
[root@artisan mysql]#
[root@artisan mysql]#
[root@artisan mysql]# ps -ef|grep mysql
mysql    117703      1  8 23:40 ?        00:00:00 /usr/sbin/mysqld --daemonize --pid-file=/var/run/mysqld/mysqld.pid
root     117739  74961  0 23:40 pts/1    00:00:00 grep --color=auto mysql
MySQL启停
#启动mysql
[root@artisan mysql]systemctl start mysqld
 #停止mysqld
[root@artisan mysql]systemctl stop mysqld
 #重启mysqld
[root@artisan mysql]systemctl restart mysqld
 #设置开机启动
[root@artisan mysql]systemctl enable mysqld
 #查看 MySQL Server 状态
[root@artisan mysql]systemctl status mysqld
防火墙的相关设置
生产环境一般我们都是不会关闭防火墙的,所以开放特定端口即可。
# 查看防火墙状态

[root@artisan mysql]# systemctl status firewalld
● firewalld.service - firewalld - dynamic firewall daemon
   Loaded: loaded (/usr/lib/systemd/system/firewalld.service; disabled; vendor preset: enabled)
   Active: inactive (dead)

# 打开防火墙
[root@artisan mysql]# systemctl start firewalld
# 防火墙状态

[root@artisan mysql]# systemctl status firewalld
● firewalld.service - firewalld - dynamic firewall daemon
   Loaded: loaded (/usr/lib/systemd/system/firewalld.service; disabled; vendor preset: enabled)
   Active: active (running) since Tue 2020-01-28 02:43:15 CST; 9s ago
 Main PID: 127040 (firewalld)
   CGroup: /system.slice/firewalld.service
           └─127040 /usr/bin/python -Es /usr/sbin/firewalld --nofork --nopid

Jan 28 02:43:14 artisan systemd[1]: Starting firewalld - dynamic firewall daemon...
Jan 28 02:43:15 artisan systemd[1]: Started firewalld - dynamic firewall daemon.

# 开放 3306 端口  TCP UDP


[root@artisan mysql]# firewall-cmd --permanent --zone=public --add-port=3306/tcp
success
[root@artisan mysql]#
[root@artisan mysql]# firewall-cmd --permanent --zone=public --add-port=3306/udp
success
[root@artisan mysql]#
[root@artisan mysql]# firewall-cmd --reload
success
[root@artisan mysql]#

# CentOS 7,需要将 MySQL 服务加入防火墙,重启防火墙


[root@artisan mysql]# firewall-cmd --zone=public --permanent --add-service=mysql
success
[root@artisan mysql]#
[root@artisan mysql]# systemctl restart firewalld
[root@artisan mysql]#
