操作系统:
| centos版本 | 7.4 |
| 防火墙 | 关闭 |
| selinux | 关闭 |
| elasticsearch版本 | 6.3.2 |
| java版本 | 1.8 |
| server1 | 192.168.10.126 |
| server2 | 192.168.10.127 |

[root@server1 ~]# wget -c https://artifacts.elastic.co/downloads/elasticsearch/elasticsearch-6.3.2.tar.gz
[root@server1 ~]# tar zxf elasticsearch-6.3.2.tar.gz -C /usr/local/
[root@server1 ~]# yum -y install java
[root@server1 ~]# vim /etc/hosts
192.168.10.126 server1
192.168.10.127 server2
192.168.10.128 server3
[root@server1 ~]# vim /etc/profile
export ELASTICSEARCH_HOME=/usr/local/elasticsearch-6.3.2
export PATH=$ELASTICSEARCH_HOME/bin:$PATH
[root@server1 ~]# source /etc/profile
[root@server1 ~]# useradd elasticsearch
[root@server1 ~]# chown elasticsearch.elasticsearch /usr/local/elasticsearch-6.3.2/ -R
[root@server1 ~]# vim /etc/security/limits.conf
#最大用户进程数
* soft nproc 20480
* hard nproc 20480
#调整进程最大打开文件描述符
* soft nofile 65536
* hard nofile 65536
#最大锁定内存地址空间
* soft memlock unlimited
* hard memlock unlimited
[root@server1 ~]# vim /etc/sysctl.conf
#配置系统最大打开文件描述符
fs.file-max=655360
#限制一个Java线程数量,进程可以拥有的VMA(虚拟内存区域)的大小
vm.max_map_count = 262144
[root@server1 ~]# vim /etc/security/limits.d/20-nproc.conf
* soft nproc 4096
#root soft nproc unlimited
* soft nproc 20480
[root@server1 ~]# vim /usr/local/elasticsearch-6.3.2/config/jvm.options
#设置java内存资源使用为物理内存的一半
-Xms1g
-Xmx1g
[root@server1 ~]# vim /usr/local/elasticsearch-6.3.2/config/elasticsearch.yml
#集群名称
cluster.name: esbigdata
#节点名
node.name: server1
#指定该节点是否有资格被选举为主,默认为true
node.master: true
#指定该节点是否存储索引数据
node.data: true
#设置索引数据的存储路径
path.data: /data/elasticsearch
#设置日志文件存储路径
path.logs: /usr/local/elasticsearch-6.3.2/logs
#设置为true用来锁住物理内存
bootstrap.memory_lock: true
#设置提供服务的ip地址
network.host: 0.0.0.0
#设置提供服务的http端口
http.port: 9200
#设置集群中最少的主节点数,默认为1
discovery.zen.minimum_master_nodes: 1
#设置集群中master节点的初始列表,master节点初始列表中对应的端口时9300,即为集群交互通信端口
discovery.zen.ping.unicast.hosts: ["192.168.10.126:9300", "192.168.10.127:9300"]
[root@server1 ~]# sysctl -p
[root@server1 ~]# mkdir -p /data/elasticsearch
[root@server1 ~]# chmod 755 /data/elasticsearch
[root@server1 ~]# chmod 755 /data/elasticsearch -R
[root@server1 ~]# chown elasticsearch.elasticsearch -R /data/elasticsearch
[root@server1 ~]# su - elasticsearch
[elasticsearch@server1 ~]$ cd /usr/local/elasticsearch-6.3.2/bin/
#切换到elasticsearch用户启动服务,-d放到后台运行
[elasticsearch@server1 bin]$ elasticsearch -d
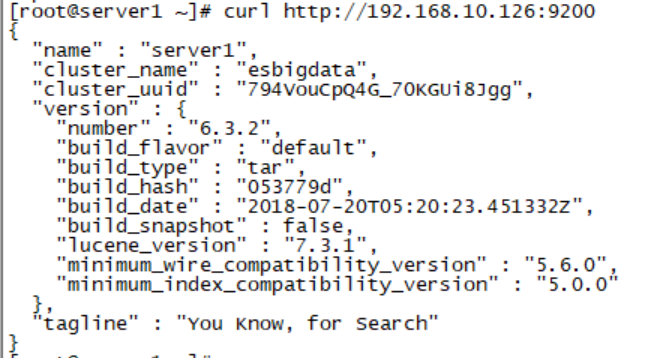
[root@server1 ~]# curl http://192.168.10.126:9200
#############################################################################
[root@server2 ~]# tar zxf elasticsearch-6.3.2.tar.gz -C /usr/local/
[root@server2 ~]# vim /etc/profile
export ELASTICSEARCH_HOME=/usr/local/elasticsearch-6.3.2
export PATH=$ELASTICSEARCH_HOME/bin:$PATH
[root@server2 ~]# source /etc/profile
[root@server2 ~]# vim /etc/hosts
192.168.10.126 server1
192.168.10.127 server2
192.168.10.128 server3
[root@server2 ~]# useradd elasticsearch
[root@server2 ~]# chown elasticsearch.elasticsearch /usr/local/elasticsearch-6.3.2/ -R
[root@server2 ~]# vim /etc/security/limits.conf
* soft nproc 20480
* hard nproc 20480
* soft nofile 65536
* hard nofile 65536
* soft memlock unlimited
* hard memlock unlimited
[root@server2 ~]# vim /etc/sysctl.conf
fs.file-max=655360
vm.max_map_count = 262144
[root@server2 ~]# vim /usr/local/elasticsearch-6.3.2/config/elasticsearch.yml
cluster.name: esbigdata
node.name: server1
node.master: true
node.data: true
path.data: /data/elasticsearch
path.logs: /usr/local/elasticsearch-6.3.2/logs
bootstrap.memory_lock: true
network.host: 0.0.0.0
http.port: 9200
discovery.zen.minimum_master_nodes: 1
discovery.zen.ping.unicast.hosts: ["192.168.10.126:9300", "192.168.10.127:9300"]
[root@server2 ~]# mkdir -p /data/elasticsearch
[root@server2 ~]# chmod 755 /data/elasticsearch
[root@server2 ~]# chmod 755 /data/elasticsearch -R
[root@server2 ~]# chown elasticsearch.elasticsearch -R /data/elasticsearch
[root@server2 ~]# chmod 755 -R /usr/local/elasticsearch-6.3.2
[root@server2 ~]# sysctl -p
[root@server1 ~]# curl http://192.168.10.126:9200
[root@server1 ~]# yum -y install nodejs npm git
[root@server1 ~]# git clone git://github.com/mobz/elasticsearch-head.git
#修改npm的源为淘宝国内镜像点
[root@server1 ~]# npm config set registry https://registry.npm.taobao.org/
[root@server1 local]# cd /usr/local/
[root@server1 local]# npm config set registry http://registry.npm.taobao.org/
[root@server1 local]# cd /usr/local/elasticsearch-head
[root@server1 elasticsearch-head]# npm install
[root@server1 _site]# cd /usr/local/elasticsearch-head/_site
[root@server1 _site]# vim app.js
4374 this.base_uri = this.config.base_uri || this.prefs.get("app-base_uri") || "http://192.168.10.126:9200";
[root@server1 _site]# vim /usr/local/elasticsearch-6.3.2/config/elasticsearch.yml
#表示开启跨域访问支持,默认为false
http.cors.enabled: true
#表示跨域访问允许的域名地址,可以使用正则表达式,这里的*表示允许所有域名访问
http.cors.allow-origin: "\*"
[root@server1 elasticsearch-head]# npm run start
浏览器里面输入:http://192.168.10.126:9100/
