这是一个Python 下应用opencv 的简单的功能演示程序,内容包括调用一个图片,图片显示,图片长宽尺寸显示,一个像素点的像素值显示,尺寸改变显示,旋转显示,模糊或降噪处理,绘图并显示。
这个原始代码来自 https://www.pyimagesearch.com/2016/11/21/raspbian-opencv-pre-configured-and-pre-installed/ 的一个教学讲稿。我做了一些修改。如果是安装了他的树莓派系统就包含了imutils包,否则需要安装imutils。
安装方法是:pip install imutils
或者是网上找到这个包,一个地址是:https://github.com/jrosebr1/imutils
解压后,在setup.py 所在目录下:python setup.py install 或者py setup.py install 看你系统下python 的命令。
调用图片
输入必要的包,
image=cv2.imread(p)就是调用图形文件。
这个是整个程序的必要部分,可以与下面程序片段任意组合。
# USAGE 使用方法
# python basics.py

# import the necessary packages 输入必要的包
import imutils  #没有安装的话,注释这个
import cv2
import os

# load the input image and show its dimensions, keeping in mind that
# images are represented as a multi-dimensional NumPy array with shape:
# num rows (height) * num columns (width) * num channels (depth)
#  p是文件名,这里要求文件所在目录有个子目录images, 其下有个图形文件,
#名字这里为shapes.png, 你可以取任何图形文件,但修改这个文件名字
p = os.path.sep.join(["images", "shapes.png"])
print(p);
image = cv2.imread(p)
获取图形的长宽,并显示
cv2.imshow("image",image) 就是显示图形。
cv2.waitKey(0) 等待输入按键,0是一直等待,也就是暂停

(h, w, d) = image.shape
print("width={}, height={}, depth={}".format(w, h, d))

# display the image to our screen -- we will need to click the window
# opened by OpenCV and press a key on our keyboard to continue execution
cv2.imshow("Image", image)
cv2.waitKey(0)
获取单个像素点的值并显示:
# access the RGB pixel located at x=430, y=200, keeping in mind that
# OpenCV stores images in BGR order rather than RGB (the pixel value
# at this location is part of the "red" in the jeep)
(B, G, R) = image[200, 430]
print("R={}, G={}, B={}".format(R, G, B))
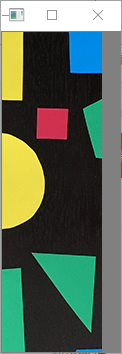
截取部分图形:

roi=image[80:400,150:250] 就是横向从80到400像素点,纵向从150到250
# extract a 100x100 pixel square ROI (Region of Interest) from the
# input image starting at x=150,y=80 and ending at x=250,y=400
roi = image[80:400, 150:250]
cv2.imshow("ROI", roi)
cv2.waitKey(0)
改变图形尺寸


resized=cv2.resize(image,(300,300) 把原图image 变为300,300.
这个比例可能不一致,要一致,可能需要计算下。
resized=imutils.resize(image,width=300) 这个是控制一致比例,宽度为300
# resize the image to 300x300px, ignoring aspect ratio
resized = cv2.resize(image, (300, 300))
cv2.imshow("Fixed Resizing", resized)
cv2.waitKey(0)

# resize the image, maintaining aspect ratio  保持比例,但需要imutils包
resized = imutils.resize(image, width=300)
cv2.imshow("Aspect Ratio Resize", resized)
cv2.waitKey(0)
旋转
这里是旋转45度

# rotate the image 45 degrees clockwise  旋转45度,需要imutils包
rotated = imutils.rotate(image, -45)
cv2.imshow("Rotation", rotated)
cv2.waitKey(0)
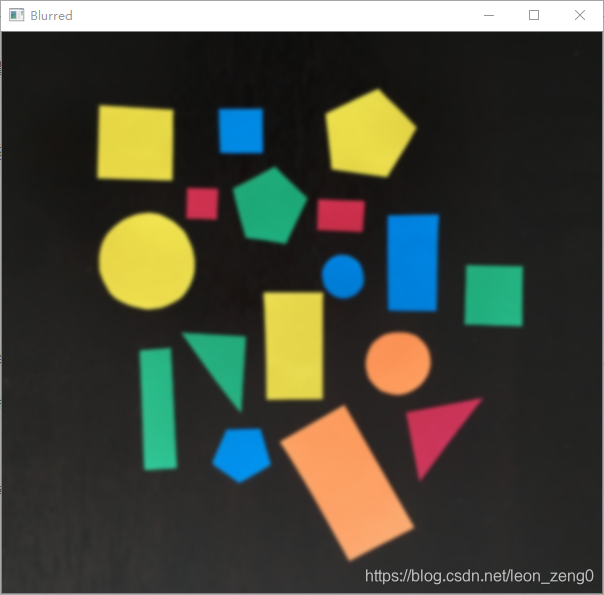
模糊或降噪处理

这个不直观,但是图像处理里的基本需要,降噪。这里是高斯降噪。
# apply a Gaussian blur with a 11x11 kernel to the image to smooth it,
# useful when reducing high frequency noise
blurred = cv2.GaussianBlur(image, (11, 11), 0)
cv2.imshow("Blurred", blurred)
cv2.waitKey(0)
绘制图形

分别绘制长方形,直线,园,文字,都有一个绘图的颜色参数
# draw a rectangle, circle, and line on the image, then draw text on
# the image as well
#长方形
cv2.rectangle(image, (150, 80), (250, 400), (255, 0, 255), 5)
#园
cv2.circle(image, (490, 240), 30, (255, 0, 0), -1)
#直线
cv2.line(image, (0, 0), (600, 457), (0, 0, 255), 5)
#文字
cv2.putText(image, "You're learning OpenCV!", (10, 435),
	cv2.FONT_HERSHEY_SIMPLEX, 0.7, (0, 255, 0), 2)
cv2.imshow("Drawing", image)
cv2.waitKey(0)
运行时窗口显示
分别显示文件名,长宽深度,一个像素的RGB,这是上面程序片段串联的显示结果

这些就是python 下opencv 的一些基本的简单功能演示,当然还有很多高级的功能。
最后给出上面组合在一起的完整程序,记住,第一部分可以和下面任一部分组合成为一个独立的程序。
# USAGE 使用方法
# python basics.py

# import the necessary packages 输入必要的包
import imutils  #没有安装的话,注释这个
import cv2
import os

# load the input image and show its dimensions, keeping in mind that
# images are represented as a multi-dimensional NumPy array with shape:
# num rows (height) * num columns (width) * num channels (depth)
#  p是文件名,这里要求文件所在目录有个子目录images, 其下有个图形文件,
#名字这里为shapes.png, 你可以取任何图形文件,但修改这个文件名字
p = os.path.sep.join(["images", "shapes.png"])
print(p);
image = cv2.imread(p)
(h, w, d) = image.shape
print("width={}, height={}, depth={}".format(w, h, d))

# display the image to our screen -- we will need to click the window
# opened by OpenCV and press a key on our keyboard to continue execution
cv2.imshow("Image", image)
cv2.waitKey(0)

# access the RGB pixel located at x=430, y=200, keeping in mind that
# OpenCV stores images in BGR order rather than RGB (the pixel value
# at this location is part of the "red" in the jeep)
(B, G, R) = image[200, 430]
print("R={}, G={}, B={}".format(R, G, B))

# extract a 100x100 pixel square ROI (Region of Interest) from the
# input image starting at x=150,y=80 and ending at x=250,y=400
roi = image[80:400, 150:250]
cv2.imshow("ROI", roi)
cv2.waitKey(0)

# resize the image to 300x300px, ignoring aspect ratio
resized = cv2.resize(image, (300, 300))
cv2.imshow("Fixed Resizing", resized)
cv2.waitKey(0)

# resize the image, maintaining aspect ratio  保持比例,但需要imutils包
resized = imutils.resize(image, width=300)
cv2.imshow("Aspect Ratio Resize", resized)
cv2.waitKey(0)

# rotate the image 45 degrees clockwise  旋转45度,需要imutils包
rotated = imutils.rotate(image, -45)
cv2.imshow("Rotation", rotated)
cv2.waitKey(0)

# apply a Gaussian blur with a 11x11 kernel to the image to smooth it,
# useful when reducing high frequency noise
blurred = cv2.GaussianBlur(image, (11, 11), 0)
cv2.imshow("Blurred", blurred)
cv2.waitKey(0)

# draw a rectangle, circle, and line on the image, then draw text on
# the image as well
#长方形
cv2.rectangle(image, (150, 80), (250, 400), (255, 0, 255), 5)
#园
cv2.circle(image, (490, 240), 30, (255, 0, 0), -1)
#直线
cv2.line(image, (0, 0), (600, 457), (0, 0, 255), 5)
#文字
cv2.putText(image, "You're learning OpenCV!", (10, 435),
	cv2.FONT_HERSHEY_SIMPLEX, 0.7, (0, 255, 0), 2)
cv2.imshow("Drawing", image)
cv2.waitKey(0)