前面我们已经学习过zabbix的安装部署步骤,那么在自动化运维方式下实现zabbix自动安装?今天,我们来学习zabbix全自动安装之playbook编程。
本实验是在上一篇实验基础上进行的:https://blog.csdn.net/CapejasmineY/article/details/103113503
一、简单回顾一下zabbix
zabbix([`zæbiks])是一个基于WEB界面的提供分布式系统监视以及网络监视功能的企业级的开源解决方案。
zabbix能监视各种网络参数,保证服务器系统的安全运营;并提供灵活的通知机制以让系统管理员快速定位/解决存在的各种问题。
zabbix由2部分构成,zabbix server与可选组件zabbix agent。
zabbix server可以通过SNMP,zabbix agent,ping,端口监视等方法提供对远程服务器/网络状态的监视,数据收集等功能,它可以运行在Linux,Solaris,HP-UX,AIX,Free BSD,Open BSD,OS X等平台上。
二、实验
2.1 实验环境
| 主机名 | ip | 服务 |
|---|---|---|
| server1 | 172.25.1.1 | ansible、zabbix-server、zabbix-agent |
| server2 | 172.25.1.2 | 远程主机hosts、db数据库 |
| server3 | 172.25.1.3 | 远程主机hosts、web前端 |
2.2 编写playbook
步骤一:定义Inventory(主机列表)文件:
/home/devops/ansible/hosts
[server]
172.25.1.2

[db]
172.25.1.1

[web]
172.25.1.3

[agent]
172.25.1.2
172.25.1.3
[zabbix:children]
server
web
db
步骤二:创建zabbix目录,存放需要的配置文件:
mkdir zabbix
步骤三:编写playbook
vim deploy.yml
---
- hosts: db  #对db组的主机进行操作
  tasks:   #任务
    - name: install mariadb
      yum:
        name: mariadb-server,MySQL-python  #服务名称
        state: present  #状态:安装

    - name: config mariadb  #配置数据库,安全初始化
      copy:
        src: my.cnf   #数据库安全初始化文件【1】
        dest: /etc/my.cnf
      notify: restart mariadb

    - name: start mariadb  #开启数据库
      service:
        name: '{{ item }}' #引用变量
        state: started
        enabled: yes
      loop:
        - mariadb
        - firewalld

    - name: create database zabbix  #创建数据库zabbix
      mysql_db:
        login_user: root
        login_password: westos
        name: zabbix
        state: present
      notify: import create.sql  #引用触发器

    - name: create user  #创建用户
      mysql_user:
        login_user: root
        login_password: westos
        name: zabbix
        password: zabbix
        host: '%'  #%是匹配所有host的主机,即接收所有主机访问【2】
        priv: 'zabbix.*:ALL'
        state: present

    - name: copy create.sql
      copy:
        src: create.sql.gz   #zabbix-server服务提供的数据库初始化包【3】
        dest: /tmp/create.sql.gz


    - name: config firewalld  #配置防火墙
      firewalld:
        service: mysql  #允许数据库服务的访问
        permanent: yes  #服务永久生效
        immediate: yes
        state: enabled  #防火墙状态enable

  handlers:  #触发器
    - name: restart mariadb   #名称必须与上面一致
      service:
        name: mariadb
        state: restarted

    - name: import create.sql  #将zabbix数据库初始化包导入数据库
      mysql_db:
        login_user: root
        login_password: westos
        name: zabbix
        state: import
        target: /tmp/create.sql.gz

- hosts: server
  tasks:
    - name: add zabbix repo #配置yum源
      yum_repository:
        name: zabbix
        description: zabbix 4.0
        baseurl: https://mirrors.aliyun.com/zabbix/zabbix/4.0/rhel/7/x86_64/
        gpgcheck: no

    - name: add update repo #添加版本较新的yum源,满足zabbix版本安装需求
      yum_repository:
        name: update
        description: non-supported
        baseurl: https://mirrors.aliyun.com/zabbix/non-supported/rhel/7/x86_64/
        gpgcheck: no

    - name: install zabbix-server
      yum:
        name: zabbix-server-mysql,zabbix-agent
        state: present

    - name: config zabbix-server
      copy:
        src: zabbix_server.conf #将现有目录的zabbix_server.conf配置文件复制到安装zabbix服务的主机上/etc/zabbix/zabbix_server.conf 【4】
        dest: /etc/zabbix/zabbix_server.conf
        owner: root
        group: zabbix
        mode: 640
      notify: restart zabbix-server  #触发器

    - name: start zabbix-server #开启服务
      service:
        name: "{{ item }}"
        state: started
      loop:
        - zabbix-server
        - zabbix-agent
        - firewalld

    - name: config firewalld #配置防火墙
      firewalld:
        port: 10051/tcp  #添加zabbix服务端口
        permanent: yes
        immediate: yes
        state: enabled

  handlers: #触发器
    - name: restart zabbix-server
      service:
        name: zabbix-server
        state: restarted

- hosts: web  #配置web主机
  tasks:  #配置yum源,满足高版本php安装包要求,否则在安装时会报错
    - name: add zabbix repo
      yum_repository:
        name: zabbix
        description: zabbix 4.0
        baseurl: https://mirrors.aliyun.com/zabbix/zabbix/4.0/rhel/7/x86_64/
        gpgcheck: no

    - name: add update repo
      yum_repository:
        name: update
        description: non-supported
        baseurl: https://mirrors.aliyun.com/zabbix/non-supported/rhel/7/x86_64/
        gpgcheck: no

    - name: add centos repo
      yum_repository:
        name: centos
        description: centos 7
        baseurl: https://mirrors.aliyun.com/centos/7/os/x86_64/
        gpgcheck: no

    - name: install zabbix-web
      yum:
        name: zabbix-web-mysql  # Zabbix的web端会通过数据库的数据来展示绘图
        state: present

    - name: config zabbix-web
      copy:
        src: zabbix.conf  #【5】
        dest: /etc/httpd/conf.d/zabbix.conf
      notify: restart httpd

    - name: start httpd
      service:
        name: "{{ item }}"
        state: started
      loop:
        - httpd
        - firewalld

    - name: config firewalld
      firewalld:
        service: http
        permanent: yes
        immediate: yes
        state: enabled


  handlers:
    - name: restart httpd
      service:
        name: httpd
        state: restarted


- hosts: server  #配置zabbix-agent
  tasks:
    - name: add zabbix repo
      yum_repository:
        name: zabbix
        description: zabbix 4.0
        baseurl: https://mirrors.aliyun.com/zabbix/zabbix/4.0/rhel/7/x86_64/
        gpgcheck: no

    - name: install zabbix-agent
      yum:
        name: zabbix-agent
        state: present

    - name: config zabbix-agent
      template:
        src: zabbix_agentd.conf.j2   #【6】
        dest: /etc/zabbix/zabbix_agentd.conf
        owner: root
        group: root
        mode: 644
      notify: restart zabbix-agent

    - name: start zabbix-agent
      service:
        name: "{{ item }}"
        state: started
      loop:
        - zabbix-agent
        - firewalld

    - name: config firewalld
      firewalld:
        port: 10050/tcp
        permanent: yes
        immediate: yes
        state: enabled

  handlers:
    - name: restart zabbix-agent
      service:
        name: zabbix-agent
        state: restarted
注:上述配置文件/home/devops/ansible/zabbix/deploy.yml写到的文件来源:
【1】数据库安全初始化文件 my.cnf
在server1上安装数据库mariadb-server,进行安全初始化,然后将生成的文件/eth/my.cnf拷贝到zabbix目录下。
sudo cp /eth/my.cnf .
【3】zabbix-server服务提供的数据库初始化包
提前在server1上安装zabbix-server-mysql
,生成配置文件 /usr/share/doc/zabbix-server-mysql-4.0.14/create.sql.gz,将其拷贝到zabbix目录下。
cp /usr/share/doc/zabbix-server-mysql-4.0.14/create.sql.gz zabbix/
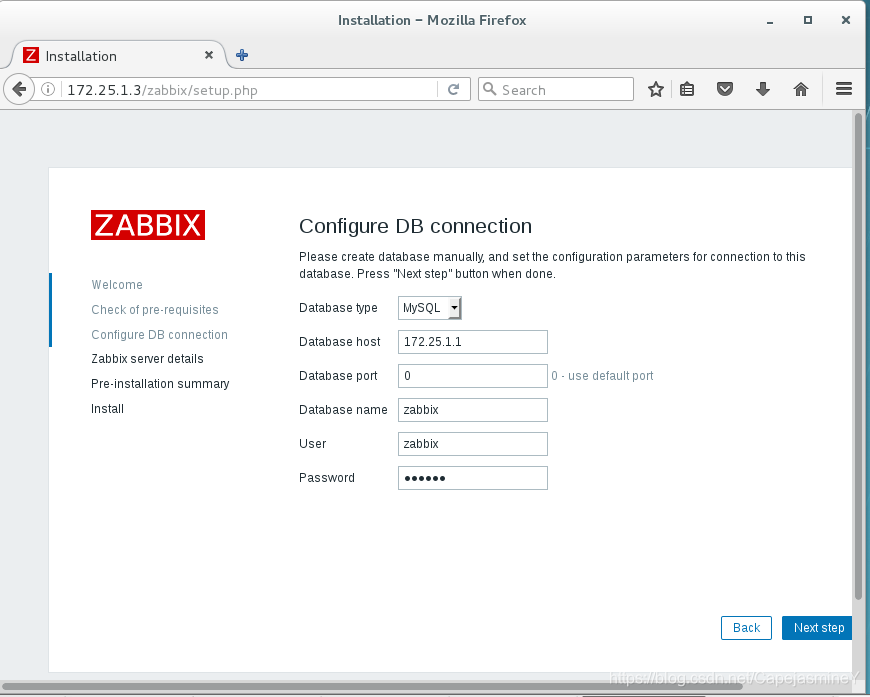
【4】修改zabbix_server.conf配置文件
提前在server1上安装zabbix-server,生成配置文件/etc/zabbix/zabbix_server.conf,复制到zabbix目录下,并做如下修改:
sudo chown devops.devops zabbix_server.conf  #修改所有人和所有组,直接复制过了所有人和所有组是root
vim zabbix_server.conf
 91 BHost=172.25.1.1
 116 DBUser=zabbix
 124 DBPassword= zabbix
 137 DBPort=3306
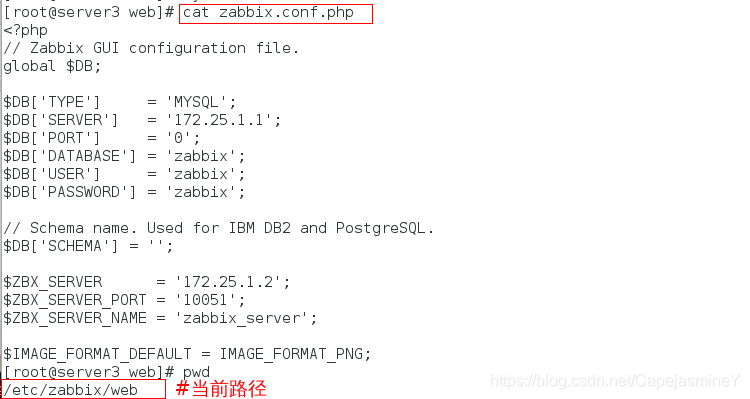
【5】安装zabbix-web和httpd后生成zabbix.conf文件,将其复制到zabbix目录下,并修改时区
sudo scp 172.25.1.3:/etc/httpd/conf.d/zabbix.conf zabbix/
vim zabbix.conf
	php_value date.timezone Asia/Shanghai
【6】
cp /etc/zabbix/zabbix_agentd.conf zabbix/
mv zabbix/zabbix_agentd.conf zabbix/zabbix_agentd.conf.j2
【2】%是匹配所有host的主机,即接收所有主机访问。
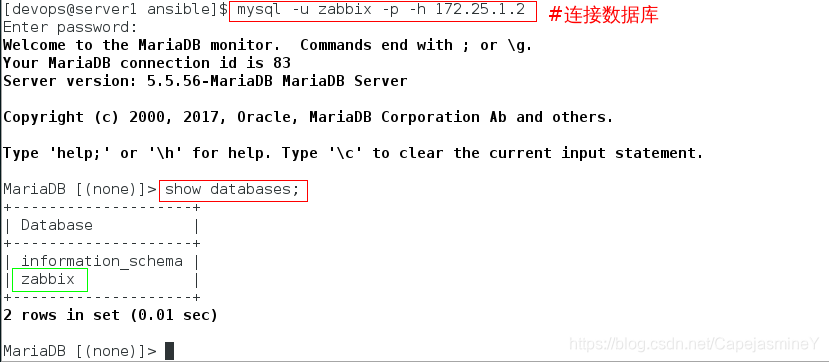
安装完成后,可测试一下数据库zabbix用户配置是否正确
将上述文件放到/home/devops/ansible/zabbix目录下:

步骤四:执行文件安装
ansible-playbook zabbix/deploy.yml
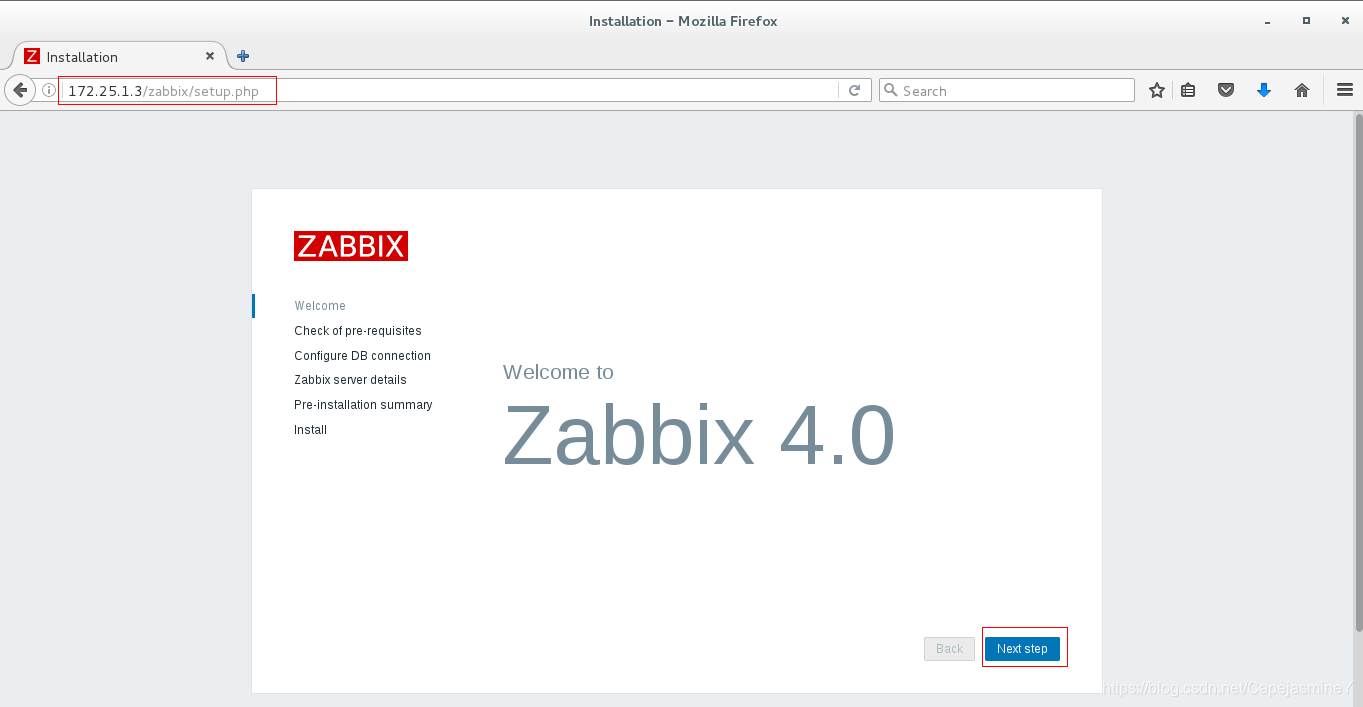
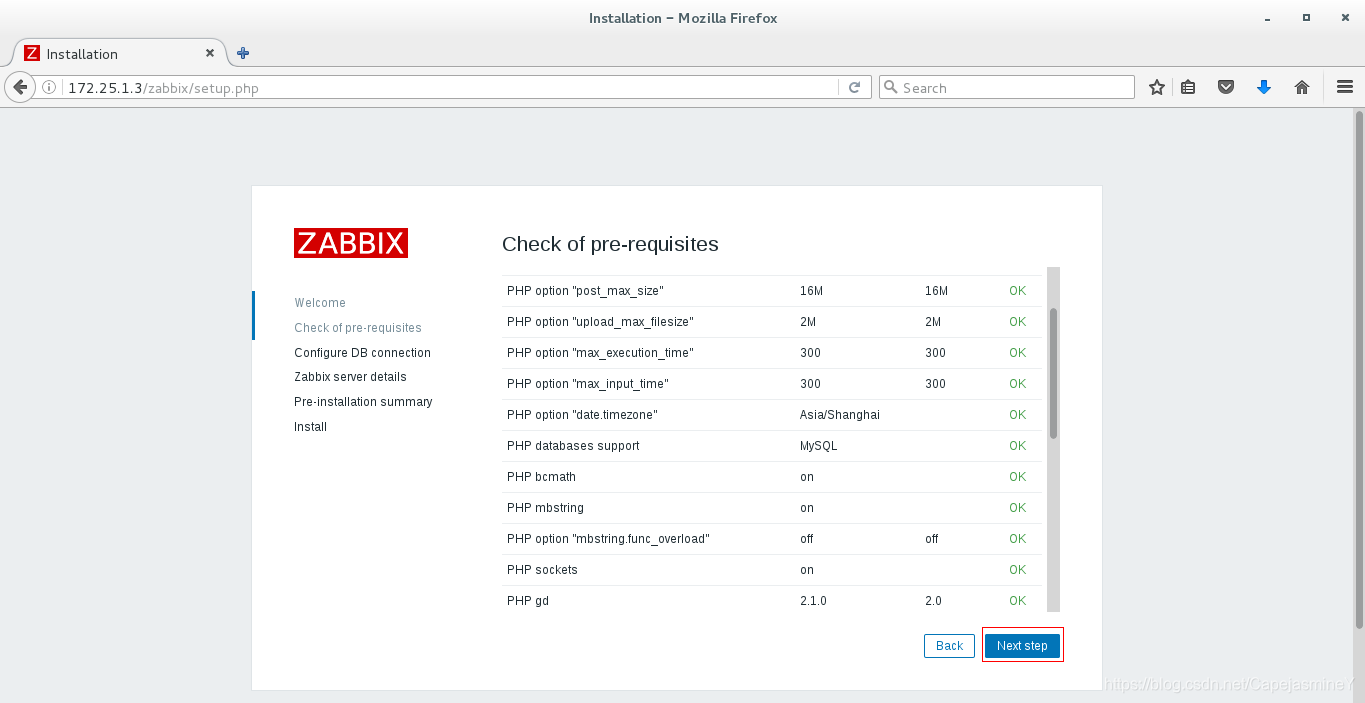
 步骤五:打开web界面搜索web主机
http://172.25.1.3/zabbix
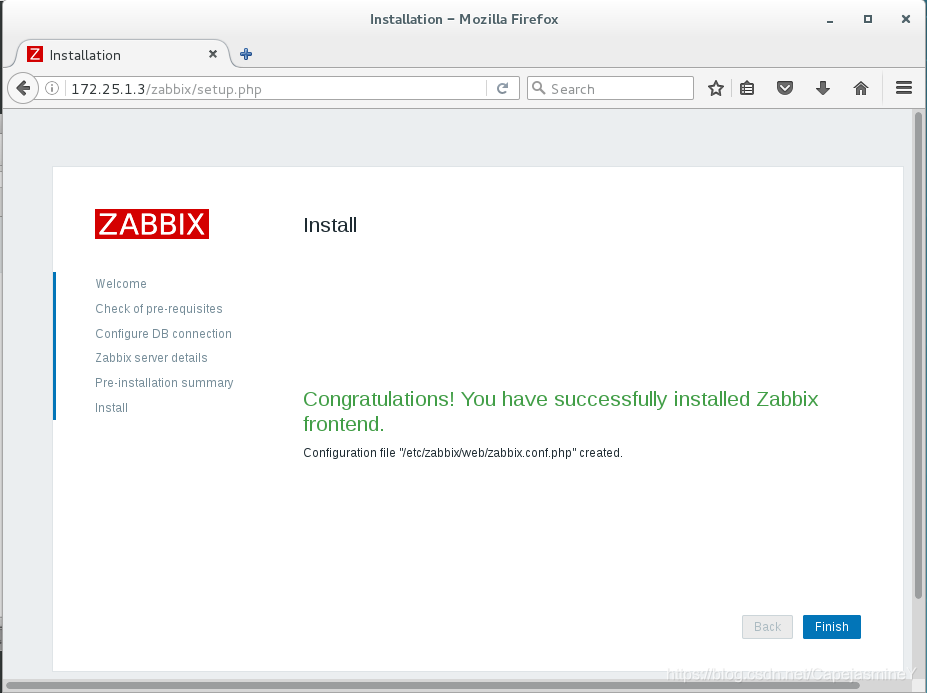
出现如下界面:
输入登陆信息:
Admin管理员身份登陆,密码zabbix:
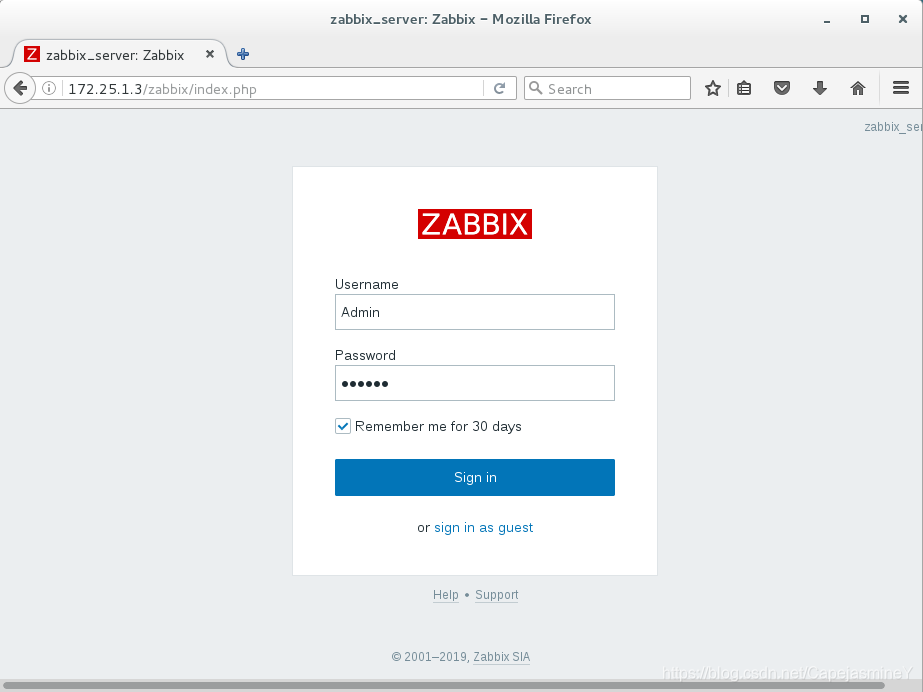 登陆界面:
登陆界面:

步骤六:验证web界面与zabbix及数据库连接信息
在web端(server3):

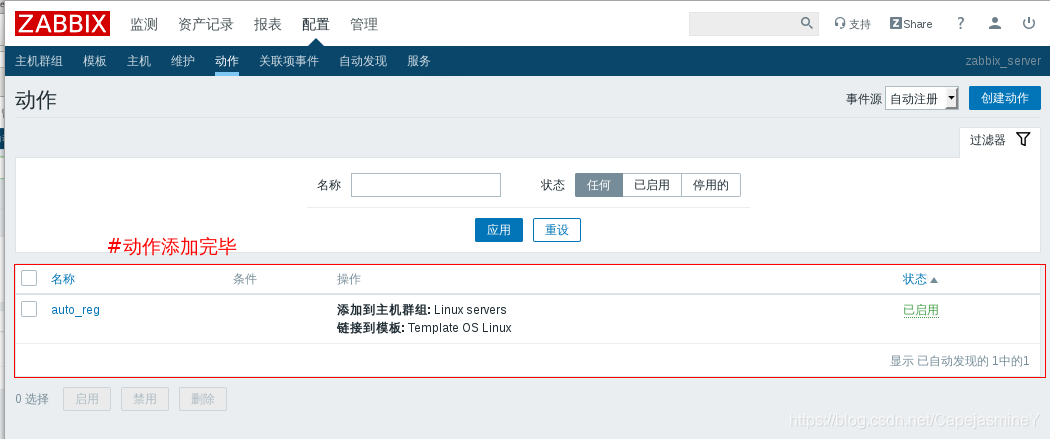
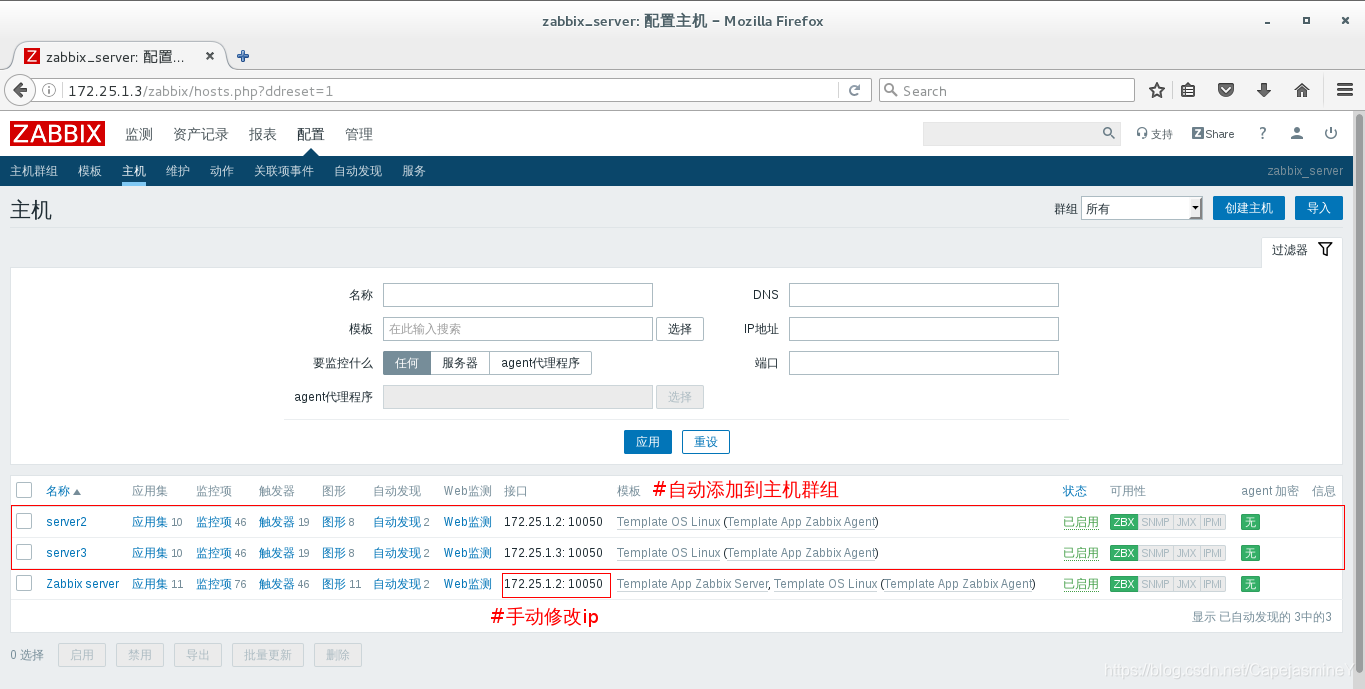
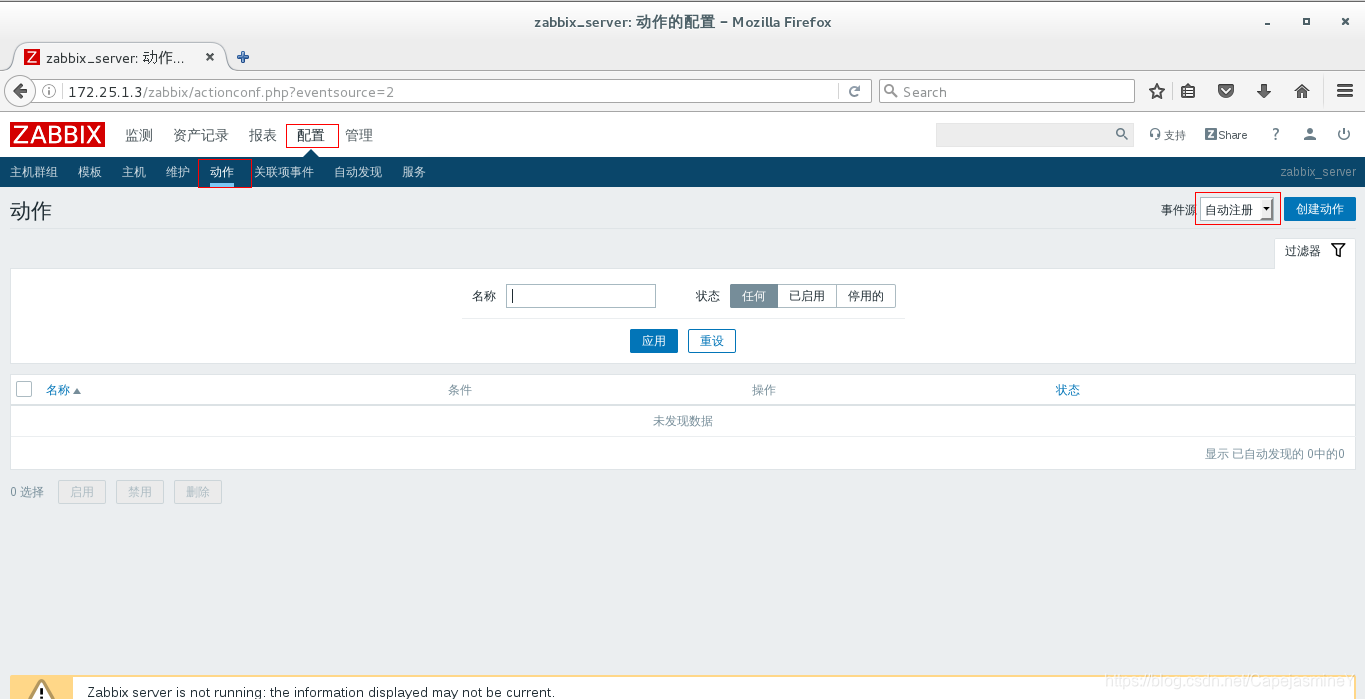
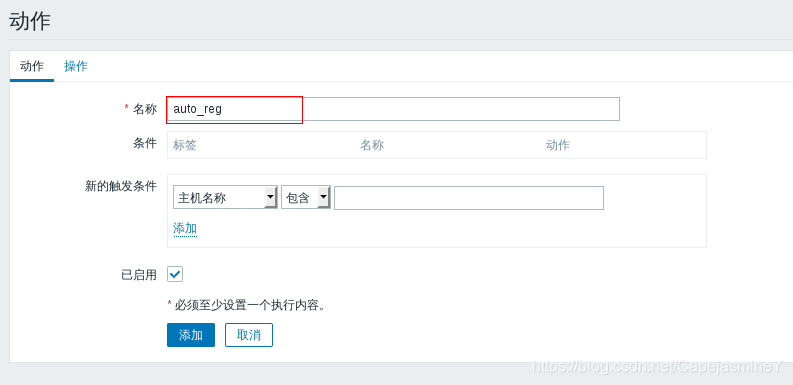
步骤七:配置zabbix为自动注册模式,将zabbix-agent自动添加到主机群组
在实际生产环境中,我们可能需要将很多台主机添加到 Zabbix Server 里,我们进行手动添加的话,会比较麻烦、费时,而且还容易出错。所以一般我们会设置主机自动注册。自动注册只需要将自动发现的符合某个条件主机添加到某个主机群组,这样就比较方便。
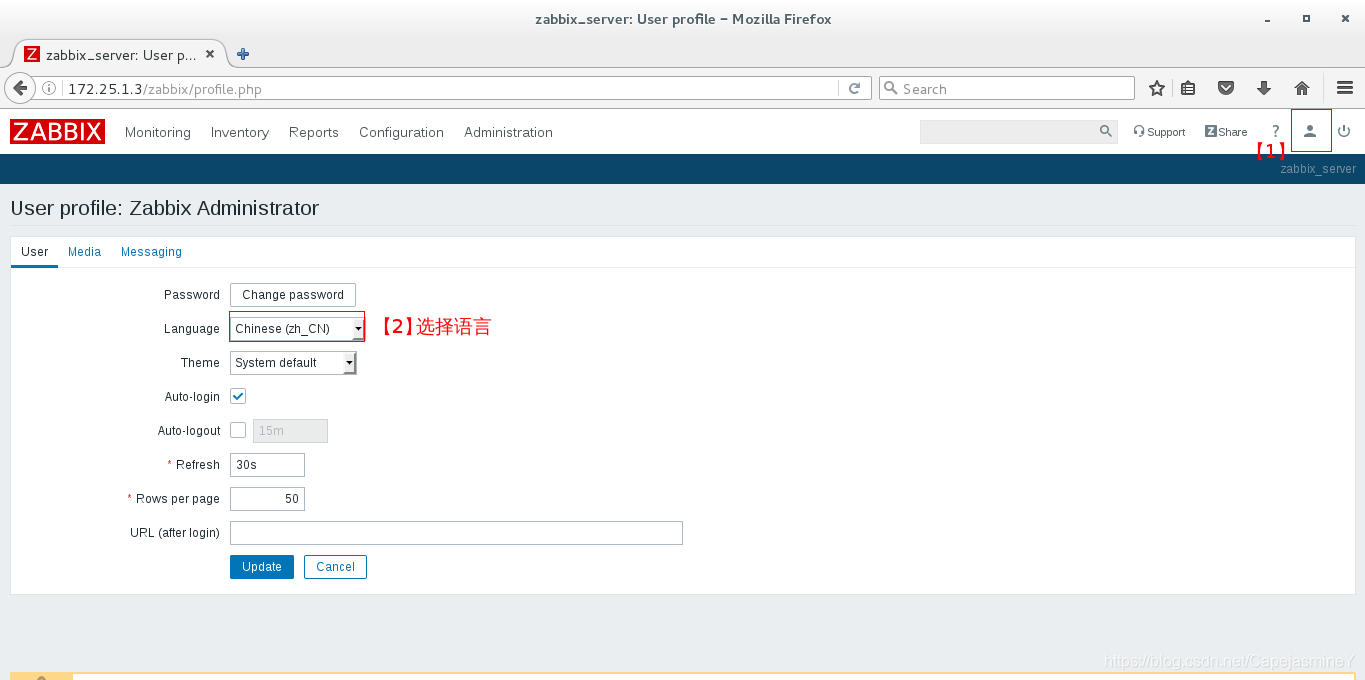
【1】修改语言,选择中文更方便
【2】修改动作为自动注册
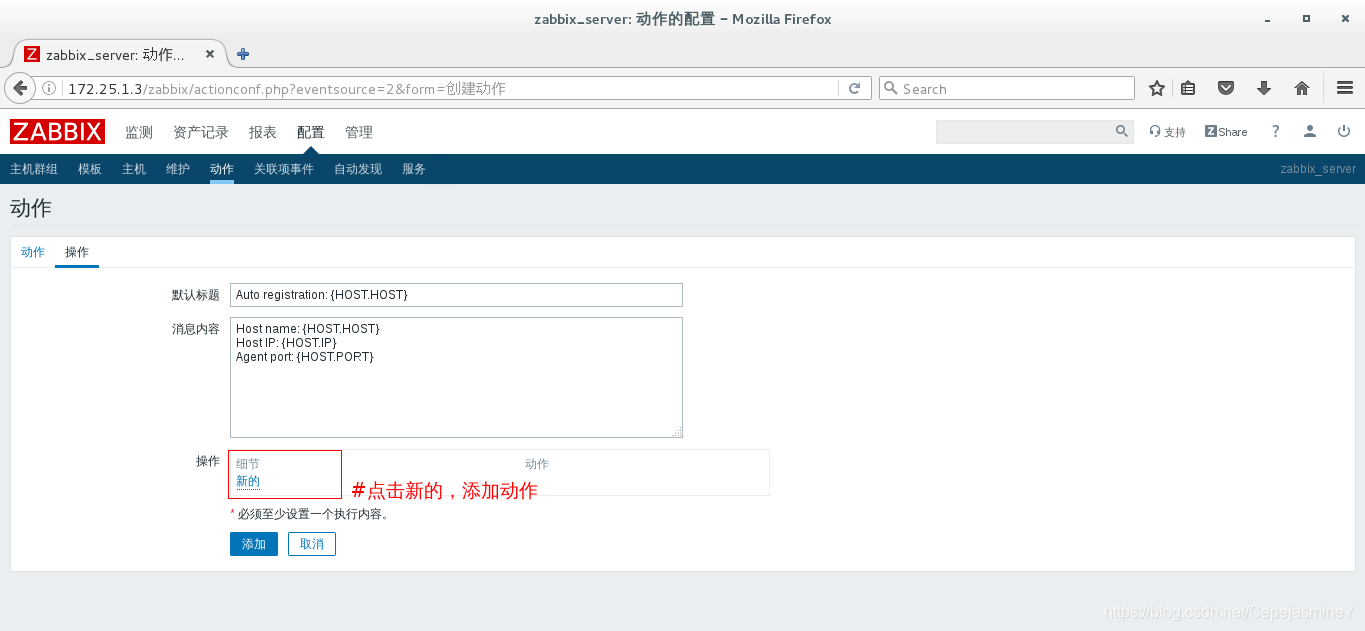
 【4】创建动作
设置动作名称:
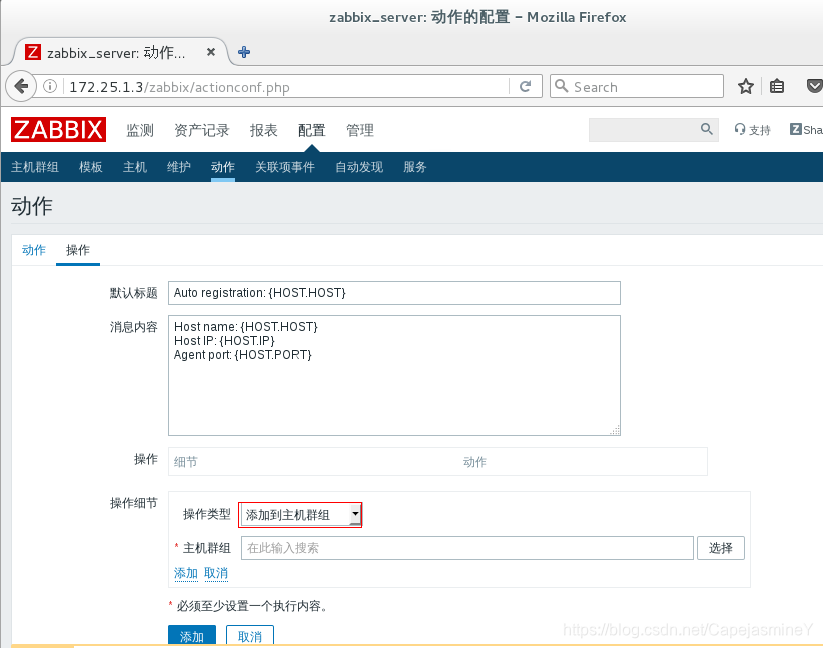 选择主机群组:
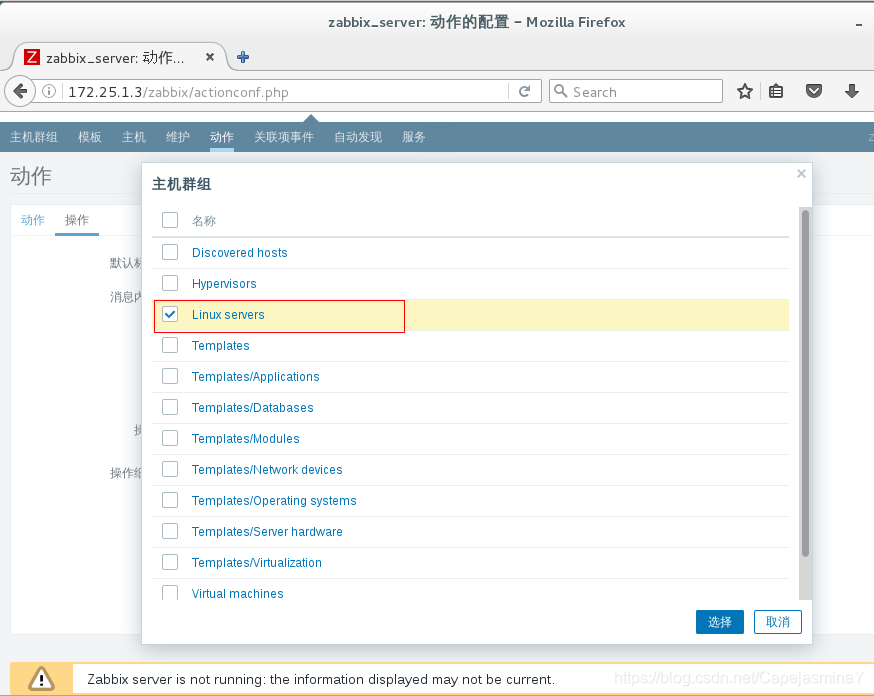
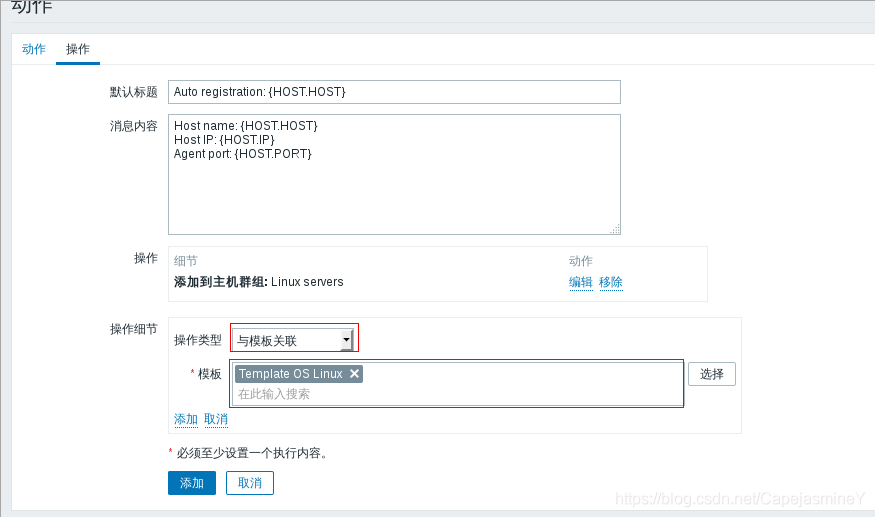 动作添加完毕:
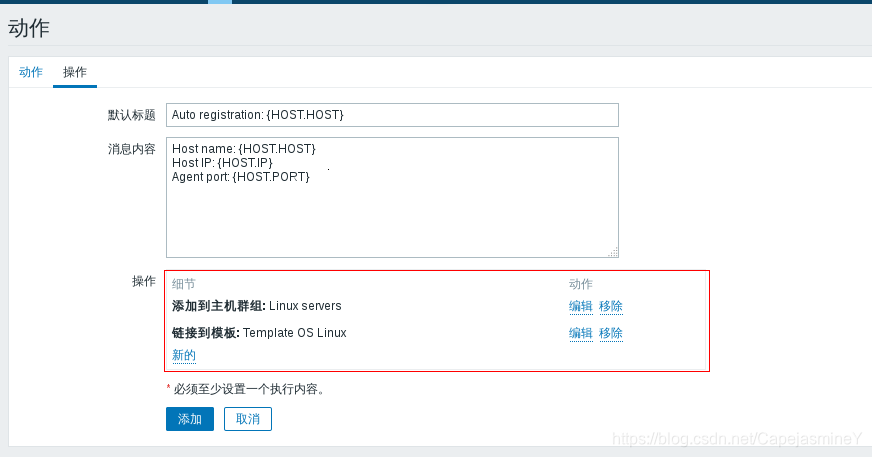
选择添加后,动作创建完成: