摘要:上一篇介绍了Direct模式的消息发生机制,这篇介绍下Topic转发模式的消息发生机制。
一:首先我们看发送端,我们需要配置队列Queue,再配置交换机(Exchange),再把队列按照相应的规则绑定到交换机上:
package com.micai.springboot.mq.config;

import com.micai.springboot.base.BaseConfig;
import org.springframework.amqp.core.*;
import org.springframework.beans.factory.annotation.Qualifier;
import org.springframework.context.annotation.Bean;
import org.springframework.context.annotation.Configuration;

/**
 * 描述:Topic转发模式
 * <p>
 * Author: 赵新国
 * Date: 2017/11/3 18:51
 */
@Configuration
public class SenderConf extends BaseConfig {

    // ---------------------------------------------------- Direct 形式 -------------------------------------------- //

    /*@Bean
    public Queue queue() {
        return new Queue(QUEUE_KEY);
    }*/

    // ---------------------------------------------------- Topic 形式 -------------------------------------------- //

    @Bean(name = "message")
    public Queue queueMessage() {
        return new Queue("topic.message");
    }

    @Bean(name = "messages")
    public Queue queueMessages() {
        return new Queue("topic.messages");
    }

    @Bean
    public TopicExchange exchange() {
        return new TopicExchange("exchange");
    }

    @Bean
    Binding bindingExchangeMessage(@Qualifier("message") Queue queueMessage, TopicExchange exchange) {
        return BindingBuilder.bind(queueMessage).to(exchange).with("topic.message");
    }

    @Bean
    Binding bindingExchangeMessages(@Qualifier("messages") Queue queueMessages, TopicExchange exchange) {
        return BindingBuilder.bind(queueMessages).to(exchange).with("topic.#");//*表示一个词,#表示零个或多个词
    }

    // -------------------------------------------- Fanout Exchange形式 ------------------------------------------- //

    /*@Bean(name="Amessage")
    public Queue AMessage() {
        return new Queue("fanout.A");
    }


    @Bean(name="Bmessage")
    public Queue BMessage() {
        return new Queue("fanout.B");
    }

    @Bean(name="Cmessage")
    public Queue CMessage() {
        return new Queue("fanout.C");
    }

    @Bean
    FanoutExchange fanoutExchange() {
        return new FanoutExchange("fanoutExchange");//配置广播路由器
    }

    @Bean
    Binding bindingExchangeA(@Qualifier("Amessage") Queue AMessage,FanoutExchange fanoutExchange) {
        return BindingBuilder.bind(AMessage).to(fanoutExchange);
    }

    @Bean
    Binding bindingExchangeB(@Qualifier("Bmessage") Queue BMessage, FanoutExchange fanoutExchange) {
        return BindingBuilder.bind(BMessage).to(fanoutExchange);
    }

    @Bean
    Binding bindingExchangeC(@Qualifier("Cmessage") Queue CMessage, FanoutExchange fanoutExchange) {
        return BindingBuilder.bind(CMessage).to(fanoutExchange);
    }*/

}
package com.micai.springboot.mq;

import com.micai.springboot.base.BaseConfig;
import com.micai.springboot.entity.User;
import org.springframework.amqp.rabbit.annotation.RabbitListener;
import org.springframework.stereotype.Component;

/**
 * 描述:消息消费者
 * @RabbitListener注解定义该类对hello队列的监听,
 * 并用@RabbitHandler注解来指定对消息的处理方法。
 * 所以,该消费者实现了对hello队列的消费,消费操作为输出消息的字符串内容
 * Author: 赵新国
 * Date: 2017/11/3 15:42
 */
@Component
public class Receiver extends BaseConfig {

    // ---------------------------------------------------- Direct 形式 -------------------------------------------- //
    //监听器监听指定的Queue
    /*@RabbitListener(queues = QUEUE_KEY)
    public void process(String str) {
        System.out.println("接收MQ消息 : " + str);
    }*/

    // //监听器监听指定的Queue
    /*@RabbitListener(queues = QUEUE_KEY)
    public void process(User user) { //用User作为参数
        System.out.println("接收MQ消息 : " + user);
    }*/

    // ---------------------------------------------------- Topic 形式 -------------------------------------------- //
    @RabbitListener(queues="topic.message")    //监听器监听指定的Queue
    public void process1(String str) {
        System.out.println("message:"+str);
    }

    @RabbitListener(queues="topic.messages")    //监听器监听指定的Queue
    public void process2(String str) {
        System.out.println("messages:"+str);
    }


    // -------------------------------------------- Fanout Exchange形式 ------------------------------------------- //
    /*@RabbitListener(queues="fanout.A")
    public void processA(String str1) {
        System.out.println("ReceiveA:"+str1);
    }

    @RabbitListener(queues="fanout.B")
    public void processB(String str) {
        System.out.println("ReceiveB:"+str);
    }

    @RabbitListener(queues="fanout.C")
    public void processC(String str) {
        System.out.println("ReceiveC:"+str);
    }*/

}
三:好啦!接着我们可以进行测试了!首先我们发送如下内容:
package com.micai.springboot.mq;

import com.micai.springboot.base.BaseConfig;
import com.micai.springboot.entity.User;
import org.springframework.amqp.core.AmqpTemplate;
import org.springframework.beans.factory.annotation.Autowired;
import org.springframework.stereotype.Component;

/**
 * 描述:消息生产者
 * <p>
 * Author: 赵新国
 * Date: 2017/11/3 15:37
 */
@Component
public class Sender extends BaseConfig {

    @Autowired
    private AmqpTemplate rabbitTemplate;

    public void send() {
        // ---------------------------------------------------- Direct 形式 -------------------------------------------- //
        // 在该生产者,我们会产生一个字符串,并发送到名为hello的队列中
        /*String context = "Hello " + "Rabbit MQ!";
        System.out.println("发送MQ消息 : " + context);
        this.rabbitTemplate.convertAndSend(QUEUE_KEY, context);*/

        // 发送对象,但是该对象必须实现Serializable接口
        /*User user = new User(); //实现Serializable接口
        user.setId(1L);
        user.setName("张三");
        this.rabbitTemplate.convertAndSend(QUEUE_KEY, user);*/

        // ---------------------------------------------------- Topic 形式 -------------------------------------------- //
        this.rabbitTemplate.convertAndSend("exchange", "topic.message", "hello, rabbit!");

        // -------------------------------------------- Fanout Exchange形式 ------------------------------------------- //
        /*this.rabbitTemplate.convertAndSend("fanoutExchange", "", "xixi,hlhdidi");// 参数2将被忽略*/
    }

}
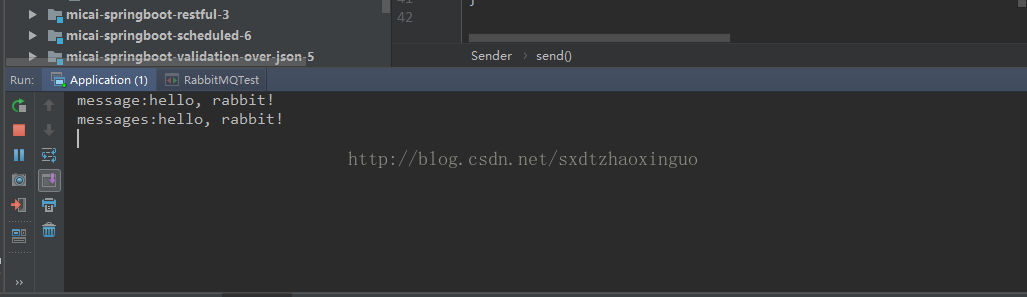
方法的第一个参数是交换机名称,第二个参数是发送的key,第三个参数是内容,RabbitMQ将会根据第二个参数去寻找有没有匹配此规则的队列,如果有,则把消息给它,如果有不止一个,则把消息分发给匹配的队列(每个队列都有消息!),显然在我们的测试中,参数2匹配了两个队列,因此消息将会被发放到这两个队列中,而监听这两个队列的监听器都将收到消息!那么如果把参数2改为topic.messages呢?显然只会匹配到一个队列,那么process2方法对应的监听器收到消息!
四:运行结果如下:
五:源代码下载地址:https://gitee.com/micai/micai-springboot/tree/master/micai-springboot-rabbitmq-7