文章目录
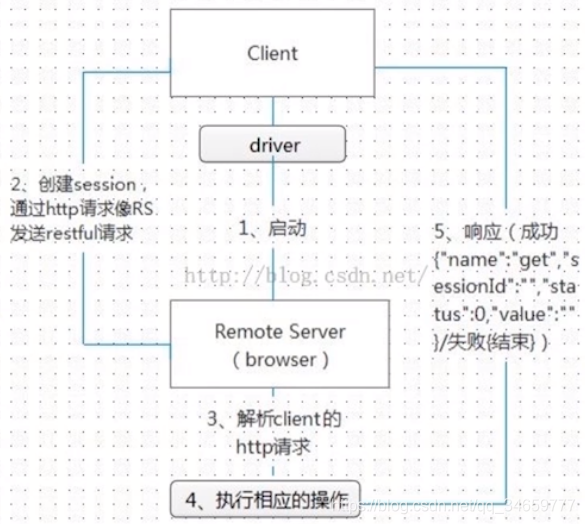
1. Selenium 工作原理
2. python的安装
这个的安装教程一抓一大把,最简单的就是看廖大神的博客
3. Selenium的安装
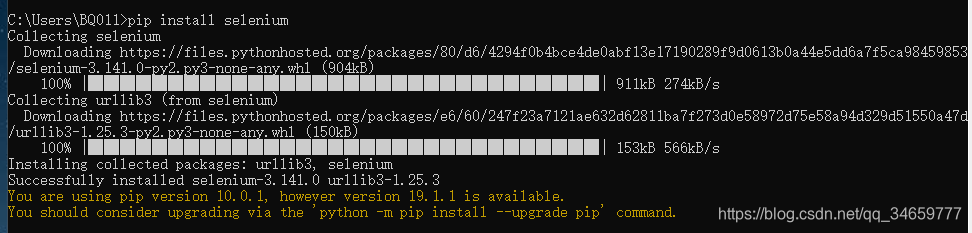
安装完成python后,可以直接使用python的pip安装selenium:
pip install selenium
如图:
注:如果使用 pip 安装时报错“Unknown or unsupported command ‘install’”,解决方案请见我的此博客。
4. Visual Studio Code的安装
进入官网:https://code.visualstudio.com/ ,选择对应的版本下载:

Stable是稳定版,Insiders应该是内测版。
5. Visual Studio Code的汉化
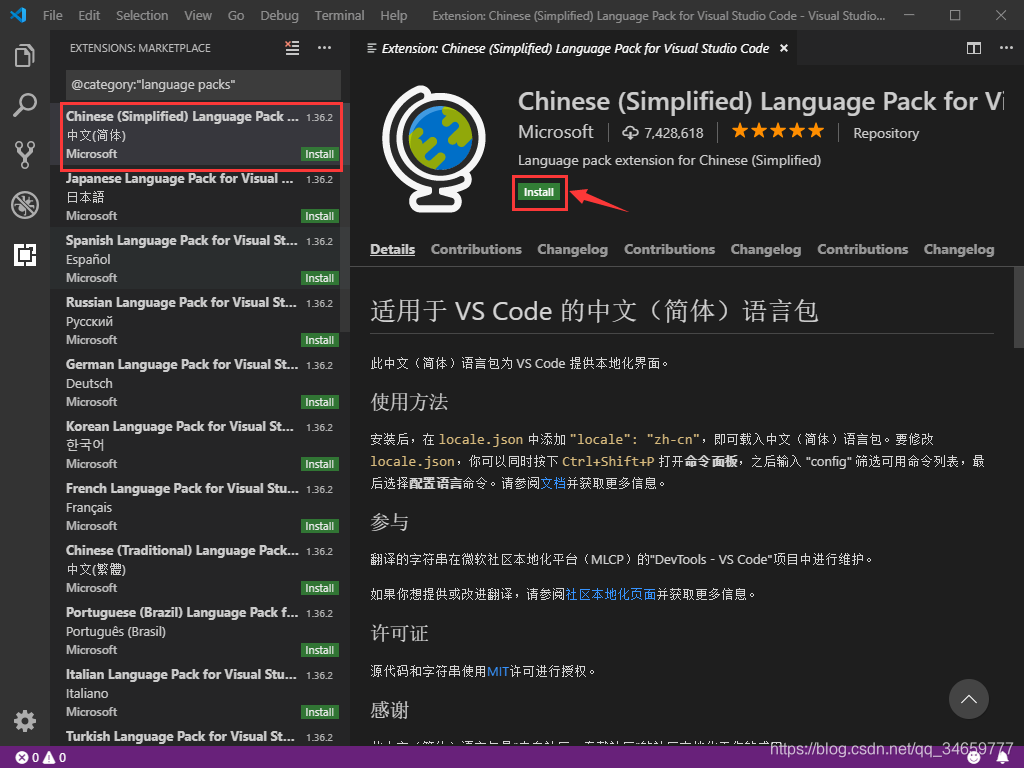
Visual Studio Code默认为英文版,将语言设置为中文版需要下载语言包,这个能够在vscode中直接实现。
进入Visual Studio Code,使用快捷键 Ctrl+Shift+P ,在弹出的输入框中输入 Configure Display Language

再点击下方的安装语言包:

点击中文简体:
选择右下方的 Yes:
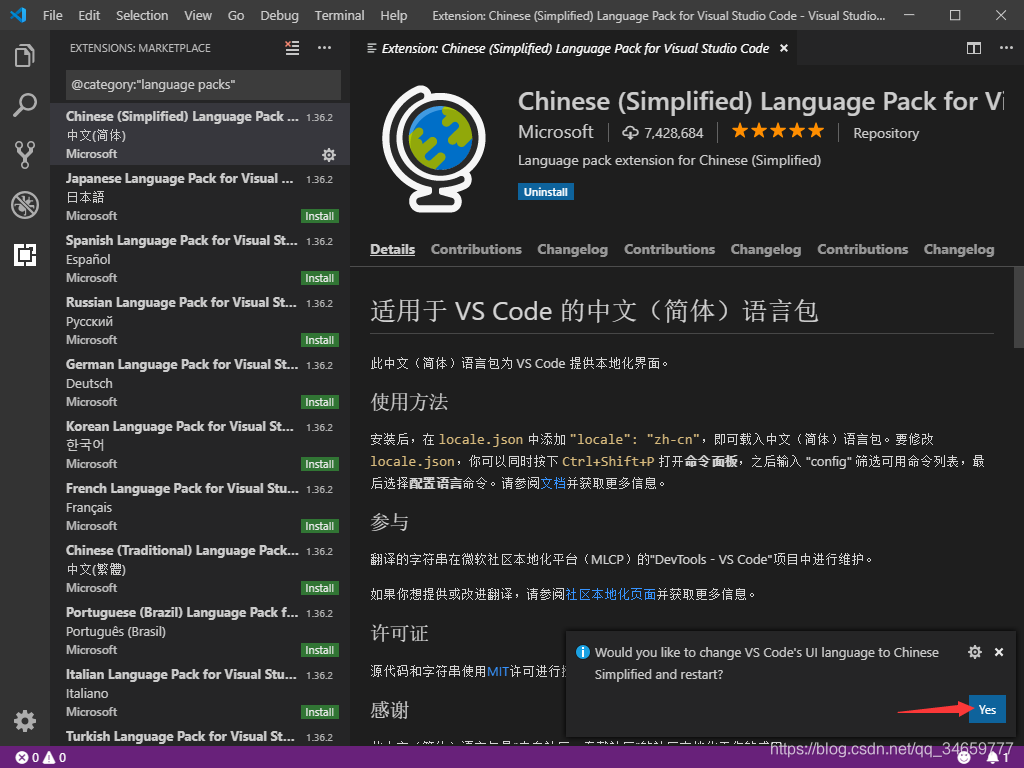
安装成功后就自动是中文版本啦。
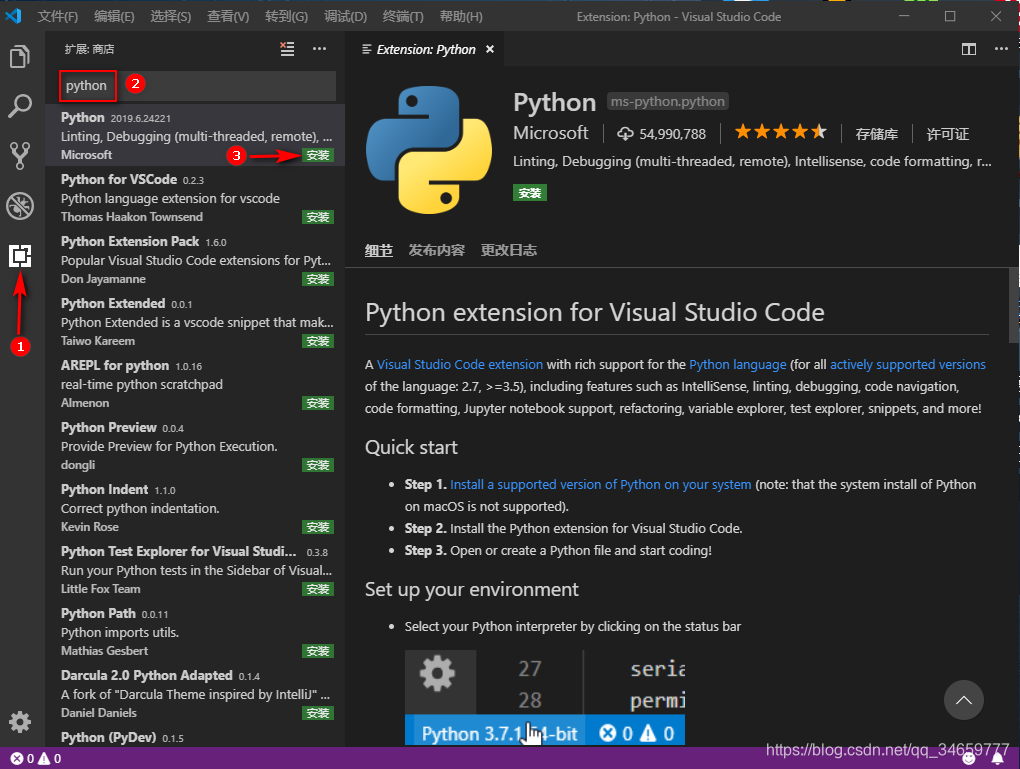
6. 安装Python扩展插件:
7. Webdriver的安装
chrome driver下载地址:https://chromedriver.storage.googleapis.com/index.html
chrome driver淘宝镜像:http://npm.taobao.org/mirrors/chromedriver
chrome浏览器各版本下载地址:http://www.chromedownloads.net/chrome64win/
禁止谷歌浏览器更新:https://jingyan.baidu.com/article/76a7e409f2137afc3b6e15be.html
查看chrome版本:chrome://version/,这样无需打开设置从而使chrome自动更新。
firefox driver下载地址:https://github.com/mozilla/geckodriver/releases/
firefox各版本下载地址:http://ftp.mozilla.org/pub/firefox/releases/
Selenium Chrome版本与chromedriver兼容版本对照表:https://blog.csdn.net/yoyocat915/article/details/80580066
7.1 关于webdriver不支持的一些问题
在使用webdriver打开chrome的过程时,遇到以下问题,说明当前使用的Chrome版本太高,webdriver不支持。
selenium.common.exceptions.SessionNotCreatedException: Message: session not created: This version of ChromeDriver only supports Chrome version 75
解决办法:
下载chrome当前版本对应的webdriver,地址和对照表见上面的链接。下载完毕后,将chromedriver.exe 文件放到chrome 的安装目录下 C:\Program Files (x86)\Google\Chrome\Application\ ,然后设置 path 环境变量,把chrome 的安装目录(我的:C:\Program Files (x86)\Google\Chrome\Application)放入。
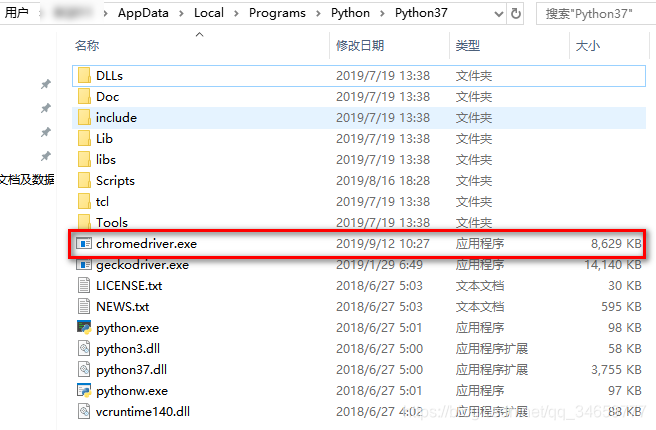
7.2 python自带的webdriver版本不支持问题
如果在VSCode使用webdriver打开浏览器时报错session not created: This version of ChromeDriver only supports Chrome XX,然后你7.1又是正确执行过,那么可能是python自带的webdriver版本太低。
下载你的chrome对应的webdriver版本,然后打开Python安装目录,将下面的webdriver替换成最新的:
8. Selenium Standalone Server下载
官网下载地址:https://www.seleniumhq.org/download/ 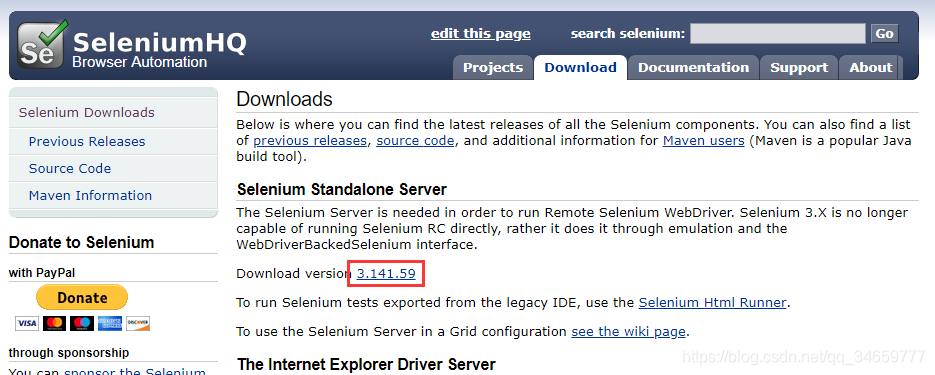
下载完成之后在cmd中运行该.jar文件(前提是安装好了JDK才能够打开)。

运行完成之后,打开浏览器,输入127.0.0.1:4444,出现以下页面则说明安装成功:
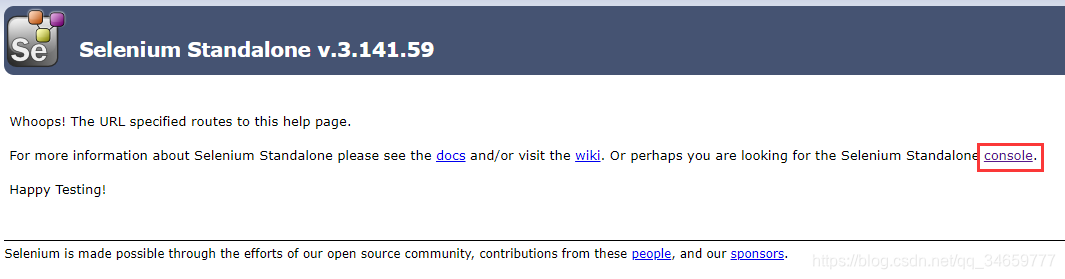
然后点击 console ,create a new session ,然后选择对应的浏览器就能够直接打开一个新的浏览器。
接下来请参考我的下一篇博客:安装request包
