SpringBoot概述
是什么?
SpringBoot是一个非常优秀的用来【快速构建Spring开发环境】的一个脚手架。
Spring的开发存在的问题?
(1) Spring项目所依赖的jar包导入过于繁琐 [版本与版本之间的相互依赖,jar包之间的相互依赖…]
SpringBoot解决方案: Maven的依赖传递和继承
spring-boot-starter-parent
spring-boot-starter-xxxx
(2)Spring项目中的配置文件的配置过于繁琐
自动装配: 整合Redis的时候,使用到了一个对象(RedisTemplate) ,所用到的RedisTemplate对象从哪里来?
SpringBoot的入门案例
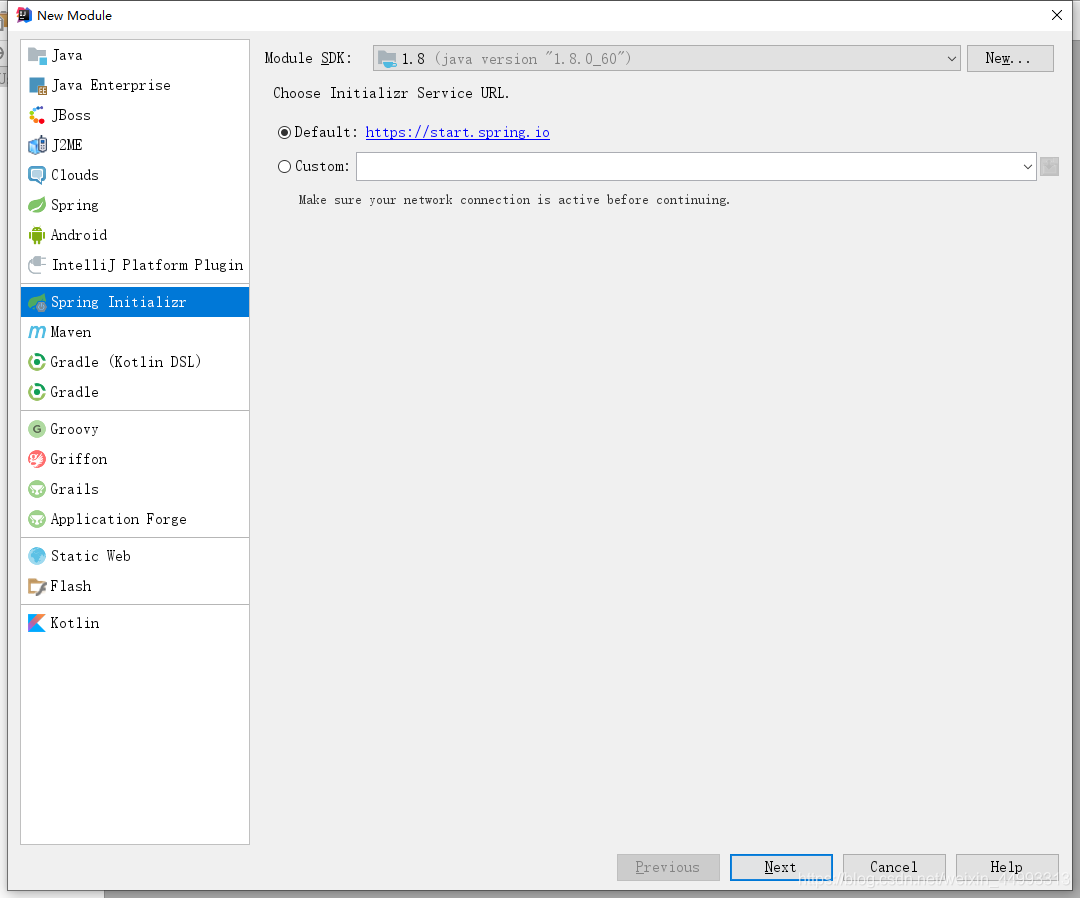
方式一
方式二
创建一个maven项目
添加parent依赖 spring-boot-starter-parent
添加起步依赖 spring-boot-starter-web
JBLSpringBootAppGen插件完成工程的创建
SpringBoot常用注解
@Configuration 配置注解 作用: applicationContext.xml
@Bean 方法上, 作用 声明Bean对象, 在applicationContext.xml中添加
@PropertySource 读取外部的properties文件,在applicationContext.xml中添加
<context:property-placeholder location=""/>
@Value @Autowired
依赖注入的问题,
<property name="" value=""|ref=""/>
@Value
@Autowired / @Resource
@ConfigurationProperties(prefix=“jdbc”)
读取SpringBoot项目中的resources下面的application.yml/application.properties配置文件中的内容,一次性可以读取多个属性到指定的类对象属性中。
jdbc.xxxxx
@SpringBootApplication
@SpringBootConfiguration 配置注解
@Configuration
@EnableAutoConfiguration 自动装配的注解
@AutoConfigurationPackage 读取引导类所在的包,SpringBoot默认会加载引导类所在包及其子包中的所有类上的注解。
@Import(AutoConfigurationImportSelector.class)
@Import applicationContext.xml
@ComponentScan 包扫描注解
过程:
springboot项目—>添加起步依赖---->XxxAutoConfiguration—>@Configuration @Bean @ConditionalOnXxxx @ConfigurationProperties[读取配置文件中的内容] —>项目启动的时候,会根据配置注解和条件来判断是否需要自动创建所需要的类对象—>项目中通过@Autowired注入对应的类对象—>类对象的方法来实现对应的操作
解决依赖jar包问题
Maven的依赖传递和继承
解决配置文件过于复杂问题
自动装配: RedisTemplate对象从哪里来?
SpringBoot的配置文件
properties文件
key=value
yml文件
简单数据、对象、集合
#简单数据类型
itheima: itcast
age: 18
#对象
user:
username: zhangsan
age: 18
gender: 1 #1代表男 0 代表女
#集合
city:
- shanghai
- beijing
- tianjin
- xian
#对象中包含集合
person:
username: lisi
age: 20
city:
- guangzhou
- hongkong
- beijing
- xian
#集合中包含对象
userList:
- username: wangwu
age: 21
gender: 1
city:- shanghai
- tianjing
- xian
- username: zhaoliu
age: 22
gendeer: 0
city:- shanxi
- xxx
SpringBoot的应用
访问静态资源
搭建微服务: 微服务虽小,五脏俱全。
Controller ServiceInterface ServiceImpl MapperInterface/Mapper.xml domain…
页面(html/css/js/images…)
SpringBoot的resources下面添加static目录,目录中添加静态资源。
但是:微服务更多应用在前后端分离系统。[项目足够大]
注意下:SpringBoot官方不推荐使用JSP,推荐使用的是thymeleaf (Freemarker)
Spring能整合的,SpringBoot基本都能做,只是
1.SpringBoot把Spring的jar包依赖使用起步依赖简化了,
2.SpringBoot通过自动装配和@Configuration @Bean…注解简化配置文件的配置
整合lombok
(1)IDEA中安装一个lombok的插件
(2)pom.xml添加一个起步依赖
org.projectlombok lombok (3)模型类上添加注解@Data //@Setter @Getter @ToString
@AllArgsConstructor//注解一加 默认的无惨构造函数就不存在
@NoArgsConstructor
@Slf4j //日志记录 private static final org.slf4j.Logger log = org.slf4j.LoggerFactory.getLogger(LogExample.class);
public class User {
private Integer id;

private String name;

private Date birthday;

//....

public static void main(String[] args) {
    log.debug("");
    log.info("");
    log.warn("");
    log.error("");
}
}
整合Mybatis
(1)pom.xml添加依赖
	<dependency>
        <groupId>org.mybatis.spring.boot</groupId>
        <artifactId>mybatis-spring-boot-starter</artifactId>
        <version>2.0.1</version>
    </dependency>

    <dependency>
        <groupId>mysql</groupId>
        <artifactId>mysql-connector-java</artifactId>
    </dependency>
(2)application.yml配置文件
#数据库连接信息
spring:
datasource:
driver-class-name: com.mysql.jdbc.Driver
url: jdbc:mysql://localhost:3306/springboot_mybatis?serverTimezone=UTC&characterEncoding=utf-8
username: root
password: 123456
#Mybatis相关的配置
mybatis:
映射文件Mapper.xml中添加parameterType resultType 模型类的类全名,添加了别名扫描就可以使用类名替换类全名
type-aliases-package: com.itheima.domain
扫描Mapper.xml所在的包,这块默认是从resources包下开始查找
mapper-locations: classpath:mappers/*.xml # 需不需要加classpath???
#设置Mybatis的日志输出为控制台输出,目的:查看执行对应数据库操作的SQL语句,开发时候开启主要是测试使用
configuration:
log-impl: org.apache.ibatis.logging.stdout.StdOutImpl
(3)编写Mapper接口
(4)编写Mapper.xml映射文件
Mapper接口的来全名要和映射文件的namespace保持一致
Mapper接口的方法名要和映射文件的statementId保持一致
Mapper接口的方法的参数要和映射文件的parameterType保持一致
Mapper接口的方法的返回值要和映射文件的resultType/resultMap保持一致
SQL语句的编写 、 resultMap的使用
(5)Mapper接口如何让项目读取到

@MapperScan(basePackages = “com.itheima.mapper”)
(6)使用Mybatis
@Autowired
private UserMapper userMapper;
userMapper.method();//实现对应的增删改查操作。
开发步骤
Mybatis:
数据库表的增删改查
(1)准备一个数据库 创建一个表

(2)针对于表创建一个模型类

(3)编写一个Mapper接口

(4)编写一个Mapper映射文件

(5)实现增删改查操作
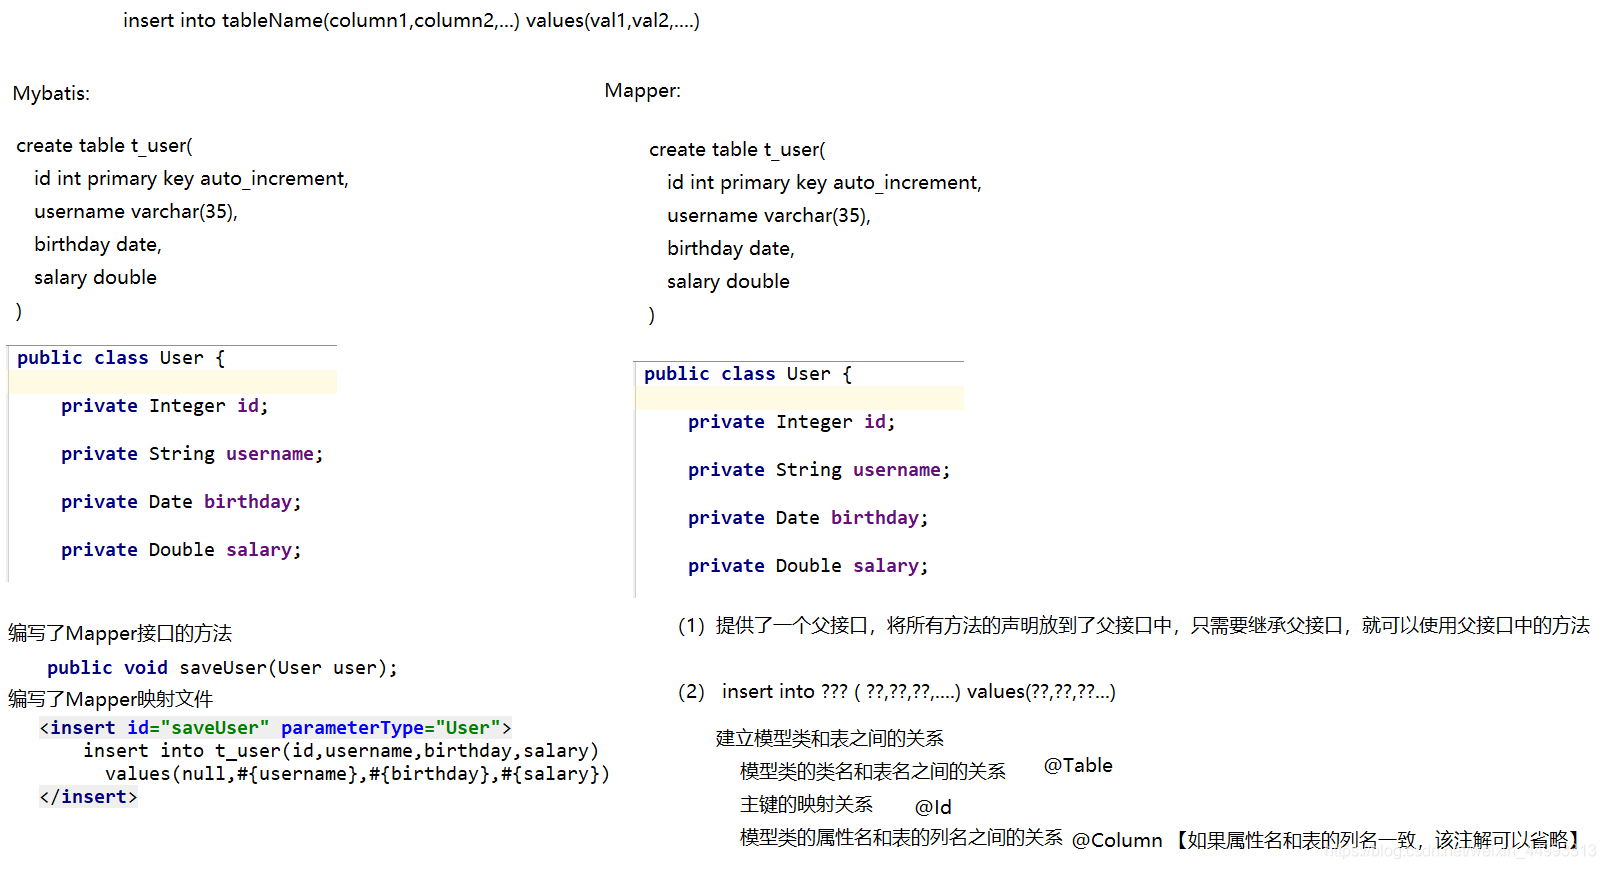
整合通用Mapper
通用Mapper:简化Mybatis的开发过程,简化在哪?
(1)【简单】的增删改查进行了统一的抽取
简单:单表的增删改查
(2)不要在编写对应的方法和映射的sql语句
(1)pom.xml
tk.mybatis mapper-spring-boot-starter 2.1.5 mysql mysql-connector-java (2)application.ymlspring:
datasource:
driver-class-name: com.mysql.jdbc.Driver
url: jdbc:mysql://localhost:3306/springboot_mybatis?
\serverTimezone=UTC&characterEncoding=utf-8
username: root
password: 123456
mybatis:
configuration:
log-impl: org.apache.ibatis.logging.stdout.StdOutImpl
(3)编写模型类
@Table(name = “t_user”)
public class User {
@Id
@KeySql(useGeneratedKeys = true) //类似于
private Integer id;
@Column(name = "username")
private String username;

private Date birthday;

private Double salary;
}
select last_insert_id() insert into t_user(id,username,birthday,salary) values(null,#{username},#{birthday},#{salary}) (4)编写Mapper接口public interface UserMapper extends Mapper{
}
(5)Mapper接口如何让项目读取到

@MapperScan(basePackages = “com.itheima.mapper”)
(6)使用通用Mapper
@Autowired
注入Mapper接口,通过Mapper接口调用方法实现增删改查。
整合单元测试Junit
(1)pom.xml
org.springframework.boot spring-boot-starter-test (2)编写测试类@RunWith(SpringRunner.class)
@SpringBootTest(classes = SpDemo2Application.class)
public class MyTest {
//测试即可
}
整合Redis
(1)pom.xml
org.springframework.boot spring-boot-starter-data-redis (2)application.yml【操作的是哪里的redis? host /port /password...】spring:
redis:
host: 127.0.0.1
port: 6379
(3)要想操作redis,需要用到RedisTemplate
@Autowired
private RedisTemplate redisTemplate;
Value List Hash Set ZSet
redisTemplate.boundValueOps("").set()
redisTemplate.OpsForValue()
整合Freemarker
页面静态化技术。
模板+模型数据=html页面
(1) pom.xml
	<dependency>
        <groupId>org.springframework.boot</groupId>
        <artifactId>spring-boot-starter-freemarker</artifactId>
    </dependency>
(2)application.yml
(3)resources下添加一个templates目录,用来存放Freemarker的模板
(4)创建一个模板hello.ftl
<body>
    <h1>${message}</h1>
</body>
@Controller
public class UserController {
@RequestMapping("/hello")
public String sayHello(Model model){

    System.out.println("=======>SpringBoot整合Freemarker测试案例");

    model.addAttribute("title","SpringBoot整合Freemarker");
    model.addAttribute("message","HELLO Freemarker");
    return "hello";
}

@RequestMapping("/hello2")
public String sayHello2(Map map){

    System.out.println("=======>SpringBoot整合Freemarker测试案例");

    map.put("title","SpringBoot整合Freemarker2");
    map.put("message","HELLO Freemarker2");
    return "hello";
}
}
SpringBoot项目部署
java -jar xxxx.jar
org.springframework.boot spring-boot-maven-plugin 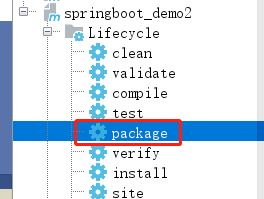可以了,检查下编译的target目录下有没有你要的js
