利用SpringBoot+Mybatis-Plus+Bootstrap+Vue 上传照片以后无法在HTML显示的问题
首先需要配置虚拟目录

打开如图所示的文件在文件中配置虚拟目录
package cn.jeefast.config;

import org.springframework.context.annotation.Configuration;
import org.springframework.core.Ordered;
import org.springframework.web.servlet.config.annotation.ResourceHandlerRegistry;
import org.springframework.web.servlet.config.annotation.ViewControllerRegistry;
import org.springframework.web.servlet.config.annotation.WebMvcConfigurerAdapter;

/**
* @description MVC视图配置
*
* @author theodo
* @email [email protected]
* @date 2017年11月6日 下午5:14:52
*/
@Configuration
public class WebMvcConfig extends WebMvcConfigurerAdapter{
	@Override
	 public void addResourceHandlers(ResourceHandlerRegistry registry) {
	     registry.addResourceHandler("/imctemp-rainy/**").addResourceLocations("file:E:\\Spring Boot\\jeefast\\jeefast-system\\src\\main\\resources\\static\\img\\upload\\");
	}
}
配置完成后需要在拦截器中放开
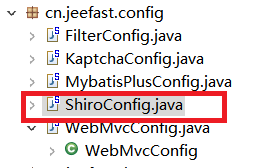
打开如图所示的文件,

在代码中加入如图所示的代码,不对他进行拦截,否则会报错

filterMap.put("/imctemp-rainy/**", "anon");
接下来就是控制器端了:
/**
	 * 文件上传
	 */
	public static void uploadFile(byte[] file, String filePath, String fileName) throws Exception {
		File targetFile = new File(filePath);
		if (!targetFile.exists()) {
		   targetFile.mkdirs();
		}
		FileOutputStream out = new FileOutputStream(filePath +"/"+ fileName);
		out.write(file);
		out.flush();
		out.close();
	}
	 //处理文件上传
	@Log("上传照片")
	@RequestMapping("/upload")
	@RequiresPermissions("stu:student:upload")
  	public R uploadImgs(@RequestParam("file") MultipartFile file,HttpServletRequest request) {
  	    String contentType = file.getContentType();
  		String fileName = System.currentTimeMillis()+file.getOriginalFilename();
  		String filePath = "E:\\Spring Boot\\jeefast\\jeefast-system\\src\\main\\resources\\static\\img\\upload\\";
  		if (file.isEmpty()) {
  			return R.error("文件为空");
  		}
  		try {
  		   uploadFile(file.getBytes(), filePath, fileName);
  		   return R.ok(fileName);
  		} catch (Exception e) {
  			return R.error("上传失败");
  		}
  	}
在上传成功后返回照片的名
js端:
upload:function(){
	          var form = new FormData();
	          form.append("file", document.getElementById("file").files[0]);//
	           $.ajax({
	               url: baseURL + 'stu/student/upload',        //后台url
	               data: form,
	               cache: false,
	                async: false,
	               type: "POST",                   //类型,POST或者GET
	               dataType: 'json',              //数据返回类型,可以是xml、json等
	               processData: false,
	               contentType: false,
	               success: function (r) {
	            	  alert(JSON.stringify(r));  // msg  ==>  fileName
	            	   if (r.code == 0) {
		                  	 vm.pic="/jeefast/imctemp-rainy/"+r.msg;
	                   } else {
	                   	   alert("失败");
	                   }
	               },
	               error: function (er) {          //失败,回调函数
	              	 alert(JSON.stringify(r));
	               }
	           });
		  },
vm.pic="/jeefast/imctemp-rainy/"+r.msg;
在jeefast框架中上传照片显示的时候一定要在虚拟路径前面加上/jeefast
在jeefast框架中上传照片显示的时候一定要在虚拟路径前面加上/jeefast
在jeefast框架中上传照片显示的时候一定要在虚拟路径前面加上/jeefast
f否则无法显示
html端:
<div class="form-group">
				<div class="col-sm-2 control-label">上传头像</div>
				<div class="col-sm-10">
					<input type="file" name="file" id="file" @change="upload()">
					<p id="url"><img :src=pic width=200></p>
				</div>
			</div>
这样就可以显示了,如果需要存入数据库,在添加数据的时候把照片的名字或者地址赋给数据库的字段就可以了
