一、开启关闭code-push-server
- 开启code-push-server服务器:cd到code-push-server目录下,使用命令./bin/www开启服务器,或者直接点击该文件(充分条件是要打开MySQL服务器)
- 关闭code-push-server服务器:直接close 服务器的终端即可
二、code-push-server的搭建
- 安装MySQL服务器
mysql是code-push-server所使用的服务器,首先得去官网下载MySQL并安装,可以参考这里
- server端配置流程
- 安装和启动code-push-server
$ git clone https://github.com/lisong/code-push-server.git
$ cd code-push-server
$ npm install
- 初始化数据库
cd到code-push-server目录
$ ./bin/db init --dbhost localhost --dbuser root --dbpassword #初始化mysql数据库
初始化数据库的时候本命令默认没有密码的,请前往code-push-server安装目录bin/db中修改
密码修改之后在执行数据库初始化命令就可以成功了。
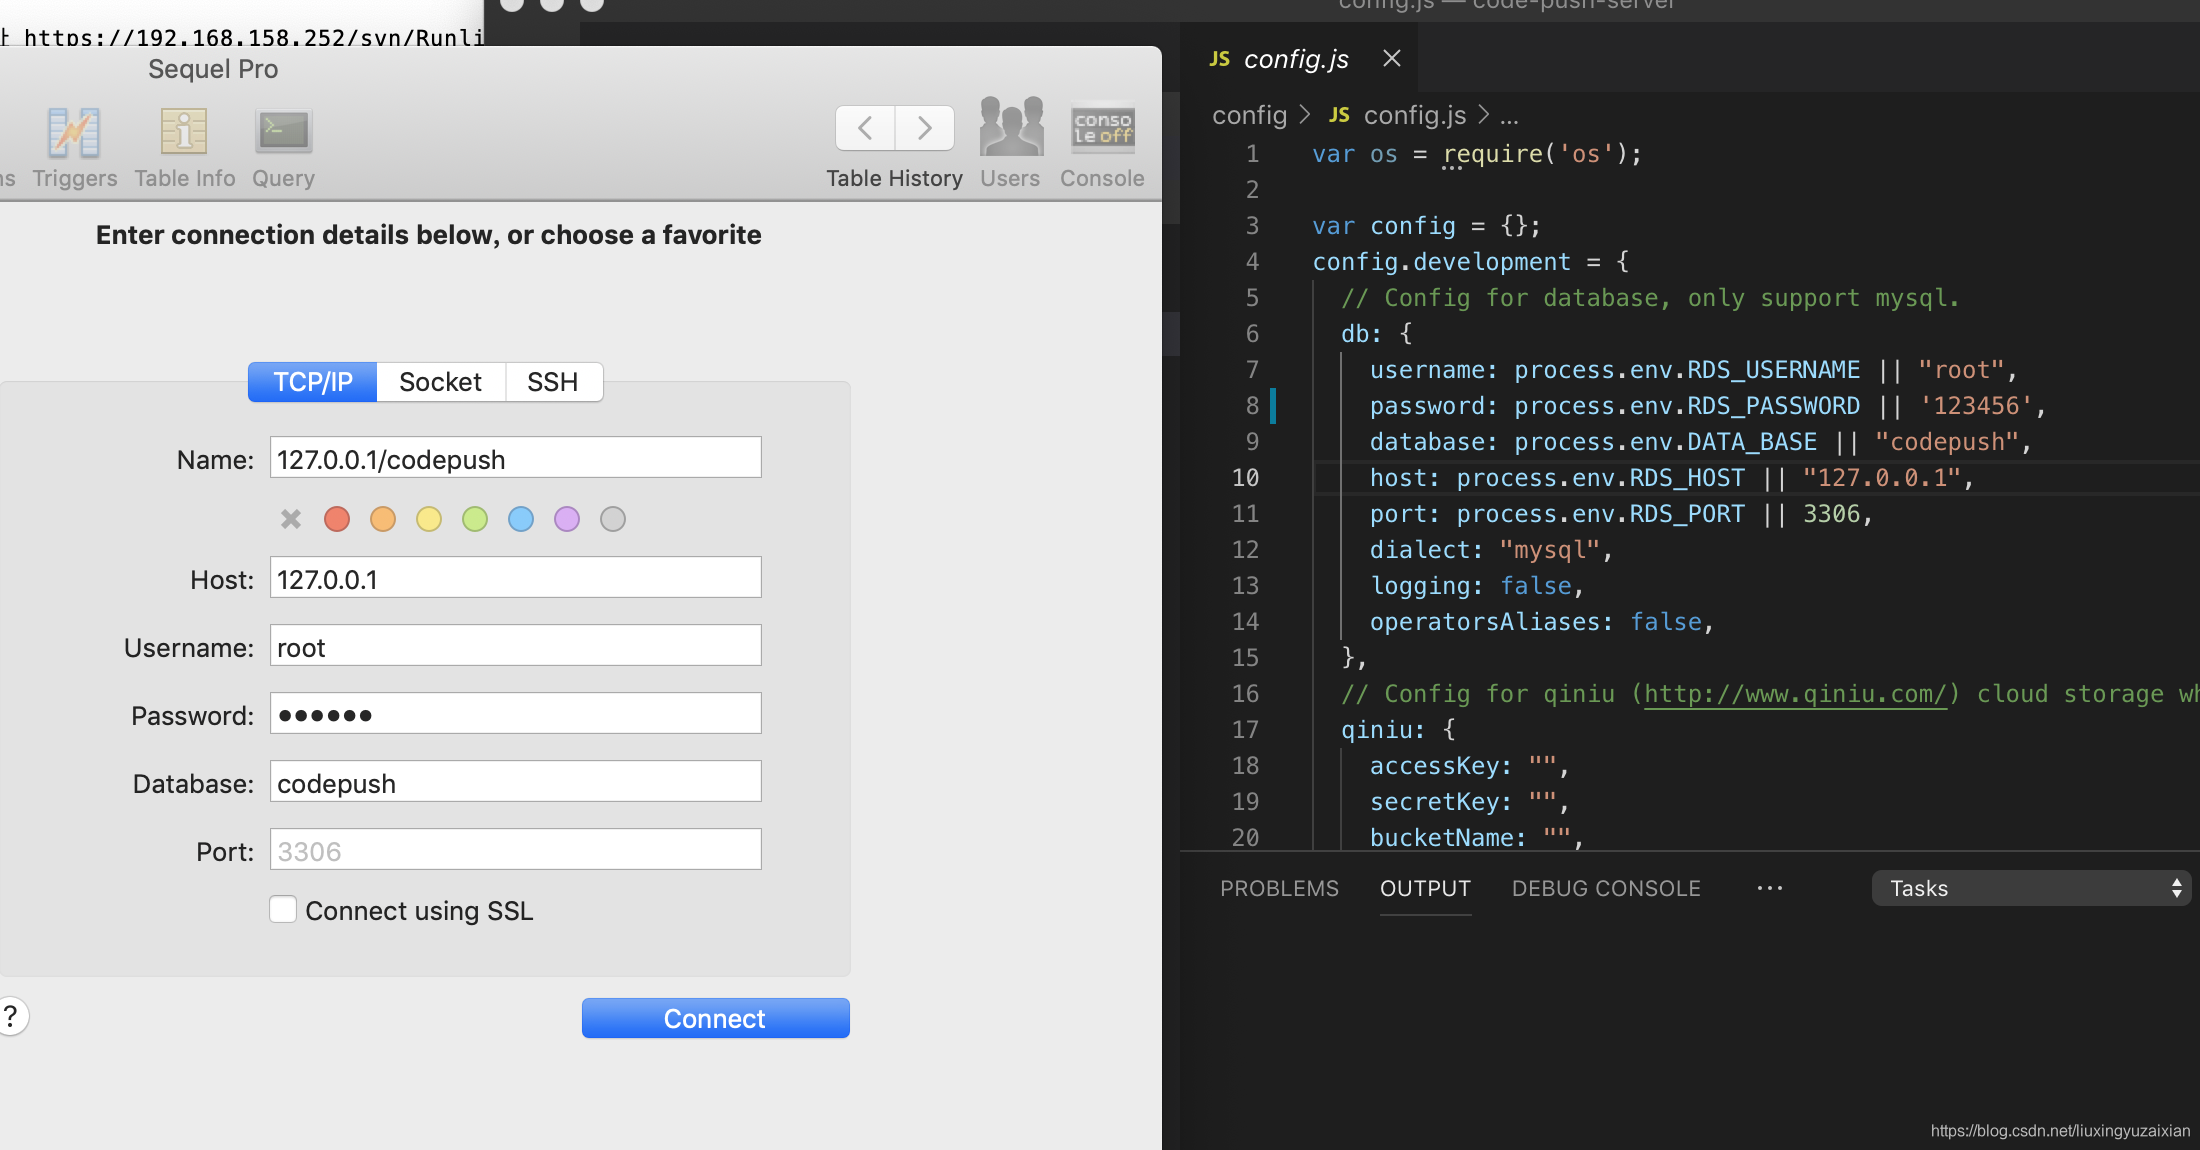
- 修改config.js配置问题
打开配置文件~/code-push-server/config/config.js,修改三个地方,新建一个目录

 a, 数据库配置信息,账号密码等

 b, 修改local中的downloadUrl 为本机ip地址

 c,  到https://www.grc.com/passwords.htm 这个地方,生成一个63 random alpha-numeric characters,填到tokenSecret字段里面

 d,安装配置文件中的目录结构,新建storage与data文件夹。比如“/Users/zhanglei/workspace/storage”、“/Users/zhanglei/workspace/data”,前者用于数据库相关的资料路径记录,后者用于图片等资源文件与jsbundle

4,启动code-push-server服务器

cd到code-push-server目录,执行一下命令

$ ./bin/www #启动服务 浏览器中打开 http://127.0.0.1:3000 (也可以用本机ip访问 http://192.168.0.7:3000)

到此服务器端到配置就完成了。
然后贴一下全部的js文件
var os = require('os');

var config = {};
config.development = {
  // Config for database, only support mysql.
  db: {
    username: process.env.RDS_USERNAME || "root",
    password: process.env.RDS_PASSWORD || '123456',
    database: process.env.DATA_BASE || "codepush",
    host: process.env.RDS_HOST || "127.0.0.1",
    port: process.env.RDS_PORT || 3306,
    dialect: "mysql",
    logging: false,
    operatorsAliases: false,
  },
  // Config for qiniu (http://www.qiniu.com/) cloud storage when storageType value is "qiniu".
  qiniu: {
    accessKey: "",
    secretKey: "",
    bucketName: "",
    downloadUrl: "" // Binary files download host address.
  },
  // Config for upyun (https://www.upyun.com/) storage when storageType value is "upyun"
  upyun: {
    storageDir: process.env.UPYUN_STORAGE_DIR,
    serviceName: process.env.UPYUN_SERVICE_NAME,
    operatorName: process.env.UPYUN_OPERATOR_NAME,
    operatorPass: process.env.UPYUN_OPERATOR_PASS,
    downloadUrl: process.env.DOWNLOAD_URL,
  },
  // Config for Amazon s3 (https://aws.amazon.com/cn/s3/) storage when storageType value is "s3".
  s3: {
    accessKeyId: process.env.AWS_ACCESS_KEY_ID,
    secretAccessKey: process.env.AWS_SECRET_ACCESS_KEY,
    sessionToken: process.env.AWS_SESSION_TOKEN, //(optional)
    bucketName: process.env.BUCKET_NAME,
    region: process.env.REGION,
    downloadUrl: process.env.DOWNLOAD_URL, // binary files download host address.
  },
  // Config for Aliyun OSS (https://www.aliyun.com/product/oss) when storageType value is "oss".
  oss: {
    accessKeyId: "",
    secretAccessKey: "",
    endpoint: "",
    bucketName: "",
    prefix: "", // Key prefix in object key
    downloadUrl: "", // binary files download host address.
  },
  // Config for tencentyun COS (https://cloud.tencent.com/product/cos) when storageType value is "oss".
  tencentcloud: {
    accessKeyId: "",
    secretAccessKey: "",
    bucketName: "",
    region: "",
    downloadUrl: "", // binary files download host address.
  },
  // Config for local storage when storageType value is "local".
  local: {
    // Binary files storage dir, Do not use tmpdir and it's public download dir.
    storageDir: "/Users/zhanglei/workspace/storage",
    // Binary files download host address which Code Push Server listen to. the files storage in storageDir.
    downloadUrl: "http://127.0.0.1:3000/download",
    // public static download spacename.
    public: '/download'
  },
  jwt: {
    // Recommended: 63 random alpha-numeric characters
    // Generate using: https://www.grc.com/passwords.htm
    tokenSecret: 't1iwqorl8flWwGzDc2bgveqyUIjJt3GyJOZrosEDPbvEl76rvplHQpAzfzUmoeV'
  },
  common: {
    /*
     * tryLoginTimes is control login error times to avoid force attack.
     * if value is 0, no limit for login auth, it may not safe for account. when it's a number, it means you can
     * try that times today. but it need config redis server.
     */
    tryLoginTimes: 0,
    // CodePush Web(https://github.com/lisong/code-push-web) login address.
    //codePushWebUrl: "http://127.0.0.1:3001/login",
    // create patch updates's number. default value is 3
    diffNums: 3,
    // data dir for caclulate diff files. it's optimization.
    dataDir: "/Users/zhanglei/workspace/data",
    // storageType which is your binary package files store. options value is ("local" | "qiniu" | "s3"| "oss" || "tencentcloud")
    storageType: process.env.STORAGE_TYPE || "local",
    // options value is (true | false), when it's true, it will cache updateCheck results in redis.
    updateCheckCache: false,
    // options value is (true | false), when it's true, it will cache rollout results in redis
    rolloutClientUniqueIdCache: false,
  },
  // Config for smtp email,register module need validate user email project source https://github.com/nodemailer/nodemailer
  smtpConfig:{
    host: "smtp.aliyun.com",
    port: 465,
    secure: true,
    auth: {
      user: "",
      pass: ""
    }
  },
  // Config for redis (register module, tryLoginTimes module)
  redis: {
    default: {
      host: "127.0.0.1",
      port: 6379,
      retry_strategy: function (options) {
        if (options.error.code === 'ECONNREFUSED') {
          // End reconnecting on a specific error and flush all commands with a individual error
          return new Error('The server refused the connection');
        }
        if (options.total_retry_time > 1000 * 60 * 60) {
            // End reconnecting after a specific timeout and flush all commands with a individual error
            return new Error('Retry time exhausted');
        }
        if (options.times_connected > 10) {
            // End reconnecting with built in error
            return undefined;
        }
        // reconnect after
        return Math.max(options.attempt * 100, 3000);
      }
    }
  }
}

config.development.log4js = {
  appenders: {console: { type: 'console'}},
  categories : {
    "default": { appenders: ['console'], level:'error'},
    "startup": { appenders: ['console'], level:'info'},
    "http": { appenders: ['console'], level:'info'}
  }
}

config.production = Object.assign({}, config.development);
module.exports = config;
三 、客户端配置流程
- 创建react-native热更新测试项目
创建最新版react-native 项目:react-native init
创建指定版本号项目:react-native init demo --version 0.53.3
经过阅读react-native-cli源码,发现还有另外一个参数:verbose,这个是用来在初始化的时候显示详情的,比如安装了什么模块,进度如何等等。所以如果需要,推荐的完整命令则为:react-native init demo --verbose --version 0.53.3
- app修改远程服务器地址
package com.hongshi.rn;

import android.app.Application;

import com.facebook.react.ReactApplication;
import com.hongshi.BuildConfig;
import com.hongshi.rn.bridge.NativeBridgePackage;
import com.microsoft.codepush.react.CodePush;
import com.reactnativecommunity.webview.RNCWebViewPackage;
import com.reactnativecommunity.asyncstorage.AsyncStoragePackage;
import com.airbnb.android.react.lottie.LottiePackage;
import com.react.rnspinkit.RNSpinkitPackage;
import com.swmansion.gesturehandler.react.RNGestureHandlerPackage;
import com.facebook.react.ReactNativeHost;
import com.facebook.react.ReactPackage;
import com.facebook.react.shell.MainReactPackage;
import com.facebook.soloader.SoLoader;

import java.util.Arrays;
import java.util.List;

public class MainApplication extends Application implements ReactApplication {

  private final ReactNativeHost mReactNativeHost = new ReactNativeHost(this) {

    @Override
    protected String getJSBundleFile(){
      return CodePush.getJSBundleFile();
    }

    @Override
    public boolean getUseDeveloperSupport() {
      return BuildConfig.DEBUG;
    }

    @Override
    protected List<ReactPackage> getPackages() {
      return Arrays.<ReactPackage>asList(
          new MainReactPackage(),
            new RNCWebViewPackage(),
            new AsyncStoragePackage(),
            new LottiePackage(),
            new RNSpinkitPackage(),
            new RNGestureHandlerPackage(),
              // CodePush(String deploymentKey, Context context, boolean isDebugMode, @NonNull String serverUrl)
              new CodePush(null, getApplicationContext(), BuildConfig.DEBUG, "http://127.0.0.1:3000"),
              new NativeBridgePackage()
      );
    }

    @Override
    protected String getJSMainModuleName() {
      return "index";
    }
  };

  @Override
  public ReactNativeHost getReactNativeHost() {
    return mReactNativeHost;
  }

  @Override
  public void onCreate() {
    super.onCreate();
    SoLoader.init(this, /* native exopackage */ false);
  }
}
- 注册code-push账号,注册过程中会打开授权网页,使用到项目的token,打开http://127.0.0.1:3000(本人的code-push-server账号密码为 account: admin password: 123456),获取token放到code-push中
$ code-push register
- 在code-push服务器注册App
添加部署环境 code-push deployment add <app_name> test//创建test环境
添加应用平台 code-push app add <app_name> <os> <platform>
例如添加iOS平台 $ code-push app add iOSRNHybrid ios react-native,多个平台执行多次
查看应用列表 code-push app list
查看APP的环境信息 code-push deployment list <app_name> --format json
- ReactNative项目集成code-push
项目根目录下安装组件 npm install react-native-code-push --save
添加依赖 npm link react-native-code-push
· react-native App.js中集成代码
import React, { Component } from 'react';
import {
  Platform,
  StyleSheet,
  Text,
  View
} from 'react-native';
import CodePush from "react-native-code-push"; // 引入code-push

let codePushOptions = {
  //设置检查更新的频率
  //ON_APP_RESUME APP恢复到前台的时候
  //ON_APP_START APP开启的时候
  //MANUAL 手动检查
  checkFrequency : CodePush.CheckFrequency.ON_APP_RESUME
};

const instructions = Platform.select({
  ios: 'Press Cmd+R to reload,\n' +
    'Cmd+D or shake for dev menu',
  android: 'Double tap R on your keyboard to reload,\n' +
    'Shake or press menu button for dev menu',
});

type Props = {};
class App extends Component<Props> {
  //如果有更新的提示
  syncImmediate() {
    CodePush.sync( {
          //安装模式
          //ON_NEXT_RESUME 下次恢复到前台时
          //ON_NEXT_RESTART 下一次重启时
          //IMMEDIATE 马上更新
          mandatoryInstallMode : CodePush.InstallMode.IMMEDIATE ,
          deploymentKey: 'iOS平台Key,部署环境(Production/Staging)',
          //对话框
          updateDialog : {
            //是否显示更新描述
            appendReleaseDescription : true ,
            //更新描述的前缀。 默认为"Description"
            descriptionPrefix : "更新内容:" ,
            //强制更新按钮文字,默认为continue
            mandatoryContinueButtonLabel : "立即更新" ,
            //强制更新时的信息. 默认为"An update is available that must be installed."
            mandatoryUpdateMessage : "必须更新后才能使用" ,
            //非强制更新时,按钮文字,默认为"ignore"
            optionalIgnoreButtonLabel : '稍后' ,
            //非强制更新时,确认按钮文字. 默认为"Install"
            optionalInstallButtonLabel : '后台更新' ,
            //非强制更新时,检查到更新的消息文本
            optionalUpdateMessage : '有新版本了,是否更新?' ,
            //Alert窗口的标题
            title : '更新提示'
          }
        }
    );
  }
  componentWillMount() {
    CodePush.disallowRestart();//禁止重启
    this.syncImmediate(); //开始检查更新
  }
  componentDidMount() {
    CodePush.allowRestart();//在加载完了,允许重启
  }

/*或者采用这一段代码
componentDidMount() {
    CodePush.sync({
      updateDialog: {
        appendReleaseDescription: true,
        descriptionPrefix:'\n\n更新内容:\n',
        title:'更新',
        mandatoryUpdateMessage:'',
        mandatoryContinueButtonLabel:'更新',
      },
      mandatoryInstallMode:CodePush.InstallMode.IMMEDIATE,
      deploymentKey: 'iOS平台Key,部署环境(Production/Staging)',
    });
  }
*/
  render() {
    return (
      <View style={styles.container}>
        <Text style={styles.welcome}>
          Welcome to React Native!
        </Text>
        <Text style={styles.instructions}>
          To get started, edit App.js
        </Text>
        <Text style={styles.instructions}>
          {instructions}
        </Text>

        <Text style={styles.instructions}>
          这是更新的版本
        </Text>
      </View>
    );
  }
}

// 这一行必须要写
App = CodePush(codePushOptions)(App)

export default App

const styles = StyleSheet.create({
  container: {
    flex: 1,
    justifyContent: 'center',
    alignItems: 'center',
    backgroundColor: '#F5FCFF',
  },
  welcome: {
    fontSize: 20,
    textAlign: 'center',
    margin: 10,
  },
  instructions: {
    textAlign: 'center',
    color: '#333333',
    marginBottom: 5,
  },
})
- 随意修改js文件内容,执行打包推送命令,即可看到热更新变更的内容了
code-push release-react sunny635533/DigitalMine-Android android -m true -d Staging --des "打包提测" -t "1.0.0"
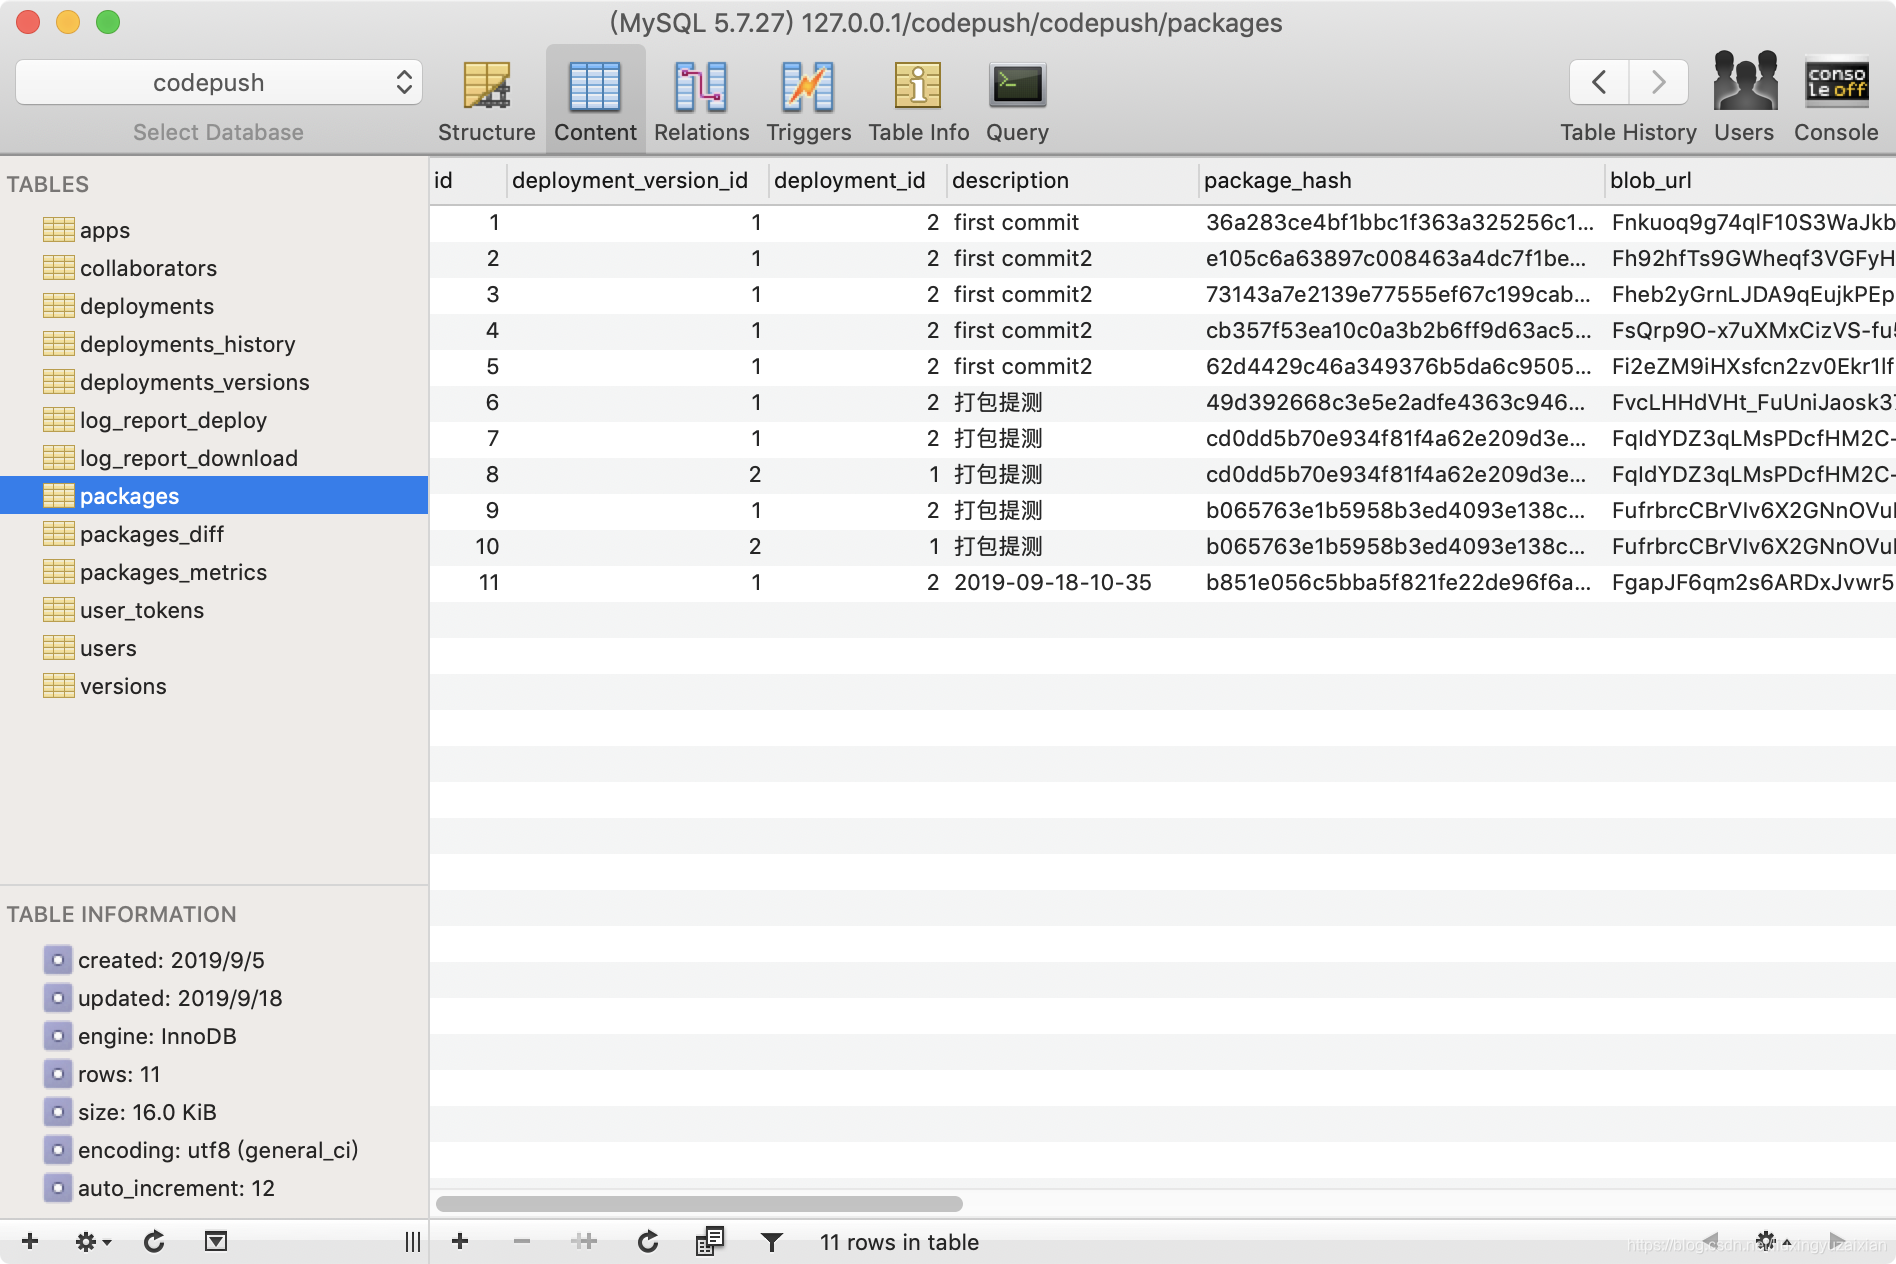
四 、使用Sequel Pro查看code-push-server数据库内容
-
下载轻量级数据库可视化工具Sequel Pro ,下载地址
-
连接数据库