Apache ActiveMQ是Apache软件基金会所研发的开放源代码消息中间件;
由于ActiveMQ是一个纯Java程序,因此只需要操作系统支持Java虚拟机,ActiveMQ便可执行。
ActiveMQ是用来干什么的?
用来处理消息,也就是处理JMS的。消息队列在大型电子商务类网站,如京东、淘宝、去哪儿等网站有着深入的应用,
队列的主要作用是消除高并发访问高峰,加快网站的响应速度。
在不使用消息队列的情况下,用户的请求数据直接写入数据库,高发的情况下,会对数据库造成巨大的压力,
同时也使得系统响应延迟加剧,但使用队列后,用户的请求发给队列后立即返回。
例如:不能直接给用户提示订单提交成功,京东上提示:“您提交了订单,
请等待系统确认”再由消息队列的消费者进程从消息队列中获取数据,异步写入数据库。
由于消息队列的服务处理速度远快于数据库,因此用户的响应延迟可得到有效改善。
ActiveMQ的使用场景?
1、异步调用。
2、一对多通信。
3、做多个系统的集成、同构、异构。
4、作为RPC的替代。
5、多个应用相互解耦。
6、作为事件驱动架构的幕后支撑。
7、为了提高系统的可伸缩性。
ActiveMQ的特点?
支持Java消息服务(JMS) 1.1 版本
集群 (Clustering)
支持的编程语言包括:C、C++、C#、Delphi、Erlang、Adobe Flash、Haskell、Java、JavaScript、Perl、PHP、Pike、Python和Ruby
协议支持包括:OpenWire、REST、STOMP、WS-Notification、MQTT、XMPP以及AMQP
怎么样安装ActiveMQ?
解压即可完成ActiveMQ的安装
解压后目录结构如下
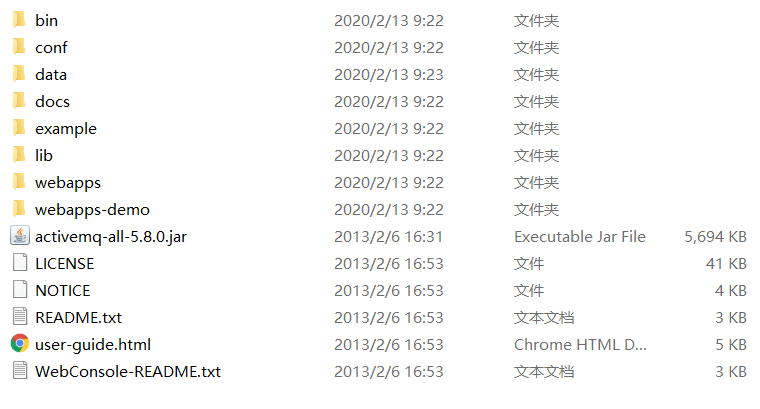
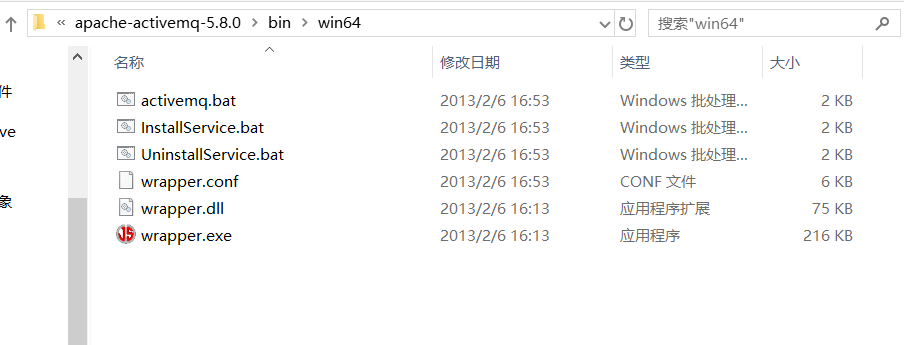
在bin目录下面如果是如果是32位就选择win32 ,64位就选择win64 然后点击activemq.bat启动
三种启动方式:
(1)普通启动 ./activemq start
(2)启动并指定日志文件 ./activemq start >tmp/smlog
(3)后台启动方式nohup ./activemq start >/tmp/smlog
前两种方式下在命令行窗口关闭时或者ctrl+c时导致进程退出,采用后台启动方式则可以避免这种情况
使用点对点的方式实现洗息队列
第一步:导入依赖
 <dependency>
        <groupId>org.apache.activemq</groupId>
        <artifactId>activemq-core</artifactId>
        <version>5.7.0</version>
    </dependency>
第二步:创建生产者
package com.wish.peertopeer;

import org.apache.activemq.ActiveMQConnection;
import org.apache.activemq.ActiveMQConnectionFactory;
import javax.jms.*;

public class P2pProducer {
    public static void main(String[] args) throws JMSException {
        // ConnectionFactory :连接工厂,JMS 用它创建连接
        ConnectionFactory connectionFactory = new ActiveMQConnectionFactory(ActiveMQConnection.DEFAULT_USER,
                ActiveMQConnection.DEFAULT_PASSWORD, "tcp://127.0.0.1:61616");
        // JMS 客户端到JMS Provider 的连接
        Connection connection = connectionFactory.createConnection();
        connection.start();
        // Session: 一个发送或接收消息的线程
        Session session = connection.createSession(Boolean.FALSE, Session.AUTO_ACKNOWLEDGE);
        // Destination :消息的目的地;消息发送给谁.
        // 获取session注意参数值my-queue是Query的名字
        Destination destination = session.createQueue("my-queue");
        // MessageProducer:消息生产者
        MessageProducer producer = session.createProducer(destination);
        // 设置不持久化
        producer.setDeliveryMode(DeliveryMode.NON_PERSISTENT);
        // 发送一条消息
        for (int i = 1; i <= 5; i++) {
            sendMsg(session, producer, i);
        }
        connection.close();
    }
    /**
     * 在指定的会话上,通过指定的消息生产者发出一条消息
     *
     * @param session
     *            消息会话
     * @param producer
     *            消息生产者
     */
    public static void sendMsg(Session session, MessageProducer producer, int i) throws JMSException {
        // 创建一条文本消息
        TextMessage message = session.createTextMessage("Hello ActiveMQ!" + i);
        // 通过消息生产者发出消息
        producer.send(message);
    }
}
第三步:创建消费者
package com.wish.peertopeer;
import org.apache.activemq.ActiveMQConnection;
import org.apache.activemq.ActiveMQConnectionFactory;
import javax.jms.*;
public class P2pConsumer {
public static void main(String[] args) throws JMSException {
// ConnectionFactory :连接工厂,JMS 用它创建连接
ConnectionFactory connectionFactory = new ActiveMQConnectionFactory(ActiveMQConnection.DEFAULT_USER,
ActiveMQConnection.DEFAULT_PASSWORD, "tcp://127.0.0.1:61616");
// JMS 客户端到JMS Provider 的连接
Connection connection = connectionFactory.createConnection();
connection.start();
// Session: 一个发送或接收消息的线程
Session session = connection.createSession(Boolean.TRUE, Session.AUTO_ACKNOWLEDGE);
// Destination :消息的目的地;消息发送给谁.
// 获取session注意参数值xingbo.xu-queue是一个服务器的queue,须在在ActiveMq的console配置
Destination destination = session.createQueue("my-queue");
// 消费者,消息接收者
MessageConsumer consumer = session.createConsumer(destination);
while (true) {
TextMessage message = (TextMessage) consumer.receive();
if (null != message) {
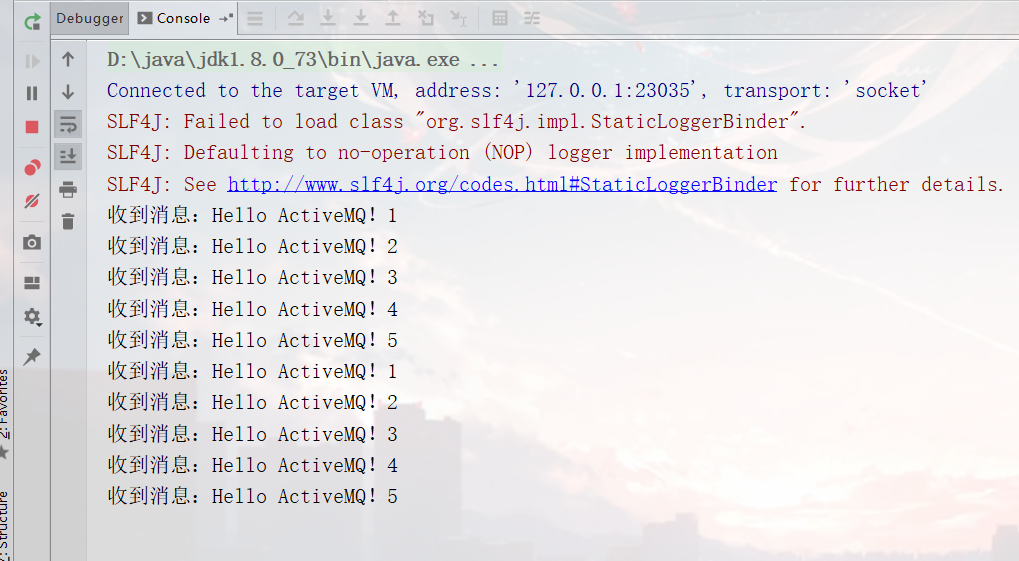
System.out.println("收到消息:" + message.getText());
} else
break;
}
session.close();
connection.close();
}
}
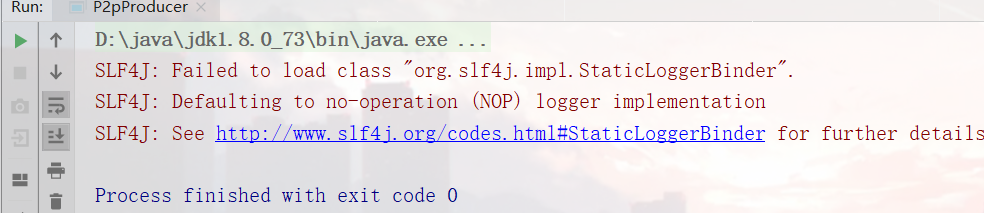
实现效果
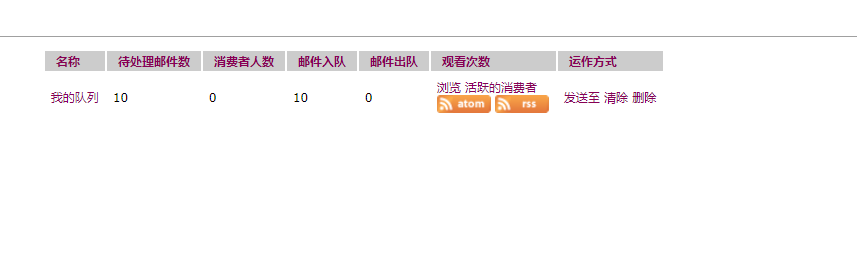
启动生产者
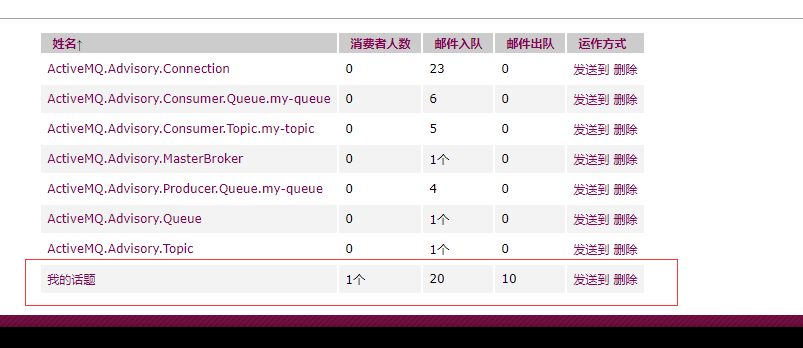
浏览http://localhost:8161/admin/queues.jsp查看
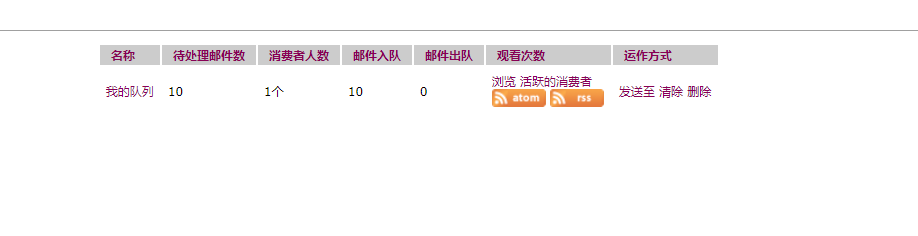
启动消费者
浏览http://localhost:8161/admin/queues.jsp查看
使用发布订阅的方式实现消息队列
第一步:也是导入依赖与上面一样
第二步:创建生产者
package com.wish.publishandsubscribe;
import org.apache.activemq.ActiveMQConnection;
import org.apache.activemq.ActiveMQConnectionFactory;
import javax.jms.*;
public class PapProducer {
private static String BROKERURL = "tcp://127.0.0.1:61616";
private static String TOPIC = "my-topic";
public static void main(String[] args) throws JMSException {
start();
}
static public void start() throws JMSException {
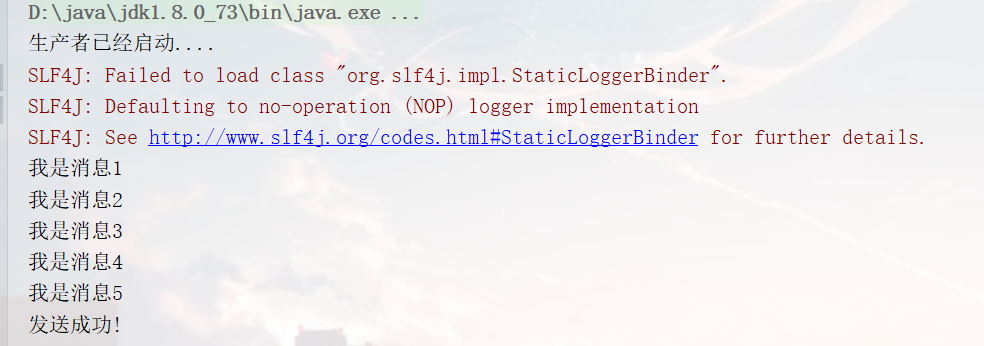
System.out.println("生产者已经启动....");
// 创建ActiveMQConnectionFactory 会话工厂
ActiveMQConnectionFactory activeMQConnectionFactory = new ActiveMQConnectionFactory(
ActiveMQConnection.DEFAULT_USER, ActiveMQConnection.DEFAULT_PASSWORD, BROKERURL);
Connection connection = activeMQConnectionFactory.createConnection();
// 启动JMS 连接
connection.start();
Session session = connection.createSession(false, Session.AUTO_ACKNOWLEDGE);
MessageProducer producer = session.createProducer(null);
producer.setDeliveryMode(DeliveryMode.PERSISTENT);
send(producer, session);
System.out.println("发送成功!");
connection.close();
}
static public void send(MessageProducer producer, Session session) throws JMSException {
for (int i = 1; i <= 5; i++) {
System.out.println("我是消息" + i);
TextMessage textMessage = session.createTextMessage("我是消息" + i);
Destination destination = session.createTopic(TOPIC);
producer.send(destination, textMessage);
}
}
}
第三步:创建消费者
package com.wish.publishandsubscribe;
import org.apache.activemq.ActiveMQConnection;
import org.apache.activemq.ActiveMQConnectionFactory;
import javax.jms.*;
public class PapConsumer {
private static String BROKERURL = "tcp://127.0.0.1:61616";
private static String TOPIC = "my-topic";
public static void main(String[] args) throws JMSException {
start();
}
static public void start() throws JMSException {
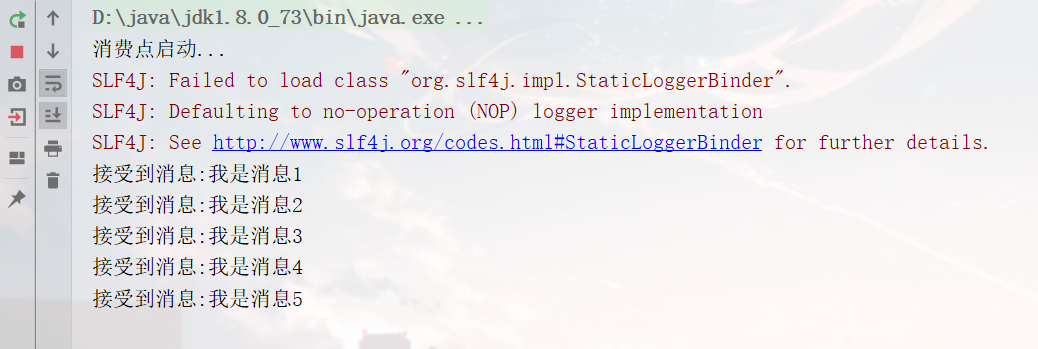
System.out.println("消费点启动...");
// 创建ActiveMQConnectionFactory 会话工厂
ActiveMQConnectionFactory activeMQConnectionFactory = new ActiveMQConnectionFactory(
ActiveMQConnection.DEFAULT_USER, ActiveMQConnection.DEFAULT_PASSWORD, BROKERURL);
Connection connection = activeMQConnectionFactory.createConnection();
// 启动JMS 连接
connection.start();
// 不开消息启事物,消息主要发送消费者,则表示消息已经签收
Session session = connection.createSession(false, Session.AUTO_ACKNOWLEDGE);
// 创建一个队列
Topic topic = session.createTopic(TOPIC);
MessageConsumer consumer = session.createConsumer(topic);
// consumer.setMessageListener(new MsgListener());
while (true) {
TextMessage textMessage = (TextMessage) consumer.receive();
if (textMessage != null) {
System.out.println("接受到消息:" + textMessage.getText());
// textMessage.acknowledge();// 手动签收
// session.commit();
} else {
break;
}
}
connection.close();
}
}
实现效果
启动生产者
浏览http://localhost:8161/admin/topics.jsp查看

启动消费者
浏览http://localhost:8161/admin/topics.jsp查看