直接以项目实例来进行讲解要素绘制
需求(假如):
1.实现在地图上画点线面功能
2.自定义其样式
3.支持编辑功能
需要用到的openlayers3中的ol.interaction.Draw 类。这是openlayers3提供的内置交互方式,除了这个用来绘制的类,还有其他的交互类,如:
1.按住alt+shift键,用鼠标左键拖动地图,就能让地图旋转,对应的交互类为ol.interaction.DragRotate。

2.用鼠标左键双击地图,就可以放大地图,对应的交互类为ol.interaction.DoubleClickZoom。

3.用鼠标左键,拖拽地图,就可以平移地图,对应的交互类为ol.interaction.DragPan。

4.在触摸屏上,用两个手指在触摸屏上旋转,就可以旋转地图,对应的交互类为ol.interaction.PinchRotate。

5.在触摸屏上,用两个手指在触摸屏上缩放,就可以缩放地图,对应的交互类为ol.interaction.PinchZoom。

6.用键盘上的上下左右键,就可以平移地图,对应的交互类为ol.interaction.KeyboardPan。

7.用键盘上的+/-键,就可以缩放地图,对应的交互类为ol.interaction.KeyboardZoom。

8.滚动鼠标中间的滑轮,就可以缩放地图,对应的交互类为ol.interaction.MouseWheelZoom。

9.按住shift键,同时用鼠标左键在地图上拖动,就可以放大地图,对应的交互类为ol.interaction.DragZoom。
针对项目,下面是步骤:
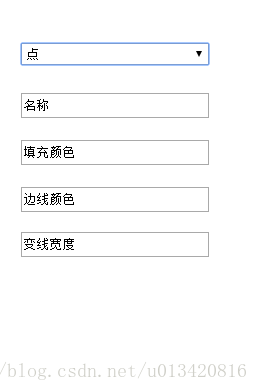
1.首先是获取输入的样式参数,然后开启draw 功能 beginDraw:
function beginDraw(){
        /*获取要素的样式参数*/
        var feaName = $('#feaName').val();
        var fillColor = $('#fillColor').val();
        var sideColor = $('#sideColor').val();
        var sideWidth = $('#sideWidth').val();
        var fontsize = $('#fontsize').val();
        var fontColor = $('#fontColor').val();
        var type_select = $('#type_select').val();
        var style ;
        // 判断用户是否输入样式参数,若填充色以及边线颜色均为填写,则判定用户未输入样式,使用默认样式
        if((fillColor==null ||fillColor=='') && (sideColor == null ||sideColor =='')){
            style = null;
        }else{
            // 使用用户提供的参数,进行实例化style 对象
             style = new ol.style.Style({
                fill:new ol.style.Fill({
                    color:fillColor
                }),
                stroke:new ol.style.Stroke({
                    color:sideColor,
                    width:sideWidth-0
                }),
                text:new ol.style.Text({
                    font:fontsize,
                    text:feaName,
                    fill:new ol.style.Fill({
                        color:fontColor
                    }),
                    stroke:new ol.style.Stroke({
                        color:sideColor,
                        width:sideWidth-0
                    })
                }),
                image:new ol.style.Circle({
                    fill:new ol.style.Fill({
                        color:fillColor
                    }),
                    stroke:new ol.style.Stroke({
                        color:sideColor,
                        width:sideWidth-0
                    }),
                })
            });
        }
        /*根据选择决定要素类型*/
        if(type_select == 'point'){
            drawPoint(style);
        }else if(type_select == 'line'){
            drawLine(style);
        }else if(type_select == 'circle'){
            drawCircle(style);
        }else if(type_select == 'polygon'){
            drawPolygon(style);
        }
    }
2.针对选择的不同图形种类,进入不同方法,并初始化draw方法:
// 绘制面要素
function drawPolygon(style){
        map.removeInteraction(draw);
        drawInteraction('Polygon',style);
    }
    //在地图中绘制图形的基础方法
    function drawInteraction(type,style){
        if(type!=null){
            // 特殊的图形进行单独配置
            draw=new ol.interaction.Draw({
                source:layer.getSource(),
                type:type
            });
            draw.on('drawend',function(evt){
                var fea = evt.feature;
                fea.set('name',type);
                if(style!=null){// 如果传入不为空,则使用自定义样式
                    fea.setStyle([style]);
                }
                map.removeInteraction(draw);
            },this);
                map.addInteraction(draw);
        }
    }
这样子,就可以在地图上进行绘制要素了。
下面就是对已经绘制好的要素进行再次编辑。这里会用到另一个交互类:ol.interaction.Select 这是内置的选择交互类,还有ol.interaction.Modify 用于修改要素的交互类。
1.首先自己封装一个修改的对象,在里面写初始化以及一些操作方法。
// 定义modify对象,为要素编辑功能提供基础帮助
var Modify ={
        init:function(){
            this.select = new ol.interaction.Select();//创建选择交互
            map.addInteraction(this.select);
            this.modify = new ol.interaction.Modify({
                features:this.select.getFeatures()
            });
            map.addInteraction(this.modify);
            this.setEvnt();
        },
        setEvnt:function(){
            var selectFeatures = this.select.getFeatures();
            this.select.on('change:active',function(){
                selectFeatures.forEach(selectFeatures.remove,selectFeatures);
            });
        },
        // 控制modify以及select的状态
        setActive:function(active){
            this.select.setActive(active);
            this.modify.setActive(active);
        },
        // 获取选择交互对象
        getSelect:function(){
            return this.select;
        }

};
// 开始编辑
function beginModify(){
    // 先初始化modify对象,添加modify以及select交互
    Modify.init();
    Modify.setActive(true);
    // 获取选择交互对象
    var select = Modify.getSelect();
    var style =null;
    // 选中要素时获取要素的样式
    select.once('select',function(event){
        sel_fea = event.selected[0];
        //调用方法将获取的要素的style信息填入input中
        setStyleVal(sel_fea.getStyle());
    });
}
到目前为止,已经可以对地图上的要素进行再次编辑,更改形状,也可以更改该要素的样式,但是还差一步,在编辑形状完后要将modify以及select交互设置为不激活状态。
    /*
     * 关闭修改功能
     * */
    function endSelect(){
        /*获取要素的样式参数*/
        var feaName = $('#up_feaName').val();
        var fillColor = $('#up_fillColor').val();
        var sideColor = $('#up_sideColor').val();
        var sideWidth = $('#up_sideWidth').val();
        var fontsize = $('#up_fontsize').val();
        var fontColor = $('#up_fontColor').val();
        var type_select = $('#up_type_select').val();
        var style ;
        if((fillColor==null ||fillColor=='') && (sideColor == null ||sideColor =='')){
            style = null;
        }else{
             style = new ol.style.Style({
                fill:new ol.style.Fill({
                    color:fillColor
                }),
                stroke:new ol.style.Stroke({
                    color:sideColor,
                    width:sideWidth-0
                }),
                text:new ol.style.Text({
                    font:fontsize,
                    text:feaName,
                    fill:new ol.style.Fill({
                        color:fontColor
                    }),
                    stroke:new ol.style.Stroke({
                        color:sideColor,
                        width:sideWidth-0
                    })
                }),
                image:new ol.style.Circle({
                    fill:new ol.style.Fill({
                        color:fillColor
                    }),
                    stroke:new ol.style.Stroke({
                        color:sideColor,
                        width:sideWidth-0
                    }),
                })
            });
        }
        closeModify(style);
    }
    function closeModify(style){
    // 更新选中要素时的样式
    if(style!=null){
        sel_fea.setStyle([style]);
    }
    Modify.setActive(false);
}
如果想实现绘制的时候是一种样式,绘制结束是input框中的样式也可以的,在dra里面有style属性,可以自定义绘制的的要素属性。然后绘制结束后在drawend事件里获取input框中的值,形成style对象即可。
好了,到此为止整个的要素绘制功能基本已经实现了,其实网上也有很多这样的例子了,我的代码里也有一些是参考网上的,然后加上自己的需求进行更改的。