先记一下命令
#启动gpu容器 带jupyter以及 ssh
(docker run -tdi --gpus all  -p 60106:22 -p 60006:8888 --name  cujupt102 --privileged=true  registry.cn-hangzhou.aliyuncs.com/mkmk/gpujupyter:sshtf20b1 /bin/bash) &&(docker exec -d cujupt102 /bin/bash -c "cd /home &&(/etc/init.d/ssh start) && nohup jupyter notebook --allow-root & " )

#删除容器
docker stop cujupt102 && docker rm cujupt102

#删除镜像
docker rmi $(docker images -q)
docker run -tdi --gpus all --name gpu102 --privileged=true nvidia/cuda:10.2-base /bin/bash
成功,
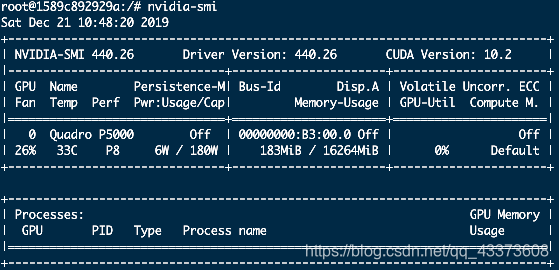
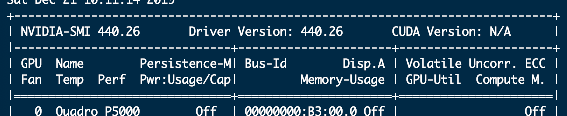
如果不使用官方的镜像,cuda会显示N/A
失败截图
#进入容器
 docker exec -it gpu102 "bash"
#查看驱动
nvidia-smi
#查看系统版本
cat /etc/issue
Ubuntu 18.04.3 LTS \n \l
安装python3
安装ptyhon3.7
sudo apt-get update

sudo apt-get install python3.7

安装成后的目录在/usr/bin/python3.7,同时将其设置成默认

sudo update-alternatives --install /usr/bin/python python /usr/bin/python3.7 150

sudo update-alternatives --config python
安装setuptools
unzip setuptools-42.0.2.zip
docker cp setuptools-42.0.2 gpu102:/home/installpackges/setuptools-42.0.2
cd s
安装pip
apt-get install python3-pip
在这里插入代码片
apt-get install python3-pip
建立 从 a 到 b 的软连接
ln -s a b
ln -s /usr/bin/pip3 /usr/bin/pip
ln -s /usr/bin/python3.6 /usr/bin/python
配置jupyter
pip install jupyter
root@1589c892929a:/home# jupyter notebook --generate-config
Writing default config to: /root/.jupyter/jupyter_notebook_config.py
>>> from notebook.auth import passwd
>>> passwd()
Enter password:
Verify password:
'sha1:e7760ad802a5:0d634bc07644459cacf405f962c504c9df1c87dc'
编辑jupyter配置文件
 docker cp gpu102:/root/.jupyter/jupyter_notebook_config.py  jupyter_notebook_config.py
 #编辑
vi /root/.jupyter/jupyter_notebook_config.py
c.NotebookApp.ip='*' #设置访问notebook的ip,*表示所有IP

c.NotebookApp.password = u'sha1:xxx' #填写刚刚复制的密钥

c.NotebookApp.open_browser = False # 禁止notebook启动时自动打开浏览器

c.NotebookApp.port =8888 #指定访问的端口,默认是8888。

jupyter notebook --config /root/.jupyter/jupyter_notebook_config.py --allow-root
#启动gpu容器 带jupyter以及 ssh
(docker run -tdi --gpus all  -p 60106:22 -p 60006:8888 --name  cujupt102 --privileged=true  registry.cn-hangzhou.aliyuncs.com/mkmk/gpujupyter:ssh0tf20opencv4keras /bin/bash) &&(docker exec -d cujupt102 /bin/bash -c "cd /home &&(/etc/init.d/ssh start) && nohup jupyter notebook --allow-root & " )

#删除容器
docker stop cujupt102 && docker rm cujupt102
pip 加速
vi ~/.pip/pip.conf
[global]
index-url = http://mirrors.aliyun.com/pypi/simple/
[install]
trusted-host=mirrors.aliyun.com
chapter3-autoencoders
下有cpu执行和gpu执行文件的对比
然后数据集加载
keras中
loaddata() 函数默认可以添加一个path
loaddata( datapath ) 这样keras就不会再去 网上下数据资源


#每秒监视一次gpu信息
watch -n 1 nvidia-smi
#在哪里查看都可以,都可以检测到GPU是否运行

最后对于每一个 echo cpu运行 60s

gpu运行16s


with  tf.device("/cpu:0"):
	执行代码


with   tf.device("/gpu:0"):
	执行代码
指定特定显卡工作
也可以创建多线程 ,cpu GPU 分别工作
