cocosCreater使用Shader 做几个小效果 基于2.0版本
先定义几个全局函数
util.js 工具类
//工具类
var util = {};
util.useShader = function(sprite, lab) {
    if (cc.game.renderType === cc.game.RENDER_TYPE_CANVAS) {
        console.warn('Shader not surpport for canvas');
        return;
    }
    if (!sprite || !sprite.spriteFrame || sprite.lab == lab) {
        return;
    }
    if (lab) {
        if (lab.vert == null || lab.frag == null) {
            console.warn('Shader not defined', lab);
            return;
        }
        cc.dynamicAtlasManager.enabled = false;

        let material = new ShaderMaterial();
        let name = lab.name ? lab.name : "None"
        material.callfunc(name, lab.vert, lab.frag, lab.defines || []);

        let texture = sprite.spriteFrame.getTexture();
        material.setTexture(texture);
        material.updateHash();

        sprite._material = material;
        sprite._renderData.material = material;
        sprite.lab = lab;
        return material;
    } else {
        // 这个就是直接变成灰色
        sprite.setState(1);
    }
}
然后再来个 ShaderMaterial.js
const renderEngine = cc.renderer.renderEngine;
const Material = renderEngine.Material;

var material = cc.Class({
    extends: Material,

    callfunc (name, vert, frag, defines) {
    	let renderer = cc.renderer;
        let lib = renderer._forward._programLib;
        !lib._templates[name] && lib.define(name, vert, frag, defines);
        this.init(name);
    },

    init(name) {
        let renderer = renderEngine.renderer;
        let gfx = renderEngine.gfx;

        let pass = new renderer.Pass(name);
        pass.setDepth(false, false);
        pass.setCullMode(gfx.CULL_NONE);
        pass.setBlend(
            gfx.BLEND_FUNC_ADD,
            gfx.BLEND_SRC_ALPHA, gfx.BLEND_ONE_MINUS_SRC_ALPHA,
            gfx.BLEND_FUNC_ADD,
            gfx.BLEND_SRC_ALPHA, gfx.BLEND_ONE_MINUS_SRC_ALPHA
        );

        let mainTech = new renderer.Technique(
            ['transparent'],
            [
                { name: 'texture', type: renderer.PARAM_TEXTURE_2D },
                { name: 'color', type: renderer.PARAM_COLOR4 },
                { name: 'pos', type: renderer.PARAM_FLOAT3 },
                { name: 'size', type: renderer.PARAM_FLOAT2 },
                { name: 'time', type: renderer.PARAM_FLOAT },
                { name: 'num', type: renderer.PARAM_FLOAT }
            ],
            [pass]
        );

        this._texture = null;
        this._color = { r: 1.0, g: 1.0, b: 1.0, a: 1.0 };
        this._pos = { x: 0.0, y: 0.0, z: 0.0 };
        this._size = { x: 0.0, y: 0.0 };
        this._time = 0.0;
        this._num = 0.0;
        this._effect = this.effect = new renderer.Effect([mainTech], {
            'color': this._color,
            'pos': this._pos,
            'size': this._size,
            'time': this._time,
            'num': this._num
        }, []);
        this._mainTech = mainTech;
    },

    setTexture(texture) {
        this._texture = texture;
        this._texture.update({ flipY: false, mipmap: false });
        this._effect.setProperty('texture', texture.getImpl());
        this._texIds['texture'] = texture.getId();
    },

    setColor(r, g, b, a) {
        this._color.r = r;
        this._color.g = g;
        this._color.b = b;
        this._color.a = a;
        this._effect.setProperty('color', this._color);
    },

    setPos(x, y, z) {
        this._pos.x = x;
        this._pos.y = y;
        this._pos.z = z;
        this._effect.setProperty('pos', this._pos);
    },

    setSize(x, y) {
        this._size.x = x;
        this._size.y = y;
        this._effect.setProperty('size', this._size);
    },

    setTime(time) {
        this._time = time;
        this._effect.setProperty('time', this._time);
    },

    setNum(num) {
        this._num = num;
        this._effect.setProperty('num', this._num);
    },
});

module.exports = material;
再建立一个init.js 写入
window.util = require("util")
window.ShaderMaterial = require("ShaderMaterial");
嗯 工具具备 我们可以开始了 先来个最简单的 来一个石头效果 ShaderStone.js
cc.Class({
    extends: cc.Component,

    properties: {

    },
    start () {
        this.node.script = this;

        let mVert = `
uniform mat4 viewProj;
attribute vec3 a_position;
attribute vec2 a_uv0;
varying vec2 uv0;
void main () {
    vec4 pos = viewProj * vec4(a_position, 1);
    gl_Position = pos;
    uv0 = a_uv0;
}`;
        let mFrag = `
uniform sampler2D texture;
uniform vec4 color;
varying vec2 uv0;
void main () {
    vec4 c = color * texture2D(texture, uv0);
    float clrbright = (c.r + c.g + c.b) * (1. / 3.);
    float gray = (0.6) * clrbright;
    gl_FragColor = vec4(gray, gray, gray, c.a);
}
`
        var lab = {
            vert: mVert,
            frag: mFrag,
            name: "stone"
        }
        let sprite = this.getComponent(cc.Sprite);
        let material = util.useShader(sprite, lab);
    },
});
有点shader基础的人可以一眼看出 其实关键性代码就四局 我做下注释
vec4 c = color * texture2D(texture, uv0);
// 这里的c其实就是这张图片原来的颜色 原来的纹理 也就是这张图片本来张什么样子就是什么样子不变
float clrbright = (c.r + c.g + c.b) * (1. / 3.);
// 这里的clrbright 就是取这张图片的每个像素点的红黄蓝的平均值
float gray = (0.6) * clrbright;
// gray就是取颜色平均值再乘以0.6
gl_FragColor = vec4(gray, gray, gray, c.a);
// 最后返回的颜色就是这个了 rgb一致  这个被称为stone效果 其实也跟图片变灰色差不多了
附上效果图 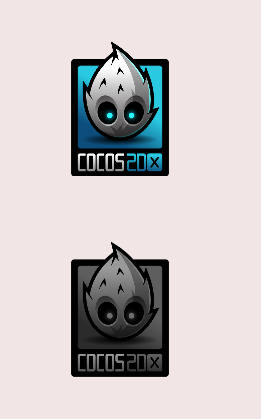
part2
嗯嗯 那我们现在就有了点shader的小基础了 我们再做个简单的比如传入左边 让shader跟着做修改的
先上个效果 
然后附上代码 ShaderBins.js
cc.Class({
    extends: cc.Component,

    properties: {

    },

    start () {
        this.node.script = this;
        this.pos_desc = cc.find("pos_desc", this.node);

        let mVert = `
uniform mat4 viewProj;
attribute vec3 a_position;
attribute vec2 a_uv0;
varying vec2 uv0;
void main () {
    vec4 pos = viewProj * vec4(a_position, 1);
    gl_Position = pos;
    uv0 = a_uv0;
}`;
        let mFrag = `
uniform sampler2D texture;
varying vec2 uv0;
varying vec4 color;
uniform vec3 pos;

const float waterwid = 0.5;
const float deepwid = 0.01;
const float pi = 3.141592653589793;

float CountScale(float left,float right)
{
    //水深
    float depth = pos.y;
    //防止怪异现象
    if (depth > 1.)
    {
        depth = 1.;
    }
    else if (depth < 0.)
    {
        depth = 0.;
    }
    //像素Y值缩放
    float scale = 1.-depth;
    float length = right - left;
    float mysca = pi/length;
    //向下弯曲的坐标值定在0.-1.之间
    float mpos = (uv0.x - left)/length;
    if (mpos < (1.-deepwid)/2. )
    {
        mpos = 1./(1.-deepwid)*(mpos);
        scale = (1.-depth) + depth *(0.5001-0.5*(sin(-pi/2.+mpos*2.*pi)) );
    }
    else if( mpos > (1.+deepwid)/2.)
    {
        mpos = 1./(1.-deepwid)*(mpos-deepwid);
        scale = (1.-depth)+ (depth)*(.5001-.5*( sin(-pi/2.+(mpos)*2.*pi) ) );
    }
    return scale;
}

void main() {
    float scale = 1.;
    float left  = pos.x - waterwid/2.;
    float right = pos.x + waterwid/2.;
    if (uv0.x > left && uv0.x < right )
    {
        scale = CountScale(left,right);
    }
    vec4 mycolor = vec4(0.0);
    if (1.-uv0.y < scale )
    {
        mycolor = texture2D(texture, vec2(uv0.x,1./scale*(uv0.y-1.+scale))  );
    }

    gl_FragColor = mycolor;
}
`
        var lab = {
            vert: mVert,
            frag: mFrag,
            name: "bins"
        }

        this.getComponent(cc.Sprite).setState(0);
        let sprite = this.getComponent(cc.Sprite);
        let material = util.useShader(sprite, lab);
        this._material = material;

        this.addTouch();
    },

    addTouch () {
        this.node.on(cc.Node.EventType.TOUCH_START, function(event) {
            var pos = this.node.convertToNodeSpace(cc.v2(event.touch._point.x, event.touch._point.y));
            this.changePos(pos)
        }, this);

        this.node.on(cc.Node.EventType.TOUCH_MOVE, function(event) {
            var pos = this.node.convertToNodeSpace(cc.v2(event.touch._point.x, event.touch._point.y));
            this.changePos(pos)
        }, this);

        this.node.on(cc.Node.EventType.TOUCH_END, function(event) {
            var pos = this.node.convertToNodeSpace(cc.v2(event.touch._point.x, event.touch._point.y));
            this.changePos(pos)
        }, this);
    },
    changePos (pos) {
        let x = pos.x/this.node.width;
        let y = pos.y/this.node.height;
        this.pos_desc.setLabel("x:"+x.toFixed(2)+" y:"+y.toFixed(2))
        this._material.setPos(x, 1-y, 0);
    },
});
这里其实我一开始写的时候定义了四个可以变化的变量鼠标点击是其中两个 另外两个就是cont waterwid-这个代表水坑宽度 deepwid-这个代表底部是否是比较存的sin形状 也就是可以拓宽底部宽度用的 读者可以自行修改看看效果 然后我们看到我定义了一个 addTouch 和 changePos
主要就是点击到这张图片上的时候 我们同时根据点击点传入着色器对应的也就是pos 这里的pos.x和pos.y的取值范围为0-1 我根据点击点 以图片的长宽为比率 传入点击比率点
归结起来这个效果的原理就是把上部分一部分的纹理往下压 然后上面的空间填充透明空白点 写的时候比较久远 这次换到cocosCreater顺便就给拉过来了 之前是给一位bins写的demo 虽然后面没用上 不过这个效果就叫做bins效果吧
趁热打铁 我们再来个简单的
先看下简单的效果 
嗯嗯 怎么说呢 这个算是一个选择界面吧 一个一个page拉动框 一般用来选择关卡的 附上代码ShaderWenyu.js 和 WenyuMain.js
cc.Class({
    extends: cc.Component,

    properties: {

    },

    start () {
        this.node.script = this;
        this._start = 0;
        this.pos_desc = cc.find("pos_desc", this.node);

        let mVert = `
uniform mat4 viewProj;
attribute vec3 a_position;
attribute vec2 a_uv0;
varying vec2 uv0;
void main () {
    vec4 pos = viewProj * vec4(a_position, 1);
    gl_Position = pos;
    uv0 = a_uv0;
}`;
        let mFrag = `
uniform sampler2D texture;
varying vec2 uv0;
uniform vec4 color;
uniform vec3 pos;

void main()
{
    float t_x;
    if (pos.x > 0.0)
    {
        t_x = 1.- uv0.x;
    }
    else
    {
        t_x =  uv0.x;
    }

    float m_y = (uv0.y - 0.5) * (2. * abs(pos.x) * t_x + 1.) + 0.5 ;
    //float m_alpha = texture2D(texture, fract(vec2(uv0.x, m_y))).a ;
    vec4 normalColor = texture2D(texture, fract(vec2(uv0.x, m_y)));
    if(m_y < 0. || m_y > 1.){
        normalColor = vec4(0.);
    }
    gl_FragColor = color * vec4(normalColor);
}
`
        var lab = {
            vert: mVert,
            frag: mFrag,
            name: "Wenyu",
        }

        this.getComponent(cc.Sprite).setState(0);
        let sprite = this.getComponent(cc.Sprite);
        let material = util.useShader(sprite, lab);
        this._material = material;

        this.changePosX();
    },

    changePosX () {
        let x = this.node.x/1000;
        this.node.zIndex = Math.ceil(9999 - Math.abs(this.node.x));
        this.pos_desc.setLabel(""+this.node.index+"\n"+x.toFixed(2));

        this._material.setPos(x, 0.5, 0);
    },
});
var ItemMoveActionTag = 123;

cc.Class({
    extends: cc.Component,

    properties: {
    },

    start () {
        this.ShaderWenyu = cc.find("ShaderWenyu", this.node)

        // 选择界面当前是第几个 this._ItemIndex
        this.itemIndex = 0;
        // item结点集合
        this.mItemSet = [];
        // Item间隔
        this.mInterval = -300;

        this.loadDisplay();

        this.addBigTouch();
    },

    loadDisplay () {
        // 装入第一个
        this.ShaderWenyu.index = 0;
        this.mItemSet.push(this.ShaderWenyu)
        // 再装入9个
        for (var i = 1; i < 10; i++) {
            var item = cc.instantiate(this.ShaderWenyu);
            item.x = (item.width + this.mInterval) * i;
            item.index = i;
            this.node.addChild(item);
            this.mItemSet.push(item);
        }
        var dx = this.mItemSet[this.itemIndex].x;
        this.itemWidth = this.mItemSet[0].width;
        this.moveItem(dx);
        this.adjustItem();
    },
    moveItem (dx) {
        var Xmin = (this.mInterval + this.itemWidth) * this.mItemSet.length/2;
        let Xmax = -1*Xmin;
        var tempWidth = -1*(this.mInterval + this.itemWidth) * this.mItemSet.length;

        for (var i = 0; i < this.mItemSet.length; i++) {
            var item = this.mItemSet[i];
            item.x = item.x + dx;
            // 调整位置, 让她循环起来
            if (item.x < Xmin) {
                item.x += tempWidth;
            } else if (item.x > Xmax) {
                item.x -= tempWidth;
            }
        }

    },
    soundKaka: function () {
        util.playSound("common/kaka");
    },
    stopItemAction: function () {
        for (var i = 0; i < this.mItemSet.length; i++) {
            this.mItemSet[i].stopActionByTag(ItemMoveActionTag);
        }
    },
    // 当触控结束后, 调整一下位置, 结点始终居中
    adjustItem: function (centerItem, speed) {
        // 新的居中 Item
        // 计算好要移动多少
        var dx = null;
        for (var i = 0; i < this.mItemSet.length; i++) {
            var item = this.mItemSet[i];
            var tempDx = item.x;
            // 对中间占有者, 做些惩罚, 让其容易退位
            if (i == this.itemIndex) {
                var tax = (item.width + this.mInterval) / 1.5;
                if (tempDx > 0) {
                    tempDx += tax;
                } else {
                    tempDx -= tax;
                }
            }
            if (dx == null || (Math.abs(tempDx) < Math.abs(dx))) {
                dx = tempDx;
                centerItem = i;
            }
        }

        // 先停止之前的动作
        this.stopItemAction();
        var self = this;
        // 移动过去
        var dx = this.mItemSet[centerItem].x;
        var speed = speed || 1000;
        var delay = Math.abs(dx) / speed;
        for (var i = 0; i < this.mItemSet.length; i++) {
            var action = cc.moveBy(delay, cc.v2(-dx, 0));
            if (i == 0) {
                action = cc.sequence(action, cc.callFunc(function() {
                    self.itemIndex = centerItem;
                }));
            }
            action.setTag(ItemMoveActionTag);
            this.mItemSet[i].runAction(action);
        }
    },

    update (dt) {
        for (var i = 0; i < this.mItemSet.length; i++) {
            if (this.mItemSet[i] && this.mItemSet[i].script) {
                this.mItemSet[i].script.changePosX();
            }
        }
    },

    addBigTouch () {
        this.node.on(cc.Node.EventType.TOUCH_START, function(event) {
            this.startPosX = event.touch._point.x;
            this.stopItemAction();
            this.mPreX = this.startPosX;
        }, this);

        this.node.on(cc.Node.EventType.TOUCH_MOVE, function(event) {
            var dx = event.touch._point.x - this.mPreX;
            this.moveItem(dx);
            this.mPreX = event.touch._point.x;
        }, this);

        this.node.on(cc.Node.EventType.TOUCH_END, function(event) {
            var dx = event.touch._point.x - this.mPreX;
            this.moveItem(dx);
            if (Math.abs(event.touch._point.x - this.startPosX) > 30) {
                this.soundKaka();
            }
            // 调整位置
            this.adjustItem();
            this.mPreX = null;
        }, this);
    }
});
所以其实 关于shader的核心代码就在main函数里面 读者有点耐心了解下Shader的语法就能读懂的 我就不多说了
