1.线性回归
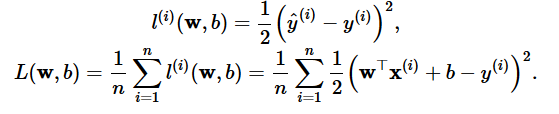
线性回归的公式

是一种线性关系
线性回归的损失函数
常用的一种损失函数是均方误差,公式如下
优化函数
这里用的是小批量随机梯度下降法,这种方法也是神经网络中常用的方法

需要注意的点
优化函数的代码
def sgd(params, lr, batch_size):
    for param in params:
        param.data -= lr * param.grad / batch_size # ues .data to operate param without gradient track
这里除以了batch_size是因为在后续代码中传入的梯度是求和后标量的梯度 所以要除以batch_size
训练的代码
# super parameters init
lr = 0.03
num_epochs = 5

net = linreg
loss = squared_loss

# training
for epoch in range(num_epochs):  # training repeats num_epochs times
    # in each epoch, all the samples in dataset will be used once

    # X is the feature and y is the label of a batch sample
    for X, y in data_iter(batch_size, features, labels):
        l = loss(net(X, w, b), y).sum()
        # calculate the gradient of batch sample loss
        l.backward()
        # using small batch random gradient descent to iter model parameters
        sgd([w, b], lr, batch_size)
        # reset parameter gradient
        w.grad.data.zero_()
        b.grad.data.zero_()
    train_l = loss(net(features, w, b), labels)
    print('epoch %d, loss %f' % (epoch + 1, train_l.mean().item()))
loss这里做了求和操作,为了后续能够做backward操作 向量是没办法backward的
在pytorch实现中还有个问题
class LinearNet(nn.Module):
    def __init__(self, n_feature):
        super(LinearNet, self).__init__()      # call father function to init
        self.linear = nn.Linear(n_feature, 1)  # function prototype: `torch.nn.Linear(in_features, out_features, bias=True)`

    def forward(self, x):
        y = self.linear(x)
        return y

net = LinearNet(num_inputs)
print(net)
这里定义的网络 没法使用net.weight 和 net.bias 尚不知道原因
softmax与分类模型
softmax一般用于分类预测,直接使用输出层做分类预测会有如下问题
1.一方面,由于输出层的输出值的范围不确定,我们难以直观上判断这些值的意义。例如,刚才举的例子中的输出值10表示“很置信”图像类别为猫,因为该输出值是其他两类的输出值的100倍。但如果o1=o3=103,那么输出值10却又表示图像类别为猫的概率很低。
2.另一方面,由于真实标签是离散值,这些离散值与不确定范围的输出值之间的误差难以衡量。
;使用softmax可以解决上述问题

其中
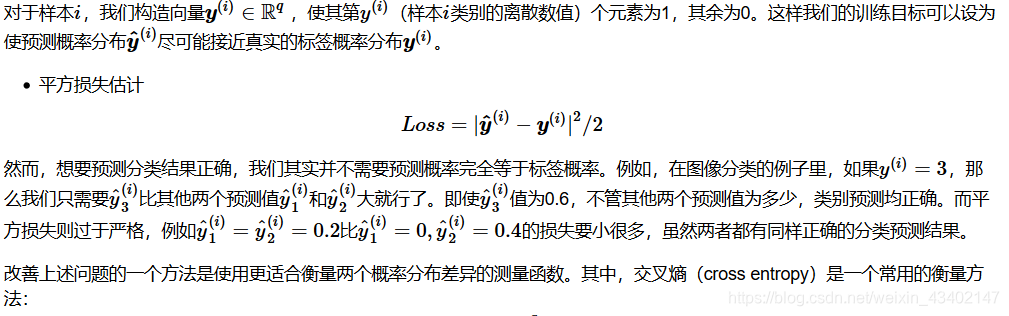
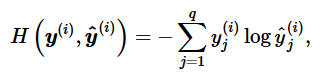
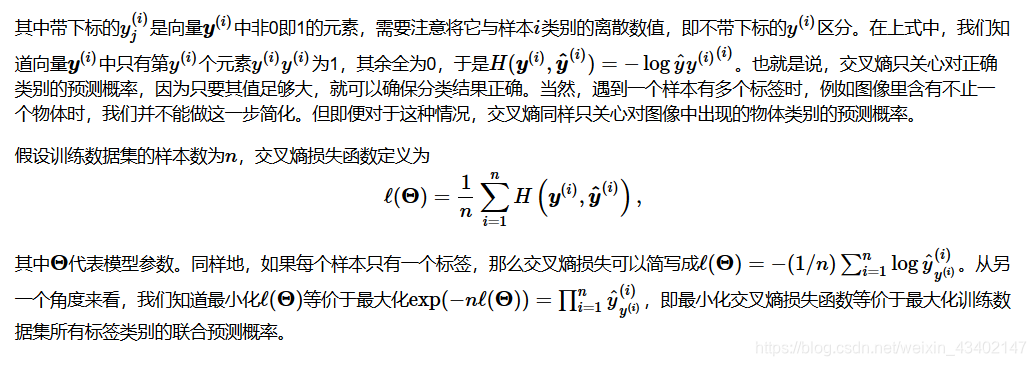
损失函数
softmax损失函数用的交叉熵损失函数
解释下为什么这里不用均方误差一类的损失函数
多层感知机
这里主要是要注意为什么多层感知机要加入激活函数

常用的几种激活函数
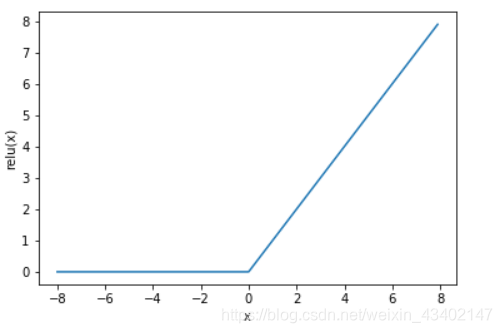
ReLu函数

图像如下所示
sigmoid函数
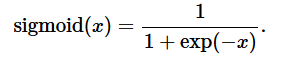
图像如下所示

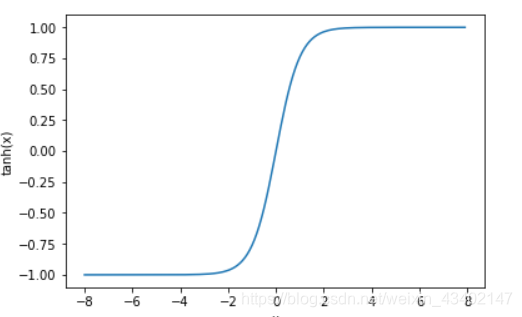
tanh函数(双曲正切函数)

图像如下
语言模型
主要是介绍两种采样的方法:随机采样和相邻采样
随机采样代码
import torch
import random
def data_iter_random(corpus_indices, batch_size, num_steps, device=None):
    # 减1是因为对于长度为n的序列,X最多只有包含其中的前n - 1个字符
    num_examples = (len(corpus_indices) - 1) // num_steps  # 下取整,得到不重叠情况下的样本个数
    example_indices = [i * num_steps for i in range(num_examples)]  # 每个样本的第一个字符在corpus_indices中的下标
    random.shuffle(example_indices)

    def _data(i):
        # 返回从i开始的长为num_steps的序列
        return corpus_indices[i: i + num_steps]
    if device is None:
        device = torch.device('cuda' if torch.cuda.is_available() else 'cpu')

    for i in range(0, num_examples, batch_size):
        # 每次选出batch_size个随机样本
        batch_indices = example_indices[i: i + batch_size]  # 当前batch的各个样本的首字符的下标
        X = [_data(j) for j in batch_indices]
        Y = [_data(j + 1) for j in batch_indices]
        yield torch.tensor(X, device=device), torch.tensor(Y, device=device)
注意随机主要是做了shuffle操作
相邻采样代码
def data_iter_consecutive(corpus_indices, batch_size, num_steps, device=None):
    if device is None:
        device = torch.device('cuda' if torch.cuda.is_available() else 'cpu')
    corpus_len = len(corpus_indices) // batch_size * batch_size  # 保留下来的序列的长度
    corpus_indices = corpus_indices[: corpus_len]  # 仅保留前corpus_len个字符
    indices = torch.tensor(corpus_indices, device=device)
    indices = indices.view(batch_size, -1)  # resize成(batch_size, )
    batch_num = (indices.shape[1] - 1) // num_steps
    for i in range(batch_num):
        i = i * num_steps
        X = indices[:, i: i + num_steps]
        Y = indices[:, i + 1: i + num_steps + 1]
        yield X, Y
