基于Arduino的PS2机械臂遥控小车(L298N)傻瓜教程
1、材料
L298N、Arduino板、数据线、舵机(SG90)、机械臂、亚克力板、电机、PS2、杜邦线、电池(7.4V)、螺丝。
2、软件
Arduino IDE。
3、代码
一、硬件安装:
安装车底盘: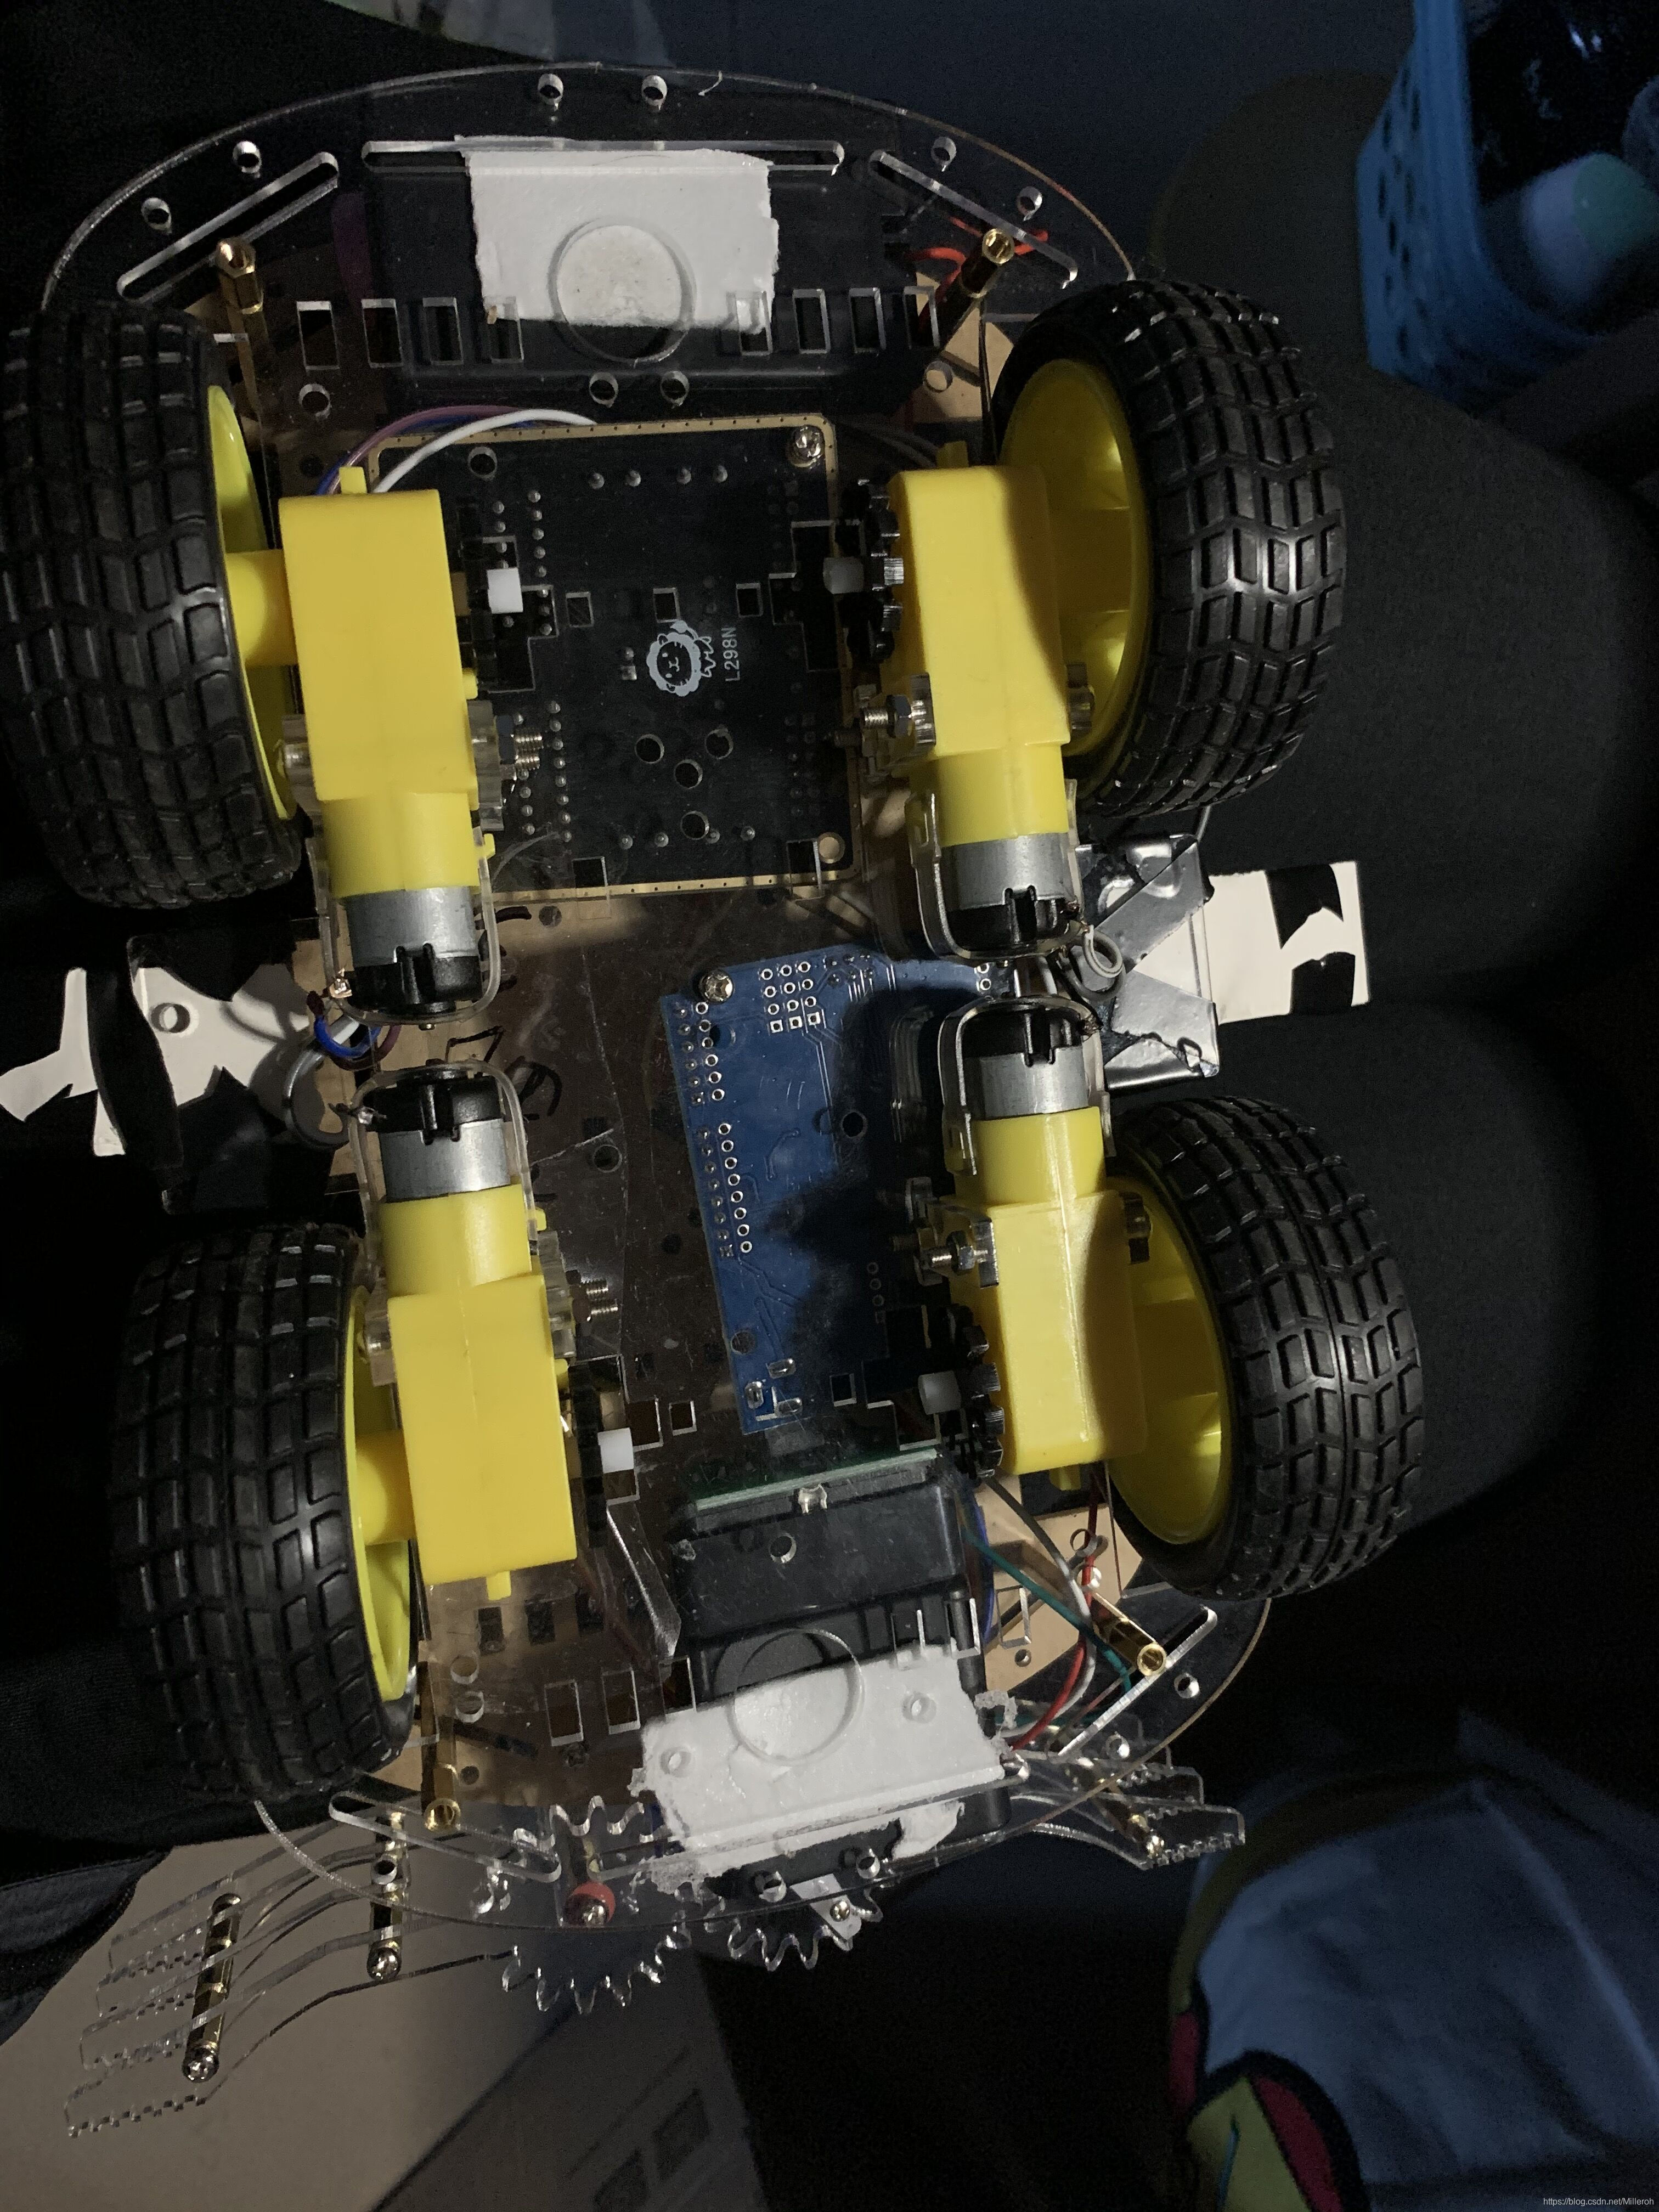
安装机械臂:
线路连接:
PS2//CLK接13号接口;CMD接11号接口;GND接GND接口;VCC接3.3V接口;CS接10号接口;DAT接12号接口。
L298N//GND接GND接口和电池负极;+3.2V接VIN接口和电池正极;IN1接4号接口;IN2接5号接口;IN3接6号接口;IN4接7号接口;右侧电机正极接OUT3接口;右侧电机负极接OUT4接口;左侧电机正极接OUT1接口;左侧电机负极接OUT2接口(参考:使用Arduino与L298N(红板) 驱动直流电机)
舵机//中间接5V接口;旁边褐色线接GND接口;另一根接9号接口;
二、软件安装:
安装Arduino IDE:
官网下载
下载PS2相关库:
PS2 密码vdnt
机械臂 密码fbrq
安装库:
Arduino库安装参考网址
三、代码:
#include <PS2X_lib.h>
#define IN1 4
#define IN2 5
#define IN3 6
#define IN4 7
#define clawPin 9
int speed=200;
//PWM控制引脚;
//int speedPinA = 8;
//int speedPinB = 9;PS2X ps2x; // create PS2 Controller Class
Servo claw;
//right now, the library does NOT support hot pluggable controllers, meaning
//you must always either restart your Arduino after you conect the controller,
//or call config_gamepad(pins) again after connecting the controller.int error = 0;
byte type = 0;
byte vibrate = 0;
int DSD = 15;
int moveStep = 45; void turnLeft() //左转
{
digitalWrite(IN1, LOW);
digitalWrite(IN2, HIGH);
digitalWrite(IN3, LOW);
digitalWrite(IN4, HIGH);
delay(20);
}
void turnRight()//右转
{
digitalWrite(IN1, HIGH);
digitalWrite(IN2, LOW);
digitalWrite(IN3, HIGH);
digitalWrite(IN4, LOW);
delay(20);
}
void back() // 前进
{
digitalWrite(IN1, LOW);
digitalWrite(IN2, HIGH);
digitalWrite(IN3, HIGH);
digitalWrite(IN4, LOW);
//analogWrite(speedPinA,speed);
//analogWrite(speedPinB,speed);
delay(20);
}
void stop() // 停止;
{
digitalWrite(IN1, LOW);
digitalWrite(IN2, LOW);
digitalWrite(IN3, LOW);
digitalWrite(IN4, LOW);
delay(20);
}
void forward() //后退
{
digitalWrite(IN1, HIGH);
digitalWrite(IN2, LOW);
digitalWrite(IN3, LOW);
digitalWrite(IN4, HIGH);
}void setup()
{
Serial.begin(9600);
pinMode(IN1, OUTPUT);
pinMode(IN2, OUTPUT);
pinMode(IN3, OUTPUT);
pinMode(IN4, OUTPUT);
//pinMode(speedPinA,OUTPUT);
//pinMode(speedPinB,OUTPUT);
//初始化电机驱动IO为输出方式
claw.attach(9); // claw 伺服舵机连接引脚9 舵机代号’c’
delay(200); // 稳定性等待
claw.write(90);
delay(10);
Serial.begin(9600);
Serial.println(“Welcome to Taichi-Maker Robot Arm Tutorial”);
error = ps2x.config_gamepad(13, 11, 10, 12, true, true); //setup pins and settings: GamePad(clock, command, attention, data, Pressures?, Rumble?) check for error if (error == 0)
{
Serial.println(“Found Controller, configured successful”);
Serial.println(“Try out all the buttons, X will vibrate the controller, faster as you press harder;”);
Serial.println(“holding L1 or R1 will print out the analog stick values.”);
Serial.println(“Go to [url]www.billporter.info[/url] for updates and to report bugs.”);
} else if (error == 1)
Serial.println(“No controller found, check wiring, see readme.txt to enable debug. visit [url]www.billporter.info[/url] for troubleshooting tips”); else if (error == 2)
Serial.println(“Controller found but not accepting commands. see readme.txt to enable debug. Visit [url]www.billporter.info[/url] for troubleshooting tips”); else if (error == 3)
Serial.println("Controller refusing to enter Pressures mode, may not support it. "); //Serial.print(ps2x.Analog(1), HEX); type = ps2x.readType();
switch (type)
{
case 0:
Serial.println(“Unknown Controller type”);
break;
case 1:
Serial.println(“DualShock Controller Found”);
break;
case 2:
Serial.println(“GuitarHero Controller Found”);
break;
}
}void loop()
{
int clawJoyPos;
ps2x.read_gamepad(false, vibrate); //read controller and set large motor to spin at ‘vibrate’ speed if (ps2x.Button(PSB_START)) //will be TRUE as long as button is pressed
Serial.println(“Start is being held”);
if (ps2x.Button(PSB_SELECT))
Serial.println(“Select is being held”); if (ps2x.Button(PSB_PAD_UP))
{ //will be TRUE as long as button is pressed
Serial.print("Up held this hard: ");
Serial.println(ps2x.Analog(PSAB_PAD_UP), DEC);
forward();
}
if (ps2x.Button(PSB_PAD_RIGHT))
{
Serial.print(“Right held this hard: “);
Serial.println(ps2x.Analog(PSAB_PAD_RIGHT), DEC);
turnLeft();
}
if (ps2x.Button(PSB_PAD_LEFT))
{
Serial.print(“LEFT held this hard: “);
Serial.println(ps2x.Analog(PSAB_PAD_LEFT), DEC);
turnRight();
}
if (ps2x.Button(PSB_PAD_DOWN))
{
Serial.print(“DOWN held this hard: “);
Serial.println(ps2x.Analog(PSAB_PAD_DOWN), DEC);
back();
} vibrate = ps2x.Analog(PSAB_BLUE); //this will set the large motor vibrate speed based on
//how hard you press the blue (X) button if (ps2x.NewButtonState()) //will be TRUE if any button changes state (on to off, or off to on)
{
if (ps2x.Button(PSB_L3))
Serial.println(“L3 pressed”);
if (ps2x.Button(PSB_R3))
Serial.println(“R3 pressed”);
if (ps2x.Button(PSB_L2))
{
Serial.println(“Received Command: Claw Open Up”);
clawJoyPos = claw.read() + moveStep;
claw.write(clawJoyPos);
delay(DSD);
}
if (ps2x.Button(PSB_R2))
{
Serial.println(“Received Command: Claw Close Down”);
clawJoyPos = claw.read() - moveStep;
claw.write(clawJoyPos);
delay(DSD);
}
if (ps2x.Button(PSB_GREEN))
Serial.println(“Triangle pressed”);
} if (ps2x.ButtonPressed(PSB_RED)) //will be TRUE if button was JUST pressed
{Serial.println(“Circle just pressed”);
stop();} if (ps2x.ButtonReleased(PSB_PINK)) //will be TRUE if button was JUST released
Serial.println(“Square just released”); if (ps2x.NewButtonState(PSB_BLUE)) //will be TRUE if button was JUST pressed OR released
{Serial.println(“X just changed”);
} if (ps2x.Button(PSB_L1) || ps2x.Button(PSB_R1)) // print stick values if either is TRUE
{
Serial.print(“Stick Values:”);
Serial.print(ps2x.Analog(PSS_LY), DEC); //Left stick, Y axis. Other options: LX, RY, RX
Serial.print(”,”);
Serial.print(ps2x.Analog(PSS_LX), DEC);
Serial.print(”,”);
Serial.print(ps2x.Analog(PSS_RY), DEC);
Serial.print(”,”);
Serial.println(ps2x.Analog(PSS_RX), DEC);
}
delay(50);
}
