引用
首先参考了部分博主的美化教程。随后总结。参考地址以下:
辣条先生:https://www.cnblogs.com/CJR-QYF/p/11710666.html
Trainoo:https://www.cnblogs.com/Trainoo/p/8045340.html
教程开始(图文模式)
1.首先要自定义修改我们就需要有js权限,在设置里面申请就可以了。(凌晨申请的,早上9点后就能通过)
皮肤模版以《SimpleMemory》为例

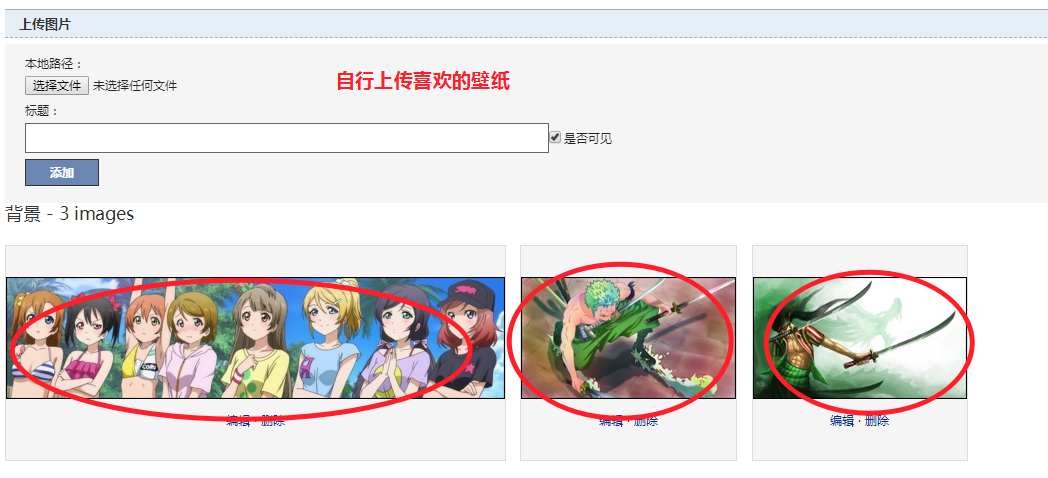
2.找一张自己喜欢的壁纸,上传到博客的相册里。选择可视。
3.在页面定制CSS代码中添加一下代码:
/*simplememory*/
#google_ad_c1, #google_ad_c2 {display:none;}
.syntaxhighlighter a, .syntaxhighlighter div, .syntaxhighlighter code, .syntaxhighlighter table, .syntaxhighlighter table td,
.syntaxhighlighter table tr, .syntaxhighlighter table tbody, .syntaxhighlighter table thead, .syntaxhighlighter table caption,
.syntaxhighlighter textarea {
font-size: 14px!important;
}
#home {
opacity: 0.80;
margin: 0 auto;
width: 85%;
min-width: 950px;
background-color: #fff;
padding: 30px;
margin-top: 30px;
margin-bottom: 50px;
box-shadow: 0 2px 6px rgba(100, 100, 100, 0.3);
}
#blogTitle h1 {
font-size: 30px;
font-weight: bold;
font-family: "Comic Sans MS";
line-height: 1.5em;
margin-top: 20px;
color: #515151;
}
#navList a:hover {
color: #4C9ED9;
text-decoration: none;
}
#navList a {
display: block;
width: 5em;
height: 22px;
float: left;
text-align: center;
padding-top: 18px;
}
#navigator {
font-size: 15px;
border-bottom: 1px solid #ededed;
border-top: 1px solid #ededed;
height: 50px;
clear: both;
margin-top: 25px;
}
.catListTitle {
margin-top: 21px;
margin-bottom: 10.5px;
text-align: left;
border-left: 10px solid rgba(82, 168, 236, 0.8);
padding: 10px 0 14px 10px;
background-color: #f5f5f5;
}
#ad_under_post_holder #google_ad_c1,#google_ad_c2{
display: none !important;
}
body {
color: #000;
background: url(https://images.cnblogs.com/cnblogs_com/CJR-QYF/1558516/o_2.jpg
) fixed;
background-size: 100%;
background-repeat: no-repeat;
font-family: "Helvetica Neue",Helvetica,Verdana,Arial,sans-serif;
font-size: 12px;
min-height: 101%;
}
#topics .postTitle {
border: 0px;
font-size: 200%;
font-weight: bold;
float: left;
line-height: 1.5;
width: 100%;
padding-left: 5px;
}
4.在这个位置的链接换成刚刚上传到相册的壁纸地址

5.查看自己的个人头像并复制图片地址
修改代码中的地址为你个人头像的图片地址:添加到 博客管理-设置-博客侧边栏公告位置处 即可
<hr>
<embed allowscriptaccess="never" allownetworking="internal" invokeurls="false" src="https://files.cnblogs.com/files/mmzs/flashDate.swf"
pluginspage="https://files.cnblogs.com/files/mmzs/flashDate.swf" type="application/x-shockwave-flash" quality="high" autostart="0" wmode="transparent" width="220"
height="65" align="middle">
</div>
<img src="https://pic.cnblogs.com/avatar/1948184/20200227071450.png" alt="90DIR的头像" class="img_avatar">
<p class="para">座右铭:<strong> 不忘初心 方得始终 </strong></p>
<p>新信息:999999+</p>
     <p>通话记录:999999+</p>
     <p>友情链接:
         <a target="_blank" href="https://www.90dir.cn" class="glyphicon glyphicon-fire">90dir</a>
         <a target="_blank" href="https://www.cnblogs.com/90dir/" class="glyphicon glyphicon-tint">个人博客</a>
     </p>
至于效果图,请看本博客右侧!!
6.添加鼠标特效代码-复制到页脚HTML里面
<script type="text/javascript">
/* 鼠标特效 */
var a_idx = 0;
jQuery(document).ready(function($) {
    $("body").click(function(e) {
        var a = new Array("❤welcome to❤","❤博客园❤","❤90DIR❤","❤富强❤","❤民主❤","❤文明❤","❤和谐❤","❤自由❤","❤平等❤","❤公正❤","❤法治❤","❤爱国❤","❤敬业❤","❤诚信❤","❤友善❤");
        var $i = $("<span></span>").text(a[a_idx]);
        a_idx = (a_idx + 1) % a.length;
        var x = e.pageX,
        y = e.pageY;
        $i.css({
            "z-index": 999999999999999999999999999999999999999999999999999999999999999999999,
            "top": y - 20,
            "left": x,
            "position": "absolute",
            "font-weight": "bold",
            "color": "rgb("+~~(255*Math.random())+","+~~(255*Math.random())+","+~~(255*Math.random())+")"
        });
        $("body").append($i);
        $i.animate({
            "top": y - 180,
            "opacity": 0
        },
        1500,
        function() {
            $i.remove();
        });
    });
});
</script>