搭建一个最简单的 Oauth2 认证服务
基于 Springboot2,在 pom.xml 中引入 Oauth2:
1 |
<dependency> |
在 xxxApplication 上添加 @EnableAuthorizationServer 注解:
1 |
|
启动项目,会在控制台打印:
1 |
security.oauth2.client.client-id = 3c7748b1-ff89-4643-8e16-56fc2ae77a3c |
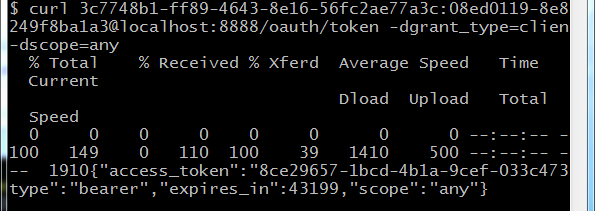
先使用 Git Bash 进行 token 获取测试:
1 |
$ curl 3c7748b1-ff89-4643-8e16-56fc2ae77a3c:08ed0119-8e8e-4a24-83c7-ac249f8ba1a3@localhost:8888/oauth/token -dgrant_type=client_credentials -dscope=any |
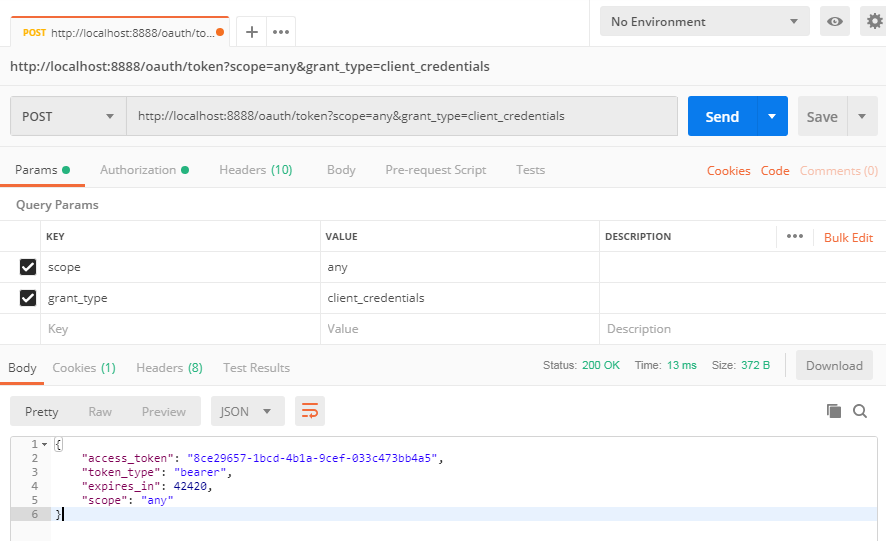
然后使用 postman 进行 token 获取:
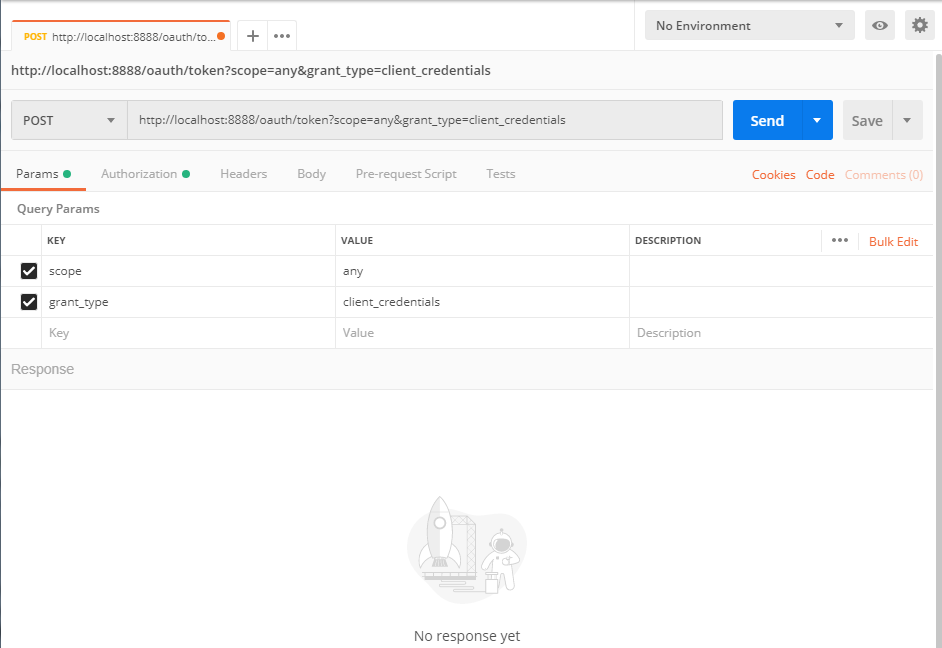
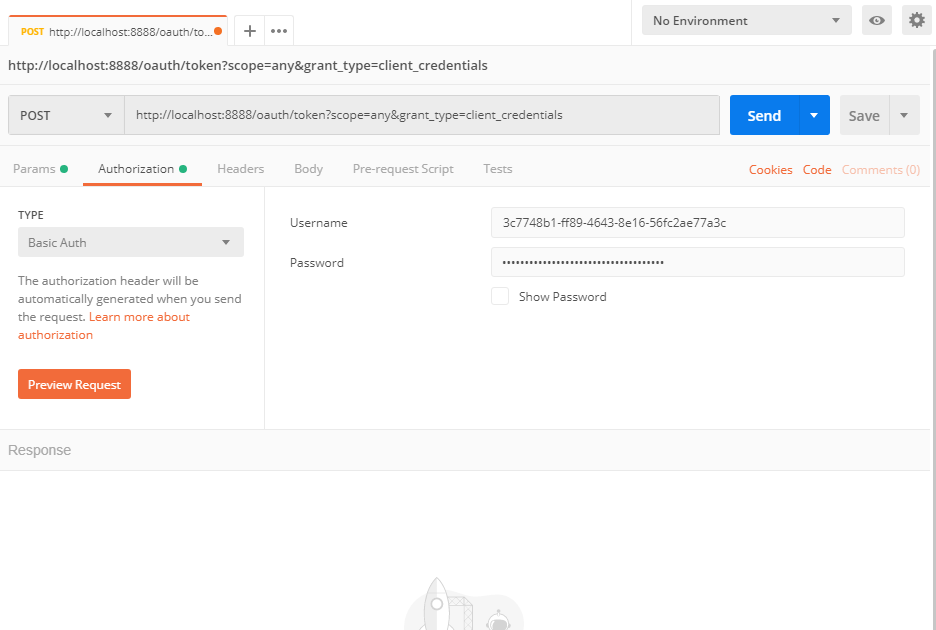
这里 Username 相当于 client_id,Password 相当于 client_secret
爬坑:对于 postman 进行测试,困扰了半天,之前都是把 client_id、client_secret、grant_type、scope 字段全部填到 Params 中,然后进行请求返回的数据全部都是:
大专栏 Oauth2 初步ote>
2
3
4
5
6
7
8
> "timestamp": "2019-06-18T06:44:16.443+0000",
> "status": 401,
> "error": "Unauthorized",
> "message": "Unauthorized",
> "path": "/oauth/token"
>}
>经过不断尝试,找到需要将 client_id 和 client_secret 整合在一起,然后通过 Base64 加密后连接到 Authorization 后放到 Header 里面进行传输,对应到 postman 中就是在 Authorization 中选择 Basic Auth,填写 Username 和 Password。但是在 Git Bash 中使用 curl 就能够直接进行请求连接,目前还不清楚 curl 请求的时候是如何处理的。
参数设置完成后,发起请求:
根据 Git Bash 和 postman 的请求结果可以看出两次使用相同client_id 和 client_secret 在不同时间发起请求,得到的
access_token值是一样的,而expires_in过期时间的值在对应减小。上面使用的是 Oauth2 自动生成的 client_id 与 client_secret,这里我们可以自己定义 client_id 与 client_secret,直接在 application.yml 中添加如下配置:
2
3
4
5
oauth2:
client:
client-id: test
client-secret: test启动项目,控制台中打印:
2
security.oauth2.client.client-secret = ****使用 postman 做测试,修改其中 Username 和 Password 为 test,发起请求,得到结果:
2
3
4
5
6
"access_token": "10093ccd-80ec-44c7-84fa-cd75c96a5309",
"token_type": "bearer",
"expires_in": 43199,
"scope": "any"
}到这里就完成了最基本的 Oauth2 授权获取 token,使用的都是 Oauth2 的客户端模式。
后记:
在项目启动的时候总是会出现:
2
3
4
5
6
7
8
9
10
11
12
13
14
15
> Note: further occurrences of HTTP request parsing errors will be logged at DEBUG level.
>
> java.lang.IllegalArgumentException: Invalid character found in method name. HTTP method names must be tokens
> at org.apache.coyote.http11.Http11InputBuffer.parseRequestLine(Http11InputBuffer.java:414) ~[tomcat-embed-core-9.0.16.jar:9.0.16]
> at org.apache.coyote.http11.Http11Processor.service(Http11Processor.java:294) ~[tomcat-embed-core-9.0.16.jar:9.0.16]
> at org.apache.coyote.AbstractProcessorLight.process(AbstractProcessorLight.java:66) [tomcat-embed-core-9.0.16.jar:9.0.16]
> at org.apache.coyote.AbstractProtocol$ConnectionHandler.process(AbstractProtocol.java:834) [tomcat-embed-core-9.0.16.jar:9.0.16]
> at org.apache.tomcat.util.net.NioEndpoint$SocketProcessor.doRun(NioEndpoint.java:1415) [tomcat-embed-core-9.0.16.jar:9.0.16]
> at org.apache.tomcat.util.net.SocketProcessorBase.run(SocketProcessorBase.java:49) [tomcat-embed-core-9.0.16.jar:9.0.16]
> at java.util.concurrent.ThreadPoolExecutor.runWorker(ThreadPoolExecutor.java:1149) [na:1.8.0_161]
> at java.util.concurrent.ThreadPoolExecutor$Worker.run(ThreadPoolExecutor.java:624) [na:1.8.0_161]
> at org.apache.tomcat.util.threads.TaskThread$WrappingRunnable.run(TaskThread.java:61) [tomcat-embed-core-9.0.16.jar:9.0.16]
> at java.lang.Thread.run(Thread.java:748) [na:1.8.0_161]
>这个异常,对于项目的运行目前没有看出有什么影响。
找了很久都未能找到解决方案,后面再继续看看吧。