1.要解析的XML文件

要解析的文件
<?xml version="1.0" encoding="utf-8"?>
<resources>

    <customer name="tom" age="20" gender="male">
        <telphone>
            <phone>13636713128</phone>
        </telphone>

        <email>tom@yahoo.com</email>
    </customer>
    <customer name="kite" age="21" gender="male">
        <telphone />

        <email>kite@qq.com</email>
    </customer>
    <customer name="jeriffe" age="28" gender="male">
        <telphone>
            <phone>13636713128</phone>
            <phone>13892008888</phone>
        </telphone>

        <email>jeriffe@126.com</email>
    </customer>

</resources>
2.activity_main.xml布局
<?xml version="1.0" encoding="utf-8"?>
<LinearLayout xmlns:android="http://schemas.android.com/apk/res/android"
    xmlns:app="http://schemas.android.com/apk/res-auto"
    xmlns:tools="http://schemas.android.com/tools"
    android:layout_width="match_parent"
    android:layout_height="match_parent"
    android:orientation="vertical"
    tools:context=".MainActivity">


    <Button
        android:id="@+id/button1"
        android:layout_width="wrap_content"
        android:layout_height="wrap_content"
        android:text="使用PULL解析"
       />

    <Button
        android:id="@+id/button2"
        android:layout_width="wrap_content"
        android:layout_height="wrap_content"
        android:text="使用SAX解析"
        />

    <Button
        android:id="@+id/button3"
        android:layout_width="wrap_content"
        android:layout_height="wrap_content"
        android:text="使用DOM解析"/>

    <Button
        android:id="@+id/button4"
        android:layout_width="wrap_content"
        android:layout_height="wrap_content"
        android:text="使用DOM4J解析"/>

    <Button
        android:id="@+id/button5"
        android:layout_width="wrap_content"
        android:layout_height="wrap_content" />

    <TextView
        android:id="@+id/tv"
        android:layout_width="match_parent"
        android:layout_height="wrap_content"
        />
</LinearLayout>
3.MainActivity
package com.example.android008;
import androidx.appcompat.app.AppCompatActivity;
import android.app.Activity;
import android.os.Bundle;
import android.view.View;
import android.widget.Button;
import android.widget.TextView;
import org.xml.sax.InputSource;
import org.xml.sax.XMLReader;
import java.io.InputStream;
import java.util.List;
import javax.xml.parsers.SAXParser;
import javax.xml.parsers.SAXParserFactory;
public class MainActivity extends Activity implements View.OnClickListener {
private Button button1;
private Button button2;
private Button button3;
private Button button4;
private TextView tv;
private List<Person> list;
@Override
protected void onCreate(Bundle savedInstanceState) {
super.onCreate(savedInstanceState);
setContentView(R.layout.activity_main);
init();
}
private void init() {
button1=findViewById(R.id.button1);
button2=findViewById(R.id.button2);
button3=findViewById(R.id.button3);
button4=findViewById(R.id.button4);
tv=findViewById(R.id.tv);
button1.setOnClickListener(this);//监听事件
button2.setOnClickListener(this);//监听事件
button3.setOnClickListener(this);//监听事件
button4.setOnClickListener(this);//监听事件
}
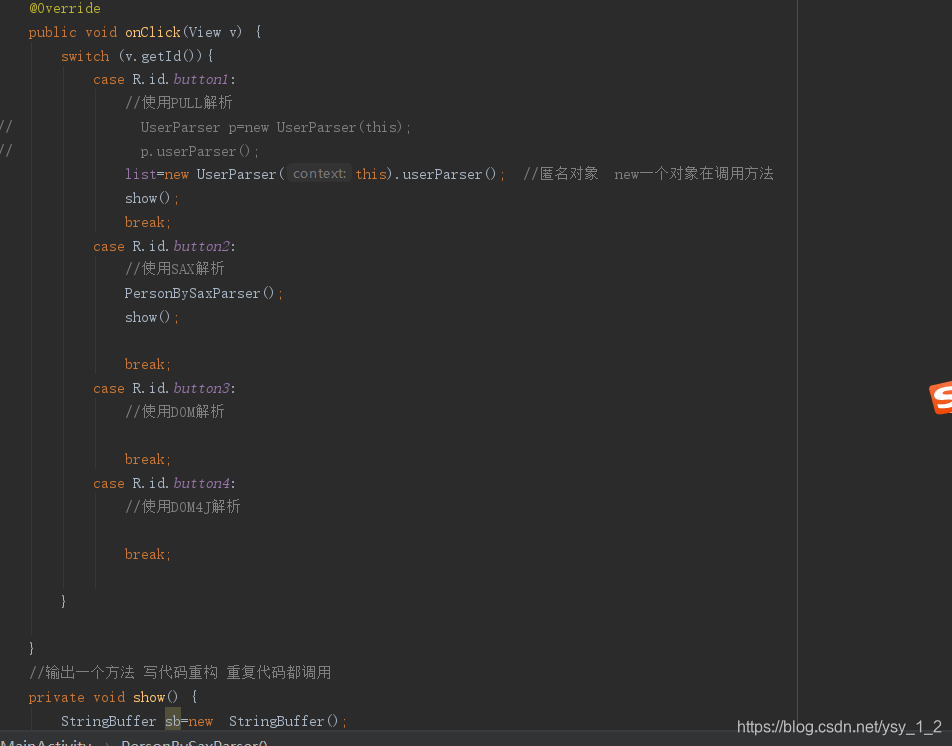
@Override
public void onClick(View v) {
switch (v.getId()){
case R.id.button1:
//使用PULL解析
// UserParser p=new UserParser(this);
// p.userParser();
list=new UserParser(this).userParser(); //匿名对象 new一个对象在调用方法
show();
break;
case R.id.button2:
//使用SAX解析
break;
case R.id.button3:
//使用DOM解析
break;
case R.id.button4:
//使用DOM4J解析
break;
}
}
//输出一个方法 写代码重构 重复代码都调用
private void show() {
StringBuffer sb=new StringBuffer();
for (Person i:list) {
sb.append(i.toString());
}
tv.setText(sb.toString());
}
}
4.使用PULL解析,按照要解析的文件创建一个Person类.
package com.example.android008;

import java.util.ArrayList;
import java.util.List;


/**
 * 员工类
 */
public class Person {
    private String name;
    private  int age;
    private String gender;
    private String email;
    private List<String> phone=new ArrayList<String>();


    public Person(){
        super();
    }

    public Person(String name, int age, String gender, String email, List<String> phone) {
        super();
        this.name = name;
        this.age = age;
        this.gender = gender;
        this.email = email;
        this.phone = phone;

    }

    public String getName() {
        return name;
    }

    public void setName(String name) {
        this.name = name;
    }

    public int getAge() {
        return age;
    }

    public void setAge(int age) {
        this.age = age;
    }

    public String getGender() {
        return gender;
    }

    public void setGender(String gender) {
        this.gender = gender;
    }

    public String getEmail() {
        return email;
    }

    public void setEmail(String email) {
        this.email = email;
    }

    public List<String> getPhone() {
        return phone;
    }

    public void setPhone(List<String> phone) {
        this.phone = phone;
    }


    //重新toString方法
    @Override
    public String toString() {
        return "Person{" +
                "name='" + name + '\'' +
                ", age=" + age +
                ", gender='" + gender + '\'' +
                ", email='" + email + '\'' +
                ", phone=" + phone +
                '}';
    }
}
5.UserParse解析文件
package com.example.android008;

import android.content.Context;
import android.content.res.Resources;
import android.content.res.XmlResourceParser;

import java.util.ArrayList;
import java.util.List;
public class UserParser {

    Context context;   //上下文

    public  UserParser(Context context){  //调用类,传递对象
        this.context=context;
    }
/*
解析xml
 */
    public List<Person> userParser(){
        List<Person> list=new ArrayList<>();
        Person person=null;
        //解析
        Resources resources=this.context.getResources();   //得到资源文件
        XmlResourceParser parser=resources.getXml(R.xml.customers); //里面资源文件
        try{
            int eventType=parser.getEventType();
            while(eventType !=XmlResourceParser.END_DOCUMENT){   //如果文档没有结束,就接着解析
                if (eventType==XmlResourceParser.START_TAG){//如果是开始节点
                    String nodeName=parser.getName();   //得到节点名称
                    if (nodeName.equals("customer")){
                        person=new Person();//创建对象,取出三个属性
                        person.setName(parser.getAttributeValue(null,"name"));
                        person.setAge(Integer.parseInt(parser.getAttributeValue(null,"age")));
                        person.setGender(parser.getAttributeValue(null,"gender"));
                    }else if (nodeName.equals("phone")){  //找到下一个节点
                        person.getPhone().add(parser.nextText());   //得到节点里面的值
                    }else if(nodeName.equals("email")){   //找到下一个节点
                        person.setEmail(parser.nextText());
                    }else if (eventType==XmlResourceParser.END_TAG){ //如果是结束标签,解析完
                        String name=parser.getName();
                        if (name.equals("customer")){  //如果说它的节点customer
                            list.add(person);   //把值给他
                        }
                    }
                eventType= parser.next();  //进入下一个节点
                }

            }
        }catch (Exception e){
        }
        return list;
    }

}
6.SAX解析,首先创建raw

7.使用SAX解析
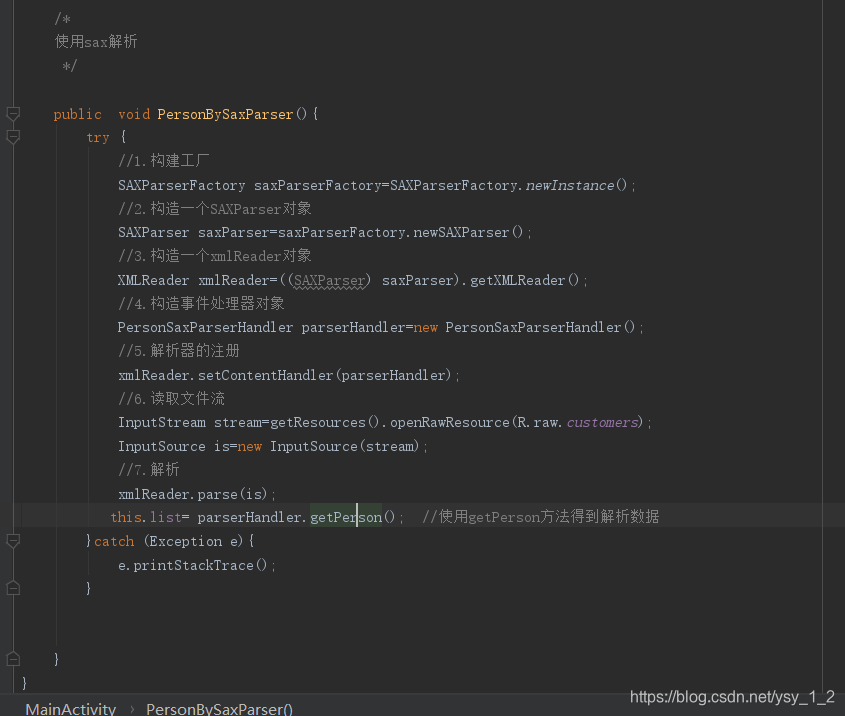
8.创建解析类
package com.example.android008;

import org.xml.sax.Attributes;
import org.xml.sax.SAXException;
import org.xml.sax.helpers.DefaultHandler;

import java.util.ArrayList;
import java.util.List;

public class PersonSaxParserHandler extends DefaultHandler {

    class PersonConst{   //内部类
        public  static  final int Persons=1;
        public static final int Person_TELPHONE=2;  //万一里面有值需要解析
        public static  final int Person_PHONE=3;
        public static  final int Person_EMAIL=4;

    }
    private List<Person> persons=new ArrayList<Person>();  //定义返回数据
    private Person person=null;    //声明

    private  int currentState=0;  //定义变量

    @Override
    public void startDocument() throws SAXException {  //可以不写
        super.startDocument();
    }

    @Override
    public void endDocument() throws SAXException {//可以不写
        super.endDocument();
    }

    @Override
    public void startElement(String uri, String localName, String qName, Attributes attributes) throws SAXException {
        String node=localName.length()!=0?localName:qName;  //判断node的长度不为0就位localName 等于0为qName
        //开始解析节点
        if (node.equals("customer")){
            person =new Person();
            person.setName(attributes.getValue("name"));  //解析属性
            person.setAge(Integer.parseInt(attributes.getValue("age")));
            person.setGender(attributes.getValue("gender"));
            return;
        }
        if (node.equals("phone")){   //解析节点,直接找phone
           // person.getPhone().add(object);  //解析属性,不是节点    在前面定义变量
             currentState=PersonConst.Person_PHONE;
             return;
        }if (node.equals("email")){
            currentState=PersonConst.Person_EMAIL;
            return;
        }

    }

    @Override
    public void endElement(String uri, String localName, String qName) throws SAXException { //结束标签
       if (localName.equals("customer")){
           persons.add(person);  //添加对象进去
           return;
       }
    }

    @Override
    public void characters(char[] ch, int start, int length) throws SAXException {  //这里面解析节点
        String string=new String(ch,start,length);
        switch (currentState){  //看currentState是什么
            case PersonConst.Person_PHONE:   //如果说phone
                person.getPhone().add(string);  //解析电话号码在放到string
                break;
            case PersonConst.Person_EMAIL:
                person.setEmail(string);
        }
    currentState=0;  //还原继续执行
    }
    //返回数据
    public List<Person> getPerson() {
        return persons;
    }
}
9.调用节点