本文参考了简书上的一篇文章:https://www.jianshu.com/p/672f400deaeb
首先需要搭建一个私有链,先进行环境的配置
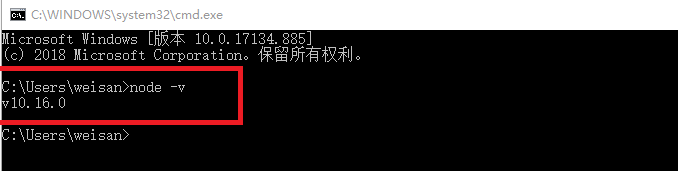
1.Node.js的安装
这个安装比较简单,直接去Node的官网去下载安装就可以了,验证安装成功:打开cmd之后输入node -v
2.安装Geth
Geth是一个以太坊客户端,可以直接在Go Ethereum官方下载,下载后直接安装即可。安装完毕,打开控制台窗口,可以查看是否安装成功。如果你不能打开这个网站进行下载,可以从国内镜像下载。安装完成之后可能会出现一个错误PATH was not updated with "XXXX > 1024"。这个经过分析应该是安装的时候没有把环境变量添加到系统内的结果,也就是自动添加失败了。这时候可以手动添加PATH,也可以进入刚才安装的地址去运行geth命令。
E:\>cd blockchain

E:\blockchain>geth -v
Incorrect Usage. flag provided but not defined: -v

NAME:
   geth - the go-ethereum command line interface

   Copyright 2013-2017 The go-ethereum Authors

USAGE:
   geth [options] command [command options] [arguments...]

VERSION:
   1.8.3-stable-329ac18e

COMMANDS:
   account           Manage accounts
   attach            Start an interactive JavaScript environment (connect to node)
   bug               opens a window to report a bug on the geth repo
   ......
3.安装Solidity
建议使用Remix -Solidity IDE来进行开发。不需要安装。
4.启动环境,搭建私有链
4.1配置创世区块
搭建私有链前需要创建一个 json 配置文件,用于初始化创世区块。这里自己将创建一个名为 genesis.json的文件。也就是自己新建一个文件命名为genesis.json它的内容为:
{
  "config": {
        "chainId": 1000,
        "homesteadBlock": 0,
        "eip155Block": 0,
        "eip158Block": 0
    },
  "coinbase"   : "0x0000000000000000000000000000000000000000",
  "difficulty" : "0x400",
  "extraData"  : "",
  "gasLimit"   : "0x2fefd8",
  "nonce"      : "0x0000000000000042",
  "mixhash"    : "0x0000000000000000000000000000000000000000000000000000000000000000",
  "parentHash" : "0x0000000000000000000000000000000000000000000000000000000000000000",
  "timestamp"  : "0x00",
  "alloc": {}
}
config.chainId:用来声明以太坊网络编号,选择一个大于10的数字即可(实际操作最好大于1000,不然很容易报错)。config.homesteadBlock: Homestead 硬分叉区块高度,不需要关注config.eip155Block: EIP 155 硬分叉高度,不需要关注config.eip158Block: EIP 158 硬分叉高度,不需要关注coinbase:矿工账号,第一个区块挖出后将给这个矿工账号发送奖励的以太币difficulty:用来声明挖矿难度,越小的值难度越低,也就能更快速地出块。extraData: 附加信息随便填gasLimit: gas 的消耗总量限制,用来限制区块能包含的交易信息总和,因为我们是私有链,所以填最大nonce: 一个 64 位随机数mixhash: 与 nonce 配合用于挖矿,由上一个区块的一部分生成的 hashparentHash: 上一个区块的 hash 值alloc: 预设账号以及账号的以太币数量,私有链挖矿比较容易可以不配置
4.2 初始化创世区块
geth --datadir "E:\blockchain" init genesis.json
4.3 初始化私有链节点
直接进入E:\blockchain文件夹输入以下的命令:geth --datadir testNet --dev --dev.period 1 console 2>> test.log
--datadir后面的参数是区块数据及秘钥存放目录。
第一次输入命令后,它会放在当前"D:\chain"目录下新建一个testNet目录来存放数据。
console 进入控制台。
2>> test.log 表示把控制台日志输出到test.log文件,文件名字可以随意。
实例:
E:\blockchain>geth --datadir testNet --dev --dev.period 1 console 2>> test.log
Welcome to the Geth JavaScript console!

instance: Geth/v1.8.3-stable-329ac18e/windows-amd64/go1.10
coinbase: 0x5c084bcbad742dccc9ced0132cc658c7bdb3285e
at block: 1 (Wed, 17 Jul 2019 08:29:38 CST)
 datadir: E:\blockchain\testNet
 modules: admin:1.0 clique:1.0 debug:1.0 eth:1.0 miner:1.0 net:1.0 personal:1.0 rpc:1.0 shh:1.0 txpool:1.0 web3:1.0

>
为了更好的理解,建议新开一个命令行终端,实时显示日志:
tail -f test.log
但是windows下不支持这个命令,想要使用的请看这个博客windows下使用tail命令
4.4 准备账户
部署智能合约需要一个外部账户,我们先来看看分配的开发者账户,在控制台使用以下(仍然在E:\blockchain文件夹下操作)命令查看当前区块:(如果不像上面所述的加上–dev.period 1,区块数不会变化,只有转账等交易一次,才会挖一个区块)
> eth.blockNumber
1
> eth.accounts
["0x5c084bcbad742dccc9ced0132cc658c7bdb3285e", "0xab98a488f102e04d3d96d515b54c4efbe29c1707"]
>
也可以使用personal.listAccounts查看账户
再查看当前账户里的余额,使用命令如下:
> acc0 = eth.accounts[0]
"0x5c084bcbad742dccc9ced0132cc658c7bdb3285e"
> eth.getBalance(acc0)
1.15792089237316195423570985008687907853269984665640564039437584007913129639927e+77
>
创建一个账户
> personal.newAccount("wang")
"0x8aa710ad555bcc22c53f1859f3c2225c0e9076df"
> eth.accounts
["0x5c084bcbad742dccc9ced0132cc658c7bdb3285e", "0xab98a488f102e04d3d96d515b54c4efbe29c1707", "0x8aa710ad555bcc22c53f1859f3c2225c0e9076df"]
> acc2 = eth.accounts[2]
"0x8aa710ad555bcc22c53f1859f3c2225c0e9076df"
> eth.blockNumber
1
>
personal.newAccount(“wang”)中的wang是自己设置的账户密码,需要记住,后面解锁账户需要。
给新帐户转账
账户必须要有ether才能进行交易和部署智能合约,因此从默认账户转10以太币给新账户,使用以下命令(请使用你自己eth.accounts对应输出的账户):
> eth.sendTransaction({from:acc0,to:acc2,value: web3.toWei(10,"ether")})
"0xd7b351095d357e2bac779d0293b30c0a8884a5153d0163fb7d9f04b364868c1a"
> eth.sendTransaction({from:acc0,to:acc2,value: web3.toWei(10,"ether")})
"0xaeed38de81b2ff3f7507200a5254437b4118b3674517eeef4f6ebd210f5ee246"
> eth.sendTransaction({from:acc0,to:acc2,value: web3.toWei(10,"ether")})
"0x28f51075539ae2e578c9965322fb2f4aa14ef5e8d09671e2ede42ca7e54a0e32"
> eth.sendTransaction({from:acc0,to:acc2,value: web3.toWei(10,"ether")})
"0x0456b01eba47907cccfacd3b70be4d97c264213405c8c6b712fc1ead4984436b"
> eth.getBalance(acc2)
40000000000000000000
>
转了四次账,所以是这个数字。
5.创建部署智能合约
编写智能合约
开始编写第一个智能合约代码,solidity代码如下:
pragma solidity ^0.4.0;
contract hello {
    string greeting;

    function hello(string _greeting) public {
        greeting = _greeting;
    }

    function say()constant public returns (string) {
        return greeting;
    }
}
把这段代码写(拷贝)到Browser-Solidity,记住勾选Auto compile如果没有错误,点击右边的Details获取部署代码。
在弹出的对话框中找到WEB3DEPLOY部分,点拷贝,粘贴到编辑器后。


此处要修改两个地方:
(1)修改初始化字符串/* var of type string here */为Hello, Joyce。
(2)修改from: web3.eth.accounts[0] 为 from: web3.eth.accounts[1] 。因为我们使用账户1来部署智能合约。
修改完之后的代码:
var _greeting = "Hello, World" ;
var helloContract = web3.eth.contract([{"constant":true,"inputs":[],"name":"say","outputs":[{"name":"","type":"string"}],"payable":false,"stateMutability":"view","type":"function"},{"inputs":[{"name":"_greeting","type":"string"}],"payable":false,"stateMutability":"nonpayable","type":"constructor"}]);
var hello = helloContract.new(
   _greeting,
   {
     from: web3.eth.accounts[2],
     data: '0x608060405234801561001057600080fd5b506040516102a83803806102a8833981018060405281019080805182019291905050508060009080519060200190610049929190610050565b50506100f5565b828054600181600116156101000203166002900490600052602060002090601f016020900481019282601f1061009157805160ff19168380011785556100bf565b828001600101855582156100bf579182015b828111156100be5782518255916020019190600101906100a3565b5b5090506100cc91906100d0565b5090565b6100f291905b808211156100ee5760008160009055506001016100d6565b5090565b90565b6101a4806101046000396000f300608060405260043610610041576000357c0100000000000000000000000000000000000000000000000000000000900463ffffffff168063954ab4b214610046575b600080fd5b34801561005257600080fd5b5061005b6100d6565b6040518080602001828103825283818151815260200191508051906020019080838360005b8381101561009b578082015181840152602081019050610080565b50505050905090810190601f1680156100c85780820380516001836020036101000a031916815260200191505b509250505060405180910390f35b606060008054600181600116156101000203166002900480601f01602080910402602001604051908101604052809291908181526020018280546001816001161561010002031660029004801561016e5780601f106101435761010080835404028352916020019161016e565b820191906000526020600020905b81548152906001019060200180831161015157829003601f168201915b50505050509050905600a165627a7a72305820a7ef9308b4f91e2cbcb6bc84b3196736625ae7e0b242863d77c56dd80fc1e6480029',
     gas: '4700000'
   }, function (e, contract){
    console.log(e, contract);
    if (typeof contract.address !== 'undefined') {
         console.log('Contract mined! address: ' + contract.address + ' transactionHash: ' + contract.transactionHash);
    }
 })
会出现错误:Error: authentication needed: password or unlock undefined
这是因为我们没有解锁账户,而且以太坊客户端每隔一段时间都会锁定账户,要经常解锁。使用以下命令:
......  })
Error: authentication needed: password or unlock undefined
undefined
> personal.unlockAccount(acc1,"ju")
调用hello查看是否部署成功:
Contract mined! address: 0xb926d47fb92892d6eb108c83858d5f1a1fb9bb57 transactionHash: 0xda2420c100021809640c808c1f7aaa1ceba410c27bcd76edddba83e5d05a049a
> hello
{
  abi: [{
      constant: true,
      inputs: [],
      name: "say",
      outputs: [{...}],
      payable: false,
      stateMutability: "view",
      type: "function"
  }, {
      inputs: [{...}],
      payable: false,
      stateMutability: "nonpayable",
      type: "constructor"
  }],
  address: "0xb926d47fb92892d6eb108c83858d5f1a1fb9bb57",
  transactionHash: "0xda2420c100021809640c808c1f7aaa1ceba410c27bcd76edddba83e5d05a049a",
  allEvents: function(),
  say: function()
}
> hello.say()
"Hello, Joyce"
>
这里helloworld就部署成功了。但是还有一个问题就是var未定义问题
> var _greeting = "Hello, Joyce" ;
undefined
> var helloContract = web3.eth.contract([{"constant":true,"inputs":[],"name":"say","outputs":[{"name":"","type":"string"}],"payable":false,"stateMutability":"view","type":"function"},{"inputs":[{"name":"_greeting","type":"string"}],"payable":false,"stateMutability":"nonpayable","type":"constructor"}]);
undefined
> var hello = helloContract.new(
...    _greeting,
...    {
......      from: web3.eth.accounts[1],
......      data: '0x608060405234801561001057600080fd5b506040516102a83803806102a8833981018060405281019080805182019291905050508060009080519060200190610049929190610050565b50506100f5565b828054600181600116156101000203166002900490600052602060002090601f016020900481019282601f1061009157805160ff19168380011785556100bf565b828001600101855582156100bf579182015b828111156100be5782518255916020019190600101906100a3565b5b5090506100cc91906100d0565b5090565b6100f291905b808211156100ee5760008160009055506001016100d6565b5090565b90565b6101a4806101046000396000f300608060405260043610610041576000357c0100000000000000000000000000000000000000000000000000000000900463ffffffff168063954ab4b214610046575b600080fd5b34801561005257600080fd5b5061005b6100d6565b6040518080602001828103825283818151815260200191508051906020019080838360005b8381101561009b578082015181840152602081019050610080565b50505050905090810190601f1680156100c85780820380516001836020036101000a031916815260200191505b509250505060405180910390f35b606060008054600181600116156101000203166002900480601f01602080910402602001604051908101604052809291908181526020018280546001816001161561010002031660029004801561016e5780601f106101435761010080835404028352916020019161016e565b820191906000526020600020905b81548152906001019060200180831161015157829003601f168201915b50505050509050905600a165627a7a72305820a7ef9308b4f91e2cbcb6bc84b3196736625ae7e0b242863d77c56dd80fc1e6480029',
......      gas: '4700000'
......    }, function (e, contract){
......     console.log(e, contract);
......     if (typeof contract.address !== 'undefined') {
.........          console.log('Contract mined! address: ' + contract.address + ' transactionHash: ' + contract.transactionHash);
.........     }
......  })
null [object Object]
undefined
> null [object Object]
Contract mined! address: 0xb926d47fb92892d6eb108c83858d5f1a1fb9bb57 transactionHash: 0xda2420c100021809640c808c1f7aaa1ceba410c27bcd76edddba83e5d05a049a
> hello
{
  abi: [{
      constant: true,
      inputs: [],
      name: "say",
      outputs: [{...}],
      payable: false,
      stateMutability: "view",
      type: "function"
  }, {
      inputs: [{...}],
      payable: false,
      stateMutability: "nonpayable",
      type: "constructor"
  }],
  address: "0xb926d47fb92892d6eb108c83858d5f1a1fb9bb57",
  transactionHash: "0xda2420c100021809640c808c1f7aaa1ceba410c27bcd76edddba83e5d05a049a",
  allEvents: function(),
  say: function()
}
> hello.say()
"Hello, Joyce"
>
出现了很多的Undefined,我也不知道哪里搞错啦!希望有大神来解答一下。
疑问解答:CSDN问答
主要就是因为var在命令行上确实是没有定义的一个标识,但是var _greeting = "Hello, Joyce" ;不加var直接=的话,会默认给你这个定义,再执行赋值,比如执行a=1就是先默认执行var a,再执行a=1。所以会有未定义问题而且还可以成功执行。
附上考科一成功执行的代码:
_greeting = "Hello, World" ;
helloContract = web3.eth.contract([{"constant":true,"inputs":[],"name":"say","outputs":[{"name":"","type":"string"}],"payable":false,"stateMutability":"view","type":"function"},{"inputs":[{"name":"_greeting","type":"string"}],"payable":false,"stateMutability":"nonpayable","type":"constructor"}]);
hello = helloContract.new(
   _greeting,
   {
     from: web3.eth.accounts[2],
     data: '0x608060405234801561001057600080fd5b506040516102a83803806102a8833981018060405281019080805182019291905050508060009080519060200190610049929190610050565b50506100f5565b828054600181600116156101000203166002900490600052602060002090601f016020900481019282601f1061009157805160ff19168380011785556100bf565b828001600101855582156100bf579182015b828111156100be5782518255916020019190600101906100a3565b5b5090506100cc91906100d0565b5090565b6100f291905b808211156100ee5760008160009055506001016100d6565b5090565b90565b6101a4806101046000396000f300608060405260043610610041576000357c0100000000000000000000000000000000000000000000000000000000900463ffffffff168063954ab4b214610046575b600080fd5b34801561005257600080fd5b5061005b6100d6565b6040518080602001828103825283818151815260200191508051906020019080838360005b8381101561009b578082015181840152602081019050610080565b50505050905090810190601f1680156100c85780820380516001836020036101000a031916815260200191505b509250505060405180910390f35b606060008054600181600116156101000203166002900480601f01602080910402602001604051908101604052809291908181526020018280546001816001161561010002031660029004801561016e5780601f106101435761010080835404028352916020019161016e565b820191906000526020600020905b81548152906001019060200180831161015157829003601f168201915b50505050509050905600a165627a7a72305820a7ef9308b4f91e2cbcb6bc84b3196736625ae7e0b242863d77c56dd80fc1e6480029',
     gas: '4700000'
   }, function (e, contract){
    console.log(e, contract);
    if (typeof contract.address !== 'undefined') {
         console.log('Contract mined! address: ' + contract.address + ' transactionHash: ' + contract.transactionHash);
    }
 })
