1、运行代码:
①python enhance.py --type=photo --zoom=4 back.jpg
(zoom=4:放大四倍;back.jpg:要进行超分辨率的图片)
原分辨率增强
②python enhance.py --type=photo --model=repair --zoom=1 back.jpg
注:需要在Terminal上运行,最好将你的图片放入neural-enhance文件夹中
2、运行前所需配好的环境(window下):
python版本最好为3.4,若没有也没关系,笔者的版本为python 3.6.1
查看Numpy版本,最好安装1.15.1,以防不匹配(没有不影响)
查看SciPy版本,最好安装1.0.1,以免不匹配(没有不影响)
如何安装?以Numpy为例,打开conda,输入
pip uninstall numpy=1.15.1
下载训练集:
ne1x-photo-repair-0.3.pkl.bz2 (https://github.com/alexjc/neural-enhance/releases/download/v0.3/ne1x-photo-repair-0.3.pkl.bz2)
ne2x-photo-default-0.3.pkl.bz2 (https://github.com/alexjc/neural-enhance/releases/download/v0.3/ne2x-photo-default-0.3.pkl.bz2)
ne4x-photo-default-0.3.pkl.bz2 (https://github.com/alexjc/neural-enhance/releases/download/v0.3/ne4x-photo-default-0.3.pkl.bz2)
vgg19_conv.pkl.bz2 (https://github.com/alexjc/neural-enhance/releases/download/v0.0/vgg19_conv.pkl.bz2)
3、可能会遇到的问题:(若没遇到可自动忽略)
1. cpu不支持
· theano.gof.opt.LocalMetaOptimizerSkipAssertionError: AbstractConv2d Theano optimization failed: there is no implementation available supporting the requested options. Did you exclude both “conv_dnn” and “conv_gemm” from the optimizer? If on GPU, is cuDNN available and does the GPU support it? If on CPU, do you have a BLAS library installed Theano can link against? On the CPU we do not support float16.
–意思是你的theano没有装到位,需要修改配置和环境变量
解决方法:
安装Theano和Lasagne
打开conda,分别执行这两条命名:
pip install -r https://raw.githubusercontent.com/Lasagne/Lasagne/master/requirements.txt
pip install https://github.com/Lasagne/Lasagne/archive/master.zip
此时,基本框架已经安装完成。官方给出了测试的代码,如果使用CPU,会打印出“Used the cpu”,如果使用GPU,会打印出“Used the gpu”
#!/user/bin/env python
# _*_coding:utf-8 _*_

from theano import function, config, shared, tensor
import numpy
import time

vlen = 10 * 30 * 768  # 10 x #cores x # threads per core
iters = 1000

rng = numpy.random.RandomState(22)
x = shared(numpy.asarray(rng.rand(vlen), config.floatX))
f = function([], tensor.exp(x))
print(f.maker.fgraph.toposort())
t0 = time.time()
for i in range(iters):
    r = f()
t1 = time.time()
print("Looping %d times took %f seconds" % (iters, t1 - t0))
print("Result is %s" % (r,))
if numpy.any([isinstance(x.op, tensor.Elemwise) and
              ('Gpu' not in type(x.op).__name__)
              for x in f.maker.fgraph.toposort()]):
    print('Used the cpu')
else:
    print('Used the gpu')
接下来就是在C:\Users\“你的用户名”目录下新建一个名为.theanorc的.txt文件,我里面的内容为
[cxx]
flags=C:\Users\“你的用户名”\Anaconda3\envs\theano\MinGW\bin
[global]
floatX = float32
device = cpu
optimizer = None
[blas]
ldflags = -lopenblas
以上可是cpu正常运行
2. 有些库过时(以scipy.ndimage.imread为例)
back.jpg Traceback (most recent call last):
File “enhance.py”, line 583, in
img = scipy.ndimage.imread(filename, mode=‘RGB’)
AttributeError: module ‘scipy.ndimage’ has no attribute ‘imread’
源代码是2017年开源的,故有些库的安装需要倒退,采用较老的库,或者安装最新库,然后使用新库相同功能的函数
scipy.ndimage.imread(*args, **kwds)
imread is deprecated! imread is deprecated in SciPy 1.0.0, and will be removed in 1.2.0. Use imageio.imread instead.
在1.2.0版本用imageio.imread代替
Read an image from a file as an array.从文件中把图片读成数组
解决方法:
pip install imageio
接着调用imageio库替换scipy.ndimage.imread
import imageio
fname = "images/" + my_image
image = np.array(imageio.imread(fname))
这是最后出来的结果:
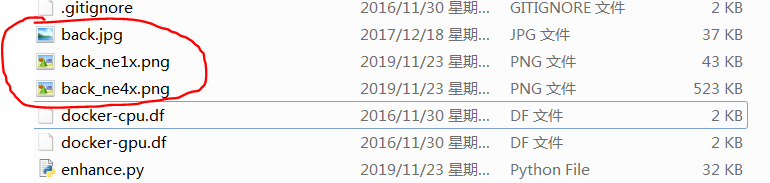
ne1x表示增强库超分辨率跑出来的结果,笔者觉得一般,没提高多少像素
ne4x表示放大四倍+超分辨率跑出来的结果,笔者觉得这个效果比1x的要好的多
自此,基本的问题就解决了
