一、自己写一个注解,并导入容器进行扫描
注解:
@Target(ElementType.TYPE)
@Retention(RetentionPolicy.RUNTIME)
@Documented
@Service
public @interface firstAnnotation {
    String value() default "默认值";
}
引用:
@firstAnnotation
public class TestService {
    public String say() {
        return "这是第一个服务注解" + new java.util.Date();
    }
}
测试:注意这里要去扫引用注解的包,这样容器加载的时候才能扫到调用的类。否则是扫不到的,因为不在容器里头
@ComponentScan("com.wgc.configuration.service")
public class TestMyService {
    public static void main(String[] args) {
        //类对象拿到类注解
        ConfigurableApplicationContext context = new SpringApplicationBuilder(TestMyService.class)
                .web(WebApplicationType.NONE)
                .run(args);
        TestService testService = context.getBean(TestService.class);
        System.out.println("TestService Bean:---"+testService);
        System.out.println("TestService Bean say:---"+testService.say());
        context.close();
    }
}
二、自己写一个@Configuration配置类
注意要先创建好对应的实体类,方面名相当于bean的ID,返回值就是class
@Configuration
public class configurationTest {

    @Bean
    public Book getBook() {
        return new Book();
    }   //注册的方法名对应着容器bean的ID

    @Bean
    public car getcar() {
        return new car();
    }
}
调用:这里也一样记得要去把组件扫进容器里头
@ComponentScan("com.wgc.configuration.config")
public class TestConfiguration {
    public static void main(String[] args) {
        //类对象拿到类注解
        ConfigurableApplicationContext context = new SpringApplicationBuilder(TestConfiguration.class)
                .web(WebApplicationType.NONE)
                .run(args);
        Book book = context.getBean("getBook",Book.class);
        car car = context.getBean("getcar",car.class);
        System.out.println(book.introduce());
        System.out.println(car.say());
        context.close();
    }
}
你看,我们getBean的时候,前面对应着方法名,后面对应着类型,这样就把对象拿出来,从而调用它们的内部方法了
三、熟悉@Import,从而明白@EnableXXX
这里导入了一个配置类,我们再详细看看
@Target(ElementType.TYPE)
@Retention(RetentionPolicy.RUNTIME)
@Documented
@Import(com.wgc.configuration.config.configurationTest.class)   //直接扫描类对象注册
public @interface Enablebookcar {
}
import导入的类:
@Configuration
public class configurationTest {

    @Bean
    public Book getBook() {
        return new Book();
    }   //注册的方法名对应着容器bean的ID

    @Bean
    public car getcar() {
        return new car();
    }
}
好,我们来测试以下:
@Enablebookcar  //利用import直接加载类对象,并注册到IOC容器
public class TestimportEnable {
    public static void main(String[] args) {
        //类对象拿到类注解
        ConfigurableApplicationContext context = new SpringApplicationBuilder(TestimportEnable.class)
                .web(WebApplicationType.NONE)
                .run(args);
        Book book = context.getBean("getBook", Book.class);
        System.out.println(book.introduce());
        car car = context.getBean("getcar", car.class);
        System.out.println(car.say());
    }
}
这样我们就通过自己写的注解@Enablebookcar,导入里面封装好的信息,@Import里的配置类@Configuration,就完成注册和调用了!
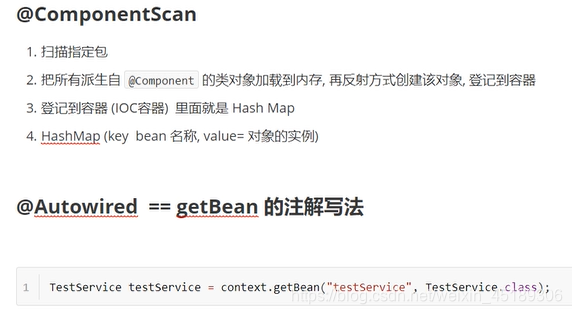
另:可以理解为@Autowired就是getBean
bean名称,value=对象的实例
万物皆哈希~

