目录:
一、功能介绍
二、源代码
三、使用案例
一、功能介绍
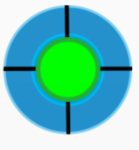
该只负责上图摇杆的那个绿点,传入绿点的view完成初始化,
通过重写doInHovering()方法可以写入悬停时发生的事件。
通过buttonDirection可以获得摇杆的旋转角度。
通过setDetectInterval(detectInterval:Long) 设置悬停事件发生频率。
*//关于摇杆的边界范围,这里面没有实现,具体需求自己改吧。
二、源代码
//该类用于构建摇杆按钮
//作者:LC
//时间:2020/2/8 14:21
package com.example.minitankwar.activity

import android.os.Handler
import android.view.MotionEvent
import android.view.View
import android.widget.FrameLayout
import kotlin.math.abs
import kotlin.math.atan

//使用说明如下
//Start: 传入原按钮的view初始化
//END  :通过 build()激活按钮
//可选项: 通过继承 doInDown() doInUp()doInHovering(),分别定义按下,抬起,悬停时的事件
//       通过setDetectInterval(detectInterval:Long) 设置悬停事件发生频率
//        可通过 buttonDirection 获得摇杆的相对角度
open class HoverButtonHelp(private val view: View)
{
    private val buttonX:Int
    private val buttonY:Int
    private var opTouchX:Int =0
    private var opTouchY:Int =0
    private val DETECT = 100
    private var detectInterval:Long = 10  //探测的间隔时间
    private var isMoveDetecting = true
    var buttonDirection = 0   //摇杆的相对角度

    //定义按下时要做的事情
    open fun doInDown(){

    }

    //定义抬起时要做的事情
    open fun doInUp(){

    }

    //定义悬停时要做的事情
    open fun doInHovering(){

    }

    fun setDetectInterval(detectInterval:Long):HoverButtonHelp{
        this.detectInterval=detectInterval
        return this
    }

    fun build()
    {
        view.setOnTouchListener { v , event ->
            when (event.action) {
                MotionEvent.ACTION_DOWN -> {
                    //开始探测,设置探测标志位为true
                    isMoveDetecting = true
                    handler.sendEmptyMessage(DETECT)
                    opTouchX = event.rawX.toInt()
                    opTouchY = event.rawY.toInt()
                    doInDown()
                }
                MotionEvent.ACTION_MOVE -> {
                    setViewPosition(v, buttonX, buttonY, event.rawX.toInt() - opTouchX, event.rawY.toInt() - opTouchY)
                    buttonDirection = getDirectionByTan(v.x.toInt(), v.y.toInt(), buttonX, buttonY)
                }
                MotionEvent.ACTION_UP -> {
                    isMoveDetecting = false                 //设置探测标志位为false,结束探测
                    setViewPosition(v, buttonX, buttonY,0,0)  //摇杆归位
                    doInUp()
                }
            }
            true
        }
    }

    //这是一个会自己给自己发信息的无限循环handler
    private var handler = Handler {
        when (it.what) {
            DETECT ->
            {
                hoverJudge()
                true
            }
            else -> true
        }
    }

    private fun hoverJudge()
    {
        if(isMoveDetecting)
        {
            doInHovering()
            handler.sendEmptyMessageDelayed(DETECT,detectInterval)
        }
    }

    private fun getDirectionByTan(x: Int, y: Int, ox: Int, oy: Int): Int {
        val tanX = x - ox
        val tanY = oy - y
        val tan = abs(tanY / tanX.toDouble())
        var direction = Math.toDegrees(atan(tan)).toInt()
        direction = if (tanY > 0) {
            if (tanX < 0) 180 - direction
            else  direction
        } else {
            if (tanX >= 0) 360 - direction
            else 180 + direction
        }
        return direction
    }

    private fun setViewPosition(v: View, x:Int, y:Int, diffX:Int, diffY:Int){
        val params = v.layoutParams as FrameLayout.LayoutParams
        params.setMargins(x+diffX, y+diffY,0,0)
        v.layoutParams = params
    }

    init {
        val params = view.layoutParams as FrameLayout.LayoutParams
        buttonX = params.leftMargin
        buttonY = params.topMargin
    }
}
三、使用案例
	inner class MoveHoverButtonHelp(view:View):HoverButtonHelp(view){
        override fun doInHovering() {
            val tmpPosition = tanks[tankId].clone()
            when (tanks[tankId].updateTankPosition(this.buttonDirection)) {
                TOOLS.CrashType.NoCrash -> {
                    tanks[tankId].setView()
                    tanks[tankId].tankBody.rotation = -tanks[tankId].direction.toFloat()
                    tanks[tankId].tankBarrel.rotation = -tanks[tankId].direction.toFloat() - tanks[tankId].barrelDiffDirection
                }
                TOOLS.CrashType.Border -> {
                    tanks[tankId].copyPositionData(tmpPosition)
                }
                TOOLS.CrashType.Tank -> {
                    tanks[tankId].copyPositionData(tmpPosition)
                }
                else -> {}
            }
        }
    }

	//设置10毫秒的事件间隔
	MoveHoverButtonHelp(opbutton).setDetectInterval(10).build()
