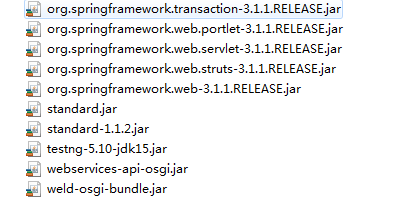
一.创建Eclipse项目导入SSM需要的jar包+asm,aspect,cglib 的jar包

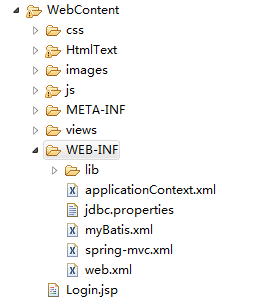
二.搭建框架,编写Spring,SpringMVC,Mybatis配置文件
1.配置文件放在WEB-INF下
2.web.xml配置
<?xml version="1.0" encoding="UTF-8"?>
<web-app xmlns:xsi="http://www.w3.org/2001/XMLSchema-instance" xmlns="http://java.sun.com/xml/ns/javaee" xmlns:web="http://java.sun.com/xml/ns/javaee/web-app_2_5.xsd" xsi:schemaLocation="http://java.sun.com/xml/ns/javaee http://java.sun.com/xml/ns/javaee/web-app_3_0.xsd" id="WebApp_ID" version="3.0">
  <display-name>SSM_School</display-name>

  <!-- 配置Spring -->
  <context-param>
  	<param-name>contextConfigLocation</param-name>
  	<param-value>WEB-INF/applicationContext.xml</param-value>
  </context-param>

  <listener>
  	<listener-class>org.springframework.web.context.ContextLoaderListener</listener-class>
  </listener>

  <!-- 配置SpringMVC -->
  <servlet>
  	<servlet-name>springmvc</servlet-name>
  	<servlet-class>org.springframework.web.servlet.DispatcherServlet</servlet-class>
  	<init-param>
  		<param-name>contextConfigLocation</param-name>
  		<param-value>WEB-INF/spring-mvc.xml</param-value>
  	</init-param>
  	<load-on-startup>1</load-on-startup>  //加载顺序
  </servlet>

  <servlet-mapping>
  	<servlet-name>springmvc</servlet-name>
  	<url-pattern>*.do</url-pattern>  //访问以*.do结尾的地址由DispatchServlet解析
  </servlet-mapping>

  <!-- 配置字符编码 -->
  <filter>
  	<filter-name>CharacterEncodingFilter</filter-name>
  	<filter-class>org.springframework.web.filter.CharacterEncodingFilter</filter-class>
  	<init-param>
  		<param-name>encoding</param-name>
  		<param-value>UTF-8</param-value>
  	</init-param>
  </filter>

  <filter-mapping>
  	<filter-name>CharacterEncodingFilter</filter-name>
  	<url-pattern>/*</url-pattern>   //拦截所有地址
  </filter-mapping>

 <!-- 设置默认打开页面列表 -->
<!-- 	<welcome-file-list>
		<welcome-file>Login.jsp</welcome-file>
	</welcome-file-list> -->
</web-app>
3.SpringMVC的配置文件—spring-mvc.xml
<?xml version="1.0" encoding="UTF-8"?>
<beans xmlns="http://www.springframework.org/schema/beans"
	xmlns:aop="http://www.springframework.org/schema/aop" xmlns:context="http://www.springframework.org/schema/context"
	xmlns:p="http://www.springframework.org/schema/p" xmlns:tx="http://www.springframework.org/schema/tx"
	xmlns:xsi="http://www.w3.org/2001/XMLSchema-instance"
	xmlns:mvc="http://www.springframework.org/schema/mvc"
	xsi:schemaLocation="
	    http://www.springframework.org/schema/beans
	    http://www.springframework.org/schema/beans/spring-beans-3.1.xsd
        http://www.springframework.org/schema/context
        http://www.springframework.org/schema/context/spring-context-3.1.xsd
        http://www.springframework.org/schema/aop
        http://www.springframework.org/schema/aop/spring-aop-3.1.xsd
        http://www.springframework.org/schema/tx
        http://www.springframework.org/schema/tx/spring-tx-3.1.xsd
        http://www.springframework.org/schema/mvc
        http://www.springframework.org/schema/mvc/spring-mvc-3.1.xsd">

<!--         配置前后缀    (可选)
        <bean class="org.springframework.web.servlet.view.InternalResourceViewResolver">
        	<property name="prefix" value="/views/"></property>
        	<property name="suffix" value=".jsp"></property>
        </bean> -->

        <!-- 自动配置注解的映射器和适配器和视图解析器等 -->
        <mvc:annotation-driven></mvc:annotation-driven>

        <!-- 批量扫描注解的Controller -->
        <context:annotation-config />
        <context:component-scan base-package="com.controller"></context:component-scan>
</beans>
4.Mybatis配置文件–myBatis.xml
<?xml version="1.0" encoding="UTF-8"?>
<!DOCTYPE configuration
PUBLIC "-//mybatis.org//DTD Config 3.0//EN"   "http://mybatis.org/dtd/mybatis-3-config.dtd">
<configuration>
<!-- 批量加载mapper.xml映射文件 -->
	<mappers>
		<package name="com.dao"/>   //mapper.xml映射文件和mapper所在的位置,要同名
	</mappers>
</configuration>
5.数据库的加载文件—jdbc.properties
jdbc.driver=com.mysql.jdbc.Driver
jdbc.url=jdbc:mysql://localhost:3306/你的数据库名字?useUnicode=true&characterEncoding=UTF-8
jdbc.user=root  //账号
jdbc.password=123456  //密码
6.Spring配置文件—applicationContext.xml
<?xml version="1.0" encoding="UTF-8"?>
<beans xmlns="http://www.springframework.org/schema/beans"
	xmlns:aop="http://www.springframework.org/schema/aop"
	xmlns:context="http://www.springframework.org/schema/context"
	xmlns:p="http://www.springframework.org/schema/p"
	xmlns:tx="http://www.springframework.org/schema/tx"
	xmlns:xsi="http://www.w3.org/2001/XMLSchema-instance"
	xmlns:mvc="http://www.springframework.org/schema/mvc"
	xsi:schemaLocation="
	    http://www.springframework.org/schema/beans
	    http://www.springframework.org/schema/beans/spring-beans-3.1.xsd
        http://www.springframework.org/schema/context
        http://www.springframework.org/schema/context/spring-context-3.1.xsd
        http://www.springframework.org/schema/aop
        http://www.springframework.org/schema/aop/spring-aop-3.1.xsd
        http://www.springframework.org/schema/tx
        http://www.springframework.org/schema/tx/spring-tx-3.1.xsd
        http://www.springframework.org/schema/mvc
        http://www.springframework.org/schema/mvc/spring-mvc-3.1.xsd">

        <!-- 加载注解service和dao -->
        <context:annotation-config />
        <context:component-scan base-package="com">
        	<context:exclude-filter type="annotation" expression="org.springframework.stereotype.Controller"/>
            //因为注解的Controller在spring-mvc.xml加载了,这里exclude-filter 属性设置除了Controller之外都加载
        </context:component-scan>

        <!-- 加载数据库文件 -->
        <context:property-placeholder location="WEB-INF/jdbc.properties"/>

        <!-- 注册c3p0,读取数据库文件 -->
        <bean id="dataSource" class="com.mchange.v2.c3p0.ComboPooledDataSource">
        	<property name="driverClass" value="${jdbc.driver}"/>
            <property name="jdbcUrl" value="${jdbc.url}"/>
            <property name="user" value="${jdbc.user}"/>
            <property name="password" value="${jdbc.password}"/>
        </bean>

        <!-- 整合Mybatis,配置sqlsessionFactory -->
        <bean id="sqlSessionFactory" class="org.mybatis.spring.SqlSessionFactoryBean">
        	<!-- 加载mybatis.xml -->
        	<property name="configLocation" value="WEB-INF/myBatis.xml"></property>
        	<!-- 加载数据库数据源 -->
        	<property name="dataSource" ref="dataSource"></property>
        </bean>

        <!-- 扫描mapper文件 -->
        <bean class="org.mybatis.spring.mapper.MapperScannerConfigurer">
        	<property name="basePackage" value="com.dao"></property>
        	<property name="sqlSessionFactoryBeanName" value="sqlSessionFactory"></property>
        </bean>

 		<!-- 开启事务管理器 -->
        <bean id="transactionManager" class="org.springframework.jdbc.datasource.DataSourceTransactionManager">
        	<property name="dataSource" ref="dataSource"></property>
        </bean>

     	<!-- 注解事务 -->
     	<tx:annotation-driven transaction-manager="transactionManager"/>
     	<aop:aspectj-autoproxy proxy-target-class="true"></aop:aspectj-autoproxy> //使用Cglib代理
</beans>
三.创建数据库表,编写实体层,dao层,service层,controller层和工具类
1.实体层和创建数据库表略过,按照自己需求来,我这里是学生数据库

2.dao层
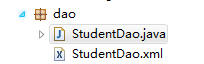
2.1 mapper类
扫描二维码关注公众号,回复:
9888570 查看本文章

package com.dao;

import org.springframework.stereotype.Repository;

import com.entity.Student;

@Repository
public interface StudentDao
{
	//查找学生学号和密码
	public Student findStudentByNameAndPwd(Student student);
	     //查找出来后映射成实体类对象
}
2.2mapper.xml映射文件
<?xml version="1.0" encoding="UTF-8"?>
<!DOCTYPE mapper
PUBLIC "-//mybatis.org//DTD Mapper 3.0//EN"   "http://mybatis.org/dtd/mybatis-3-mapper.dtd">
<mapper namespace="com.dao.StudentDao">
	<select id="findStudentByNameAndPwd" parameterType="com.entity.Student" resultType="com.entity.Student">
		select * from student
		<where>
			<if test="stu_id != null and stu_id !='' ">   //判断从登陆页面传送过来的值是否为空
				and stu_id=#{stu_id}
			</if>
			<if test="stu_pwd != null and stu_pwd !='' ">
			 	and stu_pwd=#{stu_pwd};
			</if>
		</where>
	</select>
</mapper>
3.service层
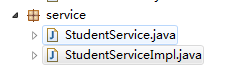
3.1接口
package com.service;


import com.entity.Student;

public interface StudentService
{
	public Student findStudentByNameAndPwd(Student student);
}
3.1实现类
package com.service;

import org.springframework.beans.factory.annotation.Autowired;
import org.springframework.stereotype.Service;
import org.springframework.transaction.annotation.Transactional;

import com.dao.StudentDao;
import com.entity.Student;

@Service    //标识为service层
@Transactional  //声明事务管理
public class StudentServiceImpl implements StudentService
{
	@Autowired  //自动注入dao
	private StudentDao dao;

	@Override
	public Student findStudentByNameAndPwd(Student student)
	{
		Student stu=dao.findStudentByNameAndPwd(student);
		if (stu != null)  //判断dao层有没有查询到值
		{

			return stu;
		}
		// TODO Auto-generated method stub
		return null;
	}
}
4.Controller层

package com.controller;


import java.awt.Color;
import java.awt.Font;
import java.awt.Graphics;
import java.awt.image.BufferedImage;
import java.util.Random;

import javax.servlet.ServletOutputStream;
import javax.servlet.http.HttpServletRequest;
import javax.servlet.http.HttpServletResponse;
import javax.servlet.http.HttpSession;

import net.sf.json.JSONObject;

import org.springframework.beans.factory.annotation.Autowired;
import org.springframework.stereotype.Controller;
import org.springframework.web.bind.annotation.RequestMapping;
import org.springframework.web.bind.annotation.RequestParam;
import org.springframework.web.bind.annotation.ResponseBody;
import org.springframework.web.servlet.ModelAndView;

import com.entity.Student;
import com.service.StudentServiceImpl;
import com.util.ImageUtil;

@Controller  //标识为控制类
@RequestMapping("/Login")  //uri映射地址
public class LoginController
{
	//注入Service层
	@Autowired
	private StudentServiceImpl service;

	//验证码
	@RequestMapping("/Verification.do")
	public void handleRnd(HttpServletRequest request,
			HttpServletResponse response) throws Exception {
		response.setHeader("Cache-Control", "no-store");
		response.setHeader("Pragma", "no-cache");
		response.setDateHeader("Expires", 0L);
		response.setContentType("image/jpeg");
		BufferedImage image = new BufferedImage(65, 25,
				BufferedImage.TYPE_INT_RGB);
		Graphics g = image.getGraphics();
		g.setColor(new Color(246,194,115));
		g.fillRect(0, 0, 65, 25);
		g.setColor(Color.yellow);
		Font font = new Font("宋体", Font.BOLD, 20);
		g.setFont(font);
		Random r = new Random();
		String rnd = "";
		int ir = r.nextInt(10);
		rnd = rnd + "" + ir;
		g.drawString("" + ir, 5, 18);
		g.setColor(Color.red);
		ir = r.nextInt(10);
		rnd = rnd + "" + ir;
		g.drawString("" + ir, 20, 18);
		g.setColor(Color.blue);
		ir = r.nextInt(10);
		rnd = rnd + "" + ir;
		g.drawString("" + ir, 35, 18);
		g.setColor(Color.green);
		ir = r.nextInt(10);
		rnd = rnd + "" + ir;
		g.drawString("" + ir, 50, 18);
		request.getSession().setAttribute("RND", rnd);   //储存Session用于验证码判断
		ServletOutputStream out = response.getOutputStream();
		out.write(ImageUtil.imageToBytes(image, "gif"));
		out.flush();
		out.close();
	}

	//登录校验
	@RequestMapping("/LoginValidate.do")
	@ResponseBody    //返回的数据封装成json模式,然后传给前端内容        @RequestParam将获取到的值传递给参数
	public JSONObject validateLogin(@RequestParam("stu_id") String stu_id,@RequestParam("stu_pwd") String stu_pwd,@RequestParam("verification") String verification,Student student,HttpServletRequest request,HttpSession session)
	{
		JSONObject jsonObject = new JSONObject();
		String sessionVerification = (String) session.getAttribute("RND");
		student = service.findStudentByNameAndPwd(student);
		if (!verification.equalsIgnoreCase(sessionVerification))   //验证验证码Session是否正确
		{
			jsonObject.put("res", "VerificationError");  //存储json值,添加键值对,在ajax获取判断
			System.out.println("验证码错误");
		}else
		{
			if (student != null)
			{
				String stu_name = student.getStu_name().toString();
				jsonObject.put("res", "VerificationSucc");   //存储json值,添加键值对,在ajax获取判断
				jsonObject.put("result", "StuSucc");
				request.getSession().setAttribute("stu_name", stu_name);
				request.getSession().setAttribute("stu_id", stu_id);
				System.out.println("登陆成功");
			}else{
				jsonObject.put("res", "VerificationSucc");
				jsonObject.put("result", "StuError");
				System.out.println("用户名或密码错误");
			}
		}
		return jsonObject;
	}


	//转到main页面
	@RequestMapping("/main.do")
	public  ModelAndView mv(HttpServletRequest httpservletrequest,
			                HttpServletResponse httpservletresponse,
			                HttpSession session,
			                Student student) throws Exception
	{
		ModelAndView mv = new ModelAndView();
		String stu_name = (String)httpservletrequest.getSession().getAttribute("stu_name");  //获取登录的学号
		mv.addObject("stu_name", stu_name);   //存储键值对在前端显示学号
		mv.setViewName("/views/main.jsp");  //转到main页面
		// TODO Auto-generated method stub
		return mv;
	}

}
5.工具类,用于验证码,直接复制粘贴
package com.util;

import java.awt.Graphics;
import java.awt.Image;
import java.awt.Label;
import java.awt.MediaTracker;
import java.awt.Toolkit;
import java.awt.image.BufferedImage;
import java.io.ByteArrayOutputStream;
import java.io.IOException;

import javax.imageio.ImageIO;

/**
 * 图片转化为字节,字节转化为图片
 *
 * @author Xu Chunfu
 *
 */
public class ImageUtil {
	/**
	 * 转换Image数据为byte数组
	 *
	 * @param image
	 *            Image对象
	 * @param format
	 *            image格式字符串.如"gif","png"
	 * @return byte数组
	 */
	public static byte[] imageToBytes(Image image, String format) {
		BufferedImage bImage = new BufferedImage(image.getWidth(null),
				image.getHeight(null), BufferedImage.TYPE_INT_ARGB);
		Graphics bg = bImage.getGraphics();
		bg.drawImage(image, 0, 0, null);
		bg.dispose();

		ByteArrayOutputStream out = new ByteArrayOutputStream();
		try {
			ImageIO.write(bImage, format, out);
		} catch (IOException e) {
			e.printStackTrace();
		}
		return out.toByteArray();
	}

	/**
	 * 转换byte数组为Image
	 *
	 * @param bytes
	 * @return Image
	 */
	public static Image bytesToImage(byte[] bytes) {
		Image image = Toolkit.getDefaultToolkit().createImage(bytes);
		try {
			MediaTracker mt = new MediaTracker(new Label());
			mt.addImage(image, 0);
			mt.waitForAll();
		} catch (InterruptedException e) {
			e.printStackTrace();
		}

		return image;
	}
}
四.编写JSP,前端
1.创建Login.jsp,放在WebContent根目录下
<%@ page language="java" contentType="text/html; charset=UTF-8"
    pageEncoding="UTF-8"%>
<!DOCTYPE html PUBLIC "-//W3C//DTD HTML 4.01 Transitional//EN" "http://www.w3.org/TR/html4/loose.dtd">
<html>
<head>
<meta http-equiv="Content-Type" content="text/html; charset=UTF-8">
<title>登陆</title>
<script language="JavaScript" src="js/jquery.js"></script>  //注意文件路径与你项目可能不一样
<script charset="UTF-8" src="js/LoginValidate.js" type="text/javascript"></script>  //注意文件路径与你项目可能不一样

</head>

<body style="background-color:#ffba53">

 //所有onclick属性在js文件实现
    <form id="form_login"  method="post">
        <div>
    		<ul>
    			<li id="li"><input id="stu_id" name="stu_id" type="text" value="" placeholder="学号"/>
    			</li>
    			<li id="li1"><input id="stu_pwd" name="stu_pwd" type="password" value="" placeholder="密码"/></li>
   				<li id="li2">
    			<span><input id="verification" name="verification" type="text" value="" placeholder="验证码"/></span>
    			 //src属性这里用了项目绝对路径
    			<cite><img style="position: relative;top:6px;height: 34px;" src="/你的项目名字/Login/Verification.do" onclick="ChangeVerification()"/></cite>
    			</li>
    			<li><input type="button" class="loginbtn" value="登录"  onclick="Login()"  /></li>
    		</ul>
    	</div>
    </form>
</body>
</html>
2.在项目的WebContent下创建js文件夹,在js文件夹创建LoginValidate.js文件
/*
 * Login.jsp里登录验证
 */

//分别设置三个错误时添加的标签
var StuError = "<span id='StuError'><font color='red'>用户名或密码错误!<font></span>";
var IdNull = "<span id='IdNull'><font color='red'>用户名不能为空!<font></span>";
var PwdNull = "<span id='PwdNull'><font color='red'>密码不能为空!<font></span>";


//页面里input被点击后删除标签
$(function(){
	$("body input").focus(function(){
		$("#StuError").remove();
	}).blur(function(){

	});
});

$(function(){
	$("body input").focus(function(){
		$("#IdNull").remove();
	}).blur(function(){

	});
});

$(function(){
	$("body input").focus(function(){
		$("#PwdNull").remove();
	}).blur(function(){

	});
});

////页面里验证码文本框被点击后删除样式
$(function(){
$("#verification").focus(function(){

	$("#verification").val("");
	$("#verification").css({"border" : "","color" : ""});
}).blur(function(){

});
});

/*
 * 按钮事件
 */
function Login()
{
	if ($("#stu_id").val()==="")
	{
		$("#li").prepend(IdNull);   //若学号文本框为空,在id为li的标签开头添加IdNull标签
 		return;
	}

	if ($("#stu_pwd").val()==="")
	{
		$("#li1").prepend(PwdNull);  //若密码文本框为空,在id为li1的标签开头添加PwdNull标签
 		return;
	}

	if ($("#verification").val()==="")
	{
		$("#verification").val("请输入验证码!");
		$("#verification").css({"border" : "1px solid red","color" : "red"});  //设置验证码文本框样式
 		return;
	}

	//表单提交数据给后端
	$.ajax({
		url :"/SSM_School/Login/LoginValidate.do",   //提交到controller的LoginValidate.do方法
		type :"post",   //post方法提交
		data:{       //提交数据,key,value形式提交
			"stu_id" : $("#stu_id").val(),
			"stu_pwd" : $("#stu_pwd").val(),
			"verification" : $("#verification").val()
		},
		datatype : "json",        //数据返回的类型为json
		async: true,            //异步提交
		success : function(data)
		{
			if (data.res=="VerificationError")    //判断从后端传过来的键值对res是否为VerificationError
			{
				$("#verification").val("验证码错误");
				$("#verification").css({"border" : "1px solid red","color" : "red"});   //设置设置验证码文本框样式
				return;
			}else if (data.res=="VerificationSucc")
			{
				if (data.result=="StuSucc")
				{
					window.location.href = "/SSM_School/Login/main.do";  //转到controller的main.do方法
				}else if (data.result=="StuError")
				{
					$("#stu_id").val("");
					$("#stu_pwd").val("");
					$("#verification").val("");
					$("#li").prepend(StuError);   //若学号密码错误或不存在用户时,在id为li的标签开头添加StuError标签
					return;
				}
			}
		}
	});
}

//点击图片更换验证码事件
function ChangeVerification()
{
	$('#Verification').attr('src', '/SSM_School/Login/Verification.do');
}
3.在项目的WebContent下创建views文件夹,在views文件夹创建main.jsp,用于登录成功后跳转
<%@ page language="java" contentType="text/html; charset=UTF-8"
    pageEncoding="UTF-8"%>
<!DOCTYPE html PUBLIC "-//W3C//DTD HTML 4.01 Transitional//EN" "http://www.w3.org/TR/html4/loose.dtd">
<html>
<head>
<meta http-equiv="Content-Type" content="text/html; charset=UTF-8">
<title></title>
<script language="JavaScript" src="${pageContext.request.contextPath}/js/jquery.js"></script>
</head>
<body>
	  ${stu_name}欢迎您
</body>
</html>
搞定。
