前言
本节利用jQuery实现最终的滑动效果。文档示例代码下面有下载链接。
网页代码
navigator2.html
<!DOCTYPE html>
<html>
	<head>
		<meta charset="utf-8">
		<title>导航栏</title>
		<script type="text/javascript" src="js/jquery.js"></script>
		<script type="text/javascript">

		(function ($) {
			$(function () {
				nav();
			});

			function nav() {
				var $liCur = $(".nav-box ul li.cur"),
				curP = $liCur.position().left,
				curW = $liCur.outerWidth(true),
				$slider = $(".nav-line"),
				$targetEle = $(".nav-box ul li a"),
				$navBox = $(".nav-box");
				$slider.stop(true, true).animate({
					"left":curP,
					"width":curW
				});
				$targetEle.mouseenter(function () {
					var $_parent = $(this).parent(),
					_width = $_parent.outerWidth(true),
					posL = $_parent.position().left;
					$slider.stop(true, true).animate({
						"left":posL,
						"width":_width
					}, "fast");
				});
				$navBox.mouseleave(function (cur, wid) {
					cur = curP;
					wid = curW;
					$slider.stop(true, true).animate({
						"left":cur,
						"width":wid
					}, "fast");
				});
			};

		})(jQuery);

		</script>
		<style type="text/css">
			body{margin: 0; }
			ul, li{margin: 0; padding: 0;}
			a{text-decoration: none;}

			.banner{
				width: 100%;
				height: 70px;

				/*background-color: yellow;*/
				}
			.nav-box{
				width: 50%;
				float: right;
				position: relative;
				top: 35px;
			/*	background-color: darkgray;*/
			}
			.nav-box ul{
				list-style: none;

			}
			.nav-box ul li{
				float: left;
				font-size: 14px;
				font-family: "微软雅黑";

				height: 30px;
				line-height: 30px;
				padding: 0 12px;
			/*	background-color: #F5F5F5;*/
			}
			.nav-box .nav-line {
			    background: none repeat scroll 0 0 #35C4FD;
			    bottom: 0;
			    font-size: 0;
			    height: 2px;
			    left: 0;
			    line-height: 2px;
			    position: absolute;
			    width: 52px;
			}

		</style>
	</head>
	<body>
		<div class="banner" >
			<div class="nav-box">
				<ul>
					<li class="cur"><a href="#">首页</a></li>
					<li><a href="#">论坛</a></li>
					<li><a href="#">商务合作</a></li>
					<li><a href="#">下载专区</a></li>
					<li><a href="#">关于我们</a></li>
				</ul>
				<div class="nav-line" ></div>
			</div>

		</div>


	</body>
</html>
下面分析一下网页中涉及到的代码。
jQuery中$(function(){})与(function($){})(jQuery)、$(document).ready(function(){})的区别
首先看navigator2.html的JS代码结构:
(function($){
$(function(){
nav();
});
function nav() {/*内容*/};
})(jQuery);
1、关于 (function($){} )(jQuery)
原理:
这实际上是匿名函数,比如 function(arg){...} ,这就定义了一个匿名函数,参数为arg,而调用函数时,是在函数后面写上括号和实参的,由于操作符的优先级,函数本身也需要用括号,即: (function(arg){...})(param),这就相当于定义了一个参数为arg的匿名函数,并且将param作为参数来调用这个匿名函数。
这样本节使用的 (function($){...})(jQuery) 就不难理解了,之所以只在形参使用$,是为了不与其他库冲突,所以实参用jQuery相当于
function output(s){...};
output(jQuery);
作用:
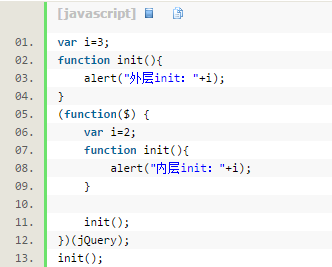
这种写法的最大好处是形成闭包,在(function($){...})(jQuery)内部定义的函数和变量只能在此范围内有效,形成是否私有函数、私有变量的概念。比如:
2、$(function(){…}); jQuery(function($) {…}); $(document).ready(function(){…})
其实这三个的作用是一样的,只是写法不同而已。
参考来源,点此进入
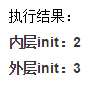
下面分析函数nav()内容
15行到20行声明并定义变量
15行:获取元素,即类为cur的li元素
16行:$(selector).position() 获取元素selector在当前页面的绝对位置信息
17行:outerWidth(true) 方法返回元素的宽度(包括内边距、边框和外边距)。
18行:获取下滑条
19行:获取层nav-box ul li下的所有a元素
20行:获取层nav-box
21-24行:关于$(selector).stop(stopAll,goToEnd)的用法解释请点此进入,改行实现的功能是网页加载后,使层nav-line停在当前的$liCur元素下面,且与$liCur的宽等长。
25-33行:这里定义了$targetEle的鼠标移入事件,即使层nav-line移到当前鼠标放置的导航标题下面。
34-41行:这里定义了$navBox的鼠标移出事件,完成的功能和21-24行相同。
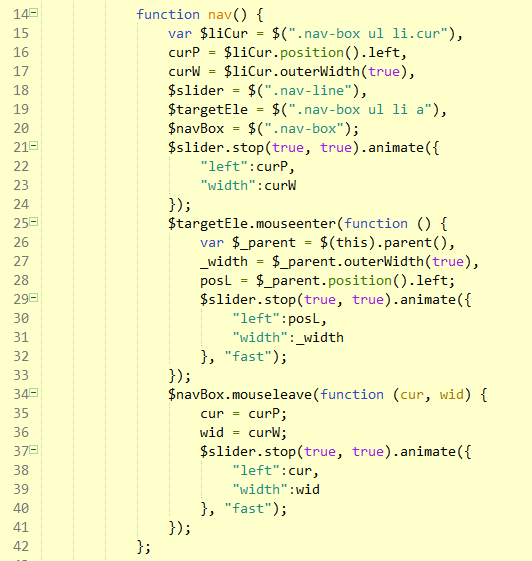
JS单独存放
由 navigator2.html的内容可以看到,虽然可以完成滑动效果,但是如果再有aboutus.html、download.html等页面,还是需要这段代码,如果再添加同样的代码就太冗余了,现在将这段代码规整到一个.js文件里,如下
web.js内容
(function($) {
			$(function () {
				nav();
			});

			function nav() {
				var $liCur = $(".nav-box ul li.cur"),
				curP = $liCur.position().left,
				curW = $liCur.outerWidth(true),
				$slider = $(".nav-line"),
				$targetEle = $(".nav-box ul li a"),
				$navBox = $(".nav-box");
				$slider.stop(true, true).animate({
					"left":curP,
					"width":curW
				});
				$targetEle.mouseenter(function () {
					var $_parent = $(this).parent(),
					_width = $_parent.outerWidth(true),
					posL = $_parent.position().left;
					$slider.stop(true, true).animate({
						"left":posL,
						"width":_width
					}, "fast");
				});
				$navBox.mouseleave(function (cur, wid) {
					cur = curP;
					wid = curW;
					$slider.stop(true, true).animate({
						"left":cur,
						"width":wid
					}, "fast");
				});
			};

		})(jQuery);
此时navigator3.html内部将其引入

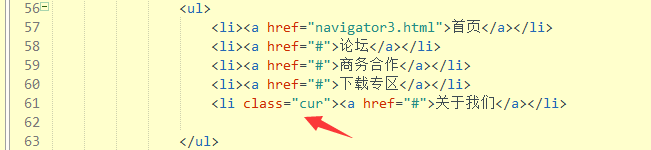
其余内容和navigator2.html内容一样,此时也能完成滑动效果。如果再有另一个界面,比如about.html,那么只需将class="cur"改变一下位置,如下
效果图如下:
该节工程代码点此下载
结语
本来导航栏以为写完了,但是发现了一个问题,下一节再讲。
