文章目录
1.概述
项目地址:ComponentizationDemo
组件化:将app按照业务、功能、等进行划分一个个Module,然后在具体的Module中可以用MVC、MVP、MVVM等架构去具体实现。
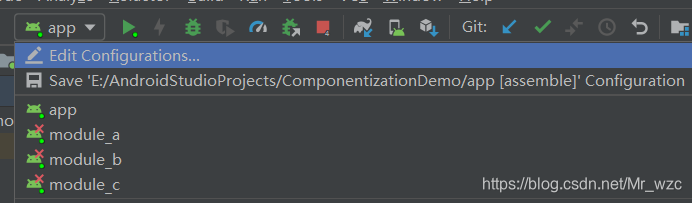
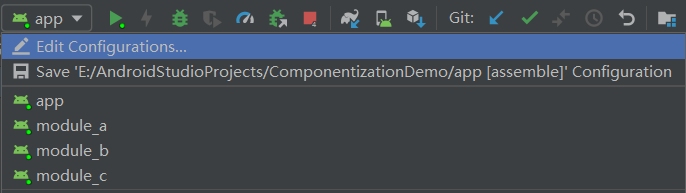
特点:在打正式app时这些Module是集成在app内的,调试时这些Module又可以变成一个个app模块一对一调试。
那么如何做到library Module和app切换呢?通过设置AS module 属性:
- application :可独立运行的Android程序,也就是我们的APP
apply plugin: ‘com.android.application’ - library :不可以独立运行,一般是Android程序依赖的库
apply plugin: ‘com.android.library’
2.基础配置
统一管理build配置以及组件/集成模式的切换
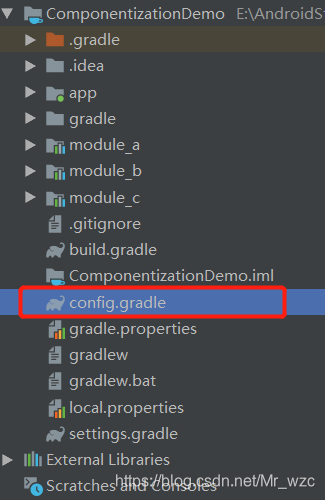
- 在根目录下新增config.gradle文件,如下:
ext {
    // 组件开关: true 组件 false 集成
    isComponent = false
    android = [
            compileSdkVersion: 28,
            defaultConfig    : [
                    buildToolsVersion        : 28,
                    applicationId            : 'com.wzc.componentizationdemo',
                    minSdkVersion            : 15,
                    targetSdkVersion         : 28,
                    versionCode              : 1,
                    versionName              : "1.0",
                    testInstrumentationRunner: 'android.support.test.runner.AndroidJUnitRunner'
            ]

    ]
    //三方库
    dependencies = [
            appcompatV7     : 'com.android.support:appcompat-v7:28.0.0',
            constraintLayout: 'com.android.support.constraint:constraint-layout:1.1.3',
            junit           : 'junit:junit:4.12',
            runner          : 'com.android.support.test:runner:1.0.2',
            espressoCore    : 'com.android.support.test.espresso:espresso-core:3.0.2'
    ]
}
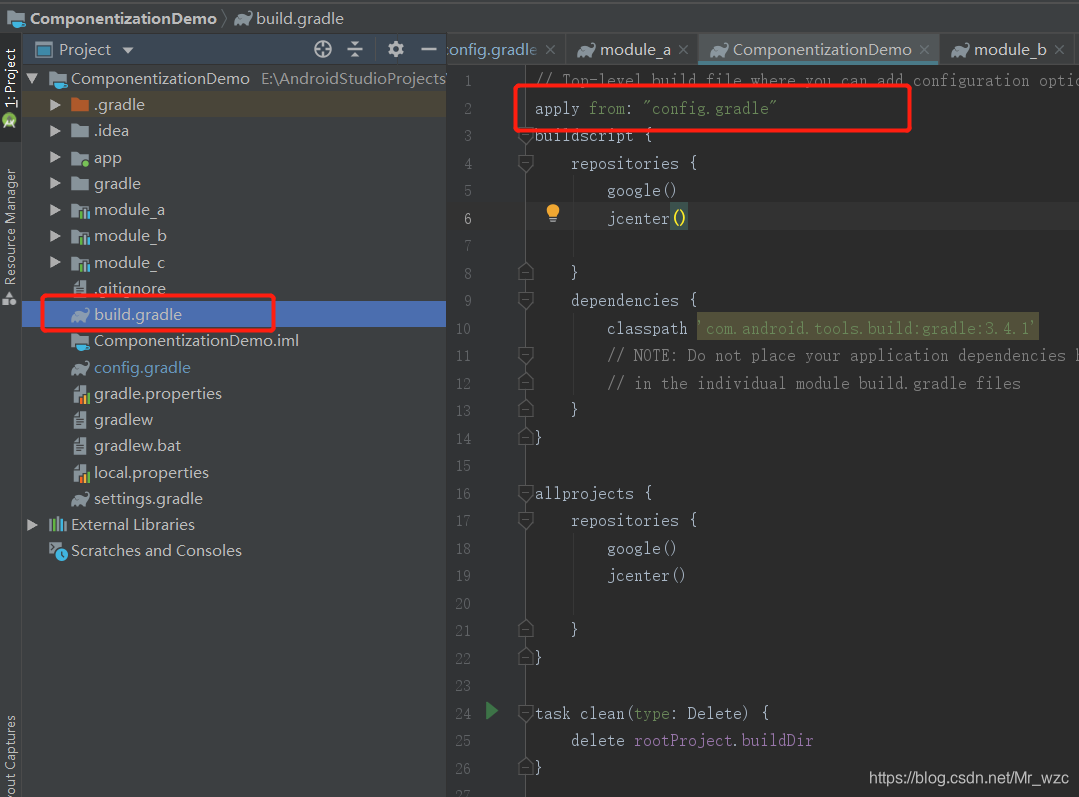
- 在根目录的build.gradle加入
apply from: "config.gradle",如下:
3.设置Module
- 新建library Module
在module的build.gradle文件中加入:
	if (rootProject.ext.isComponent) {
  		apply plugin: 'com.android.application'
	} else {
 		apply plugin: 'com.android.library'
	}
这样我们就可以在config.gradle中通过isComponent设置module属性了
- AndroidManifest文件合并问题
既然是个app,那必须有Application、主Activity和包名。
新建Application的时候需要的资源文件需要添加到module的资源文件夹中。如icon、主题等。
方法一:
在module中新建src/main/debug/AndroidManifest.xml和src/main/debug/java文件夹
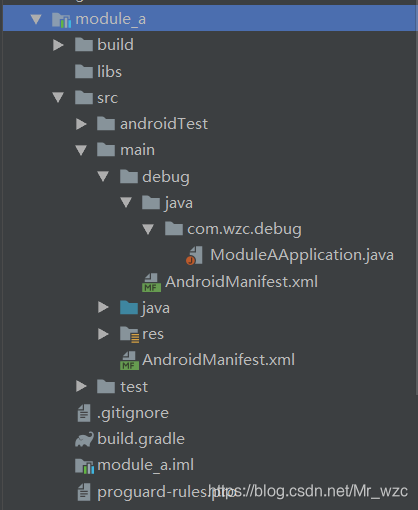
module的build.gradle文件中加入:
android {
	...
    sourceSets {
        main {
            if (rootProject.ext.isComponent) {
                manifest.srcFile 'src/main/debug/AndroidManifest.xml'
                // 配置组件模式下的java代码主文件(如果出现ClassNotFoundException clean module),这里和Module_C处理方式不一样,所以else里面不需要exclude debug文件夹
                java.srcDirs 'src/main/java','src/main/debug/java'
            } else {
                manifest.srcFile 'src/main/AndroidManifest.xml'
            }
        }
    }
        defaultConfig {
        if (rootProject.ext.isComponent) {
            applicationId 'com.wzc.module_a'
        }
        minSdkVersion rootProject.ext.android.defaultConfig.minSdkVersion
        targetSdkVersion rootProject.ext.android.defaultConfig.targetSdkVersion
        versionCode rootProject.ext.android.defaultConfig.versionCode
        versionName rootProject.ext.android.defaultConfig.versionName
        testInstrumentationRunner rootProject.ext.android.defaultConfig.testInstrumentationRunner
    }
	...
}
方法二:
在module中新建src/main/debug/AndroidManifest.xml和src/main/java/debug文件夹

module的build.gradle文件中加入:
android {
    ...
    sourceSets {
        main {
            if (rootProject.ext.isComponent) {
                manifest.srcFile 'src/main/debug/AndroidManifest.xml'
            } else {
                manifest.srcFile 'src/main/AndroidManifest.xml'
                java {
                    //排除java/debug文件夹下的所有文件
                    exclude '*debug'
                }
            }
        }
    }
    defaultConfig {
        if (rootProject.ext.isComponent) {
            applicationId 'com.wzc.module_c'
        }
        minSdkVersion rootProject.ext.android.defaultConfig.minSdkVersion
        targetSdkVersion rootProject.ext.android.defaultConfig.targetSdkVersion
        versionCode rootProject.ext.android.defaultConfig.versionCode
        versionName rootProject.ext.android.defaultConfig.versionName
        testInstrumentationRunner rootProject.ext.android.defaultConfig.testInstrumentationRunner
    }
	...
}
- 在主app中引用module
dependencies {
    implementation fileTree(dir: 'libs', include: ['*.jar'])
    implementation rootProject.ext.dependencies.appcompatV7
    implementation rootProject.ext.dependencies.constraintLayout
    testImplementation rootProject.ext.dependencies.junit
    androidTestImplementation rootProject.ext.dependencies.runner
    androidTestImplementation rootProject.ext.dependencies.espressoCore
    // isComponent = false 表示集成
    if (!rootProject.ext.isComponent) {
        //main模块
        implementation project(':module_a')
        implementation project(':module_b')
        implementation project(':module_c')
    }
}
4.最后通过isComponent就可以控制各module切换了