7.0开发中Fileprovider在openFile中的使用,发现这篇博客写的已经很详细了,转载一下。
原文地址:http://blog.csdn.net/pkandroid/article/details/53716719
最近看到一个库,觉得有点意思,就下载源码编译了一下,结果发现打不开apk包,报错为:
    //这个库的地址是:https://github.com/bingoogolapple/BGAUpdate-Android
    //设置了超链接也不变色,还是直接写出来得了
  Caused by: android.os.FileUriExposedException: file:<span class="hljs-comment"><span class="hljs-comment">///storage/emulated/0/Android/data/cn.bingoogolapple.update.demo/files/apk/BGAUpdateDemo_v1.0.0.apk exposed beyond app through Intent.getData()</span></span></code><ul class="pre-numbering"><li style="color: rgb(153, 153, 153);">1</li><li style="color: rgb(153, 153, 153);">2</li><li style="color: rgb(153, 153, 153);">3</li><li style="color: rgb(153, 153, 153);">4</li></ul><ul class="pre-numbering"><li style="color: rgb(153, 153, 153);">1</li><li style="color: rgb(153, 153, 153);">2</li><li style="color: rgb(153, 153, 153);">3</li><li style="color: rgb(153, 153, 153);">4</li></ul><div class="save_code tracking-ad"><a target="_blank"><img src="http://static.blog.csdn.net/images/save_snippets.png"></a></div><ul class="pre-numbering" style=""><li style="color: rgb(153, 153, 153);">1</li><li style="color: rgb(153, 153, 153);">2</li><li style="color: rgb(153, 153, 153);">3</li><li style="color: rgb(153, 153, 153);">4</li></ul></pre>
图文:
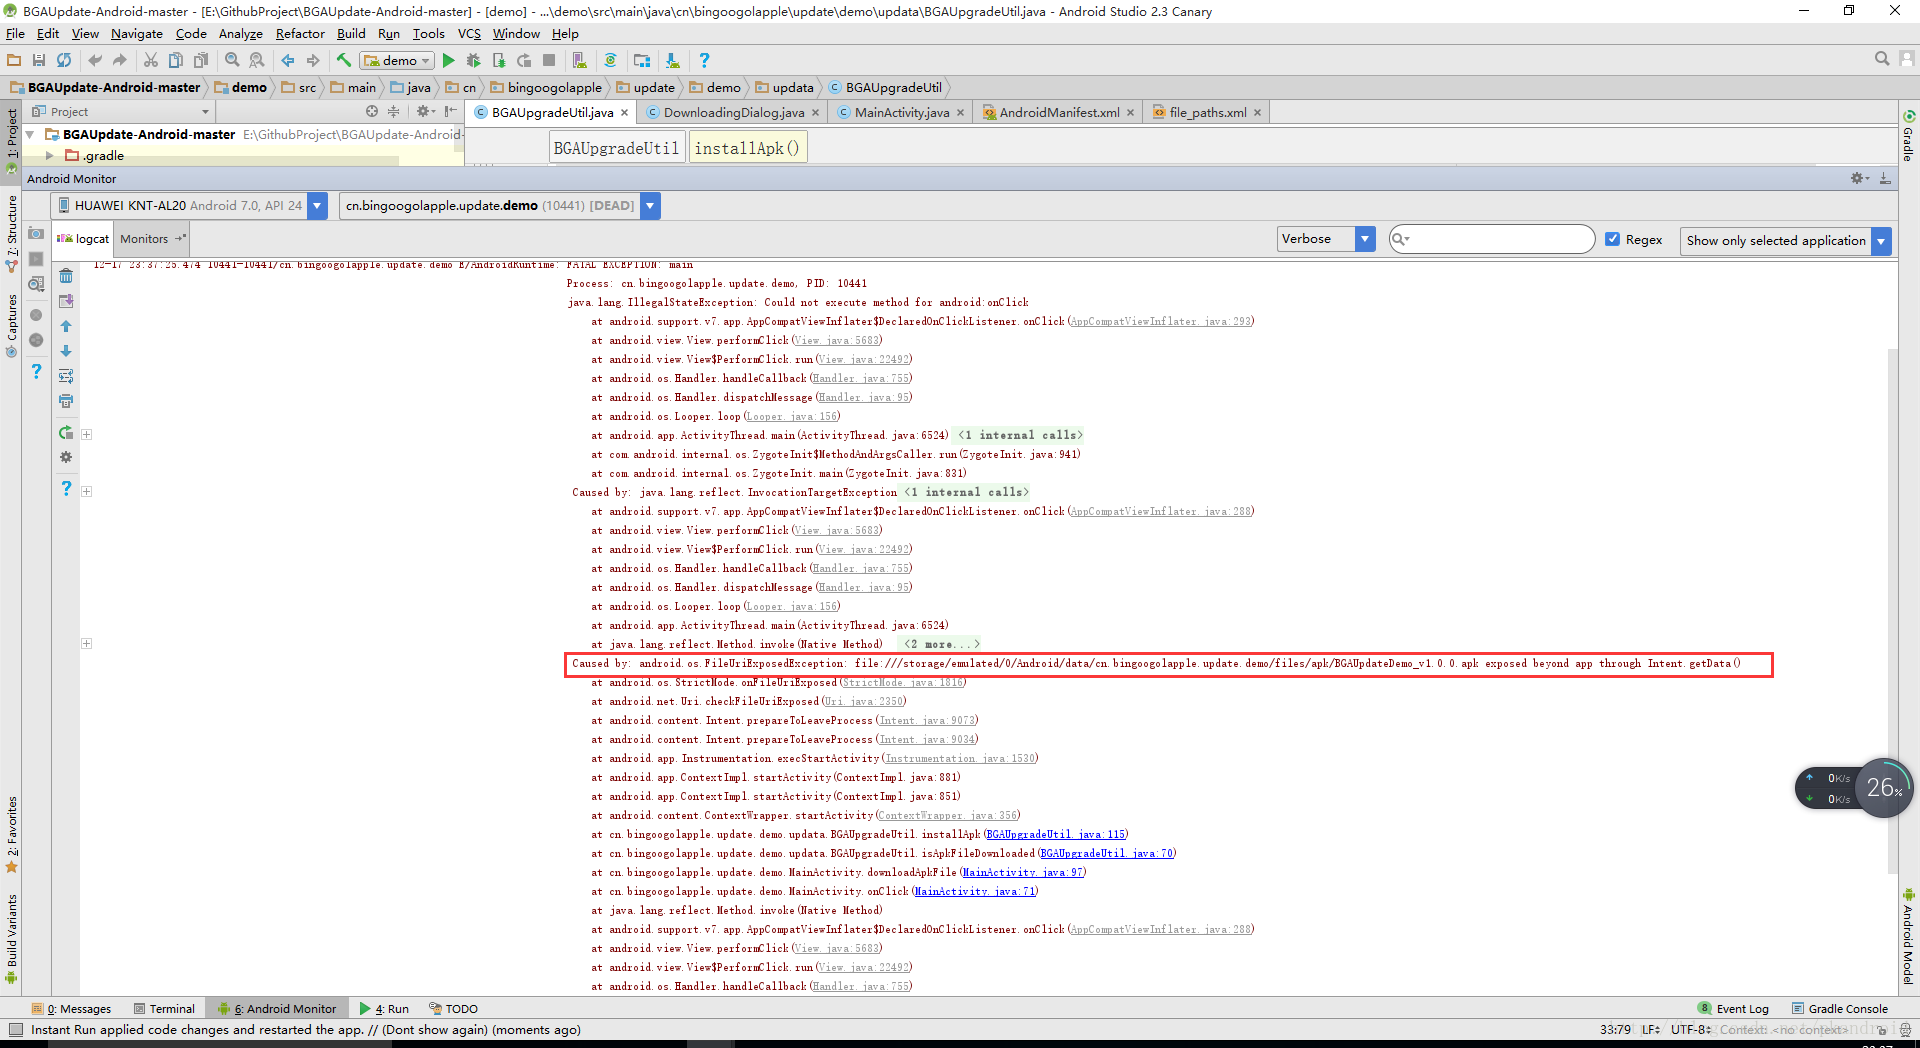
看了下,估计是没有兼容android7.0的原因,这个作者的gradle设置的比较另类,我是第一次见,就没改,提交了issues,然后呢作者回复我让我改,估计他手头没有7.0的机器吧,我的也是前两天才升级了…
在这里把解决步骤记录一下..
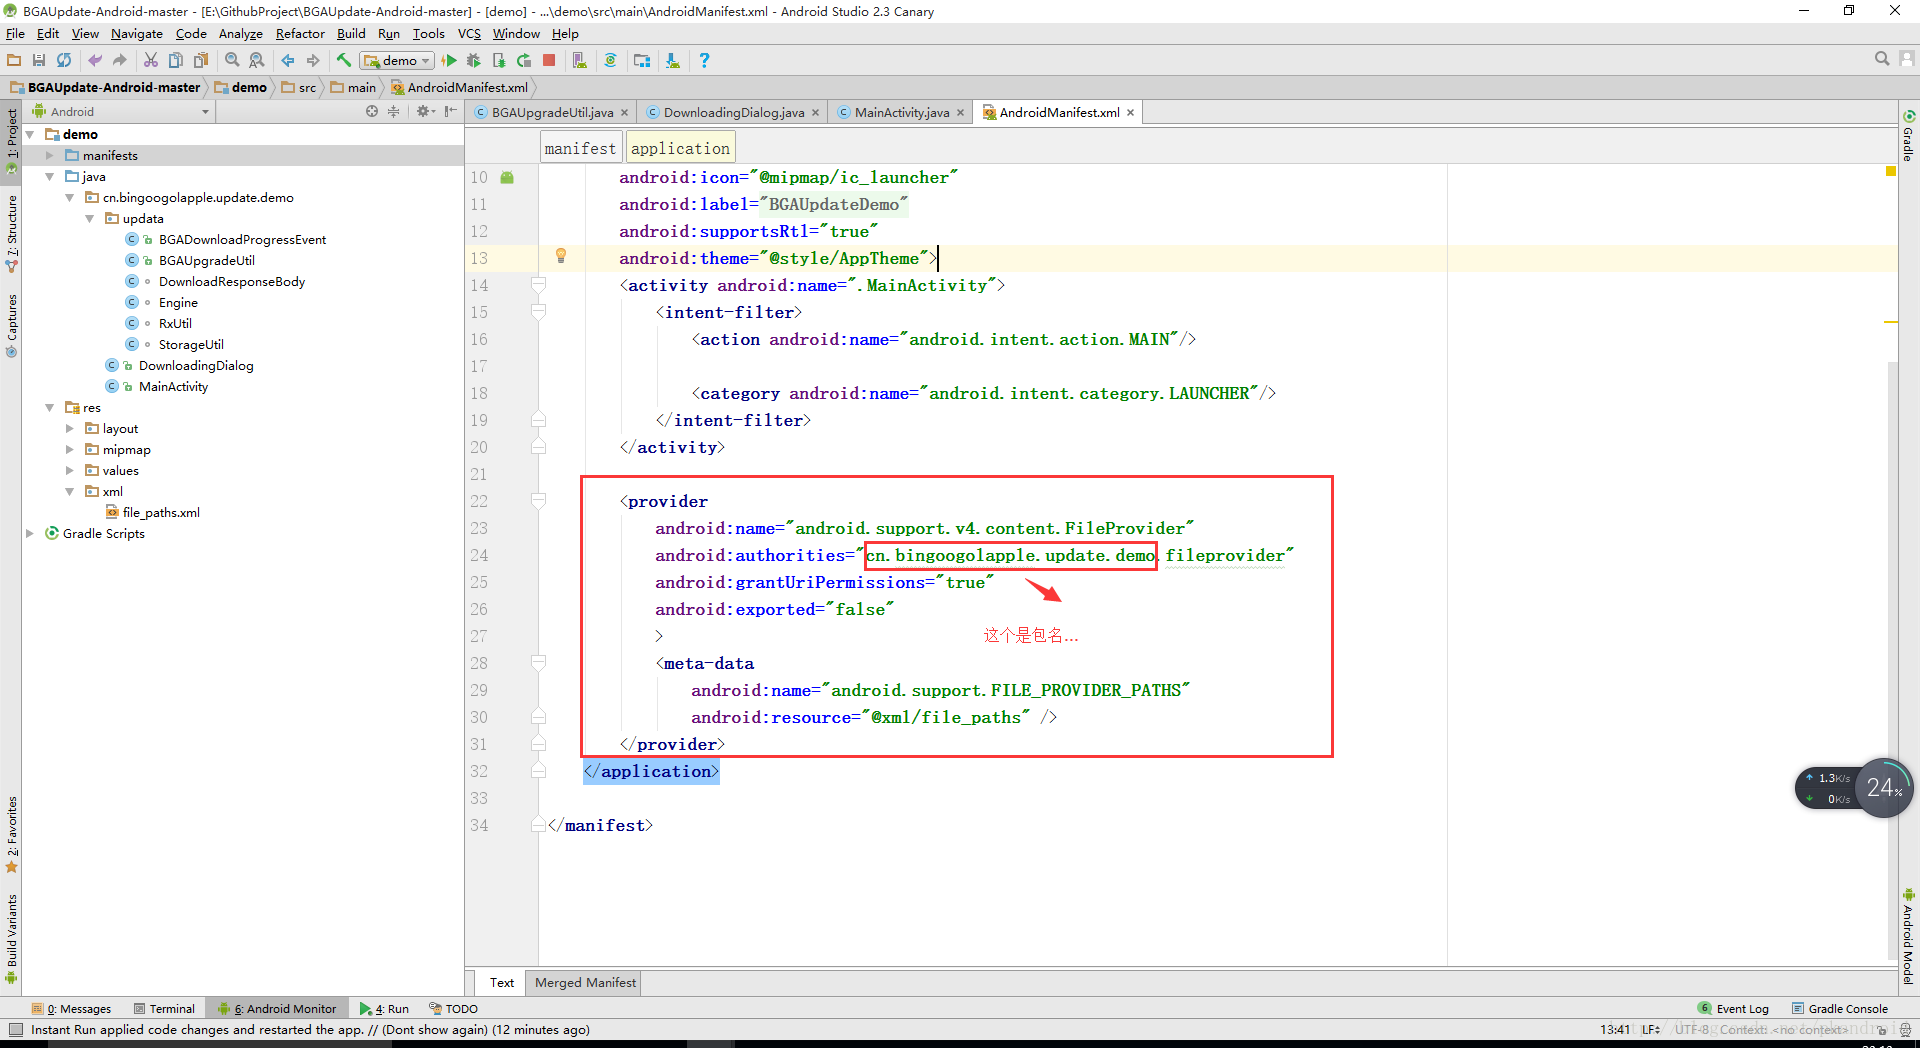
1、在AndroidManifest.xml配置清单的Application中添加
     <provider
            android:name="android.support.v4.content.FileProvider"
            android:authorities="cn.bingoogolapple.update.demo.fileprovider"
            android:grantUriPermissions="true"
            android:exported="false"
            >
            <meta-data
                android:name="android.support.FILE_PROVIDER_PATHS"
                android:resource="@xml/file_paths" />
        </provider>
- 1
- 2
- 3
- 4
- 5
- 6
- 7
- 8
- 9
- 10
- 1
- 2
- 3
- 4
- 5
- 6
- 7
- 8
- 9
- 10

- 1
- 2
- 3
- 4
- 5
- 6
- 7
- 8
- 9
- 10
注意:cn.bingoogolapple.update.demo 是包名。。。
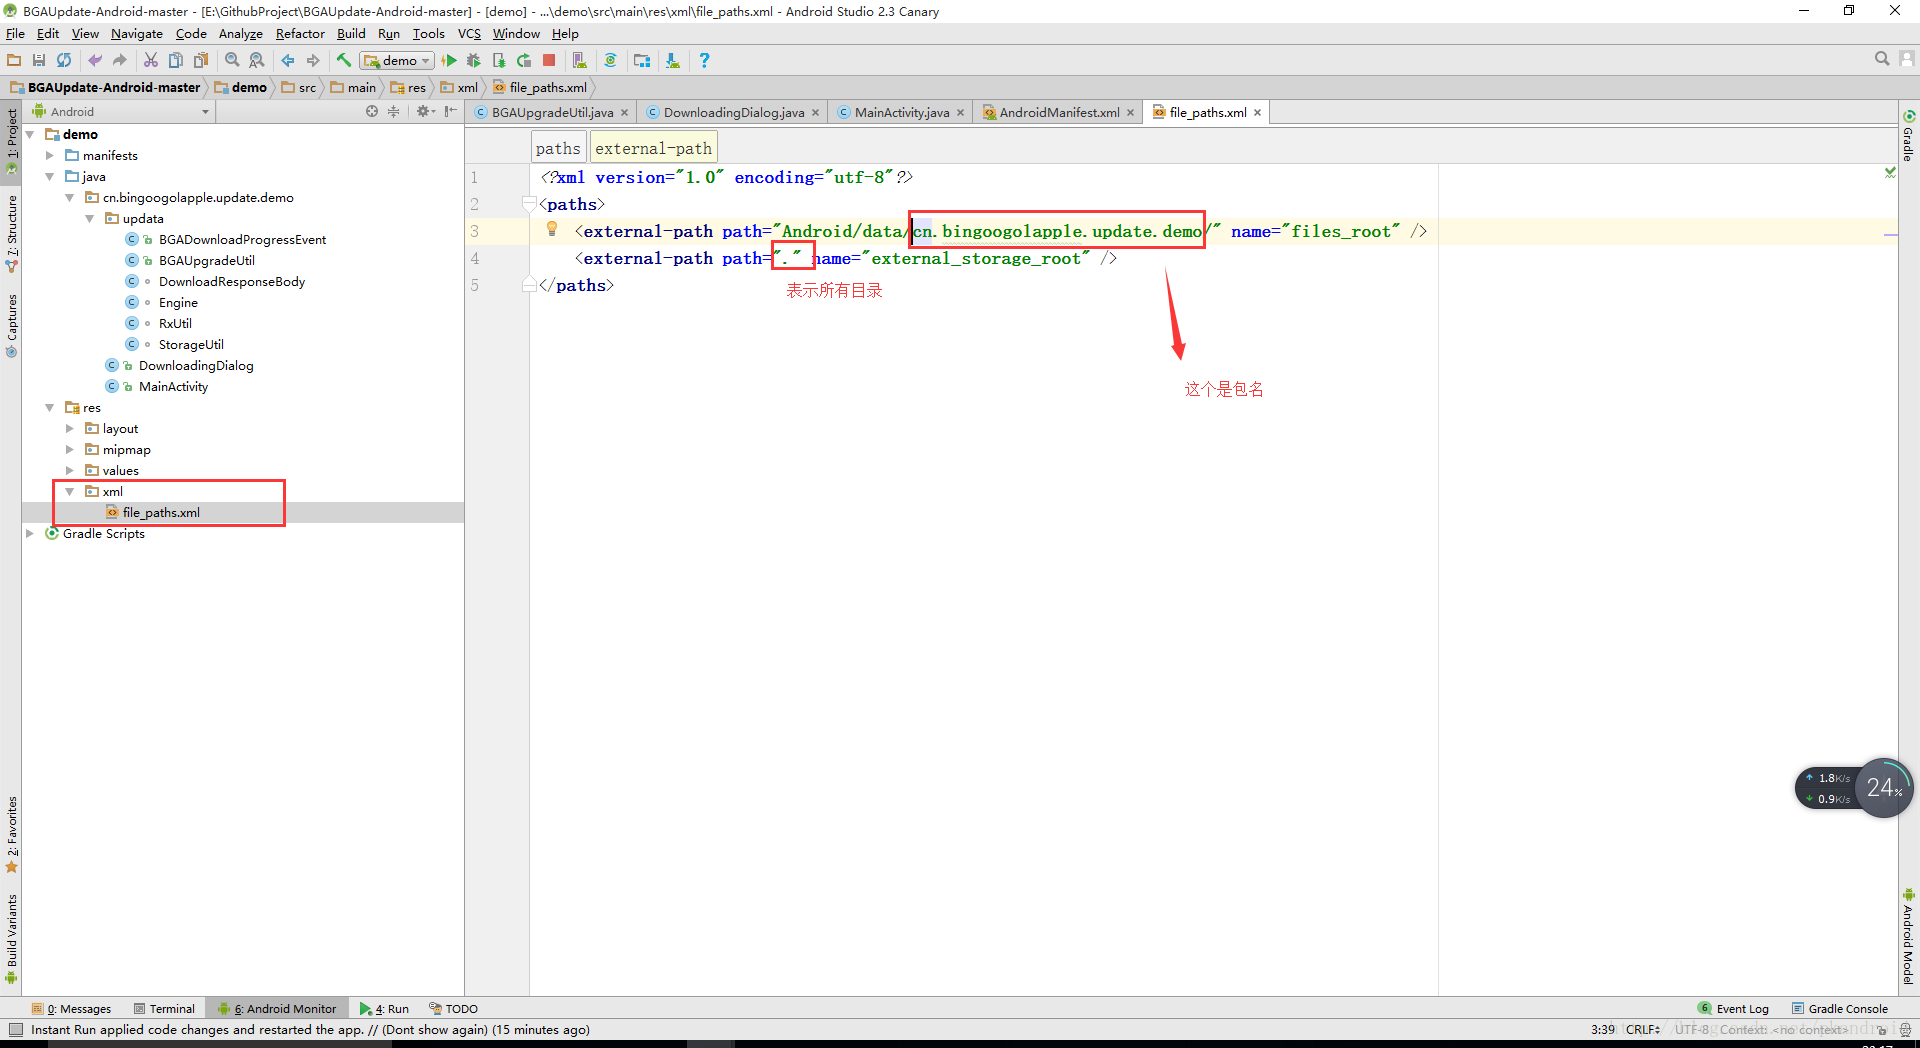
2、在res资源文件下新建目录xml,在xml目录下新建file_paths.xml文件,内容如下:
    <?xml version="1.0" encoding="utf-8"?>
    <paths>
    <external-path path="Android/data/cn.bingoogolapple.update.demo/"        name="files_root" />
    <external-path path="." name="external_storage_root" />
    </paths>
- 1
- 2
- 3
- 4
- 5
- 1
- 2
- 3
- 4
- 5
- 1
- 2
- 3
- 4
- 5
注意:cn.bingoogolapple.update.demo 是包名..
3、然后就是对安装apk方法的更改:
/**
* 安装 apk 文件
*
* @param apkFile
*/
public static void installApk(File apkFile) {
/* Intent installApkIntent = new Intent();
installApkIntent.setAction(Intent.ACTION_VIEW);
installApkIntent.addCategory(Intent.CATEGORY_DEFAULT);
installApkIntent.setFlags(Intent.FLAG_ACTIVITY_NEW_TASK);
installApkIntent.setDataAndType(Uri.fromFile(apkFile), MIME_TYPE_APK);
if (sApp.getPackageManager().queryIntentActivities(installApkIntent, 0).size() > 0) {
sApp.startActivity(installApkIntent);
}*/</span></span>
<span class="hljs-comment"><span class="hljs-comment">//Toast.makeText(sApp,apkFile.getPath(),Toast.LENGTH_SHORT).show();</span></span>
Intent intent = <span class="hljs-keyword"><span class="hljs-keyword">new</span></span> Intent(Intent.ACTION_VIEW);
<span class="hljs-keyword"><span class="hljs-keyword">if</span></span> (Build.VERSION.SDK_INT >= Build.VERSION_CODES.N) {
//intent.setFlags(Intent.FLAG_GRANT_READ_URI_PERMISSION);
intent.addFlags(Intent.FLAG_GRANT_READ_URI_PERMISSION);
intent.addFlags(Intent.FLAG_ACTIVITY_NEW_TASK);
Uri contentUri = FileProvider.getUriForFile(sApp, <span class="hljs-string"><span class="hljs-string">"cn.bingoogolapple.update.demo.fileprovider"</span></span>, apkFile);
intent.setDataAndType(contentUri, <span class="hljs-string"><span class="hljs-string">"application/vnd.android.package-archive"</span></span>);
} <span class="hljs-keyword"><span class="hljs-keyword">else</span></span> {
intent.setDataAndType(Uri.fromFile(apkFile), <span class="hljs-string"><span class="hljs-string">"application/vnd.android.package-archive"</span></span>);
intent.setFlags(Intent.FLAG_ACTIVITY_NEW_TASK);
}
<span class="hljs-keyword"><span class="hljs-keyword">if</span></span> (sApp.getPackageManager().queryIntentActivities(intent, <span class="hljs-number"><span class="hljs-number">0</span></span>).size() > <span class="hljs-number"><span class="hljs-number">0</span></span>) {
sApp.startActivity(intent);
}
}</code><ul class="pre-numbering"><li style="color: rgb(153, 153, 153);">1</li><li style="color: rgb(153, 153, 153);">2</li><li style="color: rgb(153, 153, 153);">3</li><li style="color: rgb(153, 153, 153);">4</li><li style="color: rgb(153, 153, 153);">5</li><li style="color: rgb(153, 153, 153);">6</li><li style="color: rgb(153, 153, 153);">7</li><li style="color: rgb(153, 153, 153);">8</li><li style="color: rgb(153, 153, 153);">9</li><li style="color: rgb(153, 153, 153);">10</li><li style="color: rgb(153, 153, 153);">11</li><li style="color: rgb(153, 153, 153);">12</li><li style="color: rgb(153, 153, 153);">13</li><li style="color: rgb(153, 153, 153);">14</li><li style="color: rgb(153, 153, 153);">15</li><li style="color: rgb(153, 153, 153);">16</li><li style="color: rgb(153, 153, 153);">17</li><li style="color: rgb(153, 153, 153);">18</li><li style="color: rgb(153, 153, 153);">19</li><li style="color: rgb(153, 153, 153);">20</li><li style="color: rgb(153, 153, 153);">21</li><li style="color: rgb(153, 153, 153);">22</li><li style="color: rgb(153, 153, 153);">23</li><li style="color: rgb(153, 153, 153);">24</li><li style="color: rgb(153, 153, 153);">25</li><li style="color: rgb(153, 153, 153);">26</li><li style="color: rgb(153, 153, 153);">27</li><li style="color: rgb(153, 153, 153);">28</li><li style="color: rgb(153, 153, 153);">29</li></ul><ul class="pre-numbering"><li style="color: rgb(153, 153, 153);">1</li><li style="color: rgb(153, 153, 153);">2</li><li style="color: rgb(153, 153, 153);">3</li><li style="color: rgb(153, 153, 153);">4</li><li style="color: rgb(153, 153, 153);">5</li><li style="color: rgb(153, 153, 153);">6</li><li style="color: rgb(153, 153, 153);">7</li><li style="color: rgb(153, 153, 153);">8</li><li style="color: rgb(153, 153, 153);">9</li><li style="color: rgb(153, 153, 153);">10</li><li style="color: rgb(153, 153, 153);">11</li><li style="color: rgb(153, 153, 153);">12</li><li style="color: rgb(153, 153, 153);">13</li><li style="color: rgb(153, 153, 153);">14</li><li style="color: rgb(153, 153, 153);">15</li><li style="color: rgb(153, 153, 153);">16</li><li style="color: rgb(153, 153, 153);">17</li><li style="color: rgb(153, 153, 153);">18</li><li style="color: rgb(153, 153, 153);">19</li><li style="color: rgb(153, 153, 153);">20</li><li style="color: rgb(153, 153, 153);">21</li><li style="color: rgb(153, 153, 153);">22</li><li style="color: rgb(153, 153, 153);">23</li><li style="color: rgb(153, 153, 153);">24</li><li style="color: rgb(153, 153, 153);">25</li><li style="color: rgb(153, 153, 153);">26</li><li style="color: rgb(153, 153, 153);">27</li><li style="color: rgb(153, 153, 153);">28</li><li style="color: rgb(153, 153, 153);">29</li></ul><div class="save_code tracking-ad"><a target="_blank"><img src="http://static.blog.csdn.net/images/save_snippets.png"></a></div><ul class="pre-numbering" style=""><li style="color: rgb(153, 153, 153);">1</li><li style="color: rgb(153, 153, 153);">2</li><li style="color: rgb(153, 153, 153);">3</li><li style="color: rgb(153, 153, 153);">4</li><li style="color: rgb(153, 153, 153);">5</li><li style="color: rgb(153, 153, 153);">6</li><li style="color: rgb(153, 153, 153);">7</li><li style="color: rgb(153, 153, 153);">8</li><li style="color: rgb(153, 153, 153);">9</li><li style="color: rgb(153, 153, 153);">10</li><li style="color: rgb(153, 153, 153);">11</li><li style="color: rgb(153, 153, 153);">12</li><li style="color: rgb(153, 153, 153);">13</li><li style="color: rgb(153, 153, 153);">14</li><li style="color: rgb(153, 153, 153);">15</li><li style="color: rgb(153, 153, 153);">16</li><li style="color: rgb(153, 153, 153);">17</li><li style="color: rgb(153, 153, 153);">18</li><li style="color: rgb(153, 153, 153);">19</li><li style="color: rgb(153, 153, 153);">20</li><li style="color: rgb(153, 153, 153);">21</li><li style="color: rgb(153, 153, 153);">22</li><li style="color: rgb(153, 153, 153);">23</li><li style="color: rgb(153, 153, 153);">24</li><li style="color: rgb(153, 153, 153);">25</li><li style="color: rgb(153, 153, 153);">26</li><li style="color: rgb(153, 153, 153);">27</li><li style="color: rgb(153, 153, 153);">28</li><li style="color: rgb(153, 153, 153);">29</li></ul></pre>
如图:
如果包名写错了会空指针。。。

    java.lang.NullPointerException: Attempt to invoke virtual method 'android.content.res.XmlResourceParser android.content.pm.ProviderInfo.loadXmlMetaData(android.content.pm.PackageManager, java.lang.String)' on a null object reference
at android.support.v4.content.FileProvider.parsePathStrategy(FileProvider.java:560)
at android.support.v4.content.FileProvider.getPathStrategy(FileProvider.java:534)
at android.support.v4.content.FileProvider.getUriForFile(FileProvider.java:376)
- 1
- 2
- 3
- 4
- 1
- 2
- 3
- 4
- 1
- 2
- 3
- 4
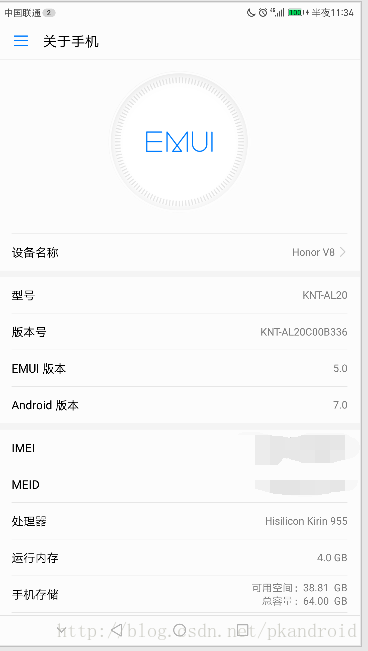
最后结果自然是打开了安装页面啦…这个是在项目里面直接修改的,如果在library里面修改,步骤是一样的

//////////////////////////////////系统截图/////////////////////////////////////////////
2016年12月17日23:35:21
如果你想下载这个demo来看看,点击下载,不过最好还是看作者的,相信他已经兼容了吧,哈
下载地址:
Java
 作者的github:https://github.com/bingoogolapple/BGAUpdate-Android
 当前版本:
 http://download.csdn.NET/detail/pkandroid/9714442
————————–2017年3月9日16:44:11———————————–
注意:如果AndroidManifest.xml中配置的provider的authorities名称不能重复,如果在别的APP中使用了这个provide的authorities属性(比如APP对于Android7.0之后的拍照的适配),那么这个APP可能会安装不上,提示卸载含有相同provider authorities属性的APP
					<link href="https://csdnimg.cn/release/phoenix/mdeditor/markdown_views-778f64ae39.css" rel="stylesheet">
            </div>

7.0开发中Fileprovider在openFile中的使用,发现这篇博客写的已经很详细了,转载一下。
原文地址:http://blog.csdn.net/pkandroid/article/details/53716719
最近看到一个库,觉得有点意思,就下载源码编译了一下,结果发现打不开apk包,报错为:
    //这个库的地址是:https://github.com/bingoogolapple/BGAUpdate-Android
    //设置了超链接也不变色,还是直接写出来得了
  Caused by: android.os.FileUriExposedException: file:<span class="hljs-comment"><span class="hljs-comment">///storage/emulated/0/Android/data/cn.bingoogolapple.update.demo/files/apk/BGAUpdateDemo_v1.0.0.apk exposed beyond app through Intent.getData()</span></span></code><ul class="pre-numbering"><li style="color: rgb(153, 153, 153);">1</li><li style="color: rgb(153, 153, 153);">2</li><li style="color: rgb(153, 153, 153);">3</li><li style="color: rgb(153, 153, 153);">4</li></ul><ul class="pre-numbering"><li style="color: rgb(153, 153, 153);">1</li><li style="color: rgb(153, 153, 153);">2</li><li style="color: rgb(153, 153, 153);">3</li><li style="color: rgb(153, 153, 153);">4</li></ul><div class="save_code tracking-ad"><a target="_blank"><img src="http://static.blog.csdn.net/images/save_snippets.png"></a></div><ul class="pre-numbering" style=""><li style="color: rgb(153, 153, 153);">1</li><li style="color: rgb(153, 153, 153);">2</li><li style="color: rgb(153, 153, 153);">3</li><li style="color: rgb(153, 153, 153);">4</li></ul></pre>