引言:nginx可以用作web服务器,也可以用作反向代理服务器,本文介绍nginx的下载,安装,配置及启停等基本命令
1、nginx下载
可以直接在nginx的官网地址:https://nginx.org/en/download.html下载稳定版本(stable version)

或者直接使用centos的wget命令
# cd /usr/local
# wget http://nginx.org/download/nginx-1.16.1.tar.gz
2、nginx安装
先执行以下命令,安装nginx依赖库,如果缺少依赖库,可能会安装失败,具体可以参考文章后面的错误提示信息。
 yum install gcc-c++
 yum install pcre
 yum install pcre-devel
 yum install zlib
 yum install zlib-devel
 yum install openssl
 yum install openssl-devel
解压安装包
tar -zxvf nginx-1.16.1.tar.gz
nginx被解压到了/usr/local/nginx-1.16.1 目录下(不要把压缩包解压到/usr/local/nginx目录下,或者将解压后的目录重命名为nginx,因为nginx会默认安装到/usr/local/nginx目录下),切换到nginx-1.16.1目录
 cd /usr/local/nginx-1.16.1/
 ./configure
该操作会检测当前系统环境,以确保能成功安装nginx,执行该操作后可能会出现以下几种提示:
checking for OS

 + Linux 3.10.0-123.el7.x86_64 x86_64

checking for C compiler ... not found

./configure: error: C compiler cc is not found

如果出现以上错误提示信息,执行yum install gcc-c++安装gcc,

./configure: error: the HTTP rewrite module requires the PCRE library.

You can either disable the module by using --without-http_rewrite_module

option, or install the PCRE library into the system, or build the PCRE library

statically from the source with nginx by using --with-pcre=<path> option.

如果出现上面提示,表示缺少PCRE库

./configure: error: the HTTP gzip module requires the zlib library.

You can either disable the module by using --without-http_gzip_module

option, or install the zlib library into the system, or build the zlib library

statically from the source with nginx by using --with-zlib=<path> option.
如果出现以上提示,表示缺少zlib库。 如果没有出现./configure: error提示,表示当前环境可以安装nginx,执行make和make install编译nginx
  make
  make install
没有出错的话,表示nginx已经成功安装完成,默认安装位置为/usr/local/nginx。 如果出现cp: ‘conf/koi-win’ and ‘/usr/local/nginx/conf/koi-win’ are the same file,可能是你把安装包解压到了/usr/local/nginx目录,解决办法是将该目录重命名为其他名称后再执行make,make install.
3、nginx启动
/usr/local/nginx/sbin/nginx
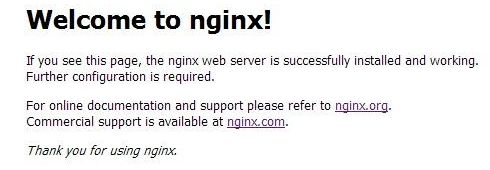
检查是否启动成功:打开浏览器访问此机器的 IP,如果浏览器出现 Welcome to nginx! 则表示 Nginx 已经安装并运行成功。
其他命令如下:
#重启:
 /usr/local/nginx/sbin/nginx –s reload

#停止:
 /usr/local/nginx/sbin/nginx –s stop

#测试配置文件是否正常:
 /usr/local/nginx/sbin/nginx –t

#强制关闭:
 pkill nginx
直接 cd /usr/local/nginx/sbin/nginx后,命令可以简写为nginx -s reload等
4、nginx配置
以上安装方法nginx的配置文件位于
/usr/local/nginx/conf/nginx.conf
Nginx配置文件常见结构的从外到内依次是「http」「server」「location」等等,缺省的继承关系是从外到内,也就是说内层块会自动获取外层块的值作为缺省值。
4.1 Server
接收请求的服务器需要将不同的请求按规则转发到不同的后端服务器上,在 nginx 中我们可以通过构建虚拟主机(server)的概念来将这些不同的服务配置隔离。
server {
listen 80;
server_name localhost;
root html;
index index.html index.htm;
}
例如我们笔戈玩下的两个子项目 passport 和 wan 就可以通过在 nginx 的配置文件中配置两个 server,servername 分别为 passport.bigertech.com 和 wan.bigertech.com。这样的话不同的 url 请求就会对应到 nginx 相应的设置,转发到不同的后端服务器上。
这里的 listen 指监听端口,server_name 用来指定IP或域名,多个域名对应统一规则可以空格分开,index 用于设定访问的默认首页地址,root 指令用于指定虚拟主机的网页跟目录,这个地方可以是相对地址也可以是绝对地址。
通常情况下我们可以在 nginx.conf 中配置多个server,对不同的请求进行设置。就像这样:
server {
listen 80;
server_name host1;
root html;
index index.html index.htm;
}
server {
listen 80;
server_name host2;
root /data/www/html;
index index.html index.htm;
}
但是当 server 超过2个时,建议将不同对虚拟主机的配置放在另一个文件中,然后通过在主配置文件 nginx.conf 加上 include 指令包含进来。更便于管理。
include vhosts/*.conf;
就可以把vhosts的文件都包含进去啦。
4.2 Localtion
每个 url 请求都会对应的一个服务,nginx 进行处理转发或者是本地的一个文件路径,或者是其他服务器的一个服务路径。而这个路径的匹配是通过 location 来进行的。我们可以将 server 当做对应一个域名进行的配置,而 location 是在一个域名下对更精细的路径进行配置。
以上面的例子,可以将root和index指令放到一个location中,那么只有在匹配到这个location时才会访问root后的内容:
location / {
    root   /data/www/host2;
    index  index.html index.htm;
}
location 匹配规则
~ 波浪线表示执行一个正则匹配,区分大小写
~* 表示执行一个正则匹配,不区分大小写
^~ ^~表示普通字符匹配,如果该选项匹配,只匹配该选项,不匹配别的选项,一般用来匹配目录
= 进行普通字符精确匹配
匹配例子:
location  = / {
  # 只匹配"/".
  [ configuration A ]
}
location  / {
  # 匹配任何请求,因为所有请求都是以"/"开始
  # 但是更长字符匹配或者正则表达式匹配会优先匹配
  [ configuration B ]
}
location ^~ /images/ {
  # 匹配任何以 /images/ 开始的请求,并停止匹配 其它location
  [ configuration C ]
}
location ~* \.(gif|jpg|jpeg)$ {
  # 匹配以 gif, jpg, or jpeg结尾的请求.
  # 但是所有 /images/ 目录的请求将由 [Configuration C]处理.
  [ configuration D ]
}
请求:
/ -> 符合configuration A
/documents/document.html -> 符合configuration B
/images/1.gif -> 符合configuration C
/documents/1.jpg ->符合 configuration D
4.3 静态文件映射
访问文件的配置主要有 root 和 aliasp’s 两个指令。这两个指令的区别容易弄混:
alias
alias后跟的指定目录是准确的,并且末尾必须加 /。
location /c/ {
    alias /a/;
}
如果访问站点http://location/c访问的就是/a/目录下的站点信息。
root
root后跟的指定目录是上级目录,并且该上级目录下要含有和location后指定名称的同名目录才行。
location /c/ {
    root /a/;
}
这时访问站点http://location/c访问的就是/a/c目录下的站点信息。
如果你需要将这个目录展开,在这个location的末尾加上「autoindex on; 」就可以了
转发
配置起来很简单比如我要将所有的请求到转移到真正提供服务的一台机器的 8001 端口,只要这样:
location / {
    proxy_pass 172.16.1.1:8001;
}
这样访问host时,就都被转发到 172.16.1.1的8001端口去了。
负载均衡
upstream myserver; {
    ip_hash;
    server 172.16.1.1:8001;
    server 172.16.1.2:8002;
    server 172.16.1.3;
    server 172.16.1.4;
}
location / {
    proxy_pass http://myserver;
}
我们在 upstream 中指定了一组机器,并将这个组命名为 myserver,这样在 proxypass 中只要将请求转移到 myserver 这个 upstream 中我们就实现了在四台机器的反向代理加负载均衡。其中的 ip_hash 指明了我们均衡的方式是按照用户的 ip 地址进行分配。另外还有轮询、指定权重轮询、fair、url_hash几种调度算法。
以上是最简单的通过 nginx 实现静态文件转发、反向代理(负载均衡)的配置。在 nginx 中所有的功能都是通过模块来实现的,比如当我们配置 upstream 时是用 upstream 模块,而 server 和 location 是在 http core 模块,其他的还有流控的 limt 模块,邮件的 mail 模块,https 的 ssl 模块。他们的配置都是类似的,可以查看
关于nginx配置的详细参考:http://nginx.org/en/docs/。
一个配置nginx请求转发的config配置文件示例(删除原nginx.conf的注释部分):
http {
    include       mime.types;
    default_type  application/octet-stream;
    sendfile        on;
    keepalive_timeout  65;
    server {
        listen       9000;
        server_name  localhost;
		location /{
            root   html;
            index  index.html index.htm;
        }

		location ^~ /api/ {
            add_header 'Access-Control-Allow-Origin' *;
            add_header 'Access-Control-Allow-Credentials' 'true';
            add_header 'Access-Control-Allow-Methods' 'GET,POST,OPTIONS';
			proxy_pass http://127.0.0.1:9003/;
            proxy_set_header   X-Real-IP         $remote_addr;
            proxy_set_header   Host              $http_host;
            proxy_set_header   X-Forwarded-For   $proxy_add_x_forwarded_for;
        }

        error_page   500 502 503 504  /50x.html;
        location = /50x.html {
            root   html;
        }
    }
}
文章主要参考以下文章并结合实践以及整理:
Centos下 Nginx安装与配置:https://www.jianshu.com/p/d5114a2a2052
CentOS 7 安装Nginx 并配置自动启动:https://blog.csdn.net/stinkstone/article/details/78082748
