目录
简介
- 分片是一种用于在多台计算机之间分配数据的方法。MongoDB使用分片来支持具有非常大的数据集和高吞吐量操作的部署。
- 具有大数据集或高吞吐量应用程序的数据库系统可能会挑战单个服务器的容量。例如,高查询率可能会耗尽服务器的CPU容量。大于系统RAM的工作集大小会增加磁盘驱动器的I/O容量。
- 解决系统增长的一般有两种办法:垂直扩展和水平扩展:
- 垂直扩展涉及增加单个服务器的容量,例如使用功能更强大的CPU,添加更多RAM或增加存储空间量。可用技术的局限性可能会限制一台计算机对于给定的工作负载没有足够的功能。此外,基于云的提供程序具有基于可用硬件配置的严格上限。结果,垂直缩放有一个实际的最大值。
- 水平扩展涉及划分系统数据集并在多台服务器上加载,并根据需要添加其他服务器以增加容量。尽管单台计算机的整体速度或容量可能不高,但是每台计算机只能处理总工作量的一部分,因此与单台高速大容量服务器相比,可能提供更高的效率。扩展部署容量仅需要根据需要添加其他服务器,这可以比一台机器的高端硬件降低总体成本。折衷方案是增加基础结构和部署维护的复杂性。
- MongoDB是通过分片支持水平扩展。
MongoDB中的分片集群
-
MongoDB分片群集由组件
- 分片(shard):用来存储数据,为了提供系统可用性和数据一致性,一个生产环境的分片集群,通常每个分片是一个副本集。
- 路由(mongos): mongos充当查询路由器,在客户端应用程序和分片群集之间提供接口。
- 配置服务器(config servers): 存储集群的元数据,这些数据包含了集群数据集到各分片的映射关系。查询路由就是通过这些元数据到特定的分片上执行指定的数据操作。(从MongoDB 3.4开始,必须将配置服务器部署为副本集(CSRS))
-
下图描述了分片群集中组件:

-
shard key(分片键)
- 为了对集合分片,你需要指定一个shard key。shard key既可以是集合的每个文档的索引字段也可以是集合中每个文档都有的组合索引字段。MongoDB将shard keys值按照块(chunks)划分,并且均匀的将这些chunks分配到各个分片上。MongoDB使用基于范围划分或基于散列划分来划分chunks的。
-
Sharding的优势
- 读/写:MongoDB将读写工作负载分布在分片集群中的各个分片上,从而允许每个分片处理集群操作的子集。通过添加更多的分片,可以在集群中水平扩展读写工作负载。
- 存储容量:分片横跨分发数据碎片在集群中,允许每个碎片以包含总簇数据的子集。随着数据集的增长,其他分片将增加群集的存储容量。
- 高可用性:甲分片簇可以继续执行,即使一个或多个碎片是不可用的部分读/写操作。尽管在停机期间无法访问不可用分片上的数据子集,但是针对可用分片的读取或写入仍然可以成功。(从MongoDB 3.2开始,您可以将配置服务器部署为副本集。只要大多数副本集可用,带有Config Server副本集(CSRS)的分片群集就可以继续处理读取和写入)
-
分片集群搭建前注意事项
- sharding集群不支持一些常规的单实例方法,如group(),可以使用mapReduce()或者aggregate()中的group来替代,因此建议从一开始学习就直接使用aggregate(),这种写法较为简单明了,且统一化易于识别。
- 对于没有用到shard key的查询,路由进行全集群广播(broadcast operation),对每个shard都查一遍进行scatter/gather,此时效率会很低。
- 生产上使用副本集或sharding时,要考虑到安全认证的问题,集群节点间要指定keyfile启动(指定keyfile后auth默认会开启),如果集群环境下只开启auth认证不配置keyfile,replica节点之间的同步就会失败。
部署分片集群
部署结构规划
- 先说明一下我就一台虚拟机,只是通过不同端口区分的。
- mongos我暂时做了一个,也可以做多个。
- shard我是做了3个复制集:shard1、shard2、shard3
| 组件名 | 地址和端口 |
|---|---|
| config servers | 192.168.137.137:7017 192.168.137.137:7018 192.168.137.137:7019 |
| mongos | 192.168.137.137:2000 |
| shard1 | 192.168.137.137:17017 192.168.137.137:17018 192.168.137.137:17019 |
| shard2 | 192.168.137.137:27017 192.168.137.137:27018 192.168.137.137:27019 |
| shard3 | 192.168.137.137:37017 192.168.137.137:37018 192.168.137.137:37019 |
- 配置文件目录结构
[zzq@localhost software]$ tree mongo-conf/
mongo-conf/
├── config
│ ├── config1.conf
│ ├── config2.conf
│ └── config3.conf
├── mongodb-keyfile
├── mongos
│ └── mongos1.conf
├── shard1
│ ├── shard1.conf
│ ├── shard2.conf
│ └── shard3.conf
├── shard2
│ ├── shard1.conf
│ ├── shard2.conf
│ └── shard3.conf
└── shard3
├── shard1.conf
├── shard2.conf
└── shard3.conf
- 数据目录结构
[zzq@localhost software]$ tree mongo-database/
mongo-database/
├── config
│ ├── config1
│ ├── config2
│ └── config3
├── mongos
│ └── mongos1
├── shard1
│ ├── shard1
│ ├── shard2
│ └── shard3
├── shard2
│ ├── shard1
│ ├── shard2
│ └── shard3
└── shard3
├── shard1
├── shard2
└── shard3
- 注意在配置时要开防火墙端口哦
 firewall-cmd --permanent --zone=public --add-port=xxx/tcp
  firewall-cmd --reload
下载解压安装包
- 官网下载地址https://www.mongodb.com/download-center/community,我自己用的是mongodb4.0.13版本,我上传到了sourceforgehttps://sourceforge.net/projects/generic-software/files/mongodb/
- 解压、改名、配置环境变量(为了方便使用命令,不配也行)
tar -zxvf mongodb-linux-x86_64-rhel70-4.0.13.tgz
mv mongodb-linux-x86_64-rhel70-4.0.13 mongodb
vim /etc/profile
#在/etc/profile后面追加,配置环境变量
export MONGO_HOME=/home/zzq/software/mongodb
export PATH=$PATH:$MONGO_HOME/bin
#使环境变量生效
source /etc/profile
配置config servers副本集
- 默认搭建出来的mongo数据库集群是没有管理员密码的,连接也不需要提供用户名和密码,非常不安全。所以我们这里先使用mongodb集群密码验证的方式生成相关的密钥。
- 生成密钥命令
openssl rand -base64 741 > ~/software/mongo-conf/mongodb-keyfile
- 修改权限
chmod 600 mongodb-keyfile否则可能启动报permissions on /home/zzq/software/mongo-conf/mongodb-keyfile are too open - 生成的样式如下(如果不想生成的可以直接拷贝过去)
TDaOROls3Af/glbKNz6cli78KVvpUYffuMaurOOcSEb4LThra+aTnOz+igsjeLIR
zibdla9dZmWcmjyw9ssm4EUOrsbcgWPBGCkBdInCqj8RDenlspEU5Lh7+KVJl7rb
qiDx/BP1N0BJvhHiRrUhZDreCnoEvFJUOVqRxncKki5PM8GmswHxg+QMu+yrr0Lr
pJJcKZmAG0wzSdCdfwWDrNAbY/0eNWIz8WMh47xdHvUPrj/TMq8pRlV92h4tjUTn
ywh0E7DWJH7MqXLVrgwujwwiMJBSh/1QdarfW+SuygFrN4bc9YibM1AVYNFGKsur
tjXhlwTeQvY9MRhjdrRUwtwRUxOvXzKbk1ZlcOeL4KD/+6+CI0jBo8CsrGjaPZwn
SNaCpYHQ58Hw567upSC2uut49Hgi3W82/np5+4PiMRLm3cGuEs3y6sQbYUR+O8RR
RowAzo8evJJqlYVbgtDUSQm2Fk4SwcyFN160RKlaimru/n3cEPE1aK/cg12sHYvi
6bBhM4CnZGX+kGNVXrqNd4/PQNG6f69+wZgRXowwa0XNWlvY8IwCOe+cTuVYAwyq
cq2IKn46yZwfm3CiVOjKKd3SJdF9GdMOfWz4ghj/bBjTFeYlFraWuL8SHPi0LQbw
/9dX26H0NUykuU2qM8+8lqi6ixt6xF4MT1B1Wa5m/M6vYpIk2hlyWCRDN6ycnoG8
/asjlMCWp/qEHmNwti5jpNccxe4dJBQVxnmMM16H+t4E3CIAjMQpQCZSO/kpXD6a
EoQ+UulN6Y6/i30k10s1rGkPCotvJa9g4RrLDsC0zxTJMhyzY+/3w8nL8KlTTxOb
rnAPvGVYjQ+4oQ3iTQXjxmL0ziUvovjL1ryBm+6LEEPTSNkc+3mw4LWiqUNkq3nR
j9ascnJd55nborTQp52aDlvb8hklkpBHoDkcArCspfTZWBKeUwJkYZkQP/PYbpA0
Lhn9kpVmUZtXcrMdRseMdpOi/4mh
- 编写config servers的配置文件
- config1
vim mongo-conf/config/config1.conf
- config1
sharding:
  clusterRole: configsvr
replication:
  replSetName: confset
net:
  port: 7017
  bindIp: 0.0.0.0

systemLog:
  destination: file
  logAppend: true
  path: /home/zzq/software/mongo-database/config/config1/mongo.log

storage:
  dbPath: /home/zzq/software/mongo-database/config/config1
  journal:
    enabled: true

processManagement:
  fork: true  # fork and run in background
  pidFilePath: /home/zzq/software/mongo-database/config/config1/mongod.pid  # location of pidfile
  timeZoneInfo: /usr/share/zoneinfo

security:
  keyFile: /home/zzq/software/mongo-conf/mongodb-keyfile
  authorization: enabled
- 其中要注意,clusterRole必须填configsvr,这一点与普通的mongod数据库进程不一样。因为config节点虽然也可以当做普通的mongo数据来使用,但是其最主要的作用不是存储业务数据,而是与mongos进程配合,存储每个分片节点的信息,数据分片规则,和分片后每个chunk的存储信息。所以不应该在config节点中存储任何业务数据。
- replSetName可以自己随便起,但在三个config节点中应该保持相同,这样才能把三个config节点添加到同一个复制集中去
- port就是开放的端口,注意和其他的进程不冲突就可以了,我这里三台config节点的配置文件都是一样的,用的一样的数据库端口。
- systemLog就是配置mongo运行时产生log日志的存放位置,storage里的dbPath就是存放数据库数据文件的位置,如果目录不存在需要手工创建。
- config2
vim mongo-conf/config/config2.conf
- config2
sharding:
  clusterRole: configsvr
replication:
  replSetName: confset
net:
  port: 7018
  bindIp: 0.0.0.0

systemLog:
  destination: file
  logAppend: true
  path: /home/zzq/software/mongo-database/config/config2/mongo.log

storage:
  dbPath: /home/zzq/software/mongo-database/config/config2
  journal:
    enabled: true

processManagement:
  fork: true  # fork and run in background
  pidFilePath: /home/zzq/software/mongo-database/config/config2/mongod.pid  # location of pidfile
  itimeZoneInfo: /usr/share/zoneinfo

security:
  keyFile: /home/zzq/software/mongo-conf/mongodb-keyfile
  authorization: enabled
- config3
vim mongo-conf/config/config3.conf
 sharding:
  clusterRole: configsvr
replication:
  replSetName: confset
net:
  port: 7019
  bindIp: 0.0.0.0

systemLog:
  destination: file
  logAppend: true
  path: /home/zzq/software/mongo-database/config/config3/mongo.log

storage:
  dbPath: /home/zzq/software/mongo-database/config/config3
  journal:
    enabled: true

processManagement:
  fork: true  # fork and run in background
  pidFilePath: /home/zzq/software/mongo-database/config/config3/mongod.pid  # location of pidfile
  timeZoneInfo: /usr/share/zoneinfo

security:
  keyFile: /home/zzq/software/mongo-conf/mongodb-keyfile
  authorization: enabled
- 配置完成后我们就可以启动这3个节点了,命令格式
mongod --config xxxx.conf或者mongod -f xxxx.conf
mongod --config /home/zzq/software/mongo-conf/config/config1.conf
mongod --config /home/zzq/software/mongo-conf/config/config2.conf
mongod --config /home/zzq/software/mongo-conf/config/config3.conf
- 检查是否启动成功

- 确认启动成功后,我们使用mongo命令任意连接其中一个节点,初始化配置三个config节点为一个复制集
mongo --port 7017
rs.initiate(
  {
    _id: "confset",
    configsvr: true,
    members: [
      { _id : 0, host : "192.168.137.137:7017" },
      { _id : 1, host : "192.168.137.137:7018" },
      { _id : 2, host : "192.168.137.137:7019" }
    ]
  }
  )
- 等待一下会儿按enter键会出现master,
PRIMARY就是master,其他2个节点是SECONDARY,这样config servers复制集是成功的。

建立3个shard复制集
shard1复制集
- shard1->shard1
vim mongo-conf/shard1/shard1.conf
sharding:
  clusterRole: shardsvr
replication:
  replSetName: shard1
net:
  port: 17017
  bindIp: 0.0.0.0

systemLog:
  destination: file
  logAppend: true
  path: /home/zzq/software/mongo-database/shard1/shard1/mongod.log

storage:
  dbPath: /home/zzq/software/mongo-database/shard1/shard1
  journal:
    enabled: true
  wiredTiger:
    engineConfig:
      cacheSizeGB: 2

processManagement:
  fork: true  # fork and run in background
  pidFilePath: /home/zzq/software/mongo-database/shard1/shard1/mongod.pid  # location of pidfile
  timeZoneInfo: /usr/share/zoneinfo

security:
  keyFile: /home/zzq/software/mongo-conf/mongodb-keyfile
  authorization: enabled
-
此时clusterRole:要改成shardsvr,这样才能和config节点,mongos节点一起组成分片集群。replSetName可以随便填一个,但是对于分片一和它的几个副本都应该是相同的名字。分片一和分片二两个复制集的replSetName一般为不一样的,和config节点的集群也应该不一样。这里要注意,repSetName要和Master节点填一样的。
-
shard1->shard2
vim mongo-conf/shard1/shard2.conf
sharding:
  clusterRole: shardsvr
replication:
  replSetName: shard1
net:
  port: 17018
  bindIp: 0.0.0.0

systemLog:
  destination: file
  logAppend: true
  path: /home/zzq/software/mongo-database/shard1/shard2/mongod.log

storage:
  dbPath: /home/zzq/software/mongo-database/shard1/shard2
  journal:
    enabled: true
  wiredTiger:
    engineConfig:
      cacheSizeGB: 2

processManagement:
  fork: true  # fork and run in background
  pidFilePath: /home/zzq/software/mongo-database/shard1/shard2/mongod.pid  # location of pidfile
  timeZoneInfo: /usr/share/zoneinfo
security:
  keyFile: /home/zzq/software/mongo-conf/mongodb-keyfile
  authorization: enabled
- shard1->shard3
vim mongo-conf/shard1/shard3.conf
sharding:
  clusterRole: shardsvr
replication:
  replSetName: shard1
net:
  port: 17019
  bindIp: 0.0.0.0

systemLog:
  destination: file
  logAppend: true
  path: /home/zzq/software/mongo-database/shard1/shard3/mongod.log

storage:
  dbPath: /home/zzq/software/mongo-database/shard1/shard3
  journal:
    enabled: true
  wiredTiger:
    engineConfig:
      cacheSizeGB: 2
processManagement:
  fork: true  # fork and run in background
  pidFilePath: /home/zzq/software/mongo-database/shard1/shard3/mongod.pid  # location of pidfile
  timeZoneInfo: /usr/share/zoneinfo

security:
  keyFile: /home/zzq/software/mongo-conf/mongodb-keyfile
  authorization: enabled
- 配置完成后就可以启动了,依然是用
mongod启动
mongod --config /home/zzq/software/mongo-conf/shard1/shard1.conf
mongod --config /home/zzq/software/mongo-conf/shard1/shard2.conf
mongod --config /home/zzq/software/mongo-conf/shard1/shard3.conf
- 然后使用mongo命令连接一个节点,来把这三个mongod节点配置成一主两备的单一分片集群
mongo --port 17017
rs.initiate(
  {
    _id : "shard1",
    members: [
      { _id : 0, host : "192.168.137.137:17017" },
      { _id : 1, host : "192.168.137.137:17018" },
      { _id : 2, host : "192.168.137.137:17019" }
    ]
  }
 )
或者使用命令(二选一)
rs.initiate(
  {
    _id : "shard1",
    members: [
      { _id : 0, host : "192.168.137.137:17019" ,priority : 2 },
      { _id : 1, host : "192.168.137.137:17018" ,priority : 1 },
      { _id : 2, host : "192.168.137.137:17017" ,arbiterOnly :true }
    ]
  }
)
- 上面的第一个方式是最简单的配置方式,mongodb自己会决定哪个节点是master,哪些是salve;第二个方式 priority默认为0,priority越大越有可能成为master,但是你也可用通过传参数来手工指定priority,并且在节点数多于2的时候可以选择一个节点不存储数据只做仲裁。也就是三副本模式可以改成两副本+仲裁模式

shard2复制集
- shard2->shard1
vim mongo-conf/shard2/shard1.conf
sharding:
  clusterRole: shardsvr
replication:
  replSetName: shard2
net:
  port: 27017
  bindIp: 0.0.0.0

systemLog:
  destination: file
  logAppend: true
  path: /home/zzq/software/mongo-database/shard2/shard1/mongod.log

storage:
  dbPath: /home/zzq/software/mongo-database/shard2/shard1
  journal:
    enabled: true
  wiredTiger:
    engineConfig:
      cacheSizeGB: 2
processManagement:
  fork: true  # fork and run in background
  pidFilePath: /home/zzq/software/mongo-database/shard2/shard1/mongod.pid  # location of pidfile
  timeZoneInfo: /usr/share/zoneinfo

security:
  keyFile: /home/zzq/software/mongo-conf/mongodb-keyfile
  authorization: enabled
- shard2->shard2
vim mongo-conf/shard2/shard2.conf
sharding:
  clusterRole: shardsvr
replication:
  replSetName: shard2
net:
  port: 27018
  bindIp: 0.0.0.0

systemLog:
  destination: file
  logAppend: true
  path: /home/zzq/software/mongo-database/shard2/shard2/mongod.log

storage:
  dbPath: /home/zzq/software/mongo-database/shard2/shard2
  journal:
    enabled: true
  wiredTiger:
    engineConfig:
      cacheSizeGB: 2

processManagement:
  fork: true  # fork and run in background
  pidFilePath: /home/zzq/software/mongo-database/shard2/shard2/mongod.pid  # location of pidfile
  timeZoneInfo: /usr/share/zoneinfo

security:
  keyFile: /home/zzq/software/mongo-conf/mongodb-keyfile
  authorization: enabled
- shard2->shard3
vim mongo-conf/shard2/shard3.conf
sharding:
  clusterRole: shardsvr
replication:
  replSetName: shard2
net:
  port: 27019
  bindIp: 0.0.0.0

systemLog:
  destination: file
  logAppend: true
  path: /home/zzq/software/mongo-database/shard2/shard3/mongod.log

storage:
  dbPath: /home/zzq/software/mongo-database/shard2/shard3
  journal:
    enabled: true
  wiredTiger:
    engineConfig:
      cacheSizeGB: 2
processManagement:
  fork: true  # fork and run in background
  pidFilePath: /home/zzq/software/mongo-database/shard2/shard3/mongod.pid  # location of pidfile
  timeZoneInfo: /usr/share/zoneinfo

security:
  keyFile: /home/zzq/software/mongo-conf/mongodb-keyfile
  authorization: enabled
- 配置好之后依然是全部启动
mongod --config /home/zzq/software/mongo-conf/shard2/shard1.conf
mongod --config /home/zzq/software/mongo-conf/shard2/shard2.conf
mongod --config /home/zzq/software/mongo-conf/shard2/shard3.conf
- 连接任意节点去初始化
mongo --port 27017
 rs.initiate(
  {
    _id : "shard2",
    members: [
      { _id : 0, host : "192.168.137.137:27017" },
      { _id : 1, host : "192.168.137.137:27018" },
      { _id : 2, host : "192.168.137.137:27019" }
    ]
  }
 )

shard3复制集
- shard3->shard1
vim mongo-conf/shard3/shard1.conf
sharding:
  clusterRole: shardsvr
replication:
  replSetName: shard3
net:
  port: 37017
  bindIp: 0.0.0.0

systemLog:
  destination: file
  logAppend: true
  path: /home/zzq/software/mongo-database/shard3/shard1/mongod.log

storage:
  dbPath: /home/zzq/software/mongo-database/shard3/shard1
  journal:
    enabled: true
  wiredTiger:
    engineConfig:
      cacheSizeGB: 2
processManagement:
  fork: true  # fork and run in background
  pidFilePath: /home/zzq/software/mongo-database/shard2/shard3/mongod.pid  # location of pidfile
  timeZoneInfo: /usr/share/zoneinfo
security:
  keyFile: /home/zzq/software/mongo-conf/mongodb-keyfile
  authorization: enabled
- shard3->shard2
vim mongo-conf/shard3/shard2.conf
sharding:
  clusterRole: shardsvr
replication:
  replSetName: shard3
net:
  port: 37018
  bindIp: 0.0.0.0

systemLog:
  destination: file
  logAppend: true
  path: /home/zzq/software/mongo-database/shard3/shard2/mongod.log

storage:
  dbPath: /home/zzq/software/mongo-database/shard3/shard2
  journal:
    enabled: true
  wiredTiger:
    engineConfig:
      cacheSizeGB: 2

processManagement:
  fork: true  # fork and run in background
  pidFilePath: /home/zzq/software/mongo-database/shard3/shard2/mongod.pid  # location of pidfile
  timeZoneInfo: /usr/share/zoneinfo
security:
  keyFile: /home/zzq/software/mongo-conf/mongodb-keyfile
  authorization: enabled
- shard3->shard3
vim mongo-conf/shard3/shard3.conf
sharding:
  clusterRole: shardsvr
replication:
  replSetName: shard3
net:
  port: 37019
  bindIp: 0.0.0.0

systemLog:
  destination: file
  logAppend: true
  path: /home/zzq/software/mongo-database/shard3/shard3/mongod.log

storage:
  dbPath: /home/zzq/software/mongo-database/shard3/shard3
  journal:
    enabled: true
  wiredTiger:
    engineConfig:
      cacheSizeGB: 2
processManagement:
  fork: true  # fork and run in background
  pidFilePath: /home/zzq/software/mongo-database/shard3/shard3/mongod.pid  # location of pidfile
  timeZoneInfo: /usr/share/zoneinfo

security:
  keyFile: /home/zzq/software/mongo-conf/mongodb-keyfile
  authorization: enabled
- 配置完成后启动复制集
mongod --config /home/zzq/software/mongo-conf/shard3/shard1.conf
mongod --config /home/zzq/software/mongo-conf/shard3/shard2.conf
mongod --config /home/zzq/software/mongo-conf/shard3/shard3.conf
- 启动完成后,连接任意节点初始化复制集
mongo --port 37017
 rs.initiate(
  {
    _id : "shard3",
    members: [
      { _id : 0, host : "192.168.137.137:37017" },
      { _id : 1, host : "192.168.137.137:37018" },
      { _id : 2, host : "192.168.137.137:37019" }
    ]
  }
 )
- 任意一个节点角色变成
PRIMARY算是成功了

配置mongos(路由)
- mongos1
vim mongo-conf/mongos/mongos1.conf,我这里只配置了一个,可以配置多个。
sharding:
  configDB: confset/192.168.137.137:7017,192.168.137.137:7018,192.168.137.137:7019
net:
  port: 2000
  bindIp: 0.0.0.0

systemLog:
  destination: file
  logAppend: true
  path: /home/zzq/software/mongo-database/mongos/mongos1/mongod.log


processManagement:
  fork: true  # fork and run in background
  pidFilePath: /home/zzq/software/mongo-database/mongos/mongos1/mongod.pid  # location of pidfile

security:
  keyFile: /home/zzq/software/mongo-conf/mongodb-keyfile
-
注意configDB: confset这是config servers replSetName的值要一致。
-
启动mongos1
mongos -f /home/zzq/software/mongo-conf/mongos/mongos1.conf
- 启动完成,为了更安全,还是连接进去先创建用户和密码
mongo --port 2000
use admin

db.createUser(
  {
    user: "root",
    pwd: "root",
    roles: [ { role: "root", db: "admin" } ]
  }
 )

exit退出来,重新登录进去,就能操作了。
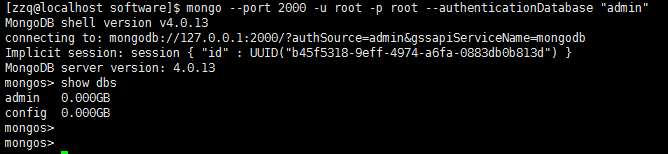
mongo --port 2000 -u root -p root --authenticationDatabase "admin"
show dbs
- 然后把三个分片都添加进去,每个分片添加里面的一个节点即可,master和slave都行,因为复制集里任何一个节点都是可以的。
sh.addShard( "shard1/192.168.137.137:17017")
sh.addShard( "shard2/192.168.137.137:27017")
sh.addShard( "shard3/192.168.137.137:37017")

- 验证是否添加成功,可以用
sh.status()命令查看

- 还有命令
use admin
db.runCommand({listshards:1})

测试分片集群
- 开启数据库分配配置
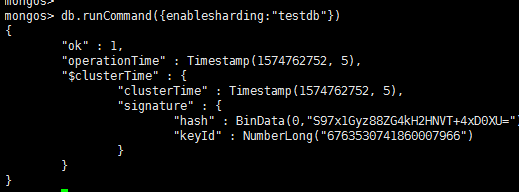
use admin
db.runCommand({enablesharding:"testdb"})
- 1、先尝试下hash分片
sh.shardCollection("testdb.t",{id:"hashed"})
- 插入测试数据
use testdb
for(i=1;i<=1000;i++){db.t.insert({id:i,name:"Leo"})}

- 2、再尝试下ranged sharding ,对testdb.users集合以id列为shard key
 db.runCommand({shardcollection:"testdb.users" ,key:{id:1,name:1}})
或者
sh.shardCollection("testdb.users",{id:1,name:1})

#如果不是第一次创建的testdb.users表
db.users.ensureIndex({id:1})

- 插入测试数据
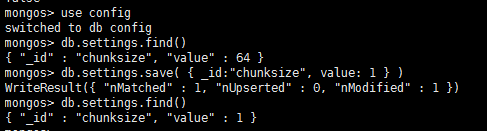
- 这个时候最好修改下chunksize,因为默认是64M,64M的数据要插入很久,现在测试把它改成1M(这地方我卡的比较久,之前数据一直都在一个复制集上) https://docs.mongodb.com/v4.0/tutorial/modify-chunk-size-in-sharded-cluster/
use config
db.settings.save( { _id:"chunksize", value: 1 } )
db.settings.find()
use testdb
for(i=1;i<=100000;i++){db.users.insert({id:i,name:"Leo"+i})}

- 其他的分片策略就不一一说明了,应该不难查看文档就可以配置出来。
其他
-
程序调用的话就是这样的格式
spring.data.mongodb.uri=mongodb://root:[email protected]:2000/xxxx?authSource=admin&authMechanism=SCRAM-SHA-1,这是java spring boot的方式,如果是多个mongosspring.data.mongodb.uri=mongodb://root:[email protected]:2000,192.168.137.137:2001/xxxx?authSource=admin&authMechanism=SCRAM-SHA-1;逗号分隔即可。 -
异常
- listShards may only be run against the admin database
使用db.runCommand({listshards:1}) 先use admin
- permissions on /home/zzq/software/mongo-conf/mongodb-keyfile are too open
修改权限chmod 600 mongodb-keyfile
- enableSharding may only be run against the admin database
使用db.runCommand({enablesharding:“testdb”})先use admin
-
参考资料
-
最后如果文章有错误的地方,希望您能批评指出,感谢您的观看。
