文章目录
一、页面整合
1、下载bootstrap(去官网下载即可)
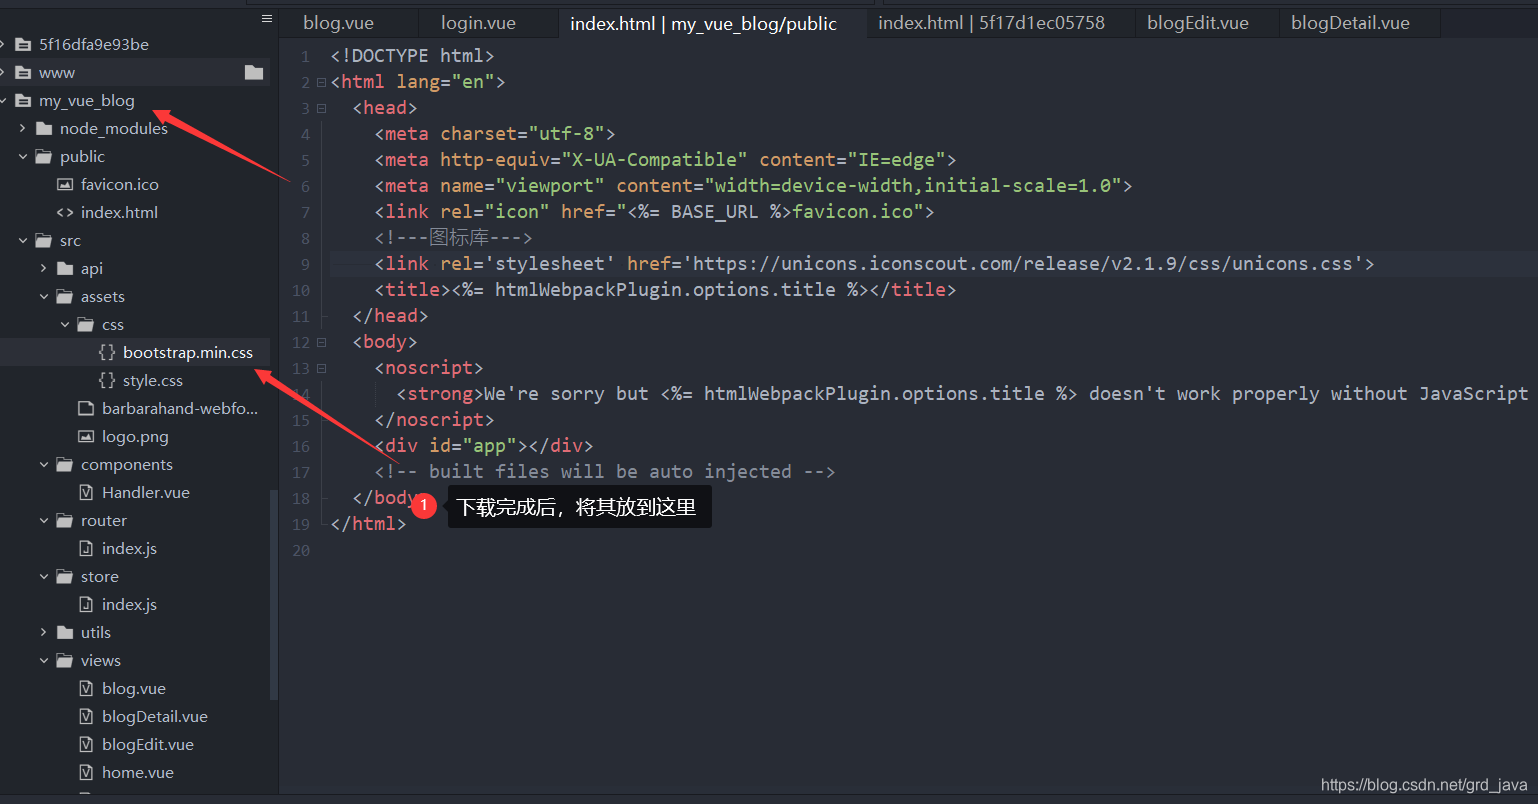
2、编写单独样式表
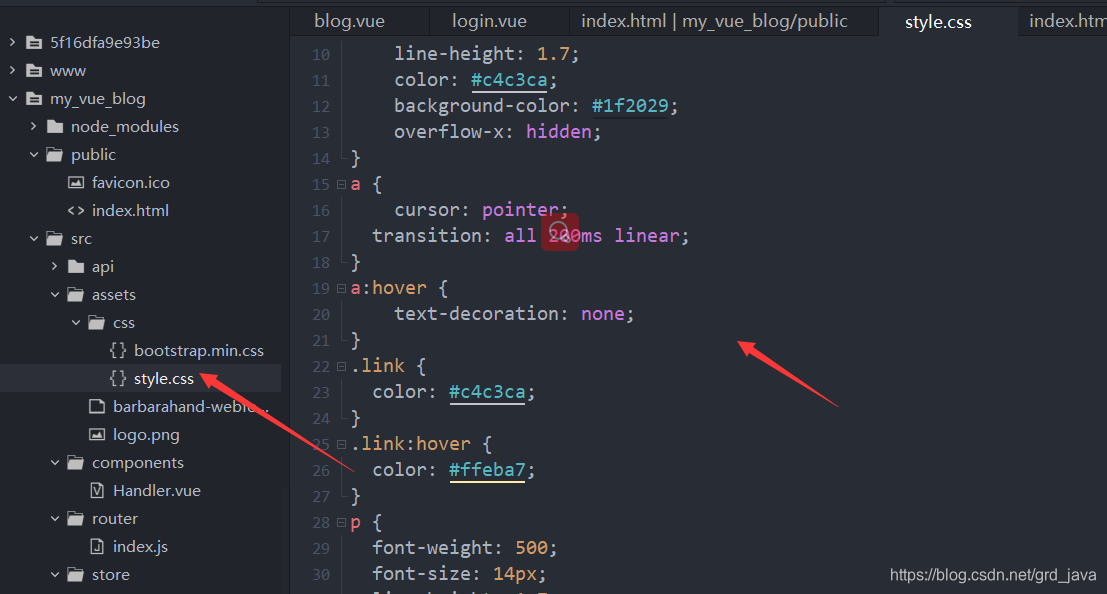
/* Please ❤ this if you like it! */


@import url('https://fonts.googleapis.com/css?family=Poppins:400,500,600,700,800,900');

body{
	font-family: 'Poppins', sans-serif;
	font-weight: 300;
	font-size: 15px;
	line-height: 1.7;
	color: #c4c3ca;
	background-color: #1f2029;
	overflow-x: hidden;
}
a {
	cursor: pointer;
  transition: all 200ms linear;
}
a:hover {
	text-decoration: none;
}
.link {
  color: #c4c3ca;
}
.link:hover {
  color: #ffeba7;
}
p {
  font-weight: 500;
  font-size: 14px;
  line-height: 1.7;
}
h4 {
  font-weight: 600;
}
h6 span{
  padding: 0 20px;
  text-transform: uppercase;
  font-weight: 700;
}
.section{
  position: relative;
  width: 100%;
  display: block;
}
.full-height{
  min-height: 100vh;
}
[type="checkbox"]:checked,
[type="checkbox"]:not(:checked){
  position: absolute;
  left: -9999px;
}
.checkbox:checked + label,
.checkbox:not(:checked) + label{
  position: relative;
  display: block;
  text-align: center;
  width: 60px;
  height: 16px;
  border-radius: 8px;
  padding: 0;
  margin: 10px auto;
  cursor: pointer;
  background-color: #ffeba7;
}
.checkbox:checked + label:before,
.checkbox:not(:checked) + label:before{
  position: absolute;
  display: block;
  width: 36px;
  height: 36px;
  border-radius: 50%;
  color: #ffeba7;
  background-color: #102770;
  font-family: 'unicons';
  content: '\eb4f';
  z-index: 20;
  top: -10px;
  left: -10px;
  line-height: 36px;
  text-align: center;
  font-size: 24px;
  transition: all 0.5s ease;
}
.checkbox:checked + label:before {
  transform: translateX(44px) rotate(-270deg);
}


.card-3d-wrap {
  position: relative;
  width: 440px;
  max-width: 100%;
  height: 400px;
  -webkit-transform-style: preserve-3d;
  transform-style: preserve-3d;
  perspective: 800px;
  margin-top: 60px;
}
.card-3d-wrapper {
  width: 100%;
  height: 100%;
  position:absolute;
  top: 0;
  left: 0;
  -webkit-transform-style: preserve-3d;
  transform-style: preserve-3d;
  transition: all 600ms ease-out;
}
.card-front, .card-back {
  width: 100%;
  height: 100%;
  background-color: #2a2b38;
  background-image: url('https://s3-us-west-2.amazonaws.com/s.cdpn.io/1462889/pat.svg');
  background-position: bottom center;
  background-repeat: no-repeat;
  background-size: 300%;
  position: absolute;
  border-radius: 6px;
  left: 0;
  top: 0;
  -webkit-transform-style: preserve-3d;
  transform-style: preserve-3d;
  -webkit-backface-visibility: hidden;
  -moz-backface-visibility: hidden;
  -o-backface-visibility: hidden;
  backface-visibility: hidden;
}
.card-back {
  transform: rotateY(180deg);
}
.checkbox:checked ~ .card-3d-wrap .card-3d-wrapper {
  transform: rotateY(180deg);
}
.center-wrap{
  position: absolute;
  width: 100%;
  padding: 0 35px;
  top: 50%;
  left: 0;
  transform: translate3d(0, -50%, 35px) perspective(100px);
  z-index: 20;
  display: block;
}


.form-group{
  position: relative;
  display: block;
    margin: 0;
    padding: 0;
}
.form-style {
  padding: 13px 20px;
  padding-left: 55px;
  height: 48px;
  width: 100%;
  font-weight: 500;
  border-radius: 4px;
  font-size: 14px;
  line-height: 22px;
  letter-spacing: 0.5px;
  outline: none;
  color: #c4c3ca;
  background-color: #1f2029;
  border: none;
  -webkit-transition: all 200ms linear;
  transition: all 200ms linear;
  box-shadow: 0 4px 8px 0 rgba(21,21,21,.2);
}
.form-style:focus,
.form-style:active {
  border: none;
  outline: none;
  box-shadow: 0 4px 8px 0 rgba(21,21,21,.2);
}
.input-icon {
  position: absolute;
  top: 0;
  left: 18px;
  height: 48px;
  font-size: 24px;
  line-height: 48px;
  text-align: left;
  color: #ffeba7;
  -webkit-transition: all 200ms linear;
    transition: all 200ms linear;
}

.form-group input:-ms-input-placeholder  {
  color: #c4c3ca;
  opacity: 0.7;
  -webkit-transition: all 200ms linear;
    transition: all 200ms linear;
}
.form-group input::-moz-placeholder  {
  color: #c4c3ca;
  opacity: 0.7;
  -webkit-transition: all 200ms linear;
    transition: all 200ms linear;
}
.form-group input:-moz-placeholder  {
  color: #c4c3ca;
  opacity: 0.7;
  -webkit-transition: all 200ms linear;
    transition: all 200ms linear;
}
.form-group input::-webkit-input-placeholder  {
  color: #c4c3ca;
  opacity: 0.7;
  -webkit-transition: all 200ms linear;
    transition: all 200ms linear;
}
.form-group input:focus:-ms-input-placeholder  {
  opacity: 0;
  -webkit-transition: all 200ms linear;
    transition: all 200ms linear;
}
.form-group input:focus::-moz-placeholder  {
  opacity: 0;
  -webkit-transition: all 200ms linear;
    transition: all 200ms linear;
}
.form-group input:focus:-moz-placeholder  {
  opacity: 0;
  -webkit-transition: all 200ms linear;
    transition: all 200ms linear;
}
.form-group input:focus::-webkit-input-placeholder  {
  opacity: 0;
  -webkit-transition: all 200ms linear;
    transition: all 200ms linear;
}

.btn{
  border-radius: 4px;
  height: 44px;
  font-size: 13px;
  font-weight: 600;
  text-transform: uppercase;
  -webkit-transition : all 200ms linear;
  transition: all 200ms linear;
  padding: 0 30px;
  letter-spacing: 1px;
  display: -webkit-inline-flex;
  display: -ms-inline-flexbox;
  display: inline-flex;
  -webkit-align-items: center;
  -moz-align-items: center;
  -ms-align-items: center;
  align-items: center;
  -webkit-justify-content: center;
  -moz-justify-content: center;
  -ms-justify-content: center;
  justify-content: center;
  -ms-flex-pack: center;
  text-align: center;
  border: none;
  background-color: #ffeba7;
  color: #102770;
  box-shadow: 0 8px 24px 0 rgba(255,235,167,.2);
}
.btn:active,
.btn:focus{
  background-color: #102770;
  color: #ffeba7;
  box-shadow: 0 8px 24px 0 rgba(16,39,112,.2);
}
.btn:hover{
  background-color: #102770;
  color: #ffeba7;
  box-shadow: 0 8px 24px 0 rgba(16,39,112,.2);
}
3、引入一个图标库
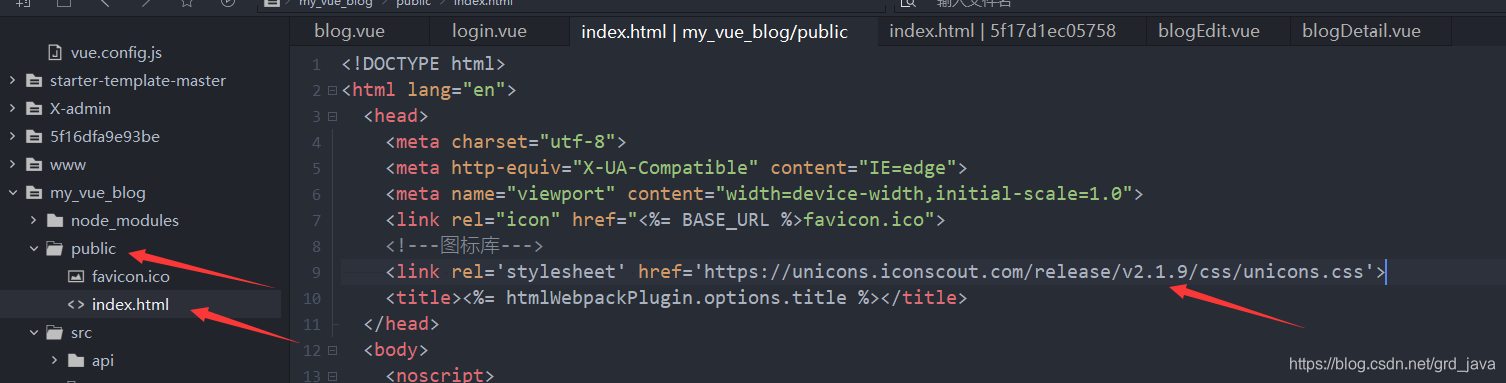
<!---图标库--->
<link rel='stylesheet' href='https://unicons.iconscout.com/release/v2.1.9/css/unicons.css'>
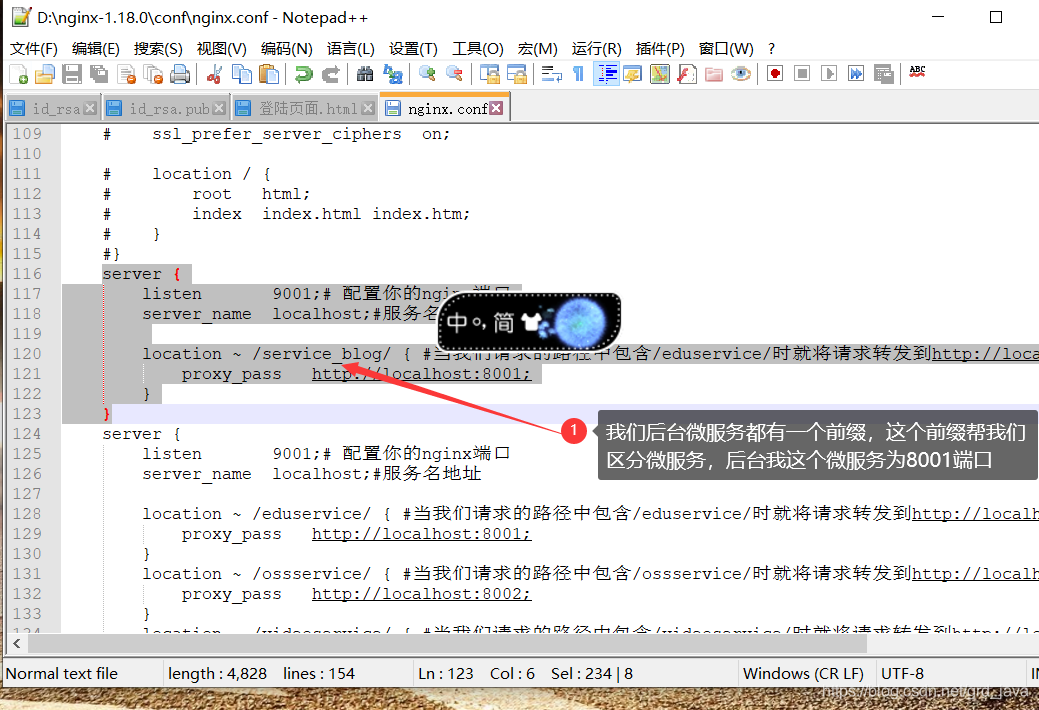
4、配置nginx,编写异步接口
server {
		listen       9001;# 配置你的nginx端口
		server_name  localhost;#服务名地址

		location ~ /service_blog/ { #当我们请求的路径中包含/service_blog/时就将请求转发到http://localhost:8001端口
            proxy_pass   http://localhost:8001;
        }
    }
5、api接口

import request from '@/utils/request.js'
export default {
  login(data) {
    return request({
      url: `/service_blog/account/login`,
      method: 'post',
	  data
    })
  },
  register(data){
	  return request({
		  url:`/service_blog/account/signIn`,
		  method:'post',
		  data
	  })
  },
  logout(){
	  return request({
		  url:`/service_blog/account/logout`,
		  method:'get'
	  })
  }
 }
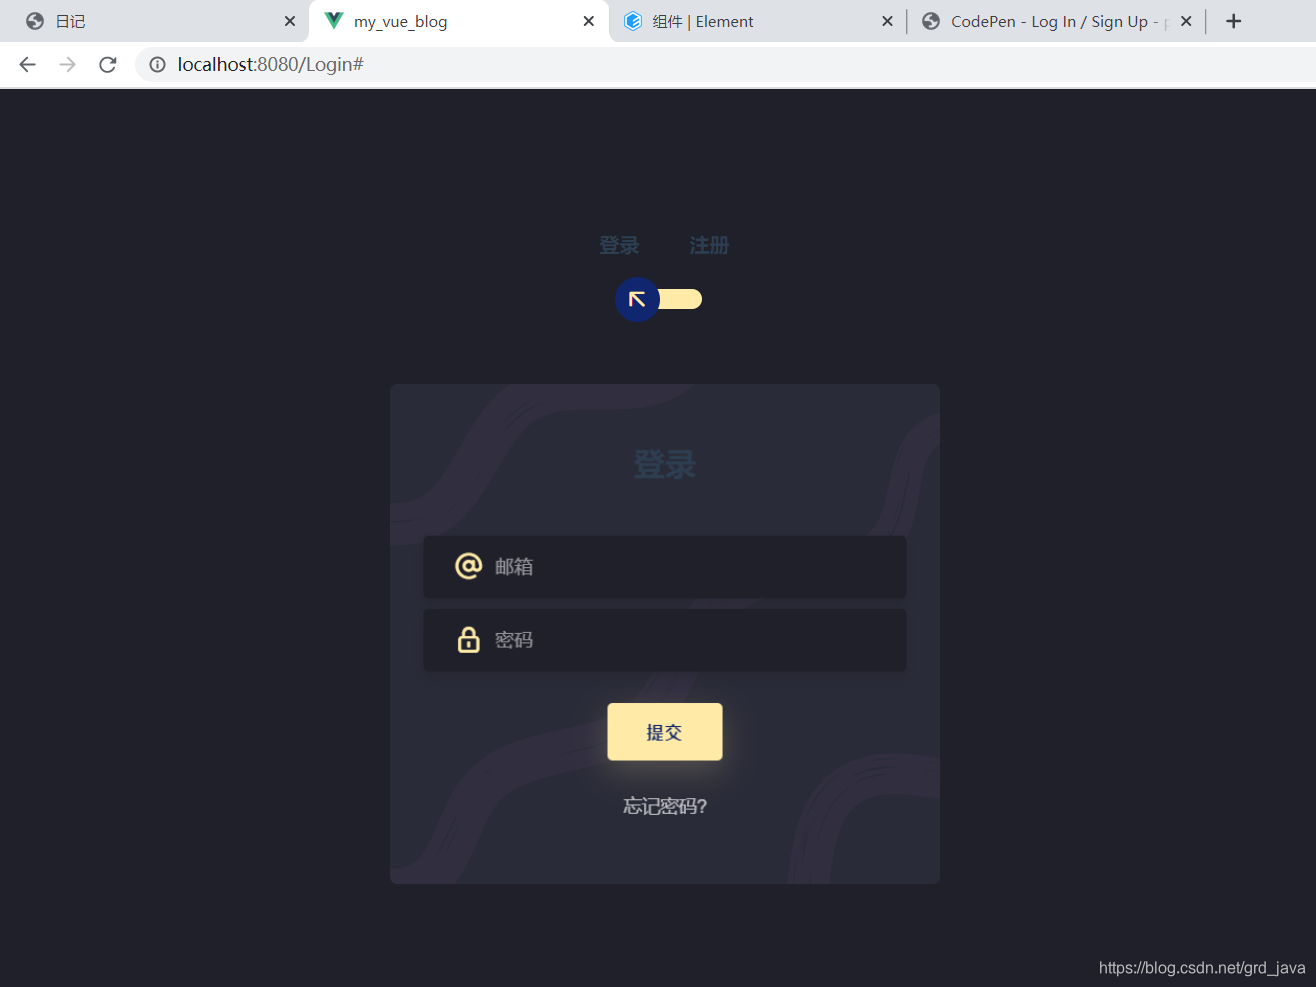
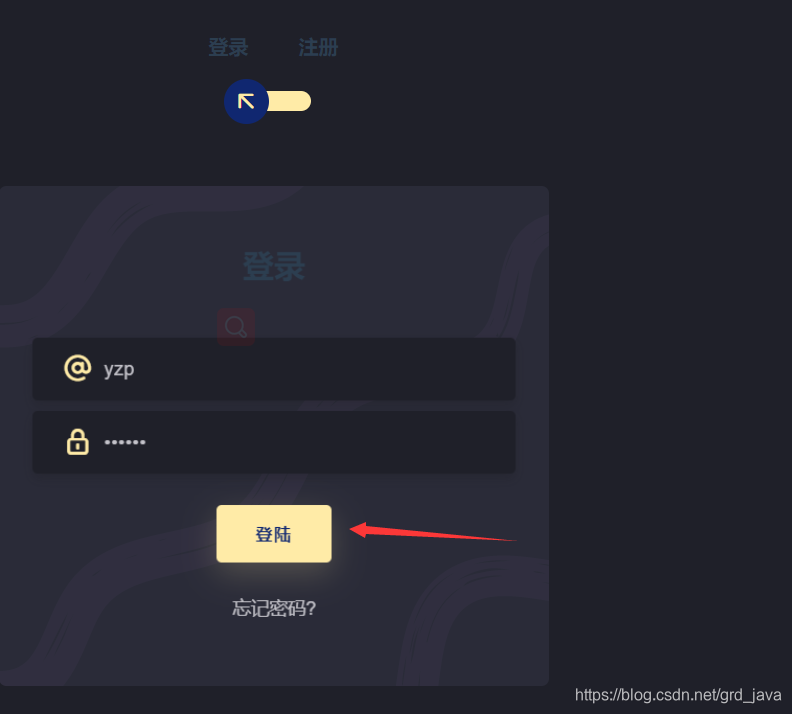
6、登陆页面开发
| html |
|---|
<template>
	<div class="section">
		<div class="container">
			<div class="row full-height justify-content-center">
				<div class="col-12 text-center align-self-center py-5">
					<div class="section pb-5 pt-5 pt-sm-2 text-center">
						<h6 class="mb-0 pb-3"><span>登录</span><span>注册</span></h6>
			          	<input class="checkbox" type="checkbox" id="reg-log" name="reg-log"/>
			          	<label for="reg-log"></label>
						<div class="card-3d-wrap mx-auto">
							<div class="card-3d-wrapper">
								<div class="card-front">
									<div class="center-wrap">
										<div class="section text-center">
											<h4 class="mb-4 pb-3">登录</h4>
											<div class="form-group">
												<input type="text" name="username" v-model="loginData.username" class="form-style" placeholder="用户名" id="logemail" autocomplete="off">
												<i class="input-icon uil uil-at"></i>
											</div>
											<div class="form-group mt-2">
												<input type="password" name="logpass" v-model="loginData.password" class="form-style" placeholder="密码" id="logpass" autocomplete="off">
												<i class="input-icon uil uil-lock-alt"></i>
											</div>
											<a href="#" class="btn mt-4" @click.stop.self="login()">登陆</a>
	                        				<p class="mb-0 mt-4 text-center"><a href="#0" class="link">忘记密码?</a></p>
				      					</div>
			      					</div>
			      				</div>
								<div class="card-back">
									<div class="center-wrap">
										<div class="section text-center">
											<h4 class="mb-4 pb-3">注册</h4>
											<div class="form-group">
												<input type="text" name="logname" v-model="registerData.username" class="form-style" placeholder="用户名" id="logname" autocomplete="off">
												<i class="input-icon uil uil-user"></i>
											</div>
											<div class="form-group mt-2">
												<input type="email" name="logemail" v-model="registerData.email" class="form-style" placeholder="邮箱" id="logemail" autocomplete="off">
												<i class="input-icon uil uil-at"></i>
											</div>
											<div class="form-group mt-2">
												<input type="password" name="logpass" v-model="registerData.password" class="form-style" placeholder="密码" id="logpass" autocomplete="off">
												<i class="input-icon uil uil-lock-alt"></i>
											</div>
											<a href="#" class="btn mt-4" @click.stop.self="register()">注册</a>
				      					</div>
			      					</div>
			      				</div>
			      			</div>
			      		</div>
			      	</div>
		      	</div>
	      	</div>
	    </div>
	</div>
</template>
| js |
|---|
<script>
import '@/assets/css/bootstrap.min.css'
import Handler from '@/components/Handler.vue'
import login from '@/api/login.js'
export default{
data(){
return{
loginData:{
username:'',//登陆用用户名
password:''//登陆用密码
},
registerData:{
username:'',//注册用用户名
password:'',//注册用密码
email:'' //注册用邮箱
}
}
},
methods:{
login(){
login.login(this.loginData).then(response=>{
if(response.data.code===20000){
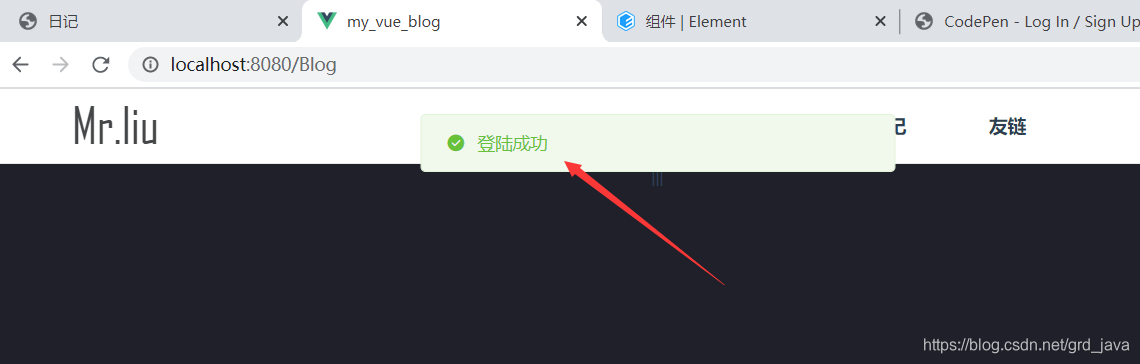
this.$message({
message: '登陆成功',
type: 'success'
});
this.$router.push({name:'Blog'})
}else{
this.$message.error(response.data.message);
}
}).catch(error=>{
this.$message.error(error.data.message);
})
},
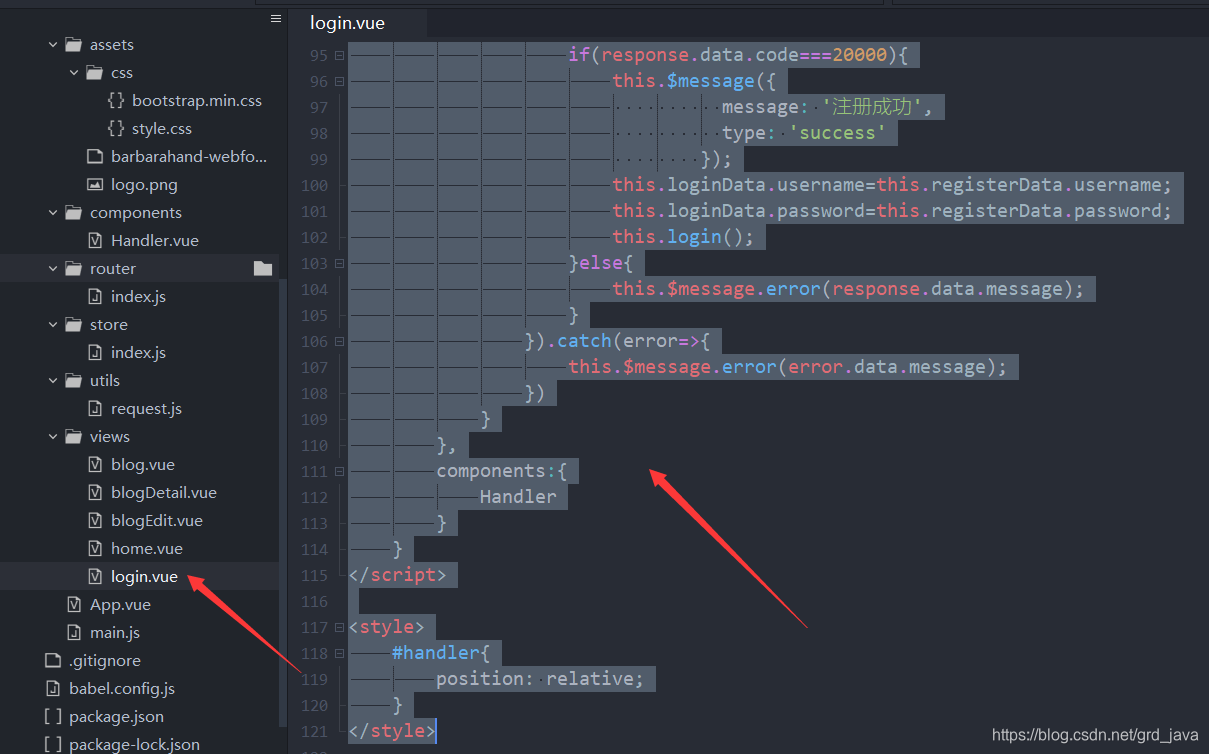
register(){
login.register(this.registerData).then(response=>{
if(response.data.code===20000){
this.$message({
message: '注册成功',
type: 'success'
});
this.loginData.username=this.registerData.username;
this.loginData.password=this.registerData.password;
this.login();
}else{
this.$message.error(response.data.message);
}
}).catch(error=>{
this.$message.error(error.data.message);
})
}
},
components:{
Handler
}
}
</script>
<style scoped src="@/assets/css/style.css">
#handler{
position: relative;
}
</style>
二、逻辑测试与完善
1、测试当前接口
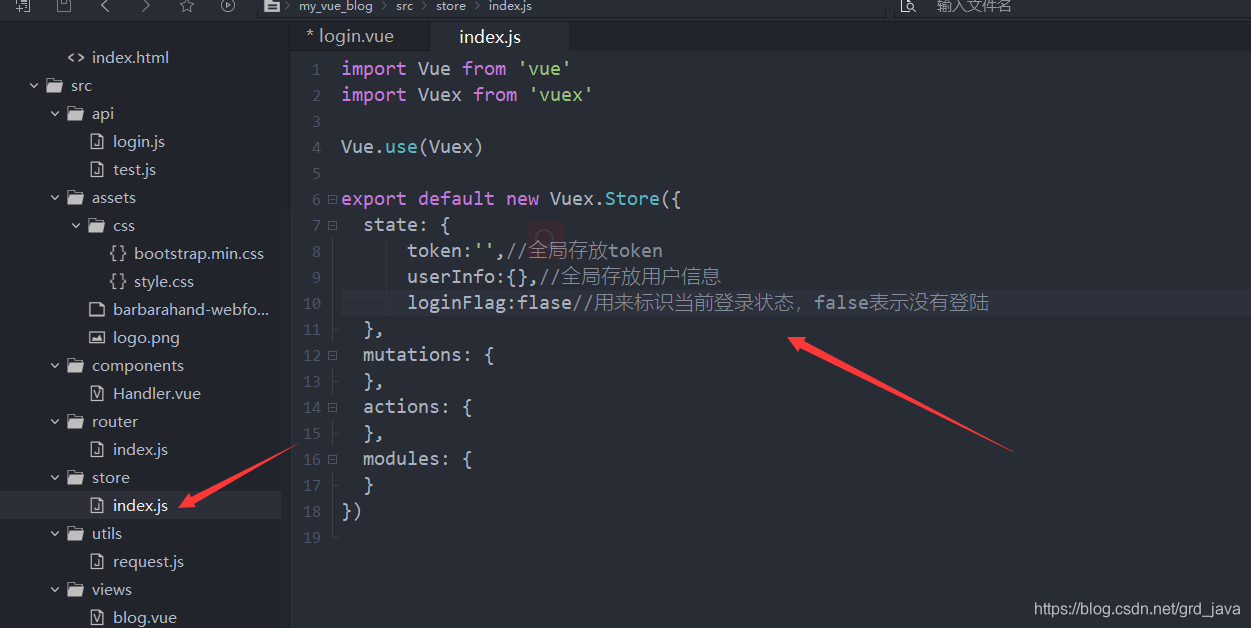
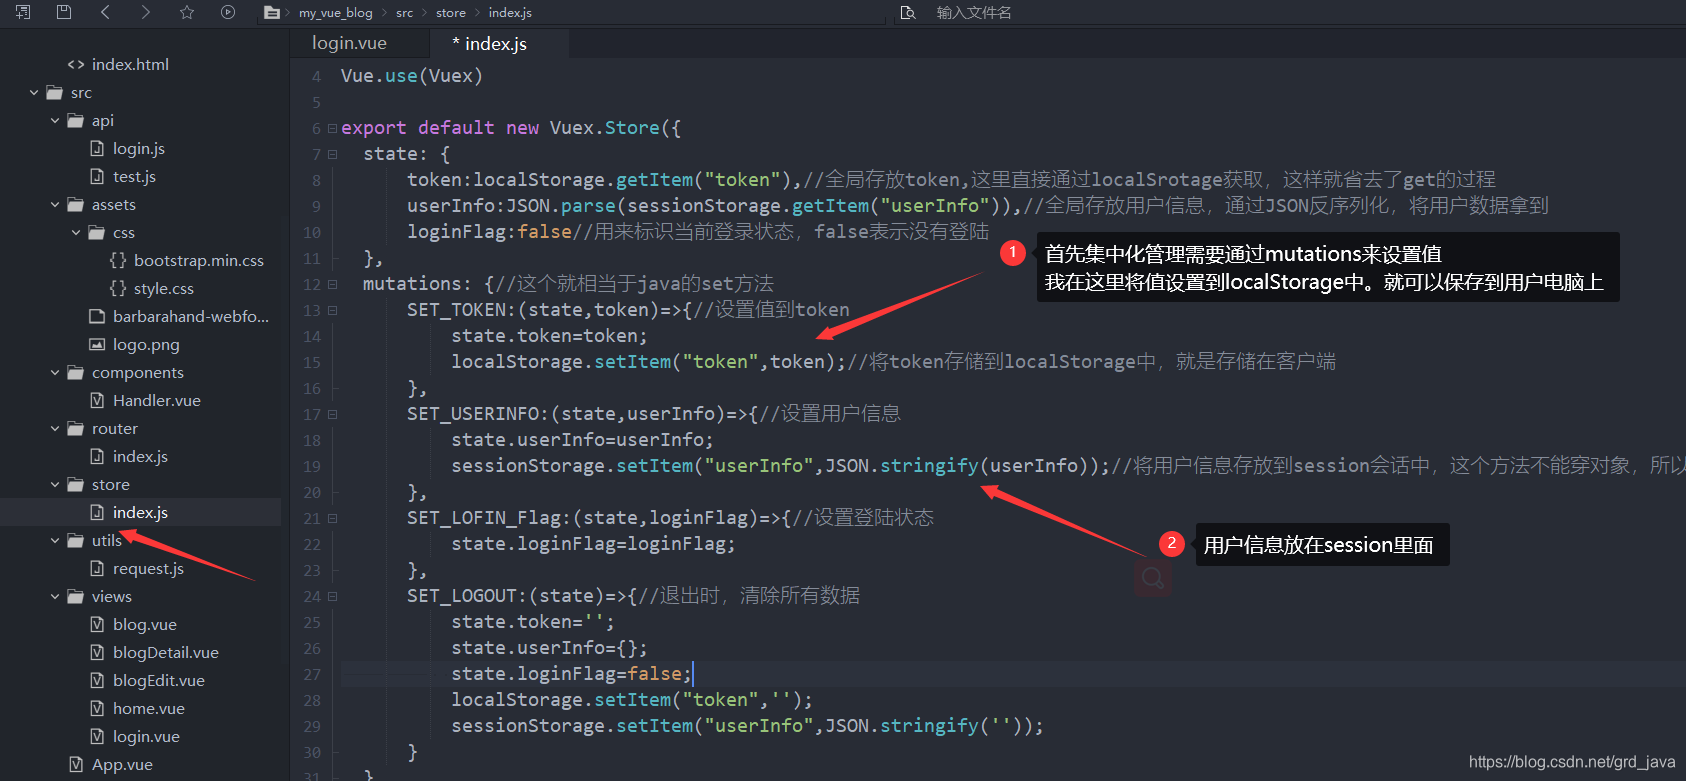
2、集中化管理数据
| 集中化管理数据 |
|---|
| 上面是正常的写法,但是我这里需要保存数据到客户端,所以采用如下写法 |
|---|
import Vue from 'vue'
import Vuex from 'vuex'

Vue.use(Vuex)

export default new Vuex.Store({
  state: {
	  token:localStorage.getItem("token"),//全局存放token,这里直接通过localSrotage获取,这样就省去了get的过程
	  userInfo:JSON.parse(sessionStorage.getItem("userInfo")),//全局存放用户信息,通过JSON反序列化,将用户数据拿到
	  loginFlag:false//用来标识当前登录状态,false表示没有登陆
  },
  mutations: {//这个就相当于java的set方法
	  SET_TOKEN:(state,token)=>{//设置值到token
		  state.token=token;
		  localStorage.setItem("token",token);//将token存储到localStorage中,就是存储在客户端
	  },
	  SET_USERINFO:(state,userInfo)=>{//设置用户信息
		  state.userInfo=userInfo;
		  sessionStorage.setItem("userInfo",JSON.stringify(userInfo));//将用户信息存放到session会话中,这个方法不能穿对象,所以通过JSON序列化
	  },
	  SET_LOFIN_Flag:(state,loginFlag)=>{//设置登陆状态
		  state.loginFlag=loginFlag;
	  },
	  SET_LOGOUT:(state)=>{//退出时,清除所有数据
		  state.token='';
		  state.userInfo={};
		  state.loginFlag=false;
		  localStorage.setItem("token",'');
		  sessionStorage.setItem("userInfo",JSON.stringify(''));
	  }
  },
  getters:{
	  //get
	  getUserInfo:state=>{
		 return state.userInfo
	  },
	  getToken:state=>{
		 return state.token
	  }
  },
  actions: {
  },
  modules: {
  }
})
3、方法重构
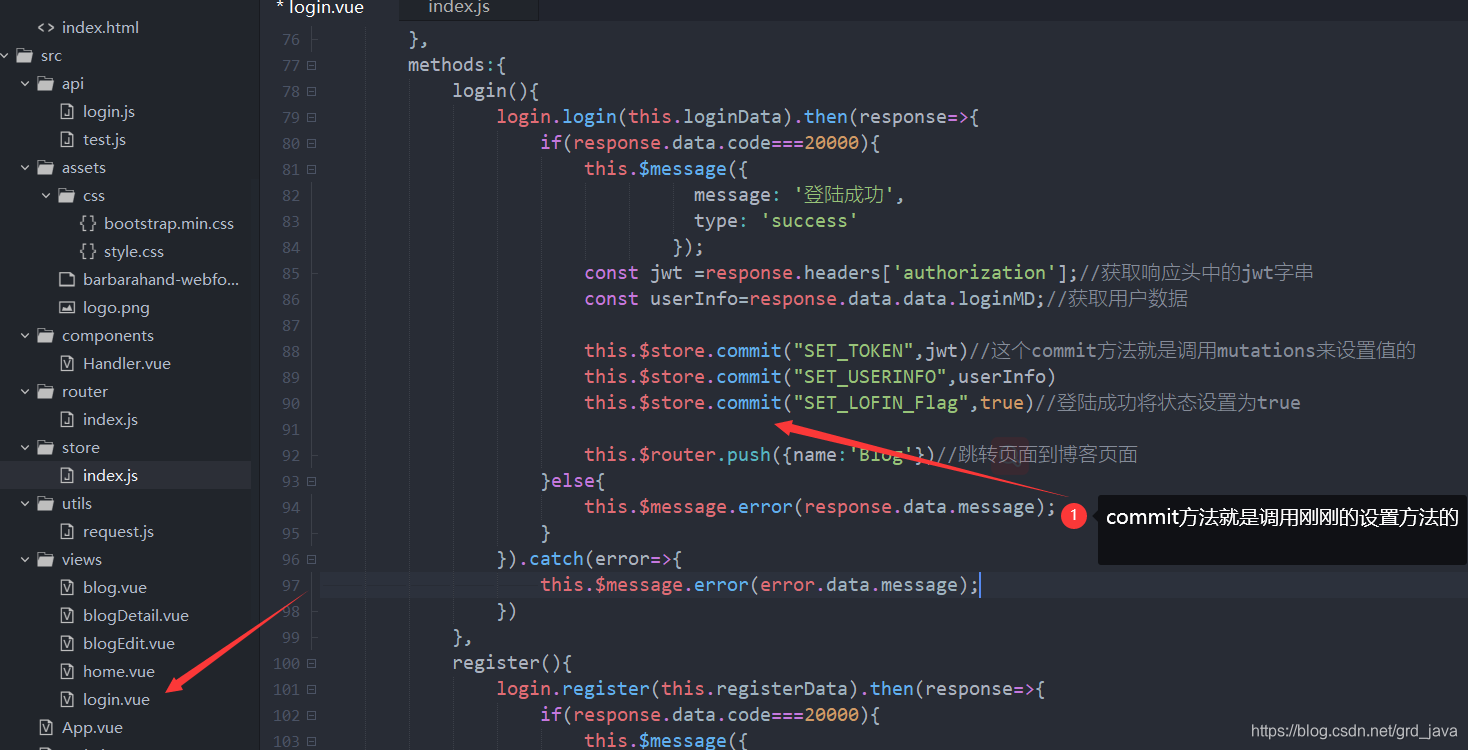
login(){
				login.login(this.loginData).then(response=>{
					if(response.data.code===20000){
						this.$message({
						          message: '登陆成功',
						          type: 'success'
						        });
						const jwt =response.headers['authorization'];//获取响应头中的jwt字串
						const userInfo=response.data.data.loginMD;//获取用户数据

						this.$store.commit("SET_TOKEN",jwt)//这个commit方法就是调用mutations来设置值的
						this.$store.commit("SET_USERINFO",userInfo)
						this.$store.commit("SET_LOFIN_Flag",true)//登陆成功将状态设置为true

						this.$router.push({name:'Blog'})//跳转页面到博客页面
					}else{
						this.$message.error(response.data.message);
					}
				}).catch(error=>{
					this.$message.error(error.data.message);
				})
			},
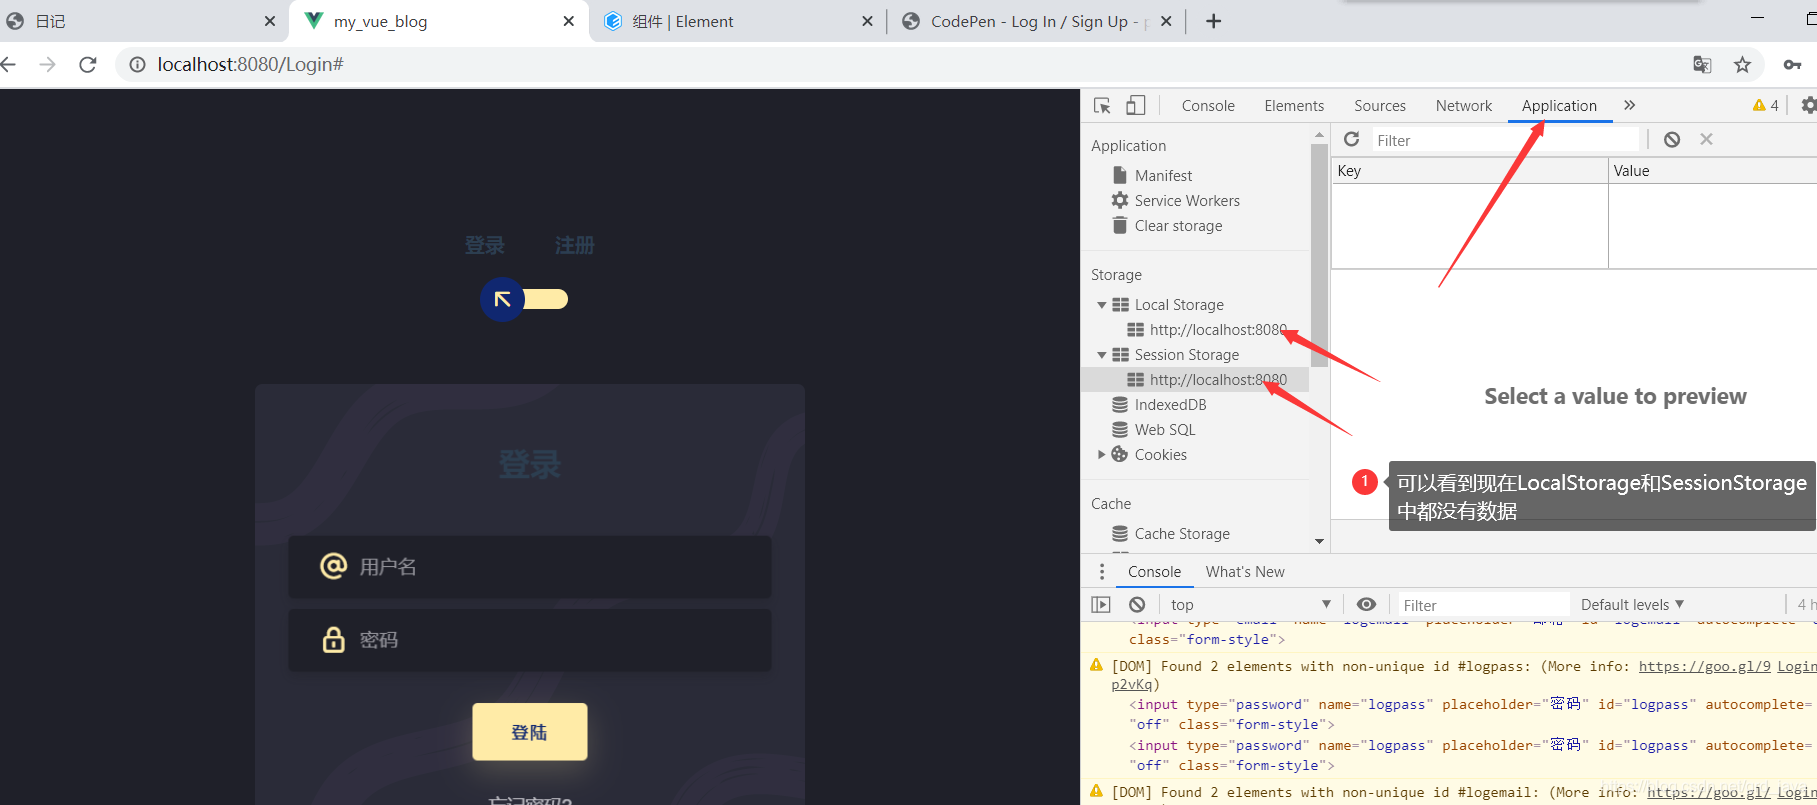
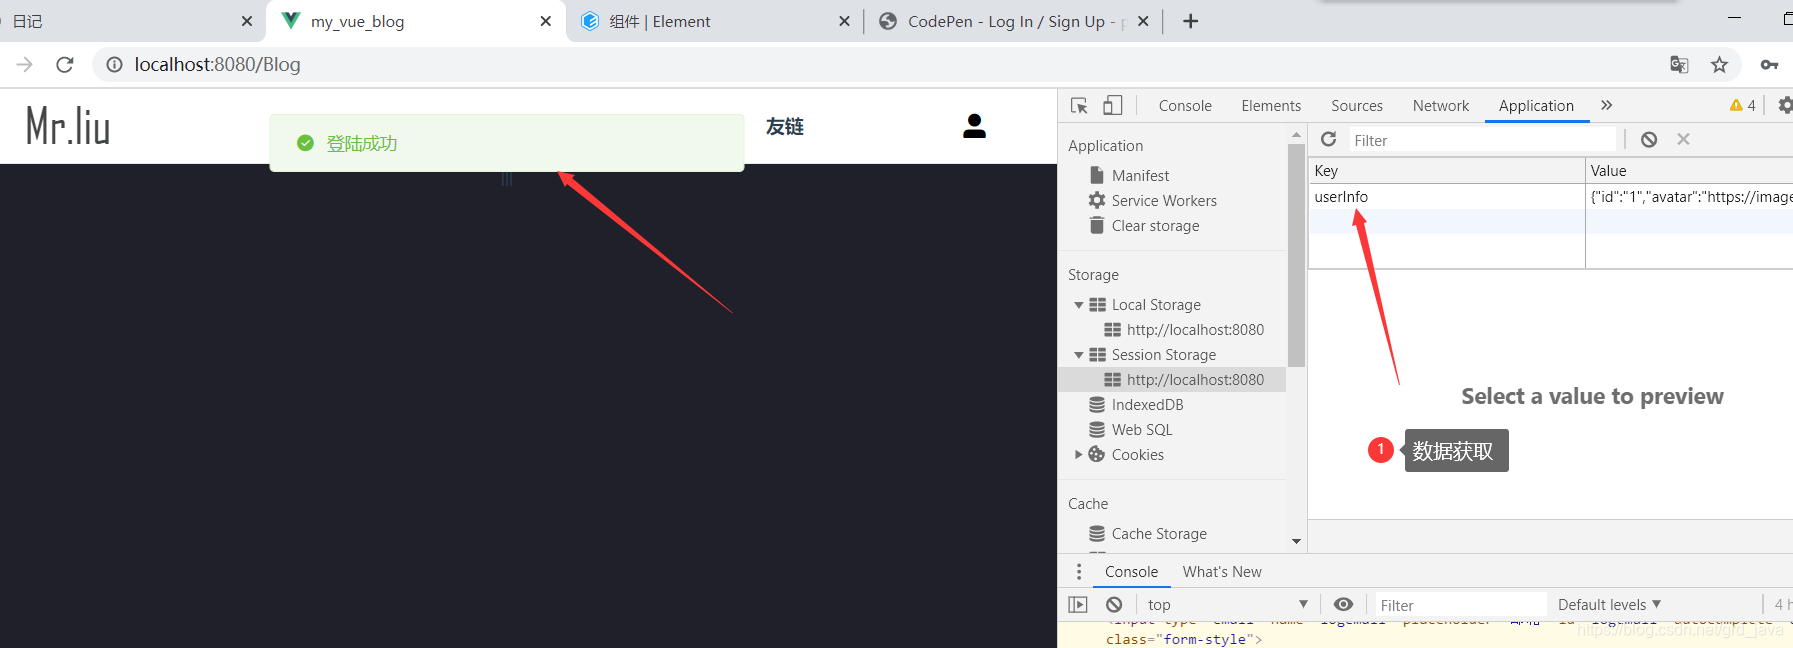
4、测试
三、获取登陆信息完善页面
| 3种常用获取集中化数据的方法 |
|---|
console.log(this.$store.state.loginFlag)//通过$store.state获取
console.log(this.$store.getters.getUserInfo)//通过getters获取
console.log(localStorage.getItem("token"))//通过localStorage或者SessionStorage获取
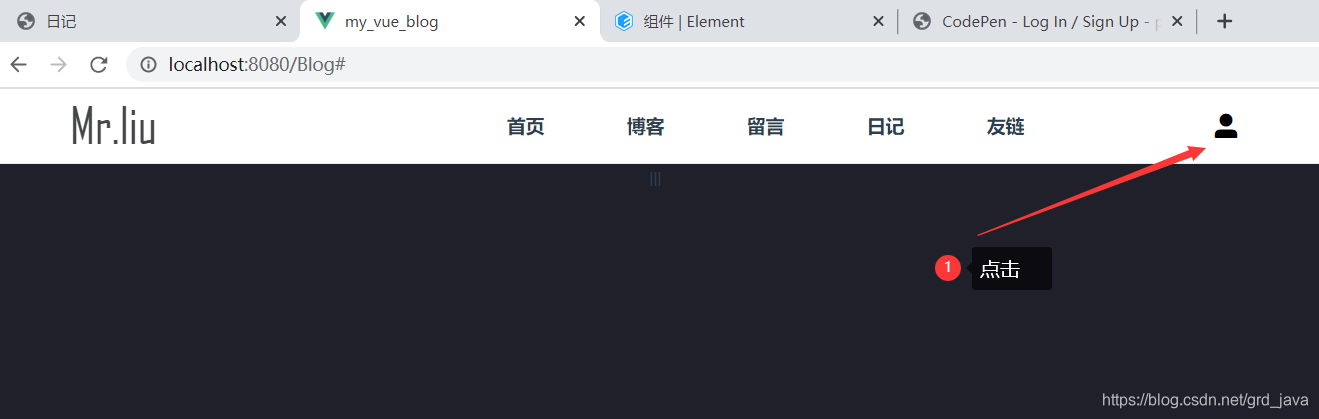
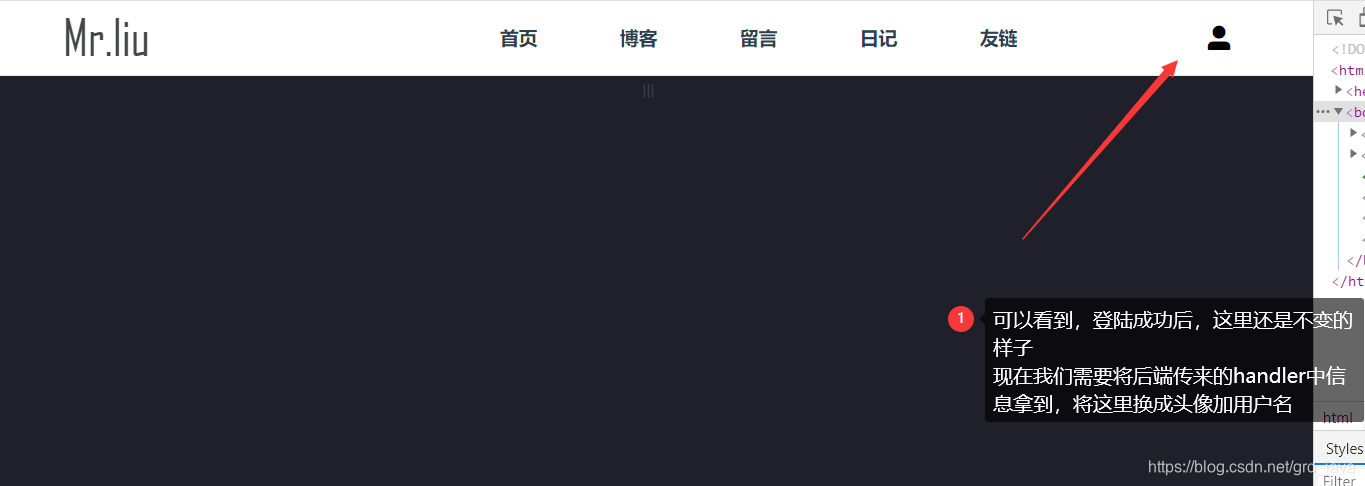
1、编写头部组件
| 根据用户登陆状态显示图标 |
|---|
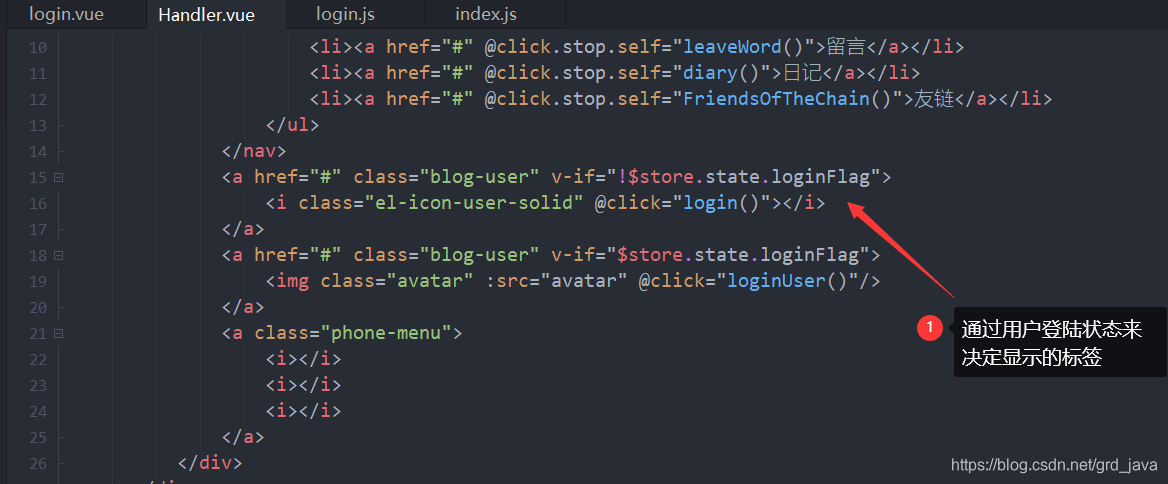
<a href="#" class="blog-user" v-if="!$store.state.loginFlag">
  <i class="el-icon-user-solid" @click="login()"></i>
 </a>
 <a href="#" class="blog-user" v-if="$store.state.loginFlag">
  <img class="avatar" :src="avatar" @click="loginUser()"/>
 </a>
| js代码 |
|---|
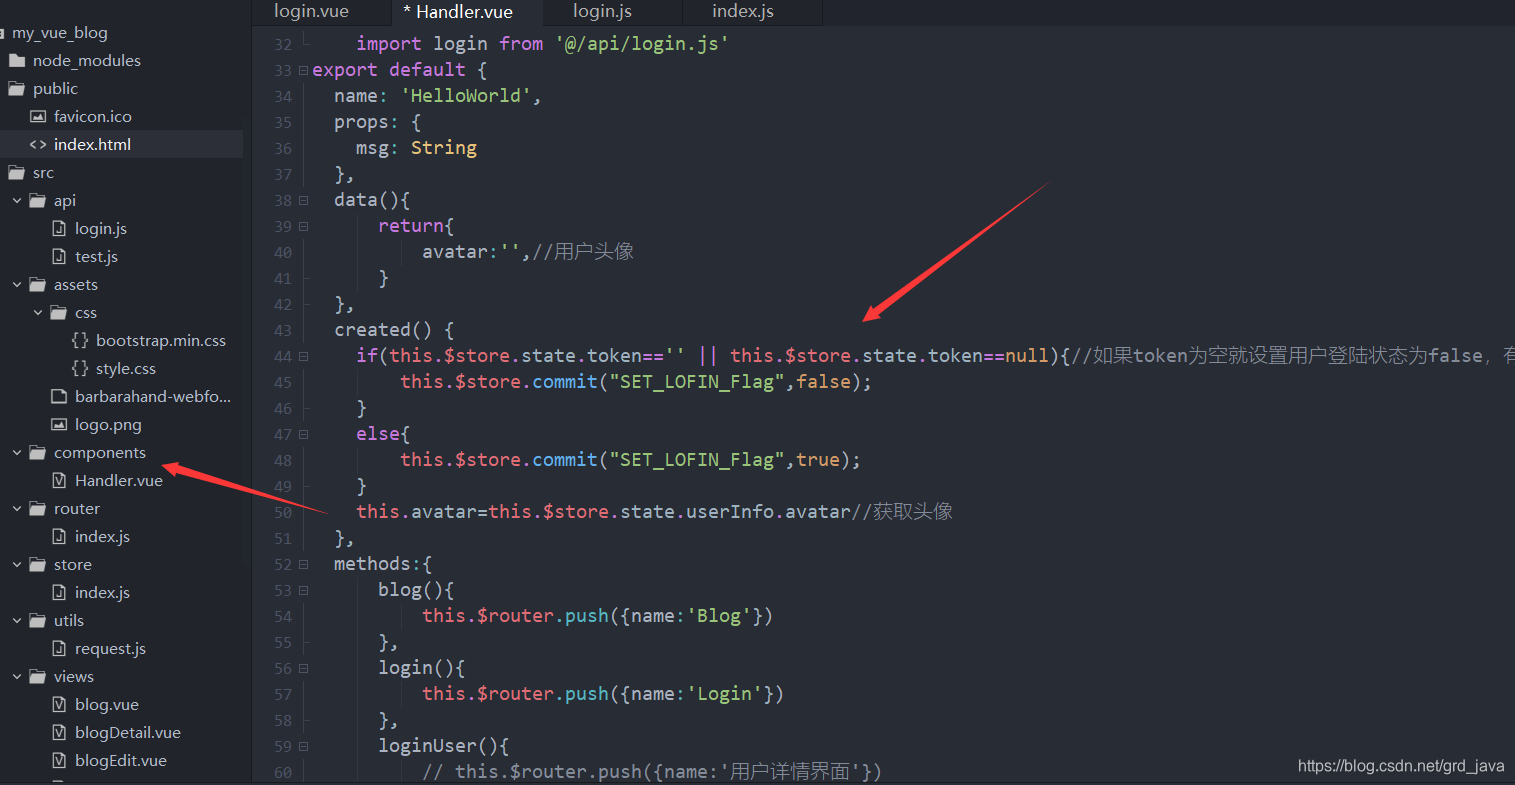
<script>
import login from '@/api/login.js'
export default {
name: 'HelloWorld',
props: {
msg: String
},
data(){
return{
avatar:'',//用户头像
}
},
created() {
if(this.$store.state.token=='' || this.$store.state.token==null){//如果token为空就设置用户登陆状态为false,有值就设置为true
this.$store.commit("SET_LOFIN_Flag",false);
}
else if(this.$store.state.userInfo!=null||this.$store.state.userInfo!=undefined){//如果token有值,就判断用户数据有没有
//如果有就设置为true并获取头像
this.$store.commit("SET_LOFIN_Flag",true);
this.avatar=this.$store.state.userInfo.avatar//获取头像
}
},
methods:{
blog(){
this.$router.push({name:'Blog'})
},
login(){
this.$router.push({name:'Login'})
},
loginUser(){
// this.$router.push({name:'用户详情界面'})
this.$confirm('是否退出登陆', '提示', {
confirmButtonText: '确定',
cancelButtonText: '取消',
type: 'warning'
}).then(() => {
login.logout().then(response=>{
if(response.data.code===20000){
this.$message({
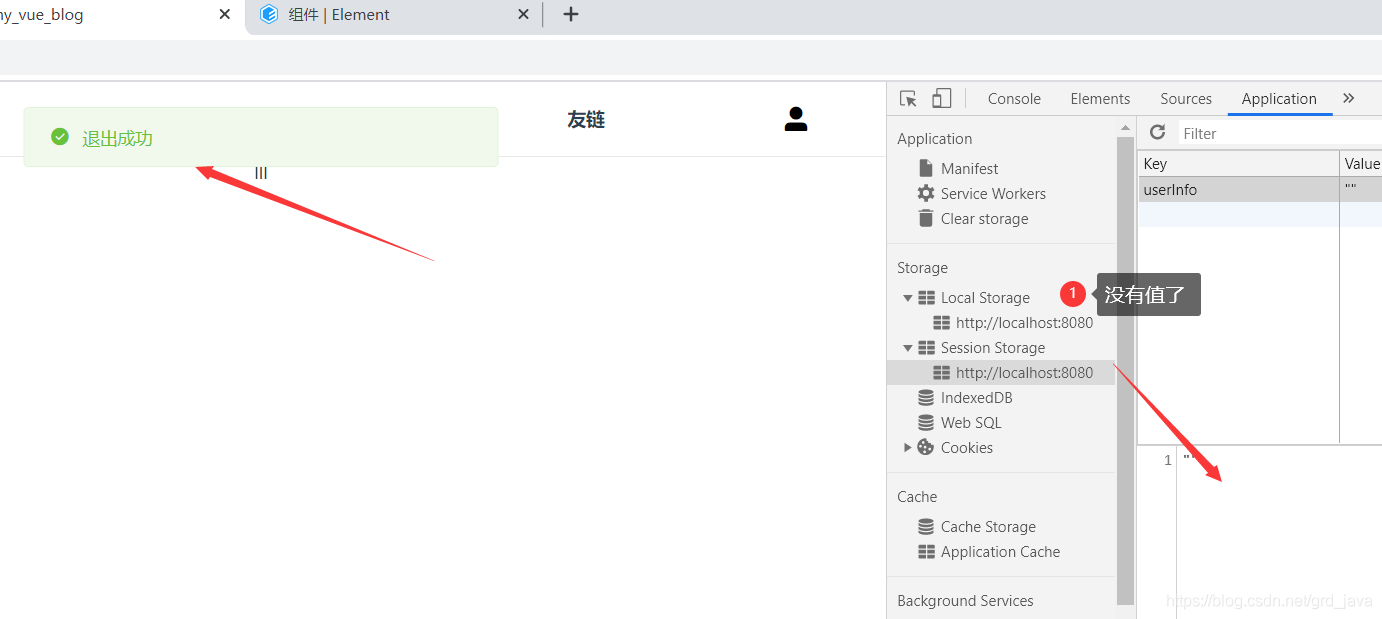
message: '退出成功',
type: 'success'
});
this.$store.commit("SET_LOGOUT")//清空vuex
this.$router.push({name:'Blog'})//跳转页面到博客页面
}else{
this.$message.error(response.data.message);
}
})
})
},
leaveWord(){
// this.$router.push({name:'留言'})
},
diary(){
// this.$router.push({name:'日记'})
},
FriendsOfTheChain(){
// this.$router.push({name:'友链'})
},
}
}
</script>
| css |
|---|
.avatar{
	width: 35px;
	border-radius: 35px;
	box-shadow: 1px 3px 9px rgba(0,0,0,0.5);
}
2、测试