目录
一级目录
二级目录
三级目录
前言
- 此文章发布项目的 Linux 为 CentOS 7
一、独立部署
1)Windows 部署
发布的时候选择独立就可以了
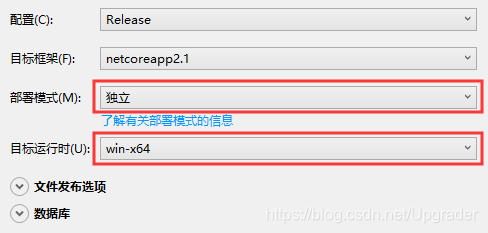
将发布好的文件拷贝到 Windows 服务器中,直接运行可执行文件即可。
2)Linux 部署
发布的时候选择独立就可以了
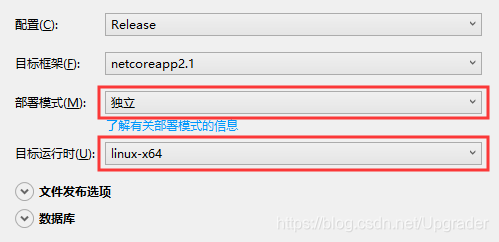
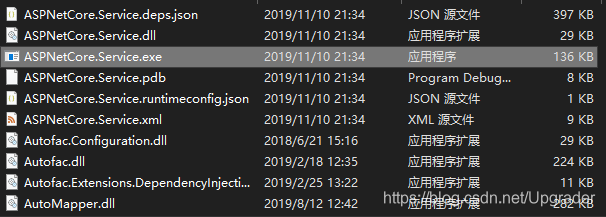
将发布好的文件拷贝到 Linux 中,当前我操作系统是 CentOS 7。
[ASPNetCore.Service 是我的Web项目的名称]
进入到文件夹,直接用命令行 ./ASPNetCore.Service 运行可执行文件。
这时提示 -bash: /ASPNetCore.Service: Permission denied 这是因为对该文件没有操作权限。
切换用户为root,输入 chmod 777 ASPNetCore.Service 。
成功后输入 exit 退出 root 用户。
再次输入命令行 ./ASPNetCore.Service 运行可执行文件。
报错 Couldn’t find a valid ICU package installed on the system. 因为需要安装 ICU 库。
切换用户为 root,输入 yum install icu 安装 ICU 库。
安装成功后输入 exit 退出 root 用户。
再次输入命令行 ./ASPNetCore.Service 运行可执行文件。
看到如下命令行即为成功。
[upgrader@localhost ASPNetCore.Service]# ./ASPNetCore.Service
Hosting environment: Production
Content root path: /home/upgrader/public/ASPNetCore.Service
Now listening on: http://[::]:5000
Application started. Press Ctrl+C to shut down.
二、 框架依赖部署
1)Windows 部署
发布的时候选择框架依赖就可以了
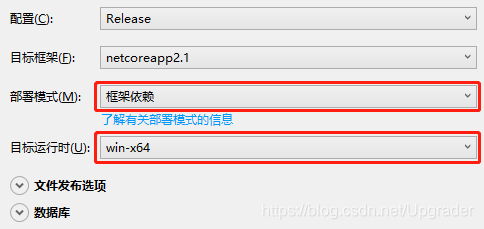
将发布好的文件拷贝到 Windows 服务器中,
进入项目文件夹运行命令行 dotnet ASPNetCore.Service.dll 即可启动项目。
看到如下命令行提示即成功启动。
PS ~\ASPNetCore.Service> dotnet ASPNetCore.Service.dll
Hosting environment: Production
Content root path: C:\Users\upgrader\Desktop\ASPNetCore.Service
Now listening on: http://[::]:5000
Application started. Press Ctrl+C to shut down.
2)Linux 部署
发布的时候选择框架依赖就可以了

将发布好的文件拷贝到 Linux 中,当前我操作系统是 CentOS 7。
[ASPNetCore.Service 是我的Web项目的名称]
切换用户为root,安装 .NetCore 2.2 SDK,使用以下命令行注册Microsoft密钥
[root@localhost ASPNetCore.Service]# rpm -Uvh https://packages.microsoft.com/config/centos/7/packages-microsoft-prod.rpm
随后安装 .Net Core Runtime
[root@localhost ASPNetCore.Service]# yum install aspnetcore-runtime-2.2
安装成功后使用命令行 dotnet --info 查看Runtime版本。
输入命令行 ./ASPNetCore.Service 运行可执行文件,项目即可启动。
如对该可执行文件没有操作权限,请参考上文对文件权限进行更改。
看到如下命令行提示即成功启动项目
[upgrader@localhost ASPNetCore.Service]# ./ASPNetCore.Service
Hosting environment: Production
Content root path: /home/upgrader/public/ASPNetCore.Service
Now listening on: http://[::]:5000
Application started. Press Ctrl+C to shut down.
三、部署到 Service
1)Windows 部署(使用 nssm)
Windwos 部署到 Service 可以使用 NSSM ,我使用的是 nssm-2.24 版本
下载以后,解压出来,找到对应的版本,双击打开 nssm.exe 文件 我们可以看到命令提示符,
在 nssm,exe 的文件夹路径打开 cmd (PowerShell不行) 并输入命令 nssm 执行也能够看到提示:
~\nssm-2.24\win64 > nssm
NSSM: The non-sucking service manager
Version 2.24 64-bit, 2014-08-31
Usage: nssm <option> [<args> ...]
To show service installation GUI:
        nssm install [<servicename>]
To install a service without confirmation:
        nssm install <servicename> <app> [<args> ...]
	......(省略)
继续输入命令 nsm install 出现一个弹框:
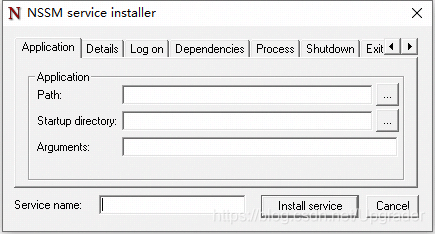
Application 选项卡中的 Path 填写 dotnet.exe 的地址,默认在 C:\Program Files\dotnet 路径,
Application 选项卡中的 Startup directory 填写项目发布后的文件夹,我将项目 ASPNetCore.Service 以文件方式发布到桌面,
C:\Users\upgrader\Desktop\ASPNetCore.Service 为路径,那么 Startup directory 就填写该路径。
Application 选项卡中的 Arguments 为 dotnet.exe 需要执行的对象,
就是 ASPNetCore.Service 文件夹中的 ASPNetCore.Service.dll 文件。
Service name 文本框为服务名称,就以项目名为名称吧。
填完以后:
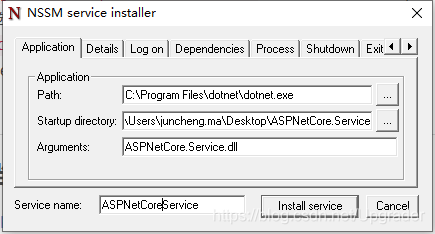
直接点击 Install service 按钮即可。然后进入 桌面应用-服务 中即可看到创建的服务。
使用命令 nssm status ASPNetCoreService 可以查看服务状态。
新建好的服务状态为 SERVICE_STOPPED ,
可以使用 nssm start ASPNetCoreService 启动服务,即可用 localhost 访问项目了。
然后可以使用 nssm stop ASPNetCoreService 停止服务,
用 nssm remove ASPNetCoreService 删除服务等。
2)Linux 部署(使用 systemctl)
因为我的项目名为 ASPNetCore.Service ,所以我发布项目到文件夹后将发布后的文件根目录改名为 ASPNetCore.Service 。
将发布好的整个文件夹拷贝到 Linux 中 ,我这里将其整个文件夹拷贝到 /home/upgrader/publish/ ,
upgrader 是我使用的用户账号。
项目根目录: /home/upgrader/publish/ASPNetCore.Service/ 。
使用以下命令创建服务文件
~$ sudo vim /etc/systemd/system/ASPNetCore.Service.service
将服务文件配置内容改为如下:
[Unit]
Description=ASPNetCore.Service program on centos7

[Service]
Type=forking
WorkingDirectory=/home/upgrader/publish/ASPNetCore.Service
ExecStart=/usr/bin/dotnet /home/upgrader/publish/ASPNetCore.Service/ASPNetCore.Service.dll
Restart=always
RestartSec=10
SyslogIdentifier=dotnet-ASPNetCore.Service
User=upgrader

[Install]
WantedBy=multi-user.target
保存以后 就可以使用 sudo systemctl start ASPNetCore.Service.service 启动服务即可。