文章目录
一、开发平台及语言等
操作系统:Ubuntu18.04
Ros版本:ros melodic
编程语言:python
依赖库:opencv-python
二、face_recognition 环境搭建
1、face_recogition github开源项目:https://github.com/ageitgey/face_recognition
2、face_recognition API在线文档:https://face-recognition.readthedocs.io/en/latest/readme.html
3、配置face_recognition环境:参考博客:https://blog.csdn.net/view994/article/details/84316318pip install dlib pip install face_recognition在实际搭建的时候发现dlib依赖包需要下载下来编译才能使用,因此我的配置步骤是:
(1) 下载dlibgit clone https://github.com/davisking/dlib.git(2) 编译dlib
参考博客:https://www.cnblogs.com/whenyd/p/7721989.htmlcd dlib mkdir build; cd build; cmake .. -DDLIB_USE_CUDA=0 -DUSE_AVX_INSTRUCTIONS=1; cmake --build .(3)安装face_recognition
pip install face_recognition整个过程很漫长,网速一直在10k/s左右,花了大概四个小时。最终出现以下打印表示安装成功
Successfully installed Click-7.0 face-recognition-1.2.3 face-recognition-models-0.3.0
三、项目简介
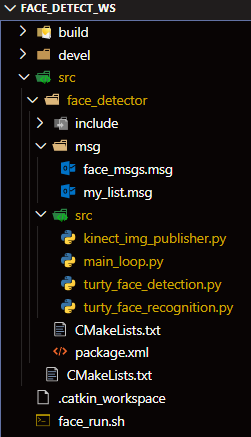
1. 工作空间结构:
2. 各节点相互关系:
| 节点名 | Kinect_2 | main_node | turty_face_detector | turty_face_recognizer |
|---|---|---|---|---|
| 节点描述 | 模拟kinect采集图像 | 模拟主节点 | 人脸检测 | 人脸识别 |
| py文件 | kinect_img_publisher.py | main_loop.py | turty_face_detection.py | turty_face_recognition.py |
| ros运行指令 | rosrun face detector kinect_img_publisher.py | rosrun face_detector main_loop.py | rosrun face_detector turty_face_detection.py | rosrun face_detector turty_face_recognition.py |
| 消息订阅 | 无 | Kinect_2、turty_face_detector、turty_face_recognizer | Kinect_2 | main_node |
| 消息发布 | 摄像头图像 | 已知人脸ROI图像、待匹配的人名 | 人脸位置、编号 | 人脸位置、编号、姓名 |
| 消息类型 | Image | face_msgs | face_msgs | face_msgs |
3. 消息类型简介
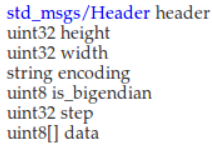
(1)Image类
该消息类型为sensor_msgs/Image下的包内已定义消息类型:
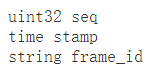
其中,std_msgs/Header为图像帧头信息,定义为:
(2)face_msgs类
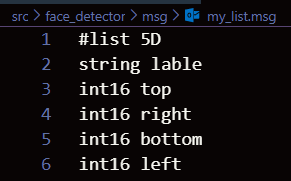
该消息类型为msg/face_msgs下的自定义消息类型:
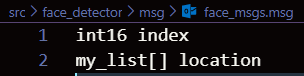
其中,my_list 子消息类型为人脸标签(姓名)及人脸区域顶点坐标信息
4. 各节点内容
在各py文件中有较为详细的介绍,故不做阐述,给出缩略图:
(1)Kinect_2

(2) main_node

(3)turty_face_detector

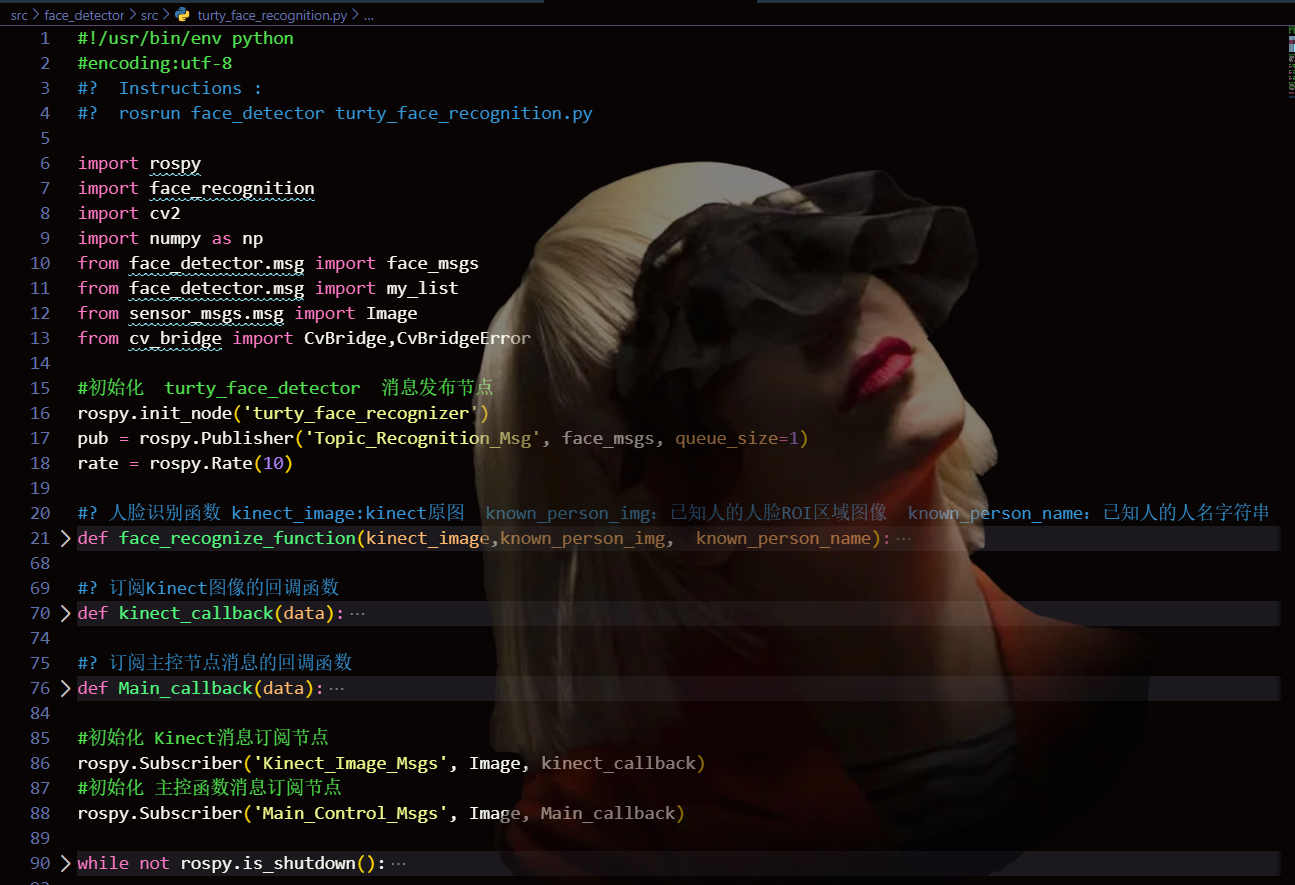
(4)turty_face_recognizer
四. 源程序下载
1、本人github链接:https://github.com/Beta-y/face_detect_ws
2、各节点调用顺序推荐:roscore rosrun face_detector kinect_img_publisher.py rosrun face_detector turty_face_detection.py rosrun face_detector main_loop.py rosrun face_detector turty_face_recognition.py