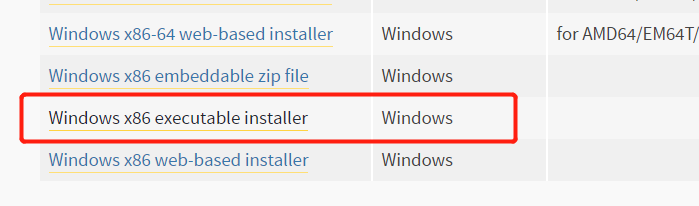
1.百度去python的官网, 下载上图选中软件,然后在计算机本地磁盘D中新建文件夹 xshell ,进入xshell文件夹新建IP.txt文件,输入6台你想登陆的服务器
10.0.84.151
10.0.3.127
10.0.3.128
10.0.3.129
10.0.3.130
10.0.3.131
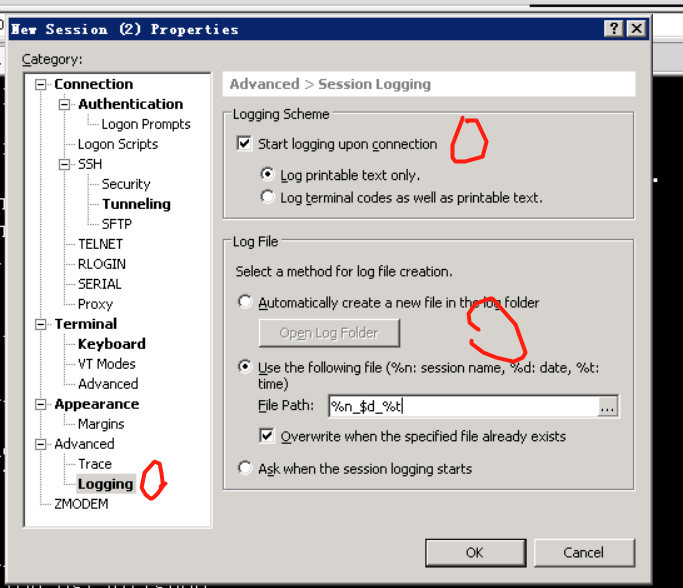
2.打开xshell, 点击file 中的新建,然后在host选项中输入IP地址,然后选中图中的10.0.3.127 右键,选择最下面的properties ,选择logging,进行登陆的操作,可以记录登陆的操作命令历史记录
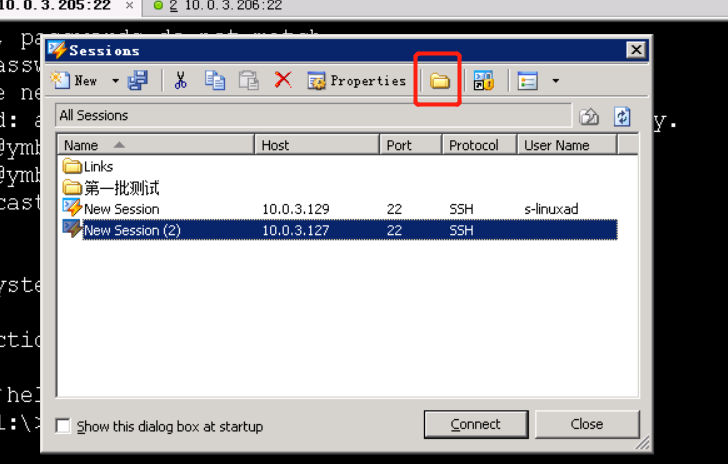
3.点击图中的红框框,出现页面,把右上方的地址复制好
4.在windows 中编辑脚本,编辑.PY 脚本
#! conding: utf8

import os

config_file='''
[CONNECTION:SERIAL]
Parity=0
StopBits=0
ComPort=0
BaudRate=6
FlowCtrl=0
DataBits=3
[CONNECTION]
Port=22
Protocol=SSH
AutoReconnect=0
TCPKeepAlive=0
KeepAliveInterval=60
AutoReconnectInterval=30
Host={host_ip}
KeepAlive=1
AutoReconnectLimit=0
[Information]
Description=Xshell Session Profile
MinorVersion=0
MajorVersion=3
[CONNECTION:AUTHENTICATION]
TelnetLoginPrompt=ogin:
TelnetPasswordPrompt=assword:
ScriptPath=
UseExpectSend=0
UserName={username}
UserKey=
ExpectSend_Count=0
Password={pwd}
Passphrase=
UseInitScript=0
Method=0
RloginPasswordPrompt=assword:
[CONNECTION:TELNET]
NegoMode=0
Display=$PCADDR:0.0
XdispLoc=1
[USERINTERFACE]
NoQuickButton=0
ShowOnLinkBar=0
QuickCommand=
[CONNECTION:SSH]
ForwardX11=1
VexMode=0
LaunchAuthAgent=1
InitLocalDirectory=
MAC=
UseAuthAgent=0
Compression=0
Cipher=
Display=localhost:0.0
InitRemoteDirectory=
ForwardToXmanager=1
FwdReqCount=0
NoTerminal=0
CipherList=aes128-cbc,3des-cbc,blowfish-cbc,cast128-cbc,arcfour,aes192-cbc,aes256-cbc,rijndael128-cbc,rijndael192-cbc,rijndael256-cbc,aes256-ctr,aes192-ctr,aes128-ctr,[email protected]
MACList=hmac-sha1,hmac-sha1-96,hmac-md5,hmac-md5-96,hmac-ripemd160,[email protected]
[TERMINAL]
ScrollErasedText=1
DisableTitleChange=0
IgnoreResizeRequest=0
UseInitSize=0
DisableBlinkingText=0
ShiftForcesLocalUseOfMouse=1
ForceEraseOnDEL=0
KeyMap=0
InitReverseMode=0
DeleteSends=0
BackspaceSends=2
UseAltAsMeta=0
InitKeypadMode=0
InitCursorMode=0
AltKeyMapPath=
CtrlAltIsAltGr=1
DisableTermPrinting=0
ScrollBottomOnKeyPress=0
InitInsertMode=0
Type=xterm
Rows=24
CodePage=65001
ScrollbackSize=1024
InitNewlineMode=0
InitEchoMode=0
CJKAmbiAsWide=1
InitOriginMode=0
DisableAlternateScreen=0
ScrollBottomOnTermOutput=1
InitAutoWrapMode=1
RecvLLAsCRLF=0
Cols=80
EraseWithBackgroundColor=1
[LOGGING]
AutoStart=1
Type=0
FilePath=C:\\你的计算机路径\\%n_%d%t.log   ####可以灵活改变
Overwrite=1
FileMethod=1
[CONNECTION:FTP]
Passive=1
InitLocalDirectory=
InitRemoteDirectory=
[CONNECTION:PROXY]
StartUp=0
Proxy=
[TERMINAL:WINDOW]
FontSize=12
CharSpace=0
CursorBlink=0
LineSpace=0
FontFace=Courier New
BoldMethod=2
ColorScheme=White on Black
CursorAppearance=0
MarginLeft=2
CursorTextColor=0
MarginBottom=2
MarginTop=2
MarginRight=2
CursorColor=65280
CursorBlinkInterval=600
[TRANSFER]
FolderMethod=0
SendFolderPath=
FolderPath=
DuplMethod=0
AutoZmodem=1
[CONNECTION:RLOGIN]
TermSpeed=38400
[TRACE]
SshTunneling=0
SshLogin=0
SockConn=1
TelnetOptNego=0
'''

def getIP(ip_file_path):
	with open(ip_file_path, 'r') as f:
		host_ip = f.readlines()
		host_ip = list(map(lambda x: x.strip(), host_ip))
	return host_ip


def main(xshell_session_path, ip_file_path, pwd, username):
    ip_list = getIP(ip_file_path)

    for host_ip in ip_list:
        try:
            xsh_file = os.path.join(xshell_session_path, host_ip) + '.xsh'
            with open(xsh_file, 'w') as f:
                f.write(config_file.format(host_ip=host_ip, pwd=pwd, username=username))
        except Exception as e:
            print('创建{} 失败!!!!!! '.format(host_ip),e)
        else:
            print('创建{} 成功!'.format(host_ip))


if __name__ == '__main__':
    xshell_session_path = 'D:\\xshell\\实验机'   ###本地的路径
    ip_file_path = 'D:\\xshell\\IP.txt'  ###本地的IP地址的文件
    username = 's-linuxad'    ###用户名
    pwd = '/aHCCaX/zEY='     ###pwd 加密后的密码
    main(xshell_session_path, ip_file_path, pwd, username)
5.在文件夹的空白处按住shift + 右键 找到在此处打开powershell 窗口 ,在页面中输入D盘中新建的.py结尾的文件名, 就可以成功操作

6.将计算机本地的.xsh 复制到堡垒机中, 就可以在堡垒机中一键盘打开想要登陆的机器